LlamaHerder
Well-Known Member
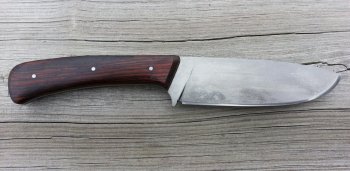
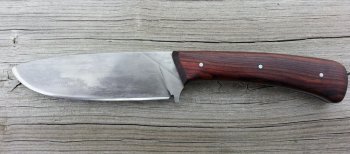
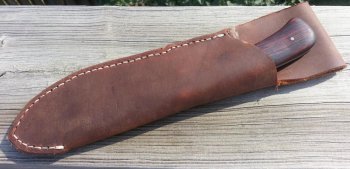
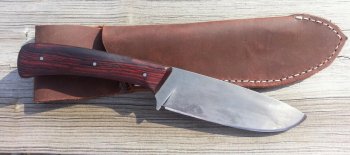
Hi all! Waiting for fun stuff to be delivered, so thought I'd post some pics of my first attempt at making a knife from a bar of steel onward. Maybe will be interesting to some other new people. Background: Bought myself a 1x42 grinder earlier this year and sharpened everything I could get my hands on. Got a kick out of that, so ordered a blade blank and added a handle to it. Here's what I ended up with...yes, I took a picture of my knife sitting on my deck rail. I didn't know any better!
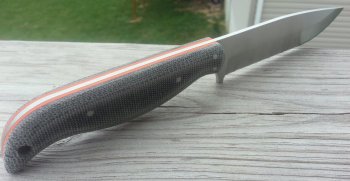
Sanded it to 200 grit and liked the grip of the Micarta so I stopped there. Considered contouring the scales a bit more, but they're thin and fit my hands well as-is. So there they are. :3:
While I was working on this, I ran into Josh Dabney's AWESOME WIP and thought it would be great to get the Bushcraft Build-Along Kit found here. Good timing, too! I jacked up the scales I bought for my blade blank, so scavenged the scales from the build-along kit. Those are the black Micarta scales you see up there, with orange G10 liners.
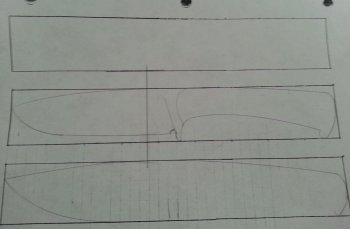
Anyway, I drew out a pattern for what I think I wish my hunting knife was. Here I've boxed out three sections of quad-rule paper the exact dimensions of the 1084 bar included in the kit. Took them to work and made a few copies, just easier to pick up and draw on, although the copier was being fussy this day. The bottom one was abandoned as ugly early on, the middle one stuck.
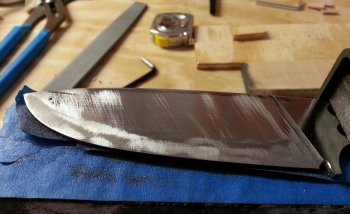
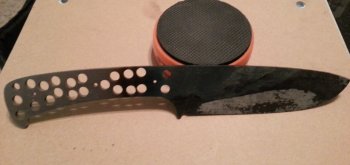
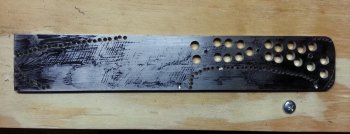
Used a Sharpie to color up one side of my steel and used a scribe to trace out the pattern - again, see Josh's sweet, sweet WIP to see how I did this. Then drilled holes around the perimeter to ease up time on the hacksaw. In the picture below you can see how my grubby hands wore off a bunch of the color. You can also see where one of my holes went off the mark on the belly. Blade will be a bit shorter because of this, since I had to grind in to get rid of that mistake.
And here I have used the hacksaw to go around the perimeter and cleaned up the jagged edges with grinder and files.
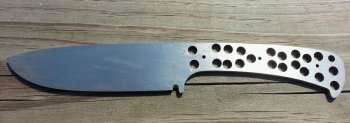
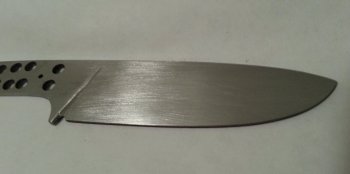
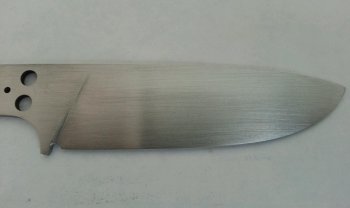
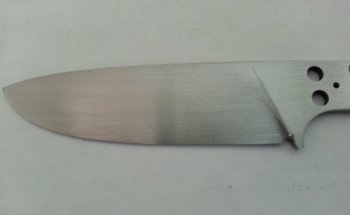
Have some nasty scratches to work on right on the ricasso. The scribe line running from choil to spine is my intended plunge line. The choil is slightly beveled, for lack of a better word, because I dinged it with the hacksaw and left a mark in my drilled hole. (And I'm back on the deck, for those counting.) Also, the more I look at the little tab thing at the end of the handle, the more I want to grind it down. Maybe to 1/3 the size it is now.
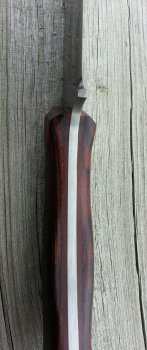
My buddy dabbles in woodworking and decided to get out of the exotic woods. Said they're tough to work with and I can have a box of stuff he was getting rid of. I brought it home, read about how cool lignum vitae is, and proceeded to gum up my bandsaw, drill bits, and a grinder belt. Stuff is crazy! Apparently will not require or appreciate stabilization due to the density and oil/wax content, and a good wood for having outdoors. Below I have a shot of one scale, there are purples in there that aren't showing up in my photos.

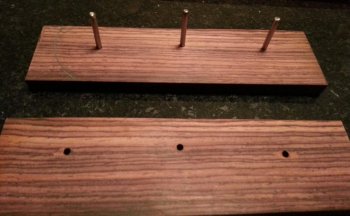
Also attached a pic of both scales, drilled for pins. I probably should use Corby bolts. If I have a problem with these later on I suppose I can drill out the holes and use Corby's.
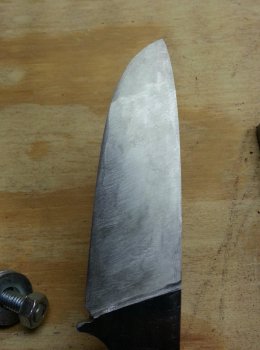
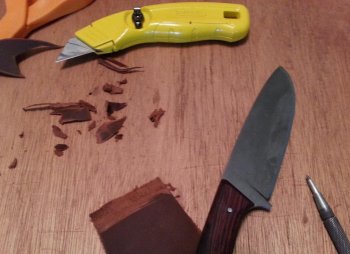
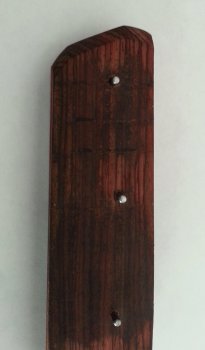
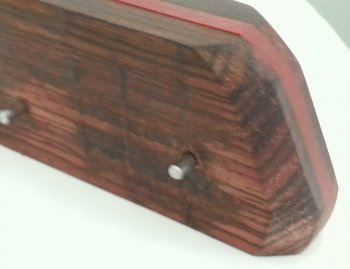
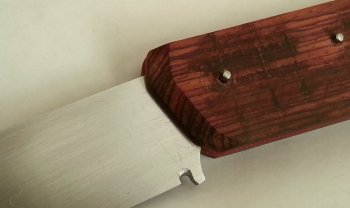
I started shaping the front of the scales, where they end on the ricasso. This is what filled up a belt very quickly, and scorched either the oily stuff in the lignum vitae or the G10 liners. Gave up on power and picked up a file - should have done that to start with. SO much easier. Faster, doesn't stink. BTW - I'm using a respirator, and so should you!! Will try hand tools when it's time to shape the scales around the blade. These began slightly curved, but seemed to look strange with my angled plunge lines. Considered dumping the angle on my plunge, but the front of the scale would be sitting right on top of my plunge line and I'm afraid to work back too close to the pin. Would look strange, I think. So now they're straightened to match my planned plunge line. Looks OK. Think I may bring the top and bottom of the scale to the center a bit to shorten the straight line, but I like the general idea. Massive scratches still visible on blade. *laughs*
How do you guys work with liners and scales? On the bushcraft up top, I epoxied everything at once. One scale, one liner, blade, other line, other scale. Should I epoxy liner to scale and work with each as a single side of the handle, then epoxy those units to the blade when the time comes around?
Also have filing coming up (waiting on my new goodies to show up to start that), and have heat treating floating around in the back of my mind. Will hopefully have an update later this week/this weekend.
Thanks for looking - I'm open to advice, as well!
*EDIT* I also need to thank everyone who has posted any little tidbit on this site, without which I would have never had the guts to start this project.

Sanded it to 200 grit and liked the grip of the Micarta so I stopped there. Considered contouring the scales a bit more, but they're thin and fit my hands well as-is. So there they are. :3:
While I was working on this, I ran into Josh Dabney's AWESOME WIP and thought it would be great to get the Bushcraft Build-Along Kit found here. Good timing, too! I jacked up the scales I bought for my blade blank, so scavenged the scales from the build-along kit. Those are the black Micarta scales you see up there, with orange G10 liners.
Anyway, I drew out a pattern for what I think I wish my hunting knife was. Here I've boxed out three sections of quad-rule paper the exact dimensions of the 1084 bar included in the kit. Took them to work and made a few copies, just easier to pick up and draw on, although the copier was being fussy this day. The bottom one was abandoned as ugly early on, the middle one stuck.

Used a Sharpie to color up one side of my steel and used a scribe to trace out the pattern - again, see Josh's sweet, sweet WIP to see how I did this. Then drilled holes around the perimeter to ease up time on the hacksaw. In the picture below you can see how my grubby hands wore off a bunch of the color. You can also see where one of my holes went off the mark on the belly. Blade will be a bit shorter because of this, since I had to grind in to get rid of that mistake.

And here I have used the hacksaw to go around the perimeter and cleaned up the jagged edges with grinder and files.

Have some nasty scratches to work on right on the ricasso. The scribe line running from choil to spine is my intended plunge line. The choil is slightly beveled, for lack of a better word, because I dinged it with the hacksaw and left a mark in my drilled hole. (And I'm back on the deck, for those counting.) Also, the more I look at the little tab thing at the end of the handle, the more I want to grind it down. Maybe to 1/3 the size it is now.
My buddy dabbles in woodworking and decided to get out of the exotic woods. Said they're tough to work with and I can have a box of stuff he was getting rid of. I brought it home, read about how cool lignum vitae is, and proceeded to gum up my bandsaw, drill bits, and a grinder belt. Stuff is crazy! Apparently will not require or appreciate stabilization due to the density and oil/wax content, and a good wood for having outdoors. Below I have a shot of one scale, there are purples in there that aren't showing up in my photos.


Also attached a pic of both scales, drilled for pins. I probably should use Corby bolts. If I have a problem with these later on I suppose I can drill out the holes and use Corby's.
I started shaping the front of the scales, where they end on the ricasso. This is what filled up a belt very quickly, and scorched either the oily stuff in the lignum vitae or the G10 liners. Gave up on power and picked up a file - should have done that to start with. SO much easier. Faster, doesn't stink. BTW - I'm using a respirator, and so should you!! Will try hand tools when it's time to shape the scales around the blade. These began slightly curved, but seemed to look strange with my angled plunge lines. Considered dumping the angle on my plunge, but the front of the scale would be sitting right on top of my plunge line and I'm afraid to work back too close to the pin. Would look strange, I think. So now they're straightened to match my planned plunge line. Looks OK. Think I may bring the top and bottom of the scale to the center a bit to shorten the straight line, but I like the general idea. Massive scratches still visible on blade. *laughs*


How do you guys work with liners and scales? On the bushcraft up top, I epoxied everything at once. One scale, one liner, blade, other line, other scale. Should I epoxy liner to scale and work with each as a single side of the handle, then epoxy those units to the blade when the time comes around?
Also have filing coming up (waiting on my new goodies to show up to start that), and have heat treating floating around in the back of my mind. Will hopefully have an update later this week/this weekend.
Thanks for looking - I'm open to advice, as well!
*EDIT* I also need to thank everyone who has posted any little tidbit on this site, without which I would have never had the guts to start this project.
Last edited:

