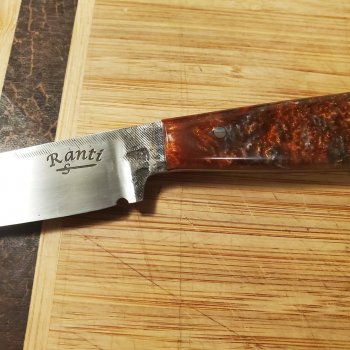
Makers mark etching power source

IanF

Well-Known Member
I’ve been through as many old threads as I can but I’m still a little confused on suitability of a power source for etching a makers mark. I have been entertains the idea of making my own but locally (Australia) I can buy a lab power supply with the following specs:

Outputs
  • AC output: Switch selected 2, 4, 6, 8, 10, 12V.AC (nominal) at 6 Amp continuous.
  • DC output: Switch selected 2, 4, 6, 8, 10, 12V.DC (nominal) full wave rectified andunfiltered 5 Amps continuous.
I don’t know if the amperage is particularly important in marking and if so is the unit I am looking at going to supply what I need?

I'm looking to set up for etching my mark on folder blades as stamping is causing me issues in getting and keeping everything flat and straight!

Thanks
Ian
 
Go to Earniesknives.com he makes Blue Lighting stencils and has a tutorial on making a power pack . I made mine from this design an have been very happy.
 
I used an train transformer from a HO train. Made a wand from a brass screw, piece of brass guard material and the handle from a hand trowel. Works great, whole thing cost me 25 bucks to build. And I went a little overboard with the build.
 

Attachments

  • IMG_20200404_113902_050.jpg
    IMG_20200404_113902_050.jpg
    185.9 KB · Views: 13
Last edited:
Thanks for all your replies guys and yes I was keen to make my own but I have so many “projects” at the moment that they are each getting in the way of the next! I guess what I really wanted to know is if there was any consensus on suitable amperage that delivered beat results or should I not worry about amps?
 
You'll get quicker results if you can go higher voltages. I usually run mine at about 24V at 5A max output. My power supply will go to 40V, but I don't go that high.
 

I made mine several years ago from Chris Crawford's plans as well. I was able to find the parts locally and it was fairly easy to assemble. It works great and I have zero complaints.

I also use it as a power source for my carbidizer that I use to add a thin layer of carbide to the face of my folder locks to mitigate lock stick. I purchased a Dremel engraver, the kind that vibrates, for a few bucks, wired on some leads and saved several literally hundreds of dollars over purchasing a carbidizer from a retailer.
 
If you're really short on time for a new project, you can use a battery trickle charger. That's what I used for my first few years and it worked fine. It's DC only but etches a good mark and leaves it nice and black.
 
Thanks guys, I guess I’m going to go down the DIY route. I do have. DC only variable power supply already that I use for titanium anodising so I’m half way already. I’ll probably make an ac/dc etcher as per the Chris Crawford plans but trial and error to see if I use my lab dc power supply or not.

Brandt - is it DC current you use for carbidizing? I have a frame lock on the go at the moment so may try it. The few folders I’ve made so far don’t seem to have needed any help with lock stick but it does interest me to see what it may add.

thanks again guys!

If you want a quick down and dirty etching machine. An HO Train transformer works great! It has DC for (train motor) etch and AC for (accessories) to blacken etch. A double pole double throw center off switch to turn it on and off and to switch etch and blacken. Biggest part of build is the wand. After the build crank the transformer all the way up (that's how I run mine. Take about 3-4 minutes to do the whole thing with crummy ole Salt water for electrolyte. Not fancy but cheap and easily accessible.
 
That's exactly how I had been thinking about making one. Thanks for validating my concept. I just spent 5 minutes in the basement ressurecting my 50 yr old train transformer. Now to see if it works and if I can find a DPDT toggle switch.
 
That's exactly how I had been thinking about making one. Thanks for validating my concept. I just spent 5 minutes in the basement ressurecting my 50 yr old train transformer. Now to see if it works and if I can find a DPDT toggle switch.

You don't need the switch but it makes it way easier to use. I'm sure you can use a larger transformer like O gage. I used what I had.
 
I just recently bought an Elenco XP-720 power supply on eBay. I got a barely used one for about $30 and it supplies both AC and DC power in a couple voltages and amperages. Banana ports for your clips. I think it should work fine when it arrives and was cheaper than building my own. There’s a couple types of these ready made power supplies out there.
 
I just recently bought an Elenco XP-720 power supply on eBay. I got a barely used one for about $30 and it supplies both AC and DC power in a couple voltages and amperages. Banana ports for your clips. I think it should work fine when it arrives and was cheaper than building my own. There’s a couple types of these ready made power supplies out there.

I would have bought that instead of building but when I looked everything that I found was way more than that. They were more than most of the actual etching machines made for hobbyist.
 
My power source made fron Ernie'snhjKd]
20200425-112347.jpg
[/url]s plans.
 
Ok guys I’ve built my own etching power source after the encouragement given here. I referenced both the Blue Lightning website and Chris Crawford’s site and have all assembled. My only hesitation is that both builds to my mind have the red socket as negative and black to positive which is opposite to everything I’ve known in circuits. Am I missing something here or is it normal for US system to use black as positive? Here is Ernie’s wiring diagram which I believe is wired opposite to what I would have done for red and black terminals.

am I seeing this wrong?
 
You need the negative to the etch pad and the positive to the blade. It went against my brain also so I wired the negative to the red post.
 
Last edited:
Back
Top