JPSWorks
Well-Known Member
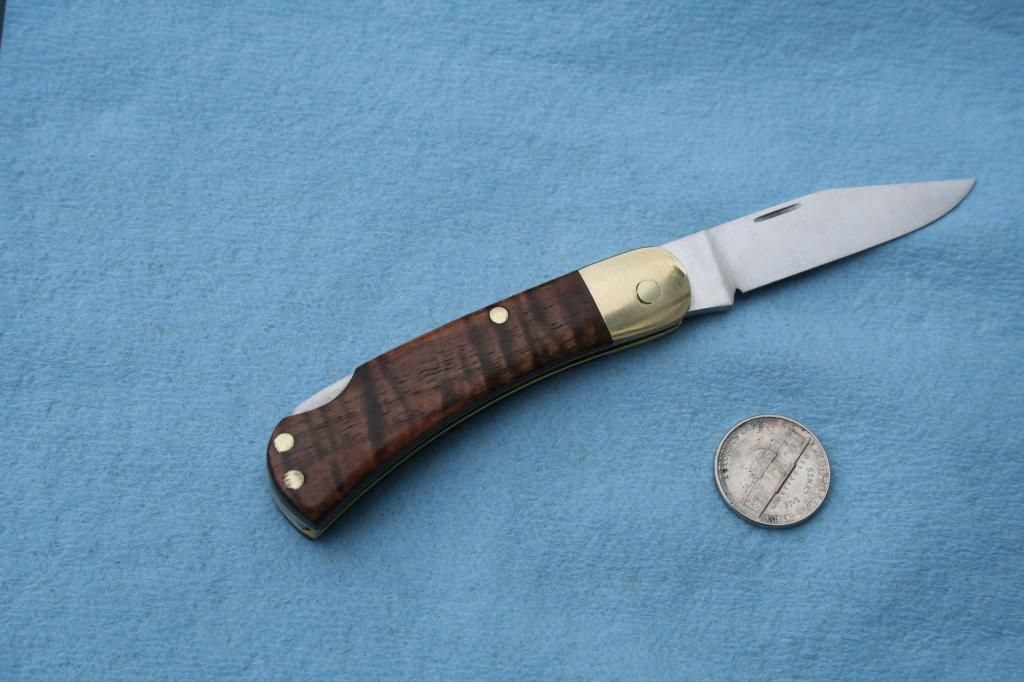
I just finished my fifth knife this last week and thought I would post the process I went through. Unfortunately I don’t have access to a mill so to get the blade and rocker arm lockup to be just right took a lot of hand filing and trial and error.
More specifically, 3 blades and two rocker arms before I got it to lock up just right not to mention getting the kick and rocker arm to meet just right so the rocker arm stayed flush with the liner in both the open and closed positions.
Then there was the issue of making that spring shape just right so the blade didn’t make contact with it. All the while not being so thin that it snaps at the slightest force. After the third time I had a workable spring. There was one issue after the other as you can see, but somehow I got it finished.
On to the knife….
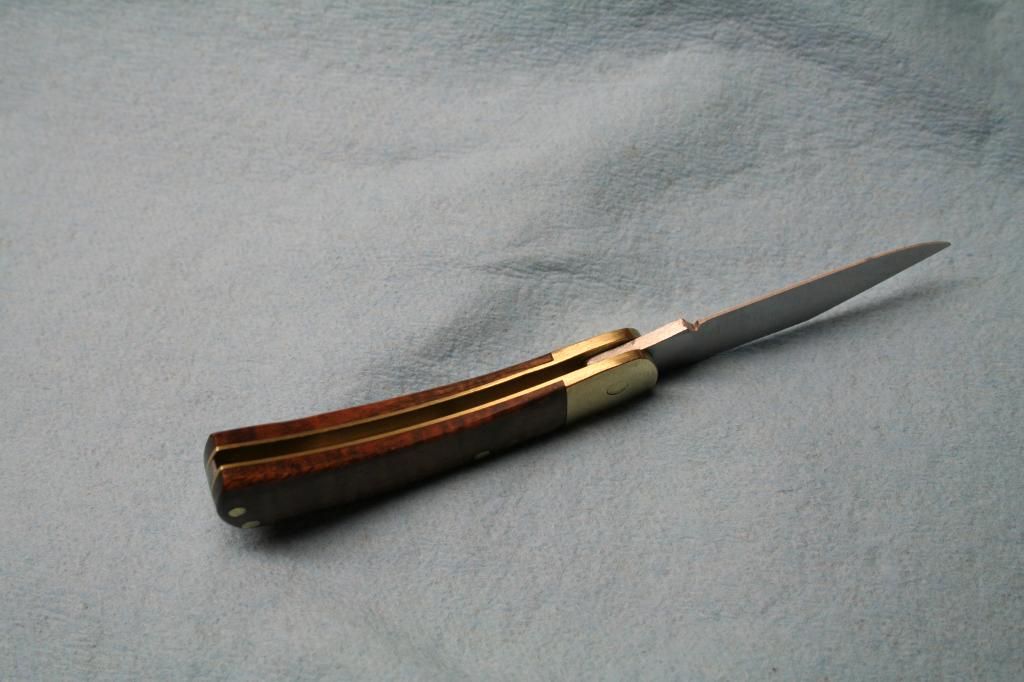
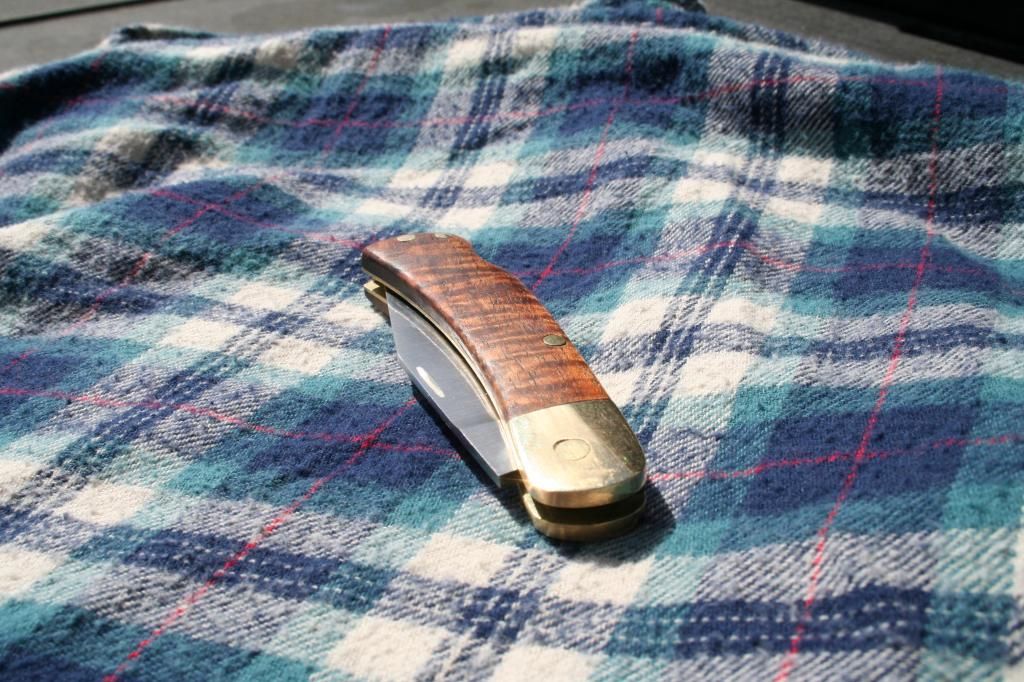
I used .130 thick CPM-154 for the blade rocker and spring. By the third blade I had run out of the CPM-154 and just made the blade out of AEB-L that I had sitting on the bench. The liners, bolster and pins are brass. The scales are made from some beautiful stabilized Hawaiian KOA that I recently purchased.
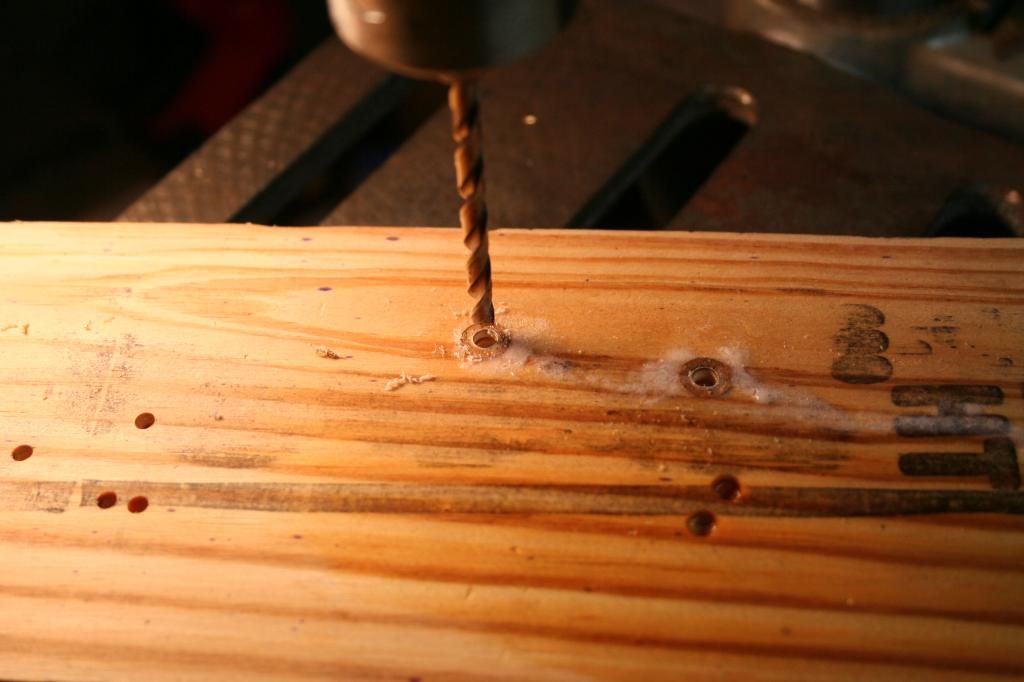
After drilling the holes for the pivot and pin locations I then began cutting out the rough shape with my hacksaw and a vice (decided not to use my portaband this time), No pics of this since it’s the same process for any knife, and I forgot to get out the camera.
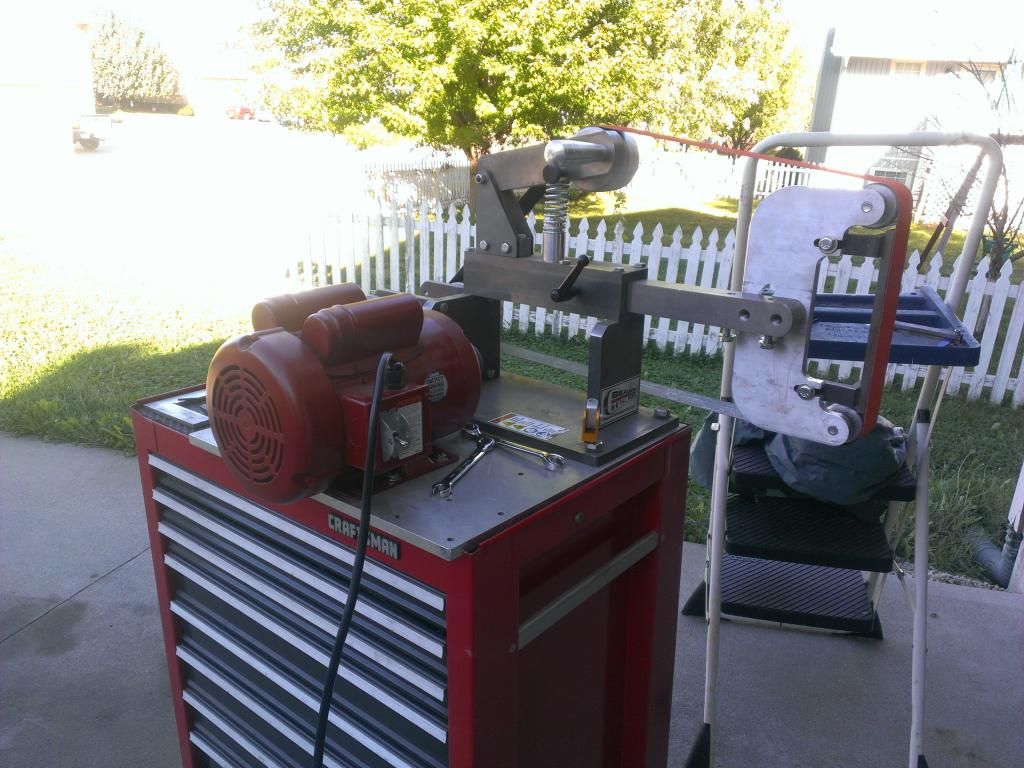
Did some grinding outside for a change.
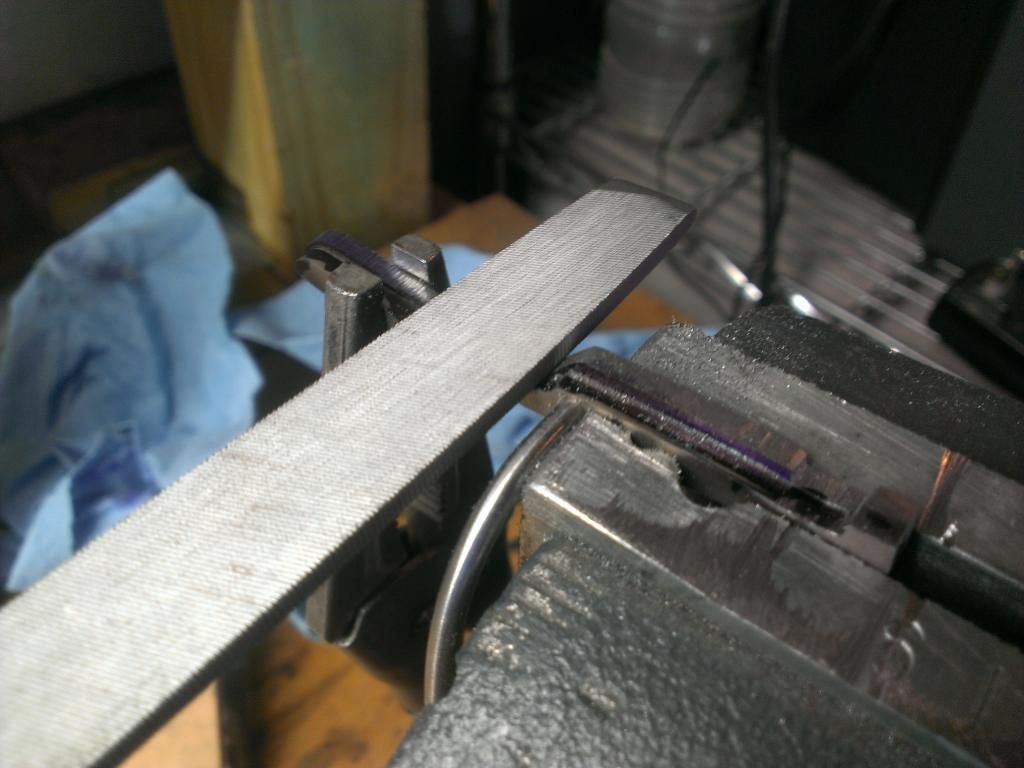
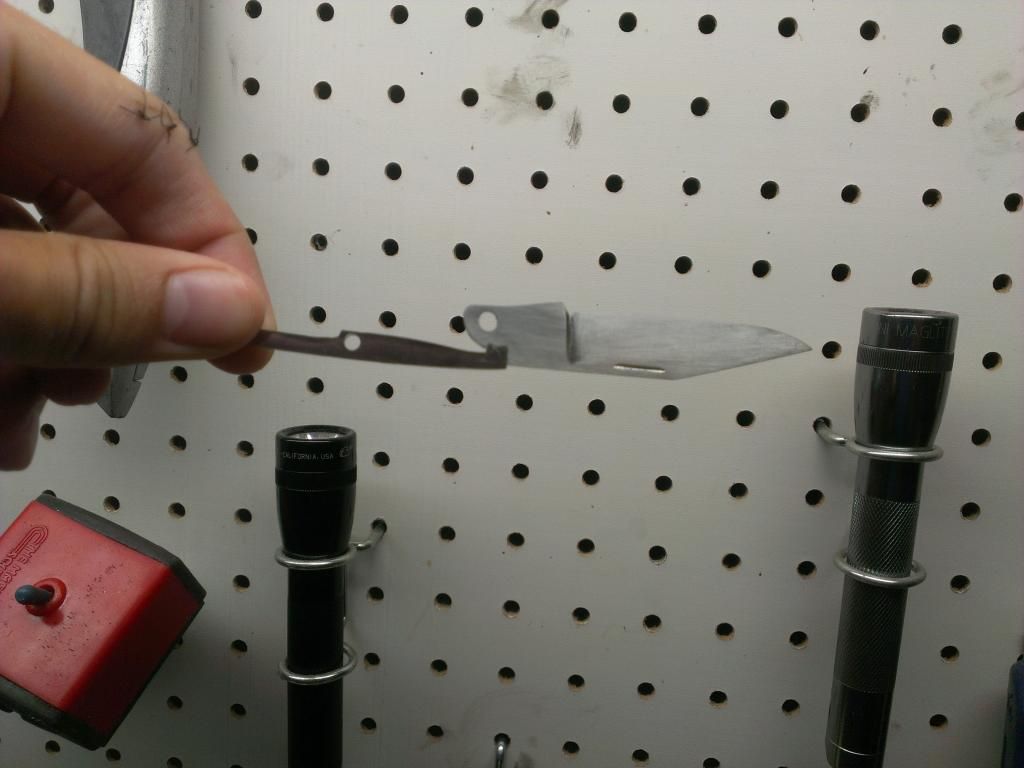
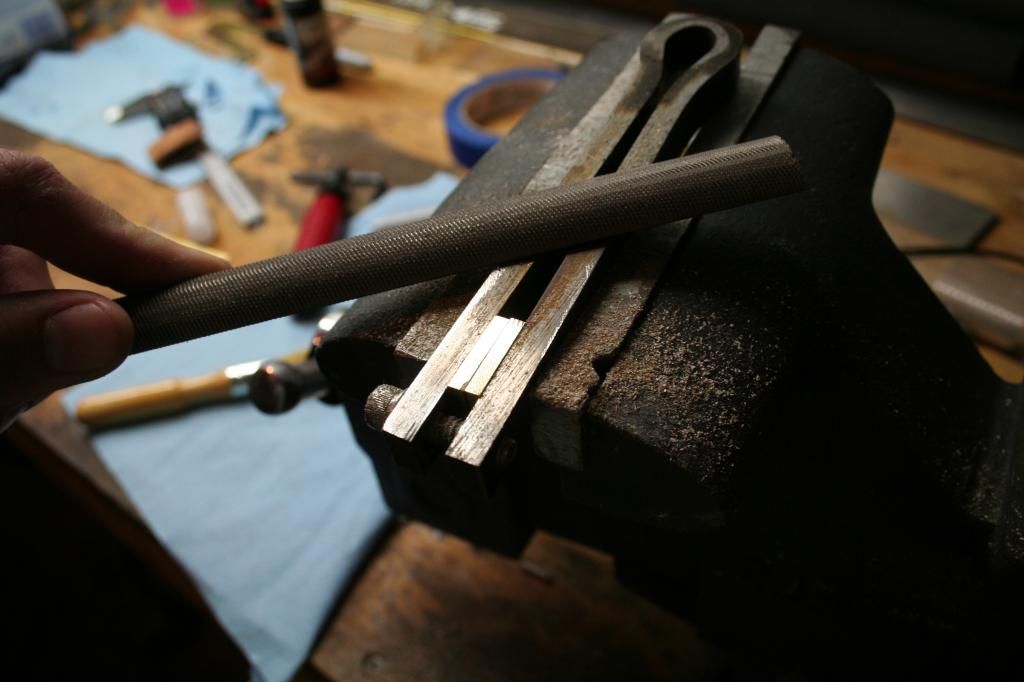
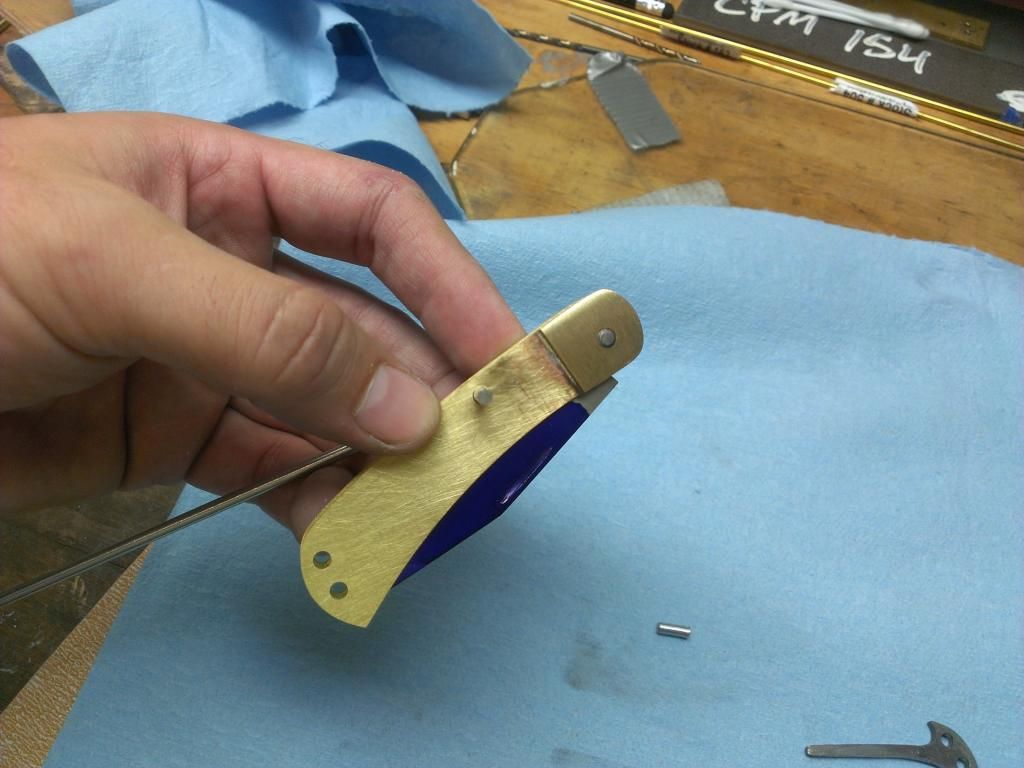
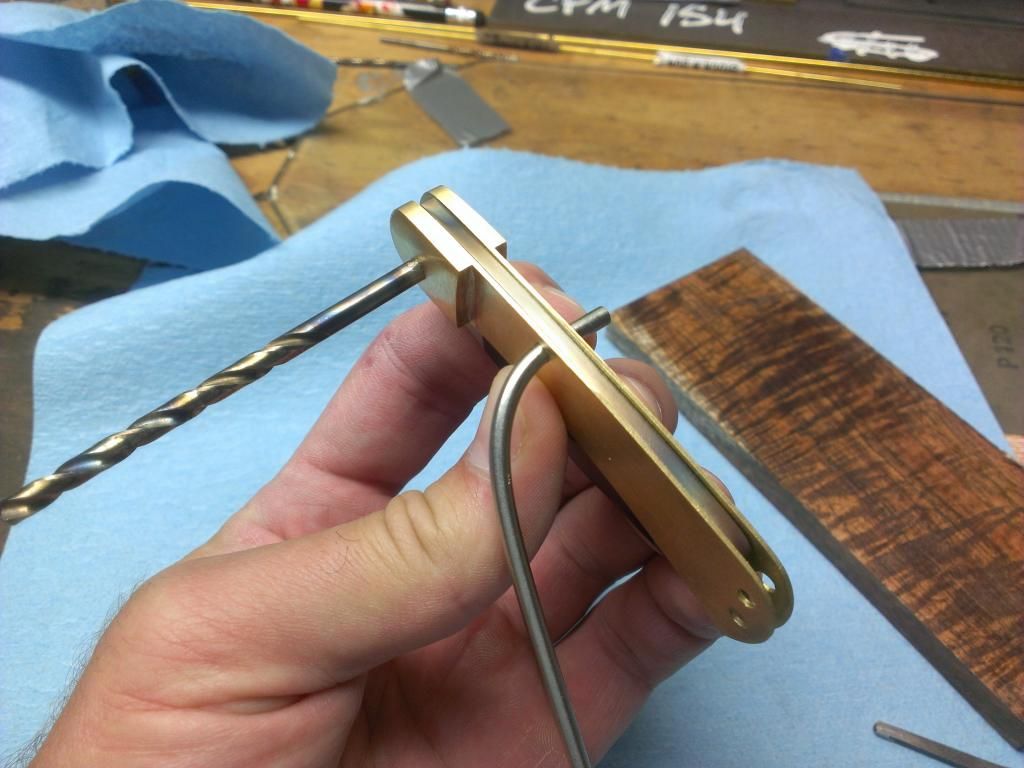
I finished shaping the pieces on my grinder then went to hand filing the blade and rocker. By the third time around I super glued blade #3 to the heat treated blade #2 to use as a filing guide. I had already spent so much time working to get the lockup just right, no since recreating the wheel.
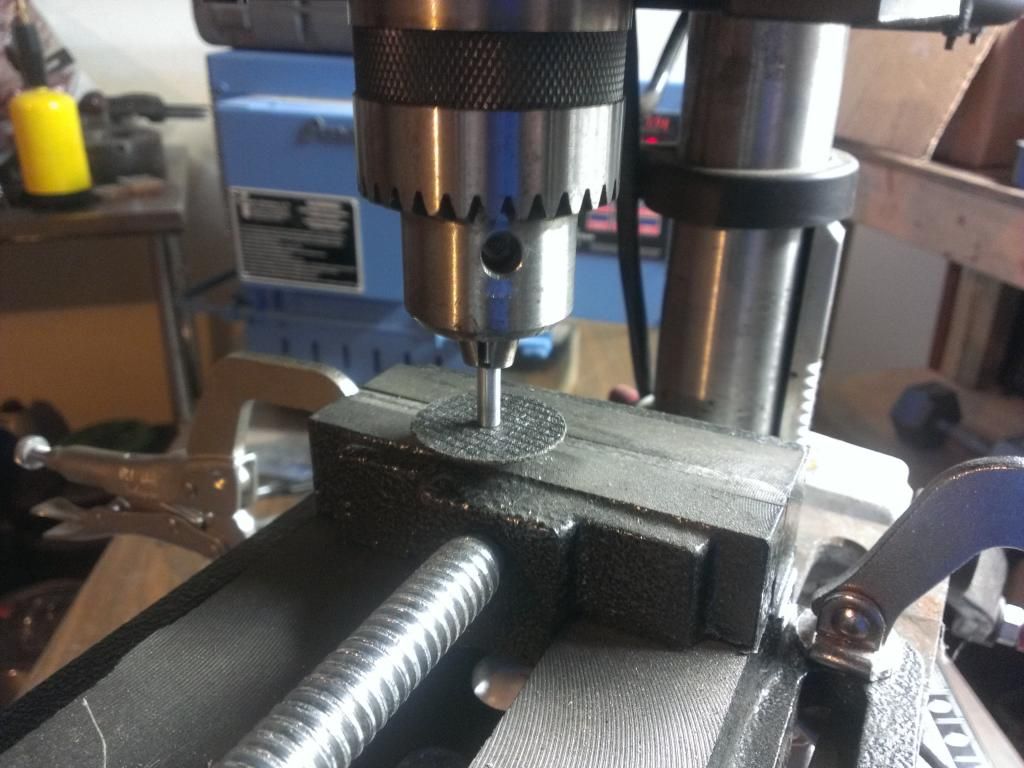
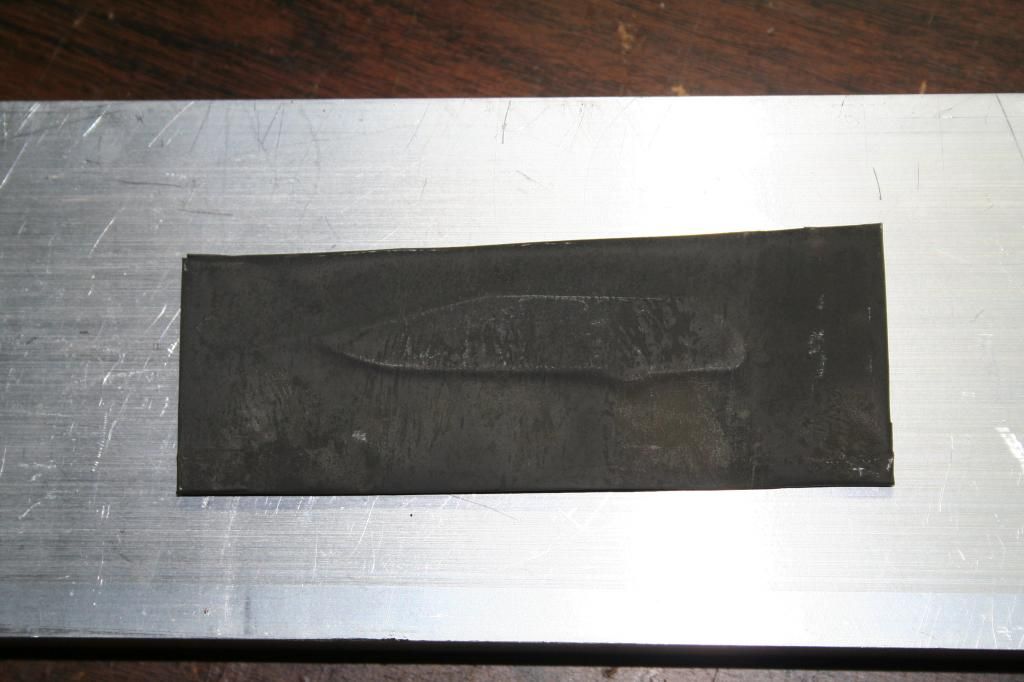
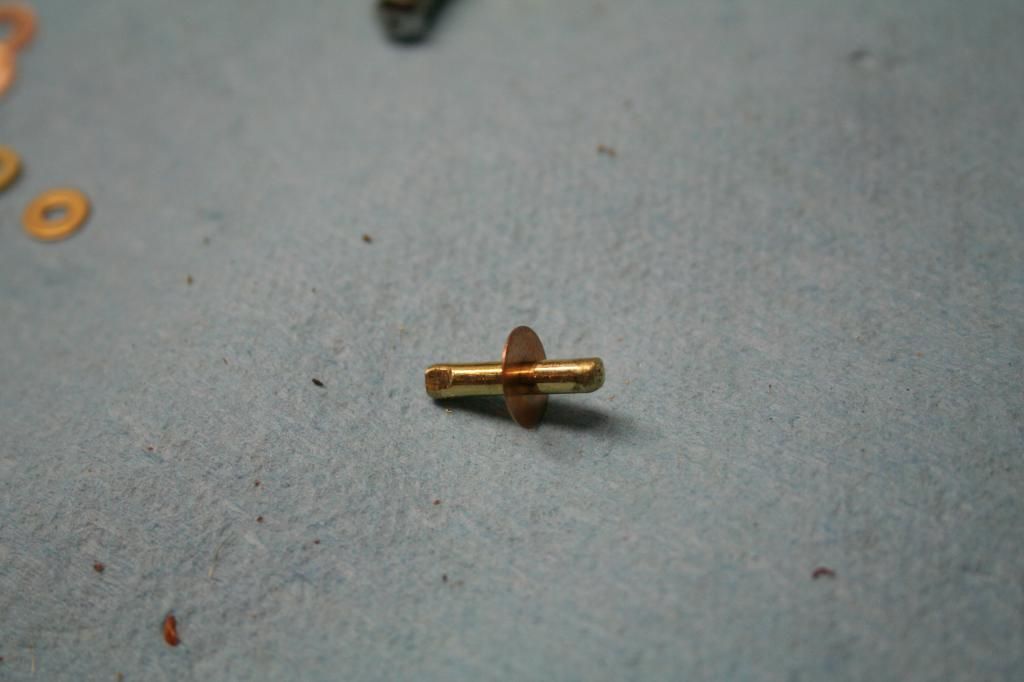
I used a Dremel brand cutoff wheel in the drill and did a light pass back and forth with a small vice as a raised level surface. It turned out decent.
Super glued the blade to a piece of brass so that I had something larger to hold on to as to not cut my cut a tendon again.
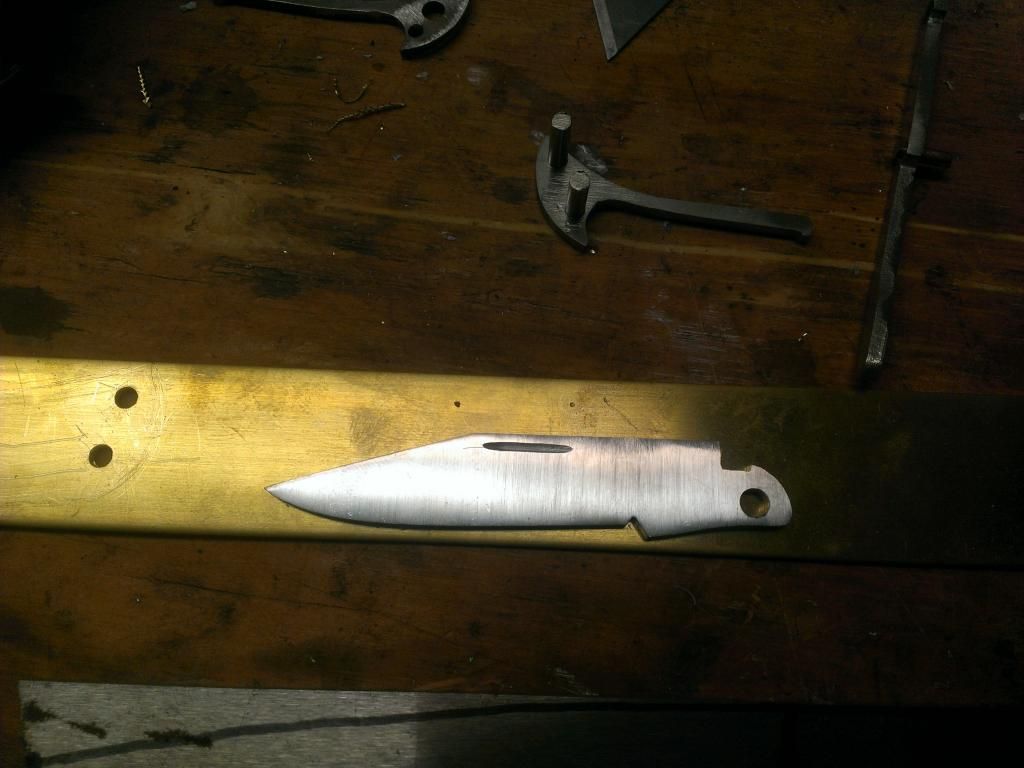
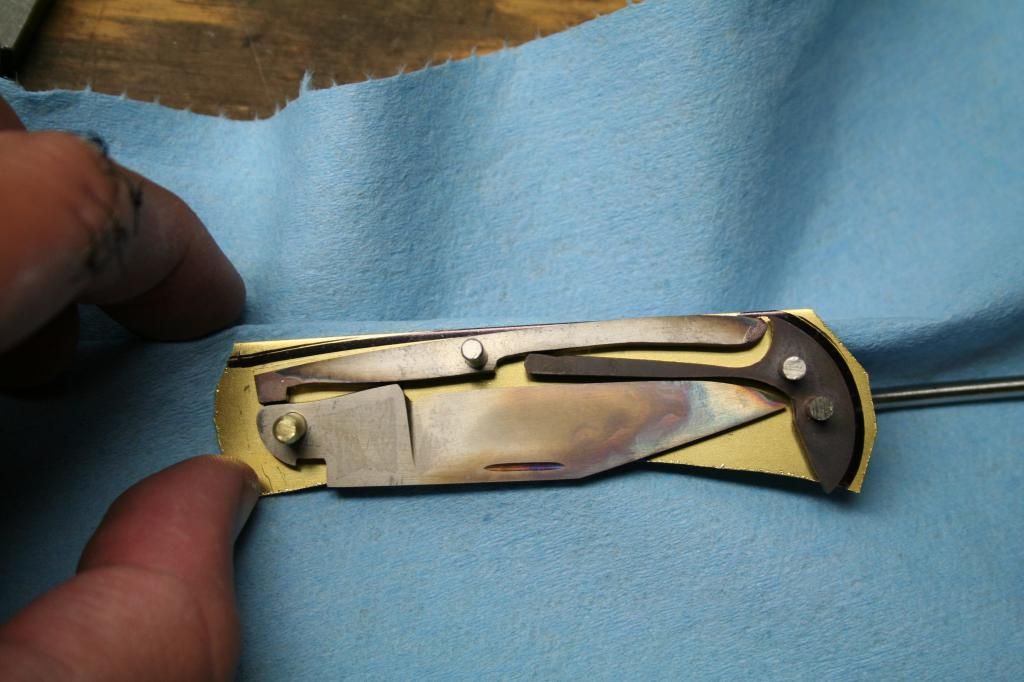
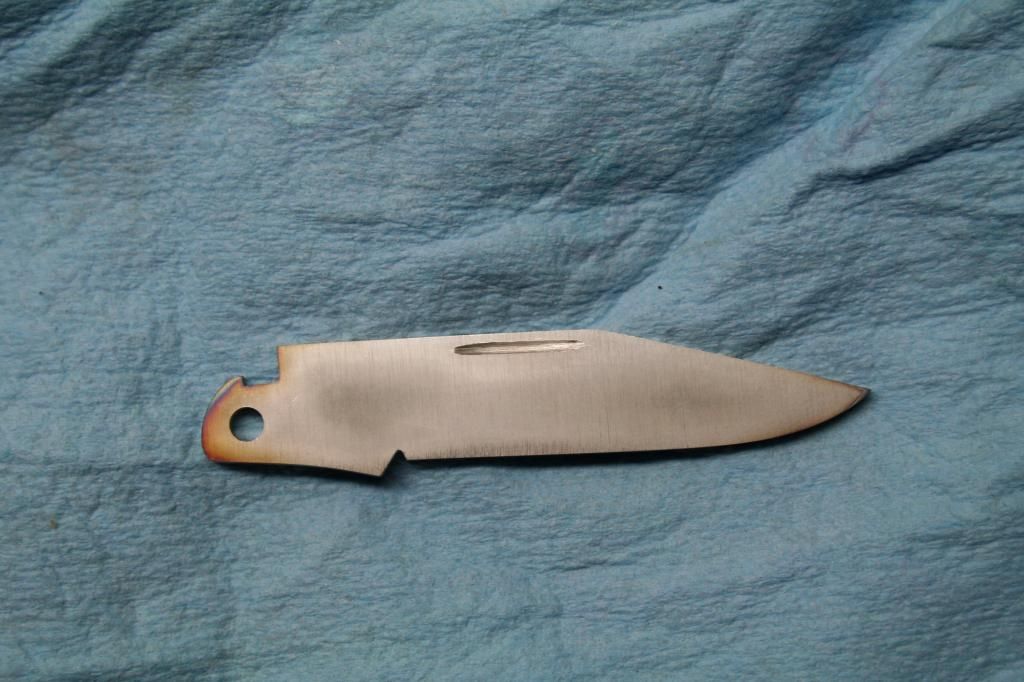
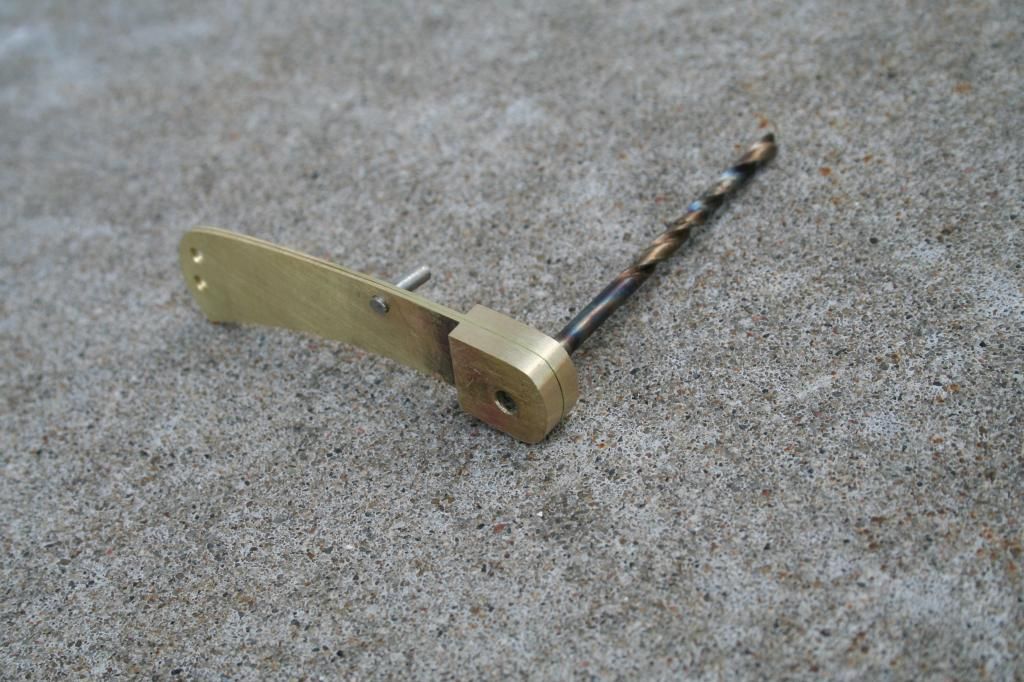
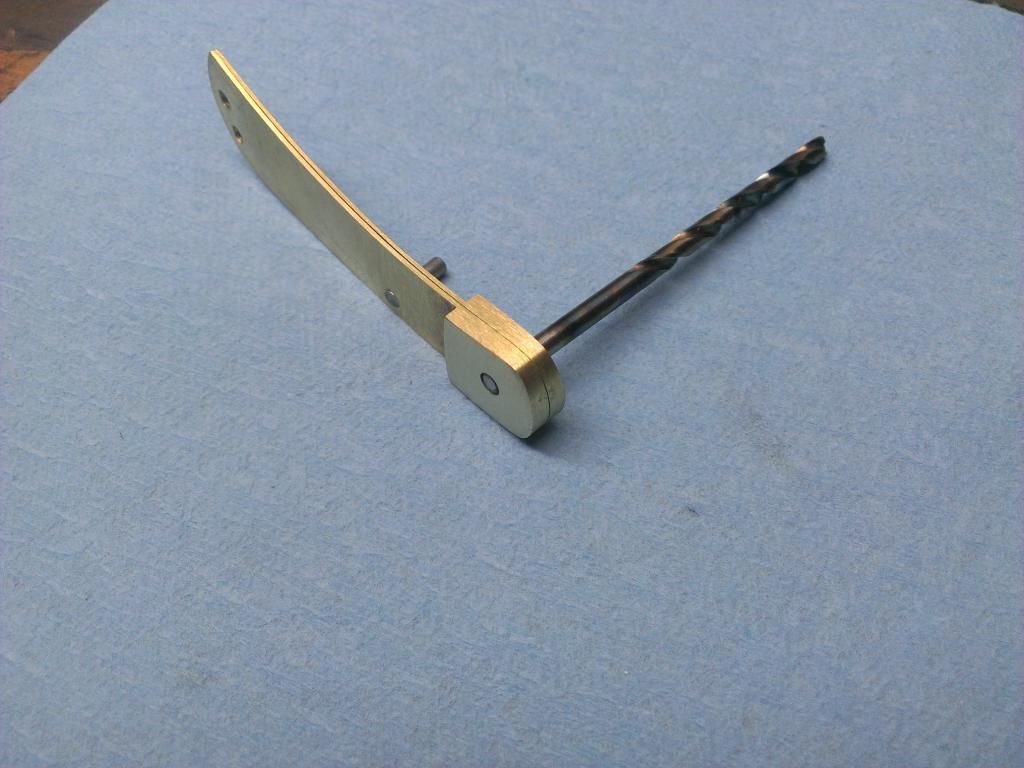
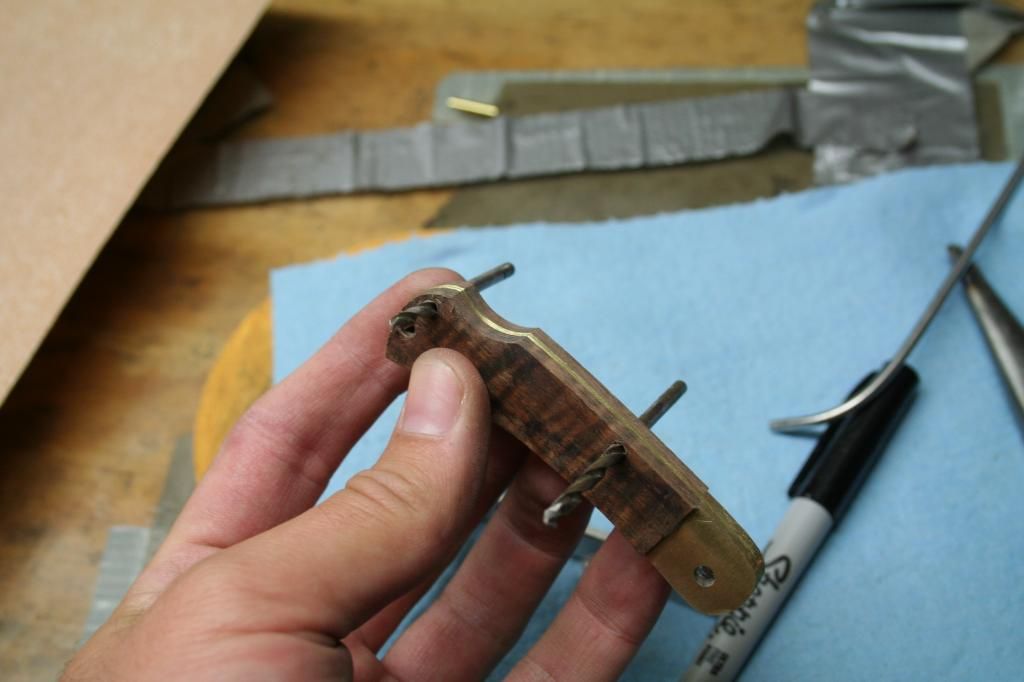
Test fitting the blade one last time before heat treating. This is a pic first blade in the pic since by the third time was tired of taking pics of it. This holds true for some of the other pics of the parts.
All wrapped and ready for heat treating!
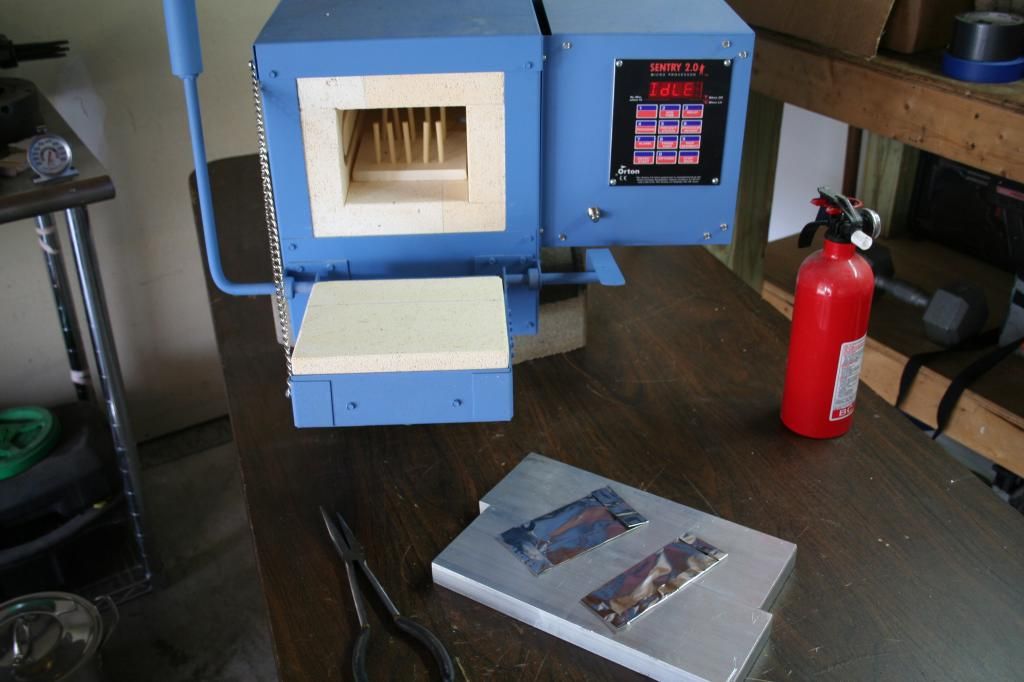
Put the packages into the room temp furnace.
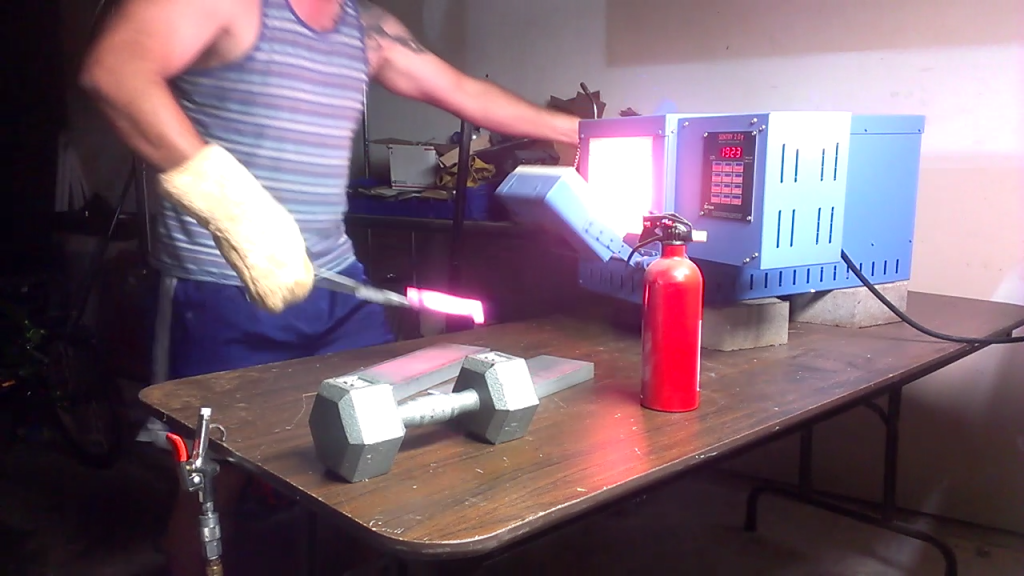
Ramp up to 1400 at full speed and hold at 1400 for 20 min
Then ramp up to 1950 and hold for 40 min
Then quickly plate quenched using positive pressure and compressed air.
Tempering
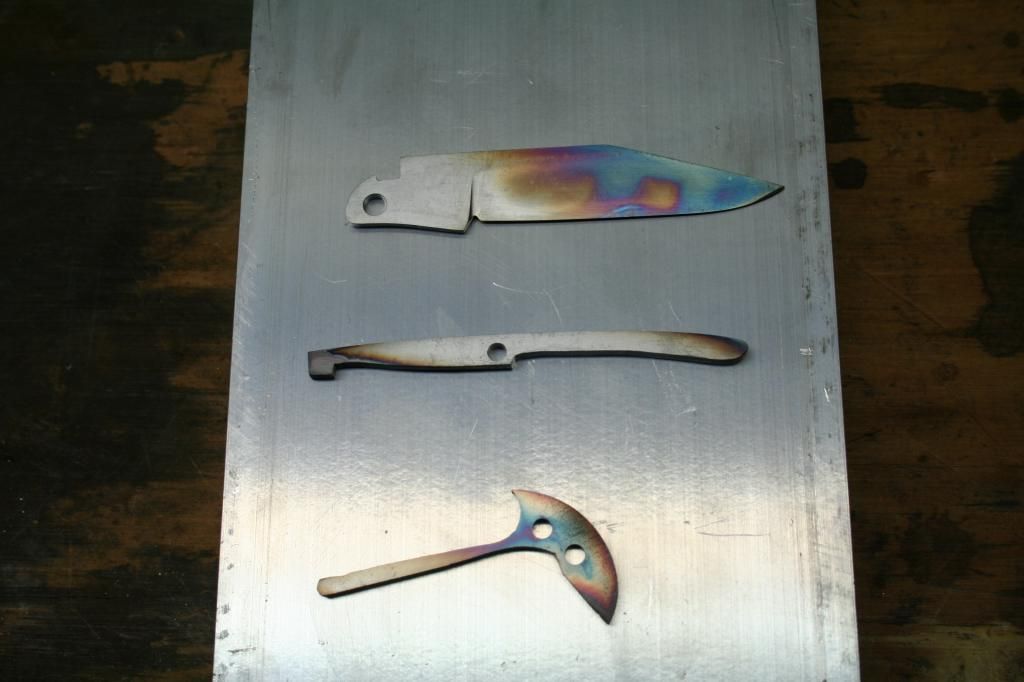
In my kitchen oven with an oven thermometer, the blade and rocker bar were tempered at 425 deg for 2 hours. Then repeated again at 425 for another 2 hours
Spring was put back into the Paragon furnace when it cooled back to below 1200 degrees. Then tempered at 1150 for 2 hours just one time.
Yes that is an oven mitt you see there. :biggrin:
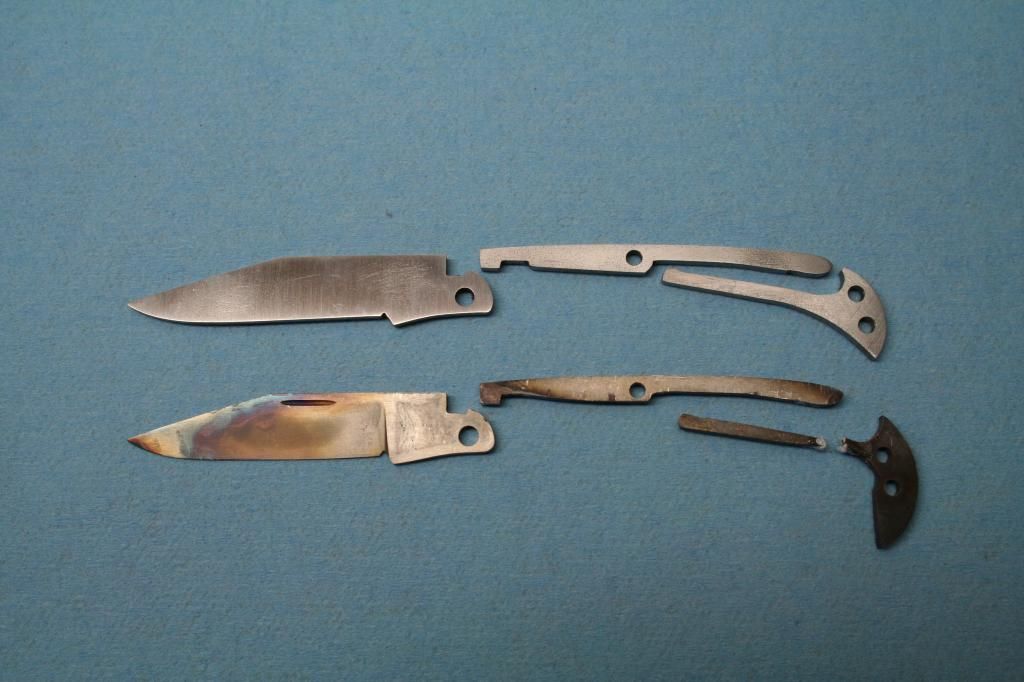
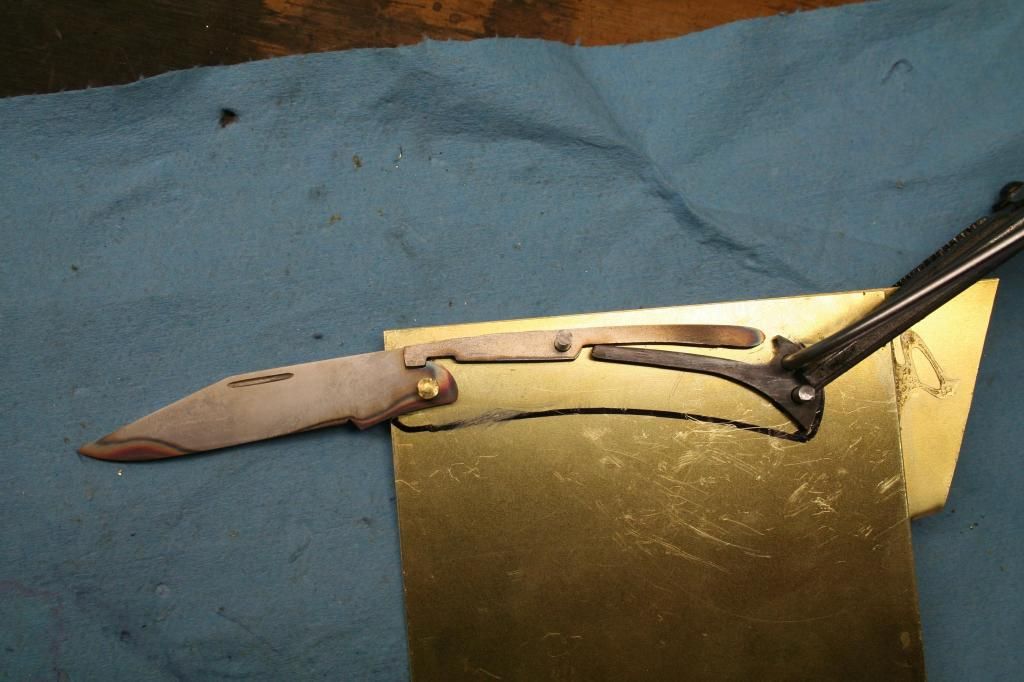
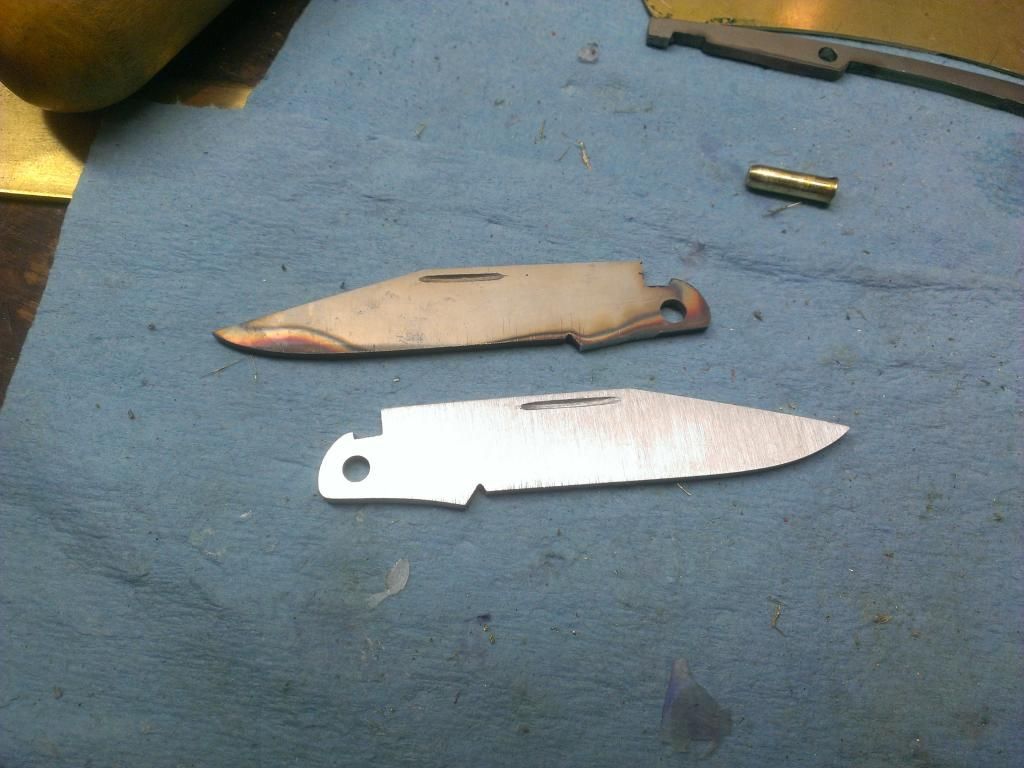
Just post the hardening process and a couple of issues right off the bat. First off I ground the blade way too thing and it warped and twisted like a dried out tortilla. The second issue was the kick was ground too short. The third and final issue was the horrible geometry of the spring. But I will get to that soon enough
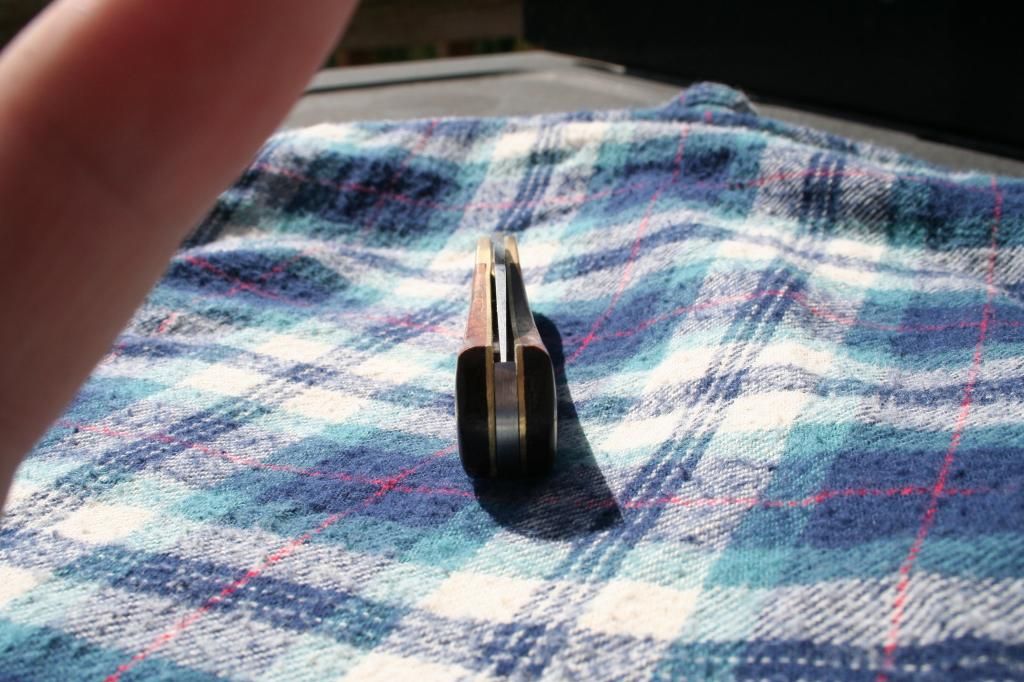
Test fitting everything and realizing that it doesn’t work in the open and closed position. Blade touches the spring and the kick and the rocker don’t match up in the open and closed position.
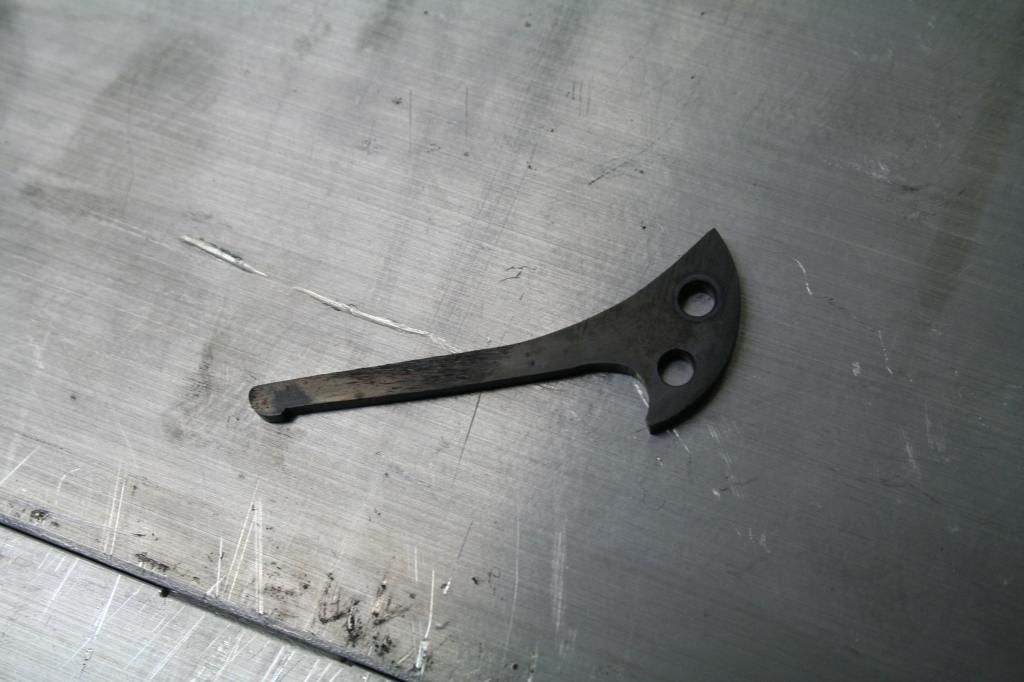
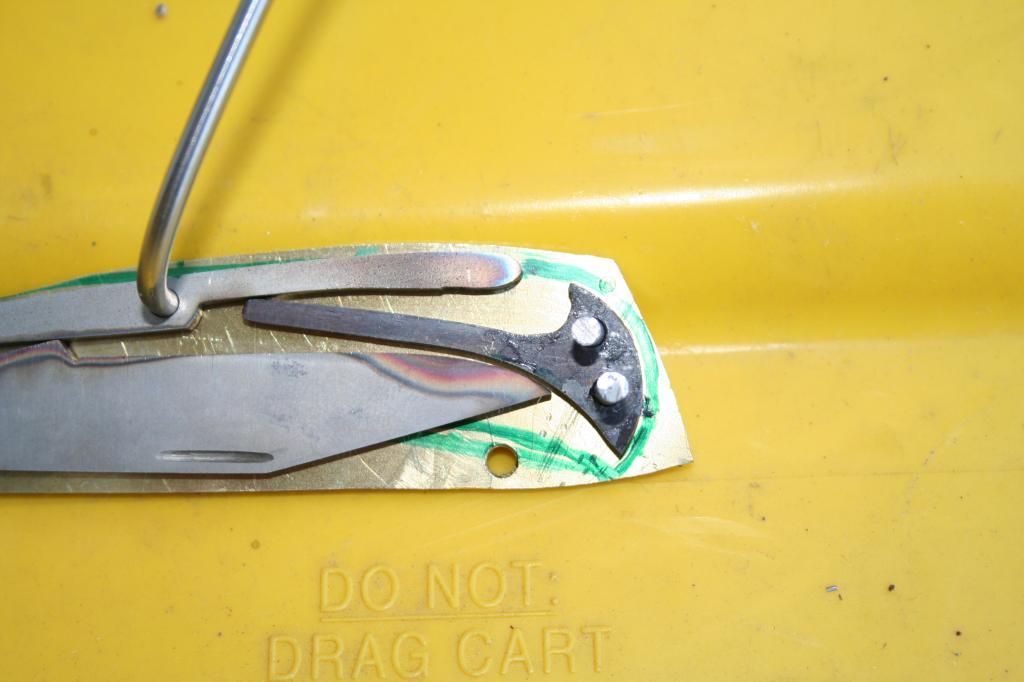
Then the final straw happened when the spring snapped. So back to the drawing board again so to speak for all new parts. This time I made the spring much thicker at the base and thinner toward the end as show in the pic below.
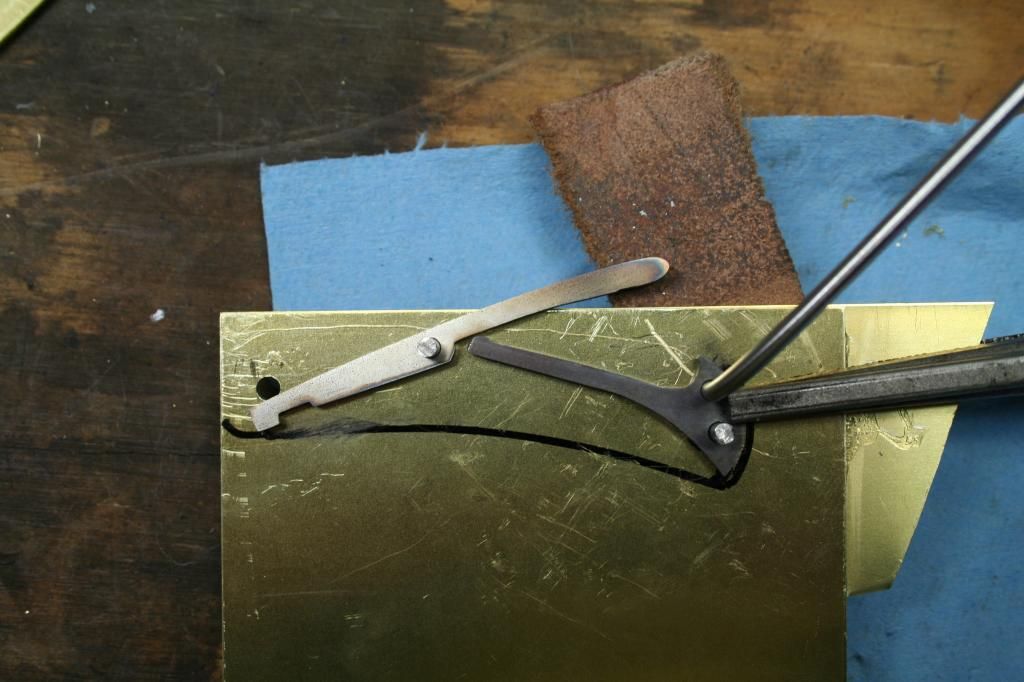
Testing out the new spring and rocker arm. Still too strong but some light removal of material and repositioning of the spring on the final liners and it worked out perfect.
Fitment is much better here.
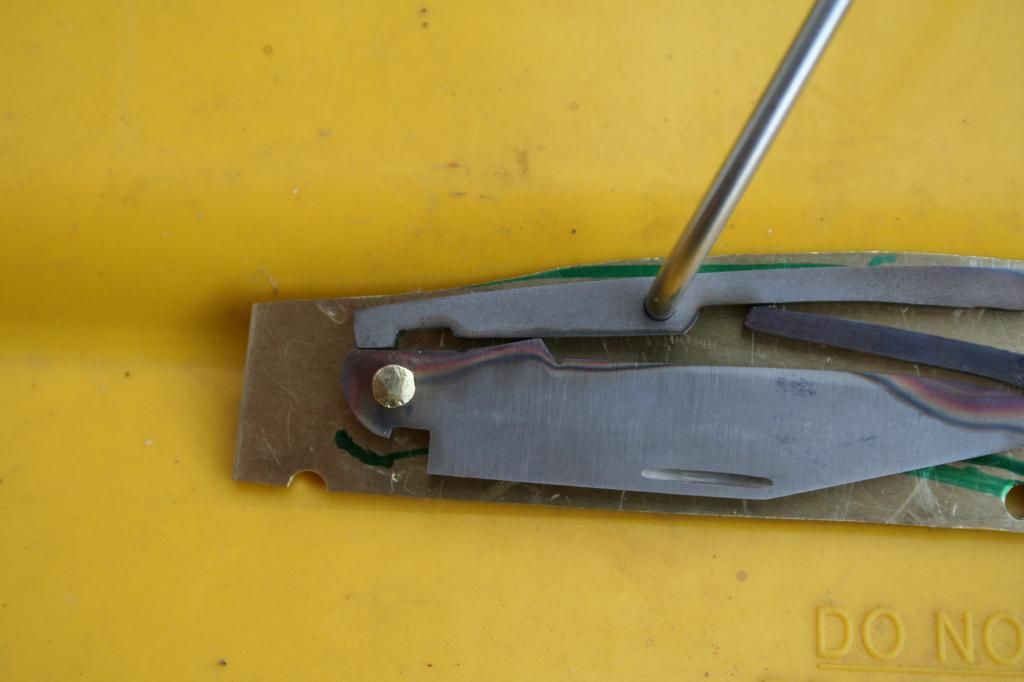
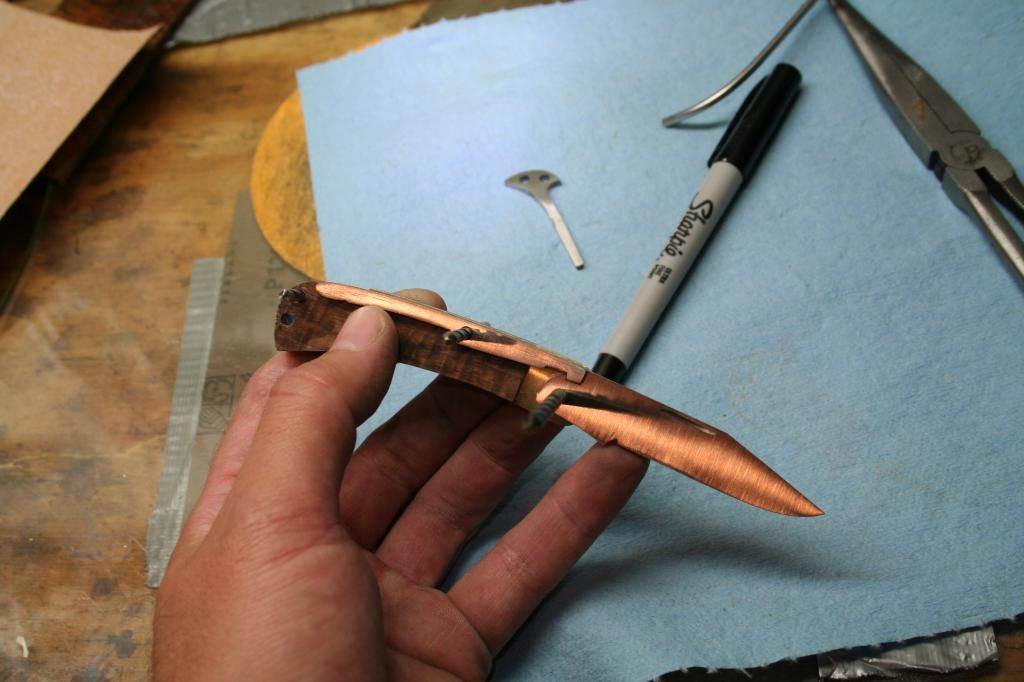
The third and final blade, and it all FINALLY worked together perfectly with the other components.
To go the way the rest of the things are going I put the nail nick on the wrong side of the last blade. Oh well not the worst things one can do.
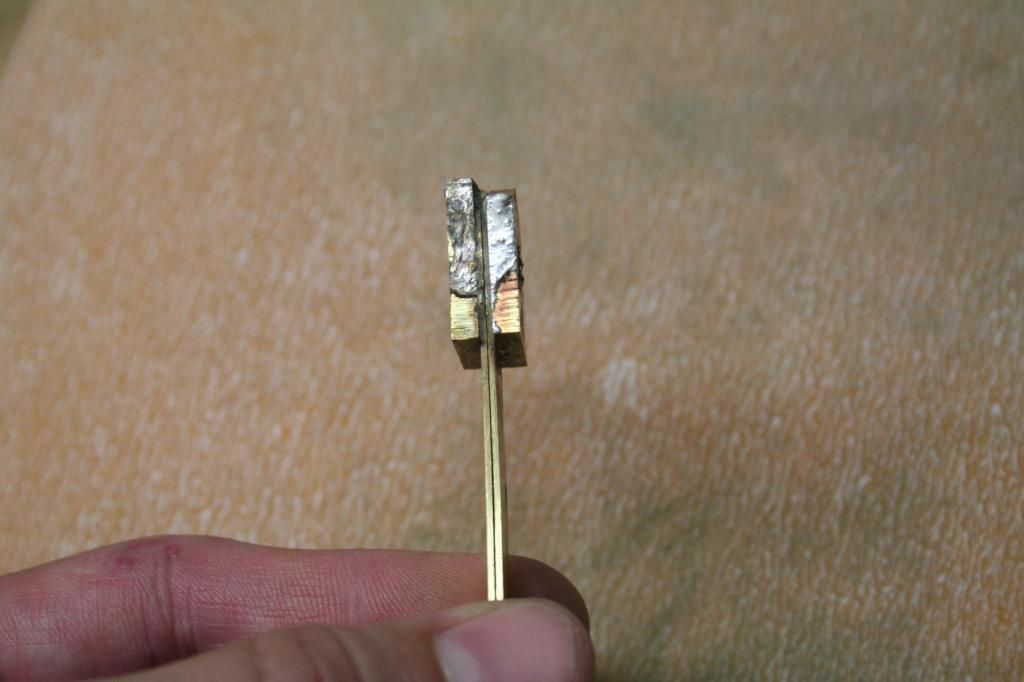
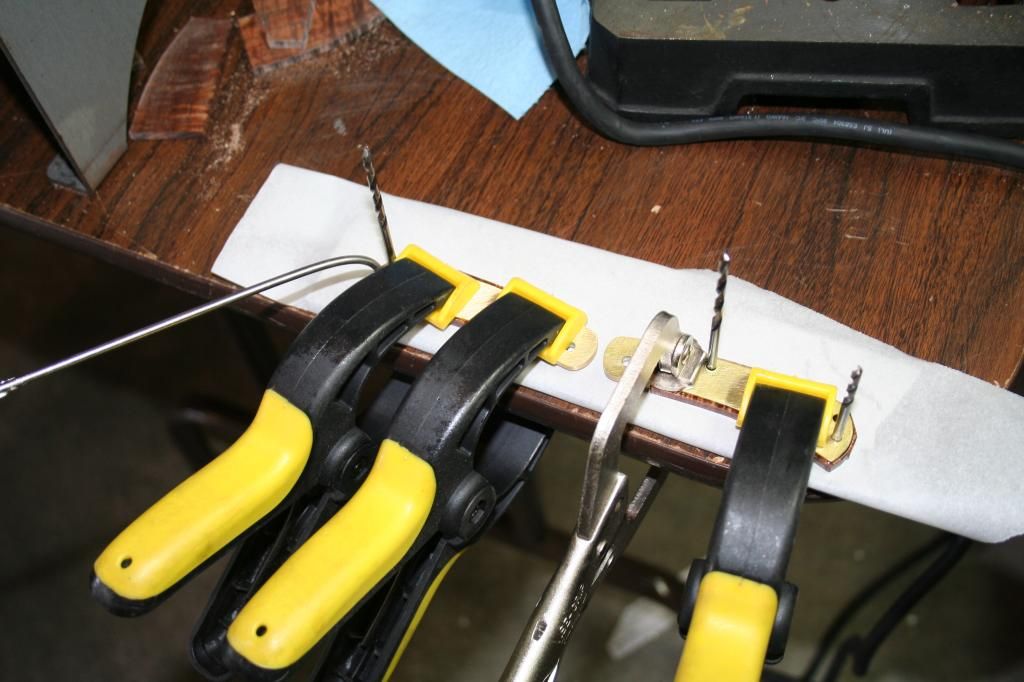
Time to try to cut out some brass bolsters and solder them on for the first time. I want to give credit to two sources for this. The BoseKnives videos on YouTube and Bill Vining’s tutorial. Thank you guys.
https://www.youtube.com/watch?v=SQEQkz4TjVU
http://www.medawebs.com/knives/tutorials/Slipjoint/Part7_soldering.htm
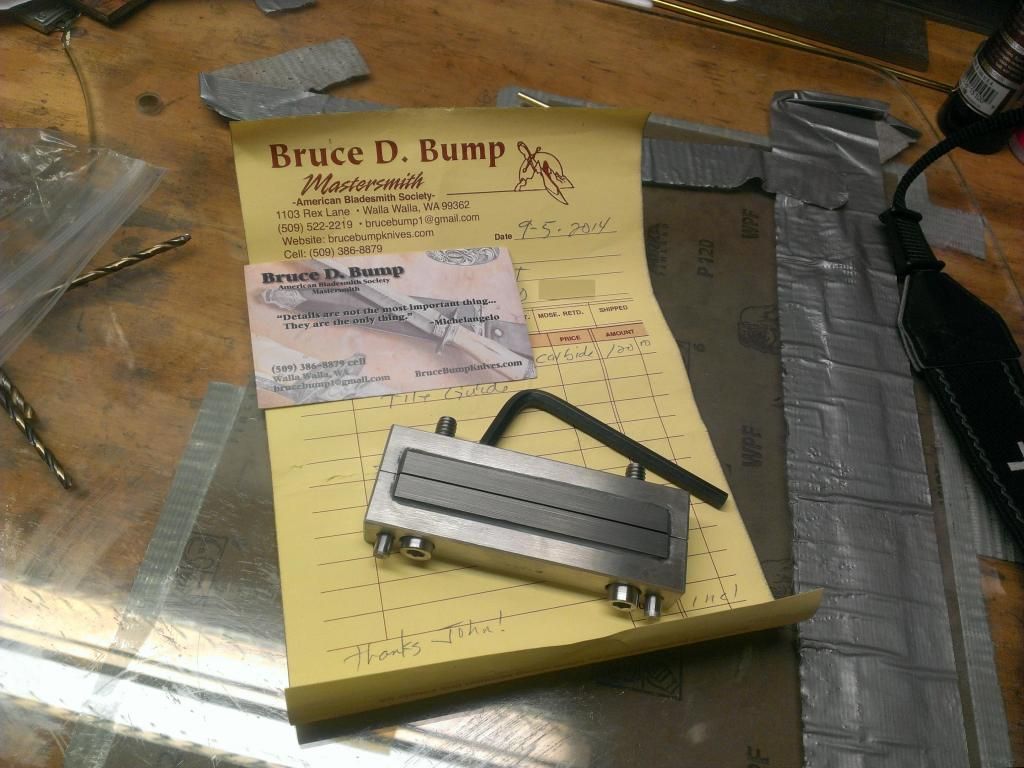
I ordered some file guides from Bruce Bump but they had not arrived yet. I was impatient and wanted to start so I just used what I had which was my Fred Roe bubble jig. It worked well enough.
The bolster and liner both tinned. Then clamped together and heated again to complete the soldering. I forgot to take a pic of this as I was nervous of messing it up and just forgot.
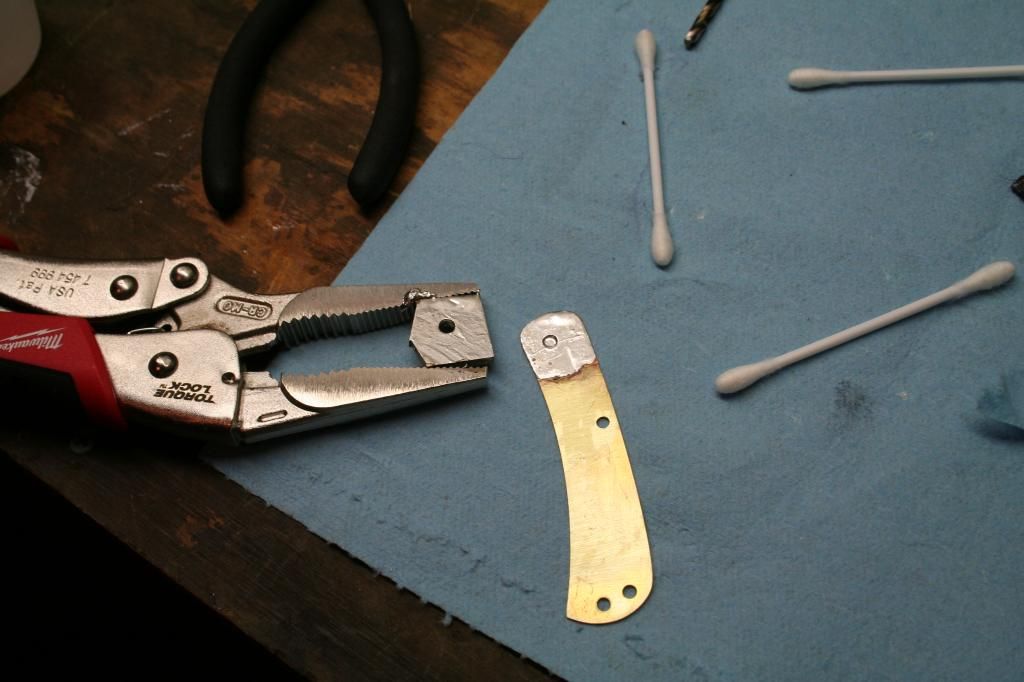
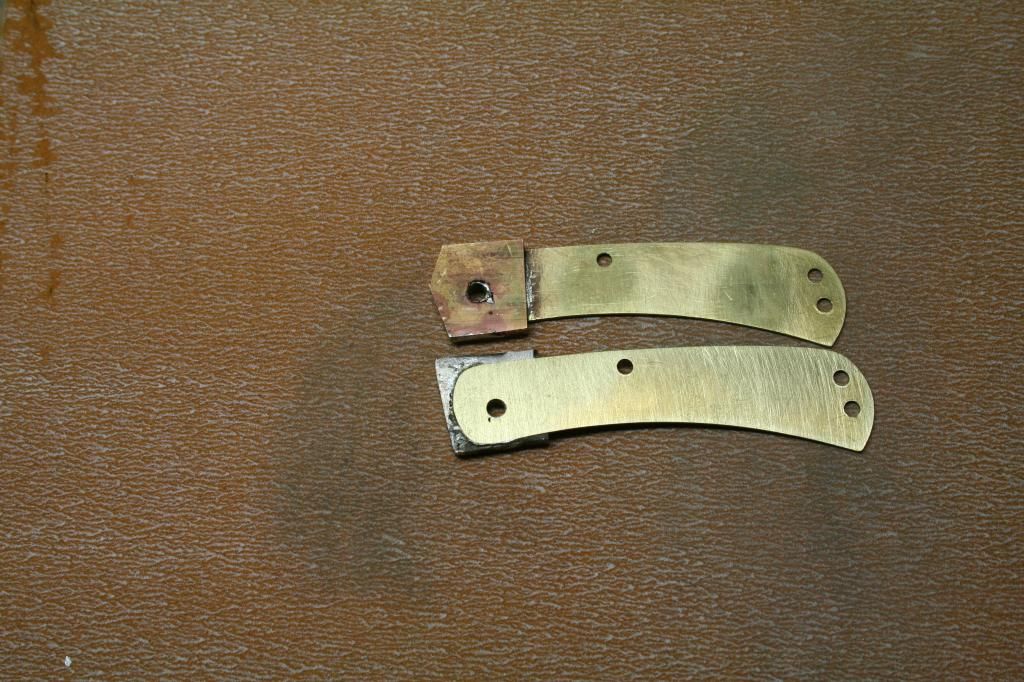
Here are some of the pics of the liners with their new bolsters. Not very pretty, in fact down right ugly. Not to worry they get better, though I was quite nervous after first sight.
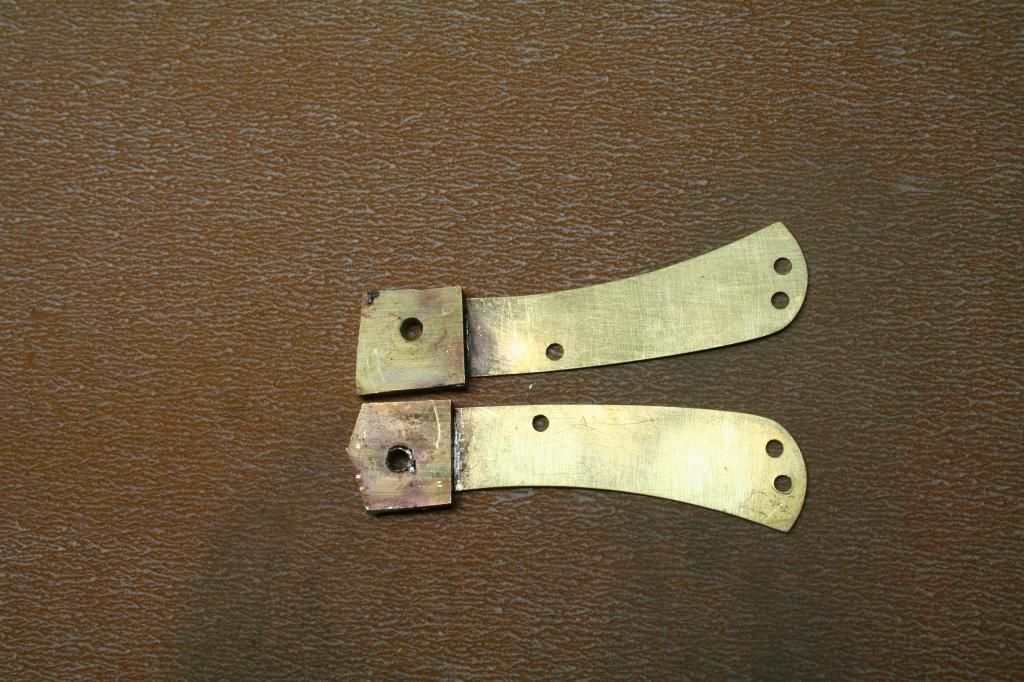
After a bit of cleanup.
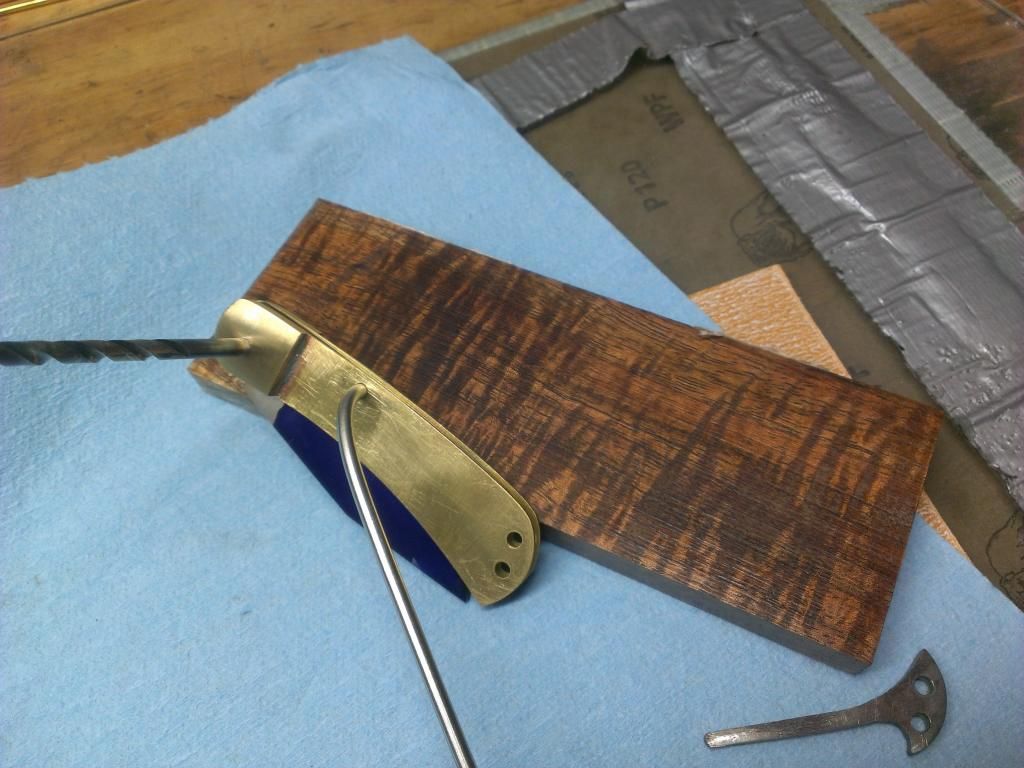
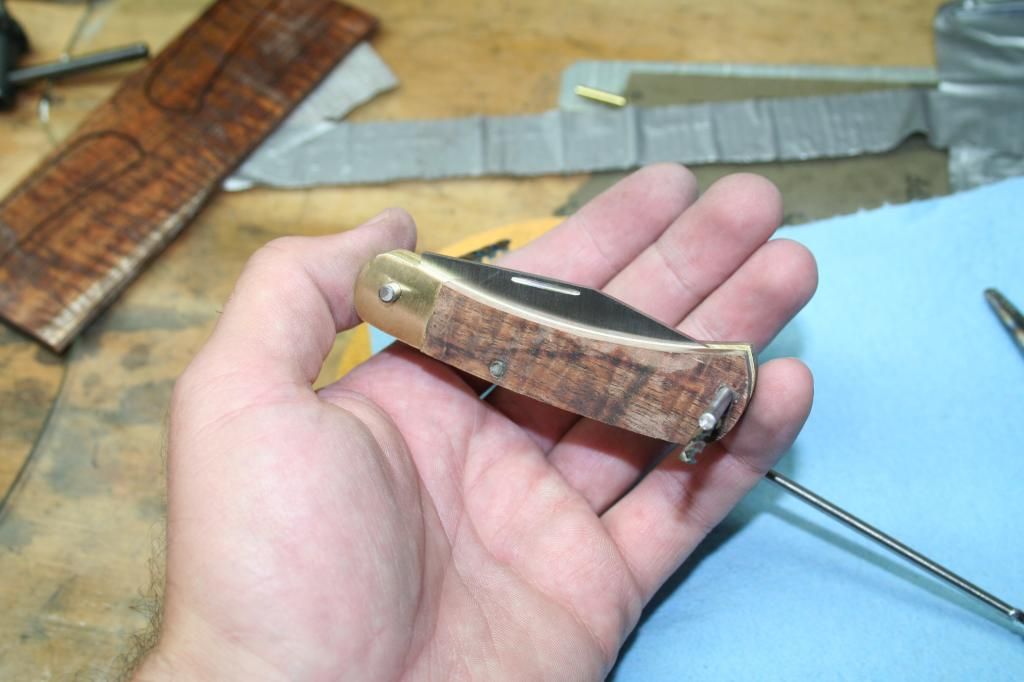
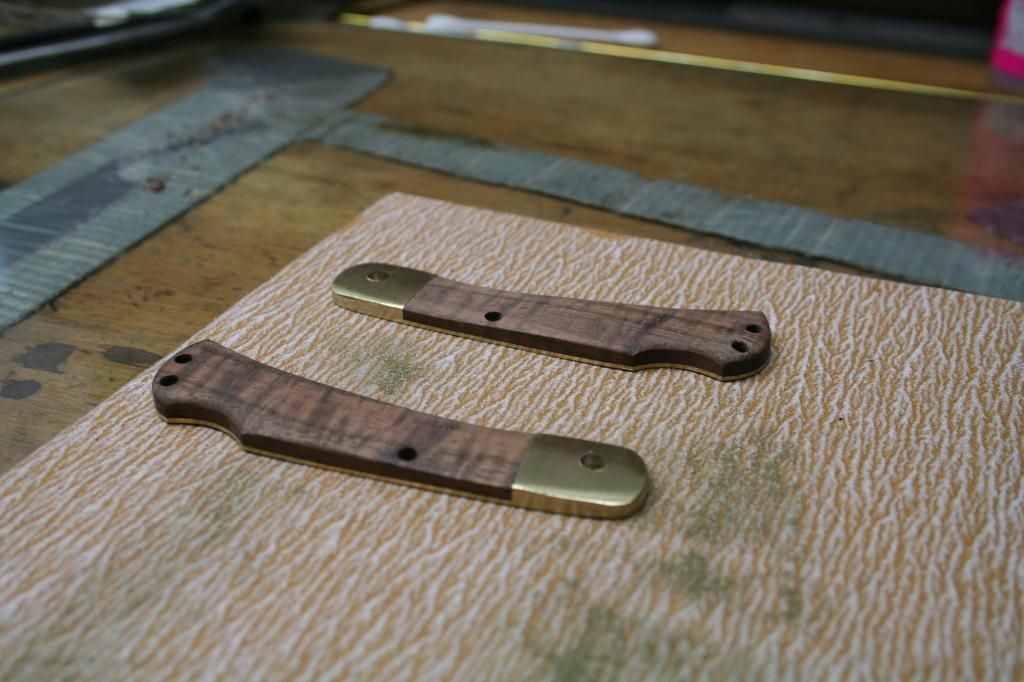
Some test fitting again. Starting to look more like a real knife.
Need to remove some material from the liner to make it even with the spring and rocker.
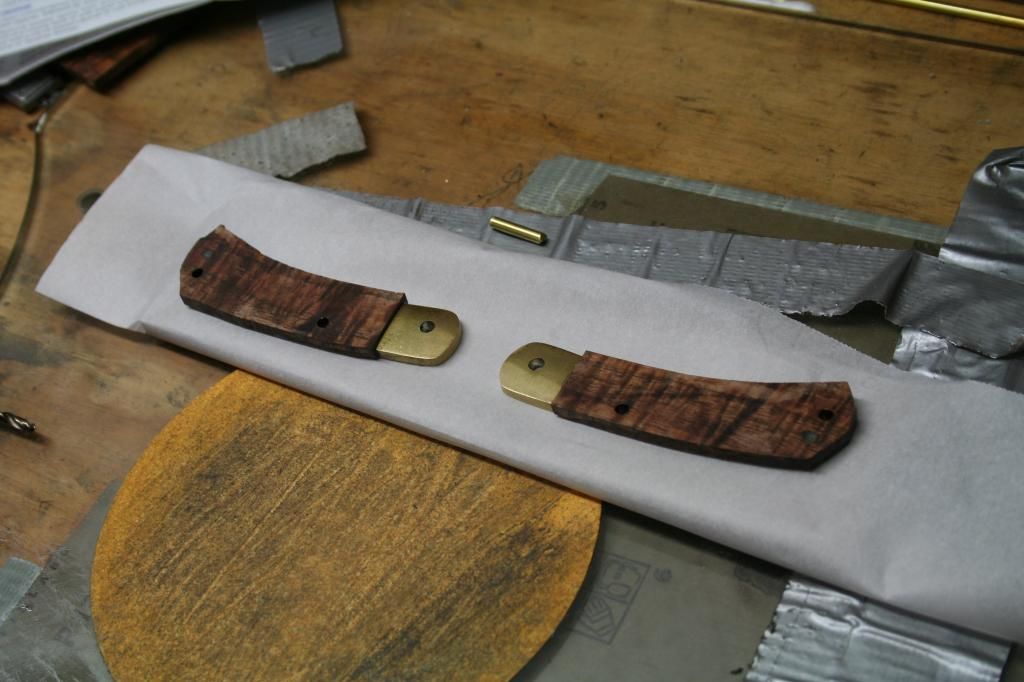
I piece of beautiful stabilized Hawaiian KOA purchased from Burl Source. Which Mr.Svinarich gracefully allowed me to have. Short story, there was a mix-up and we both purchased but he did so 30 seconds before me. Thank you again Mr.S
Traced out the shape of the liners on the then cut them out on my portaband, the attached them via 24 hour epoxy. I ran out of the Acryglass so I thought I would try the West System G Flex epoxy. I then clamped them to a flat piece of 3/16” precision ground 01 tool steel to keep them flat while curing overnight. With a piece of parchment paper in between.
After 24 hours. One step closer.
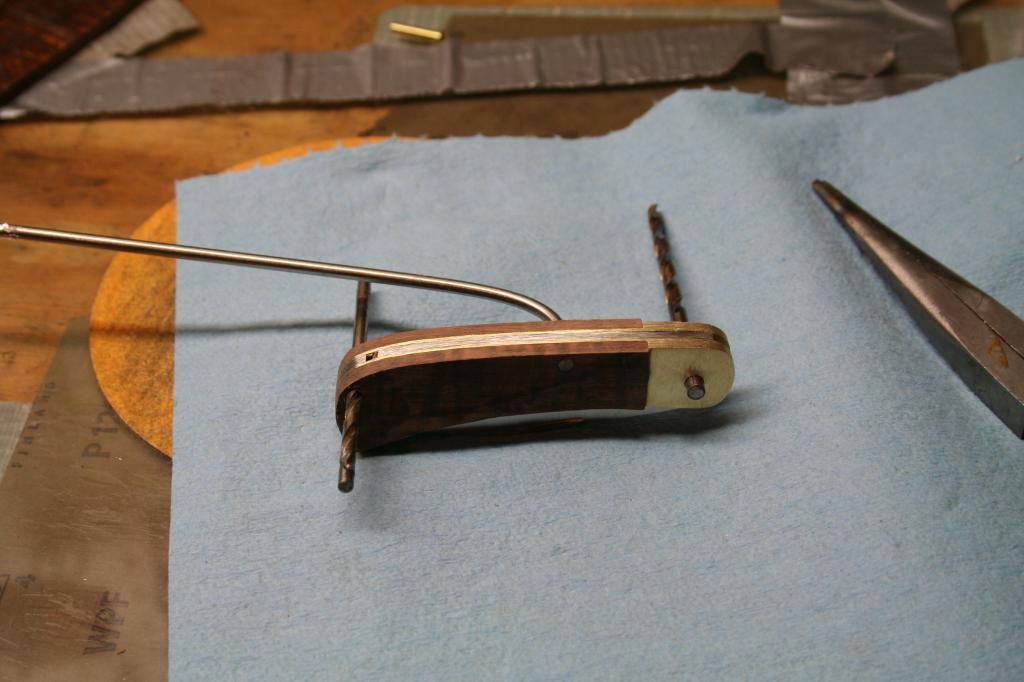
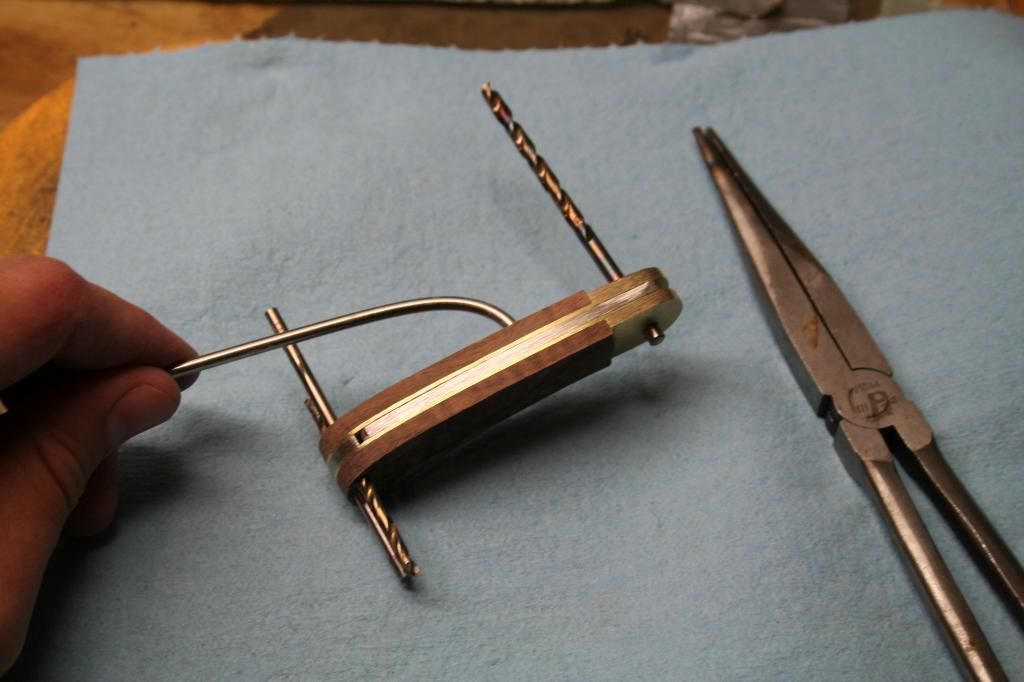
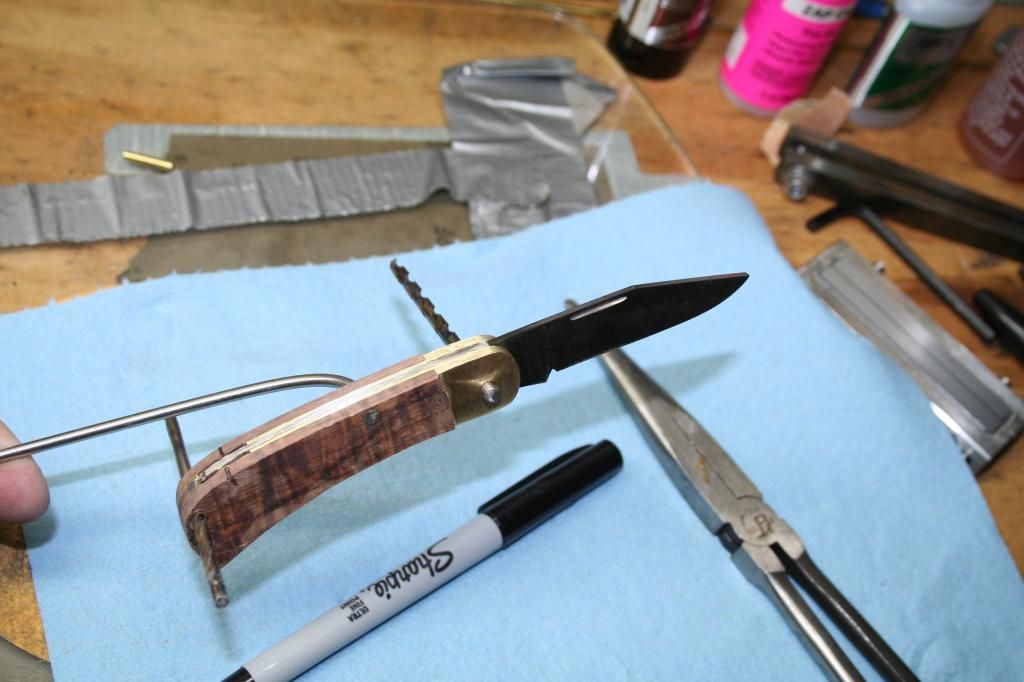
Time for another test fit.
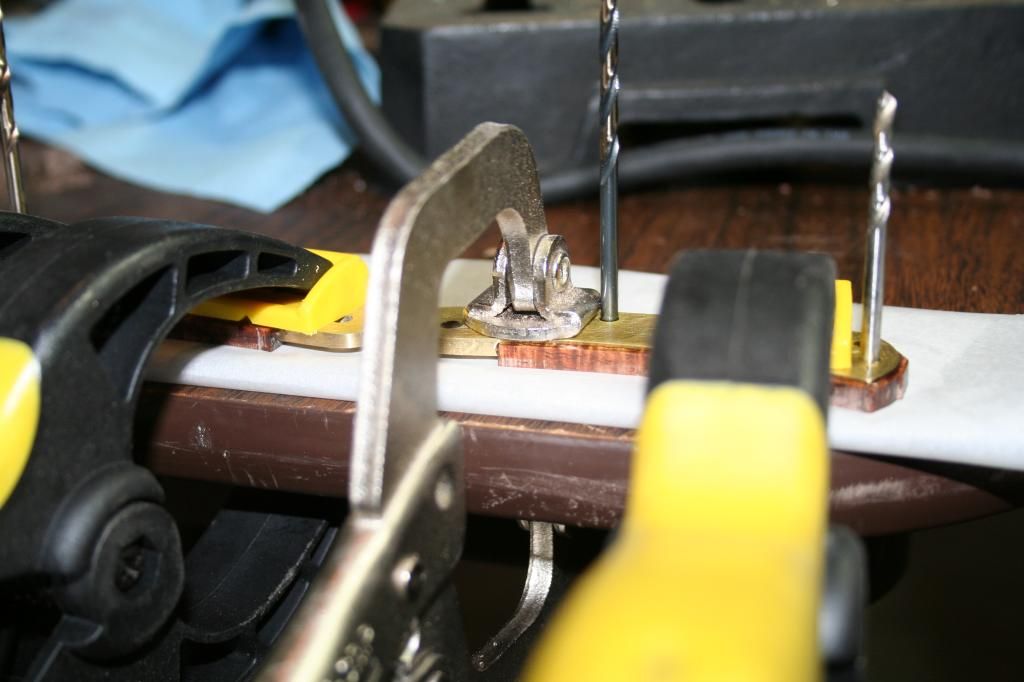
Good time to grind away the excess handle material to be flush with the internal parts.
Then I realized I forgot a crucial part……… The recess in the handle for releasing the locked blade.
This is where my recently purchased small wheel attachment for my KMG worked out great.
Verifying that I ground it deep enough.

And the file guide has arrived for future projects.
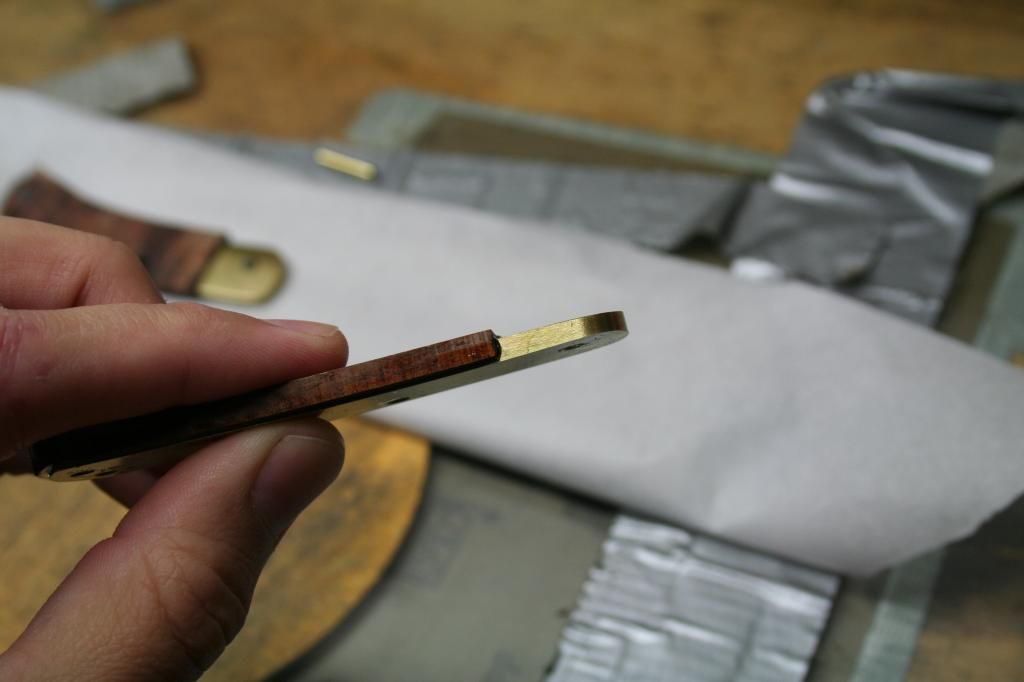
Lightly shaped the wood and bolsters via a slack belt with the platen removed, and worn belts increasing the grits. Then hand sanded the rest of the way to 1500. Also sanding them flat on higher grit paper laid flat on a piece of glass. What a difference from when I first soldered on the bolsters.
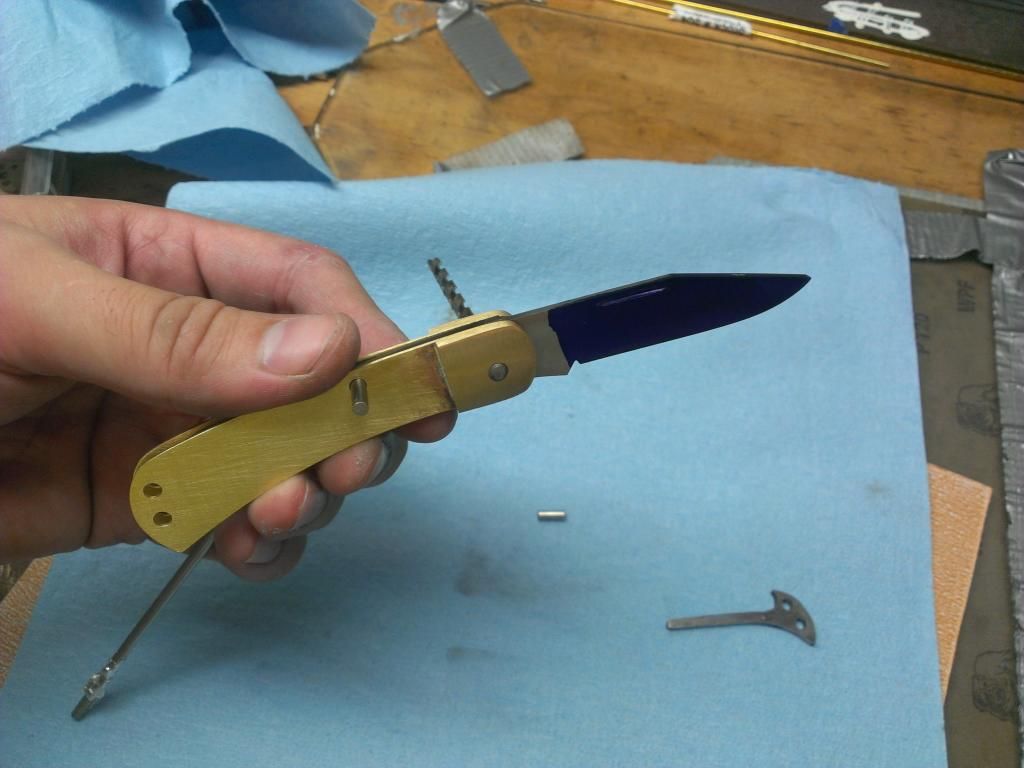
Parts ready for assembly. After assembly and before peening anything I ran into a problem. The blade would no longer snap closed and stay that way. It would slightly open enough that the pointed tip would stick out. It took me a bit to realize that the phosphor bronze bushings were too large in diameter and were causing clearance issues with the rocker arm and not allowing it to put the full pressure on the blade. Removed bushing, and that eliminated the problem.
This was the next issue to overcome. How to get the 1/8" .005" bushings to fit. I needed to increase the internal diameter to 3/32 and the external diameter small enough to not interfere with the rocker arm. Very difficult to do with something .005” thin. This was my round about method.
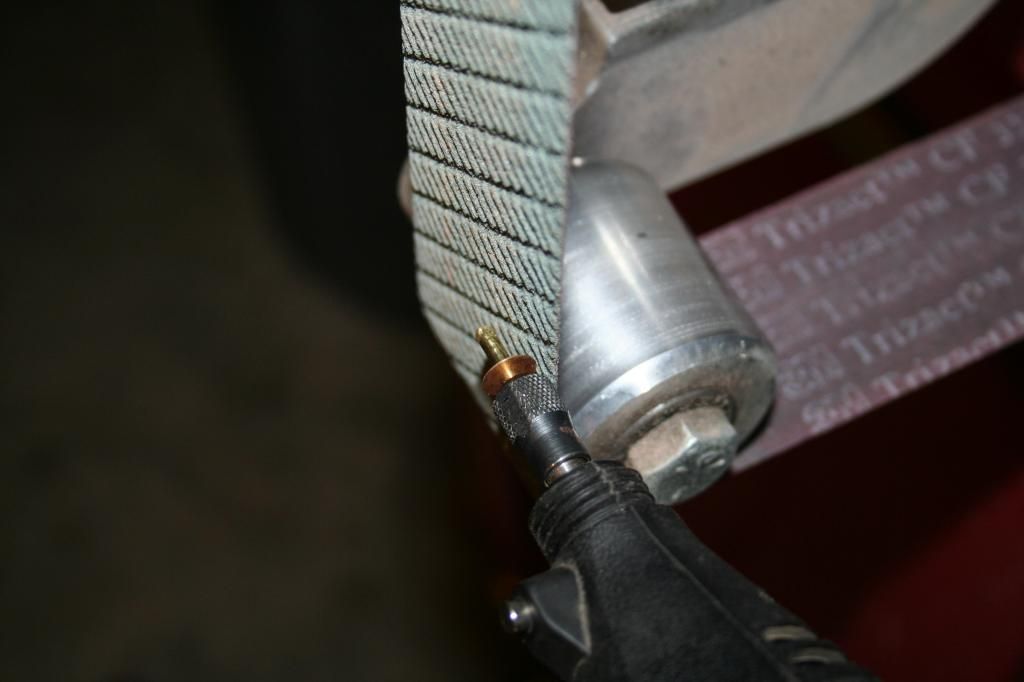
Put bushings onto a 1/8” brass rod and add a drop of super glue. Insert in a Dremel and grind against a belt on the KMG. Then remove with de-bonder.
Next to the more difficult issue of drilling a small razor sharp circle. I’ve got it…. More super glue and a piece of wood. What do you know, it worked great! Then of course remove with de-bonder.
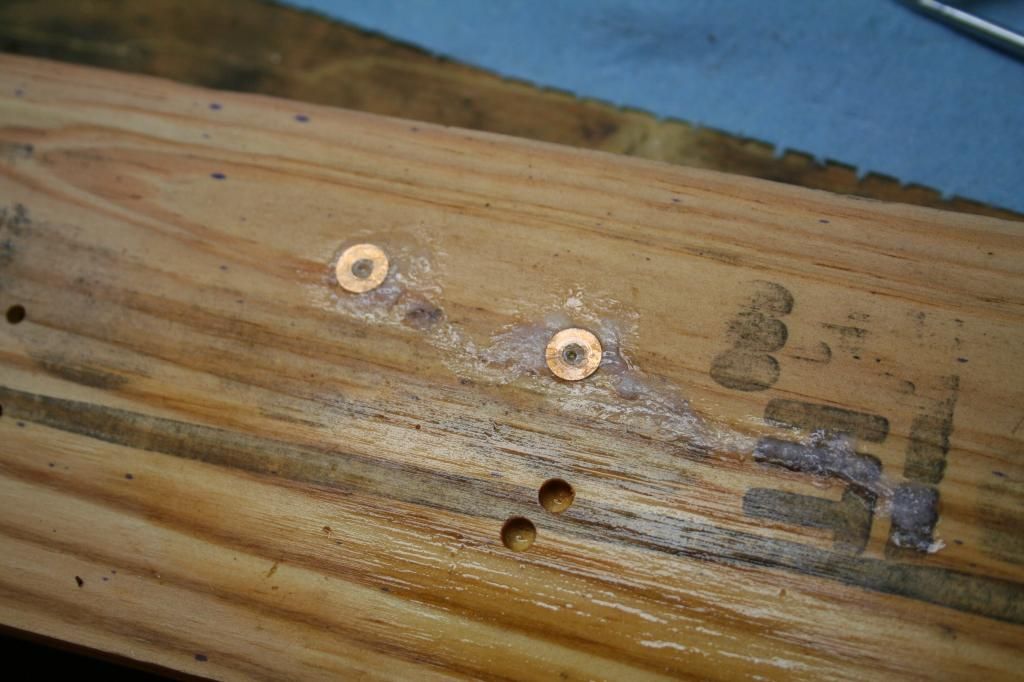
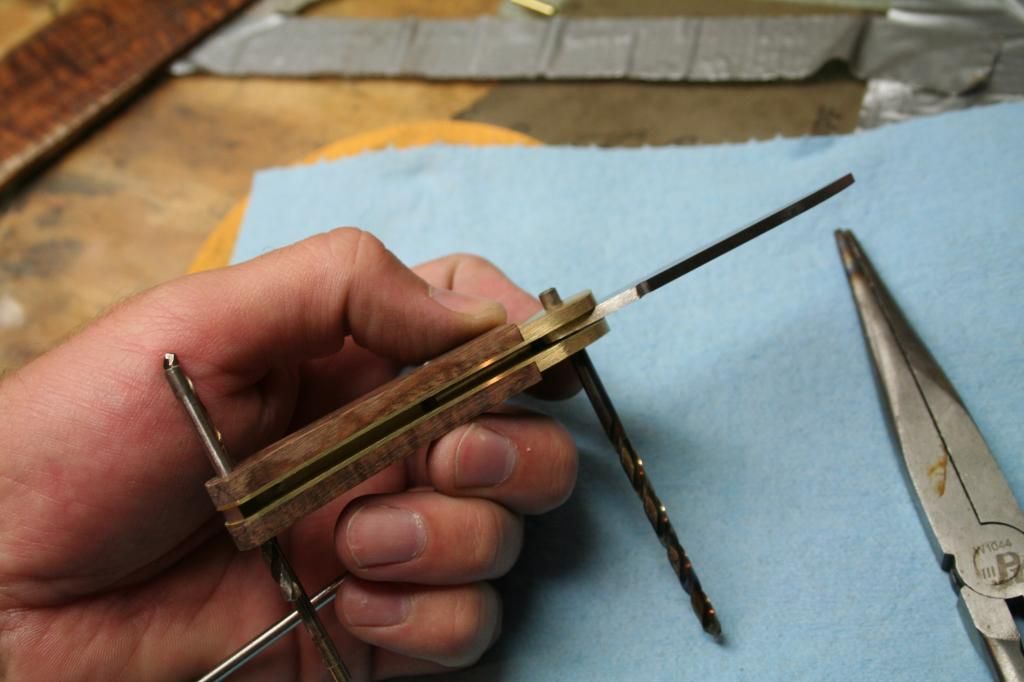
Finally ready to put it all together! Put a slight tape in the pivot location in the bolster with a tapered hand reamer.
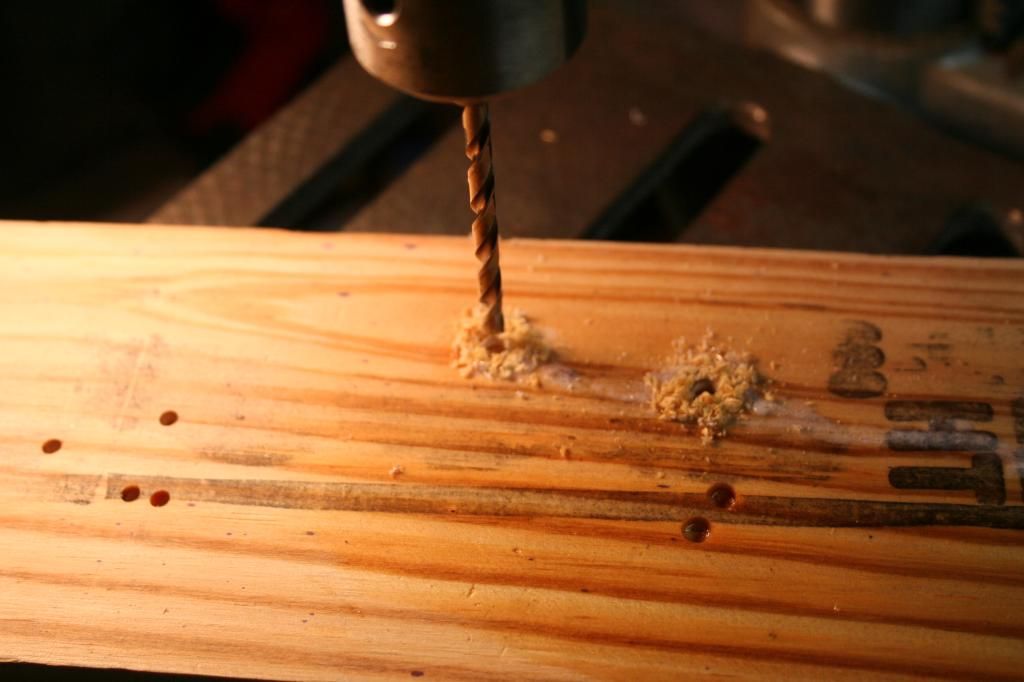
I quickly ran into a major issue after peening the blade in place. The pin mushroomed or expanded enough that the blade was very hard to open and close even though there was enough of a gap between the blade and the liners it shouldn’t have. I had to drill out the pin and punch it through and the drill wandered off the center and left a chunk gone on the bolster. Lesson learned.
I tried a second time by spinning the brass pin against the grinder belt until it was thin enough to slide through easily giving me more room for error. I tested the blade action after every couple of hits on the pin. I finally stopped when the blade movement started to stiffen up. Unfortunately the pin look bad as there are gaps around it and the missing chunk on the other side.
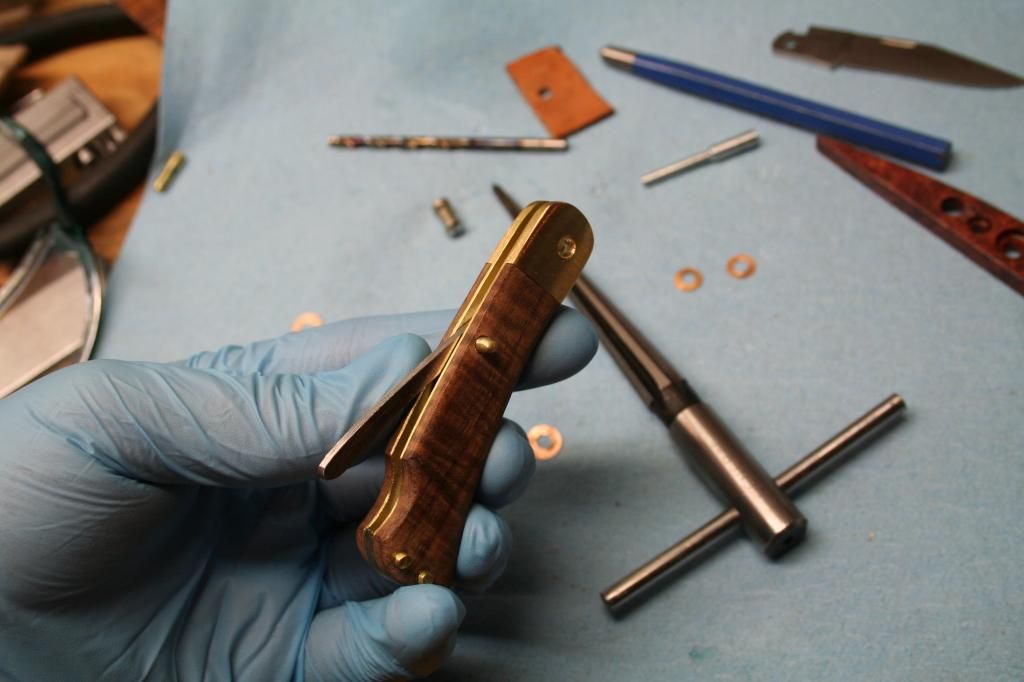
UPDATED: I forgot to include that I buffed the wood handle on using the Baldor 3 wheel buffing system.
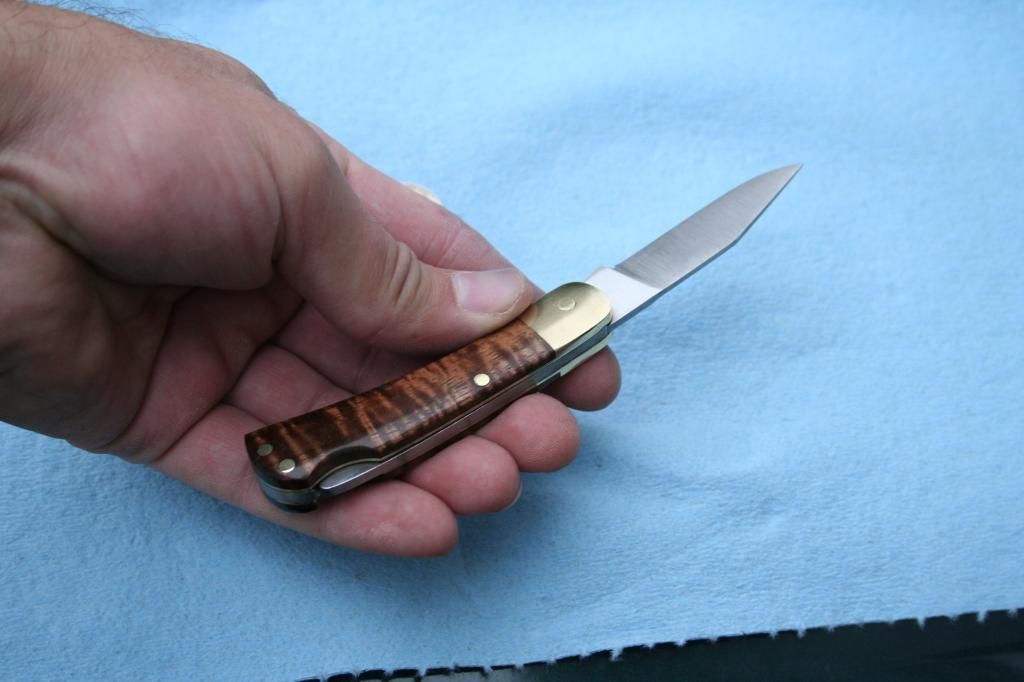
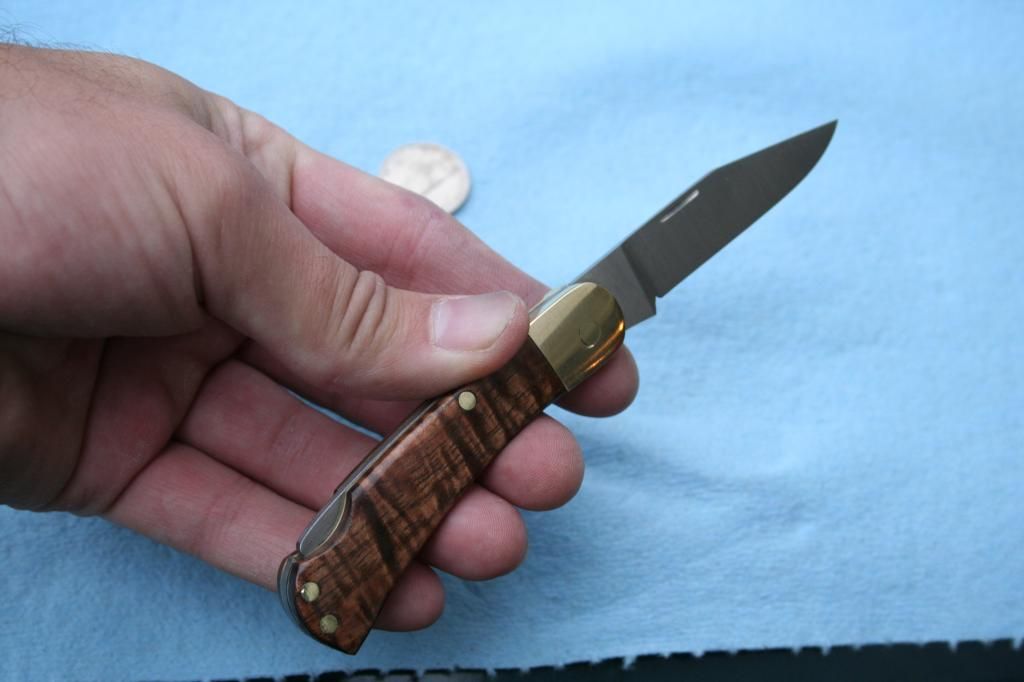
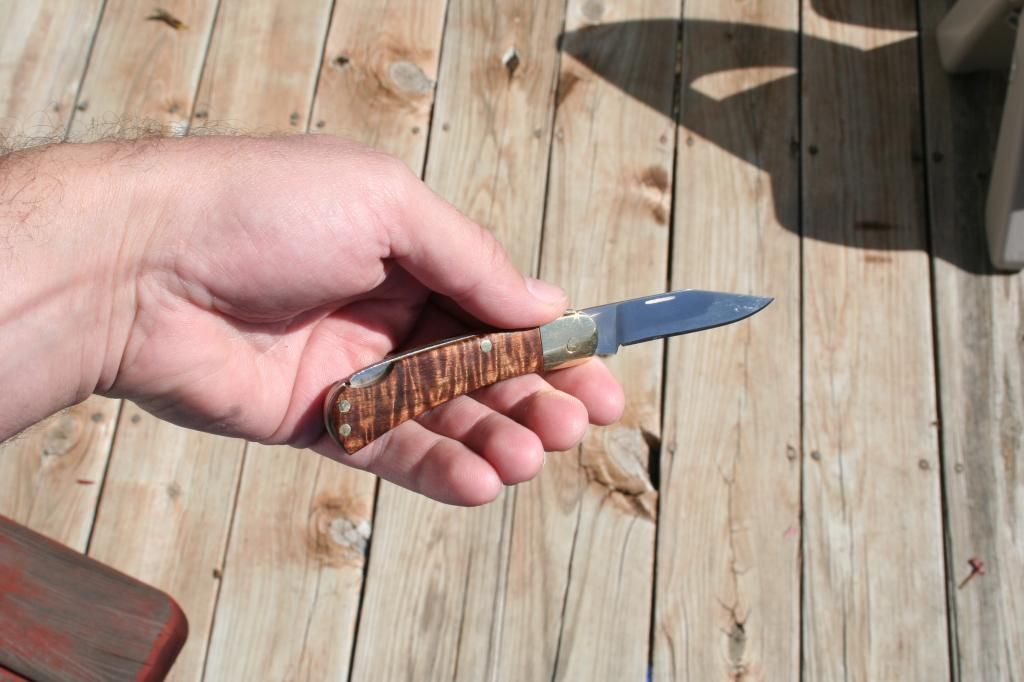
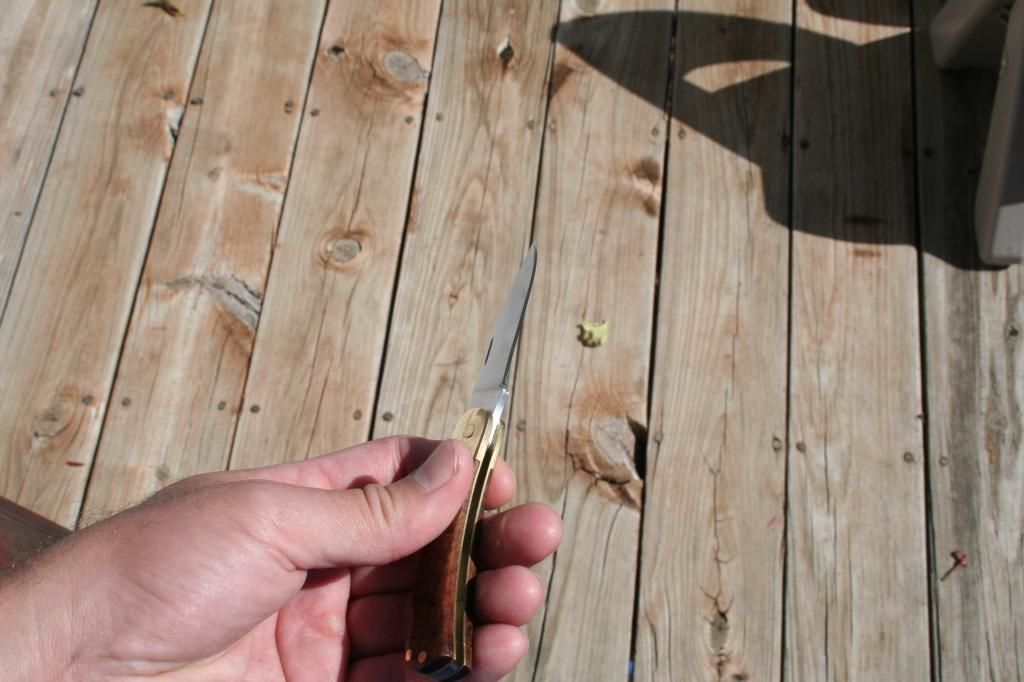
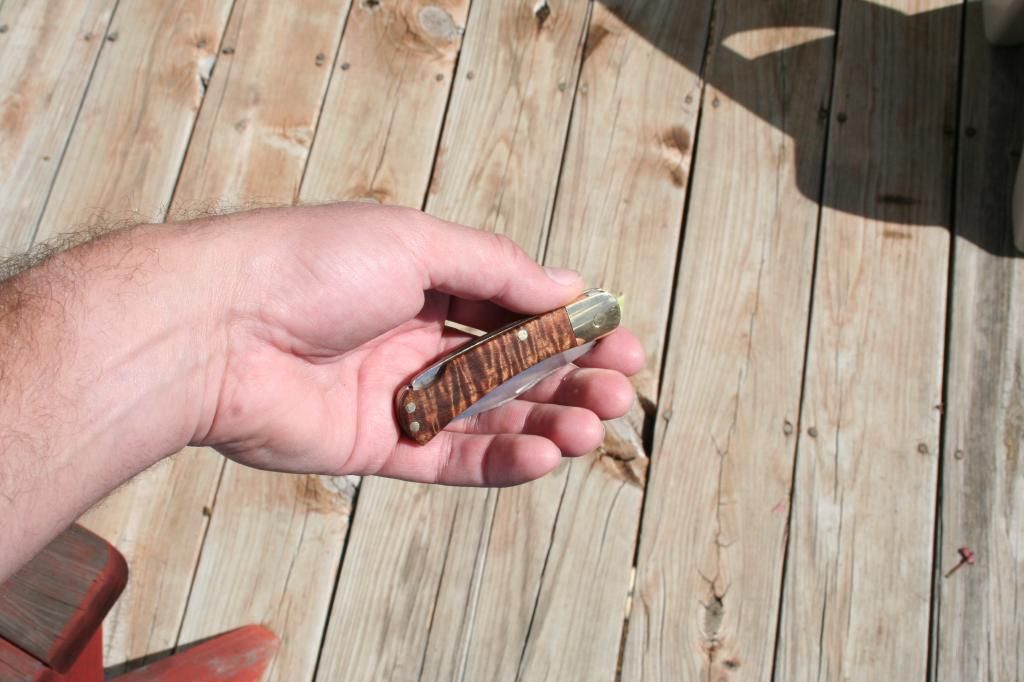
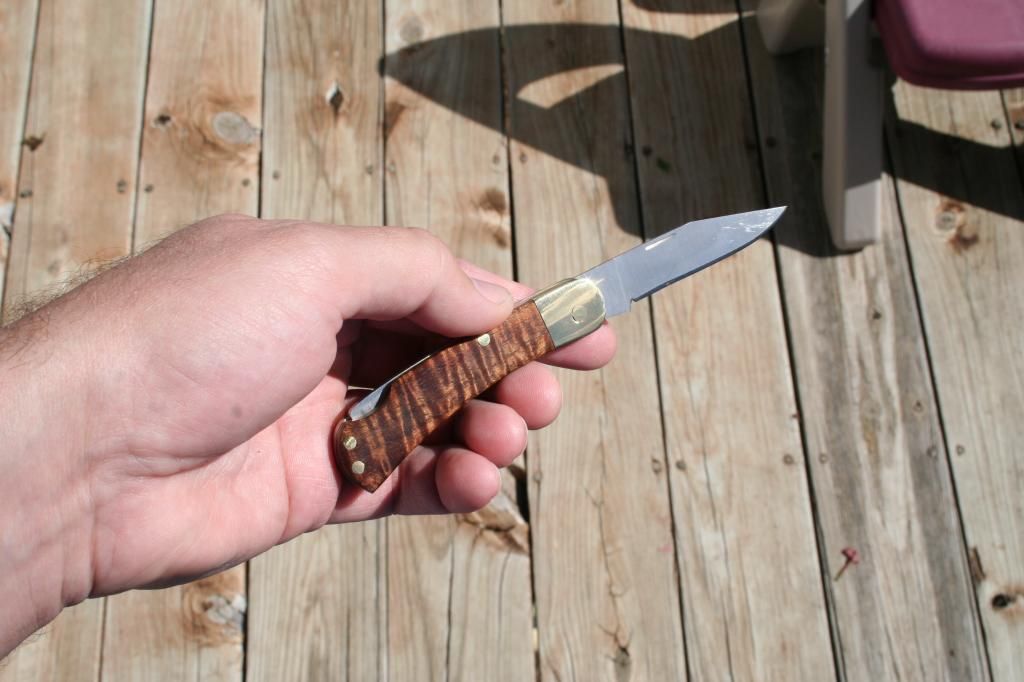
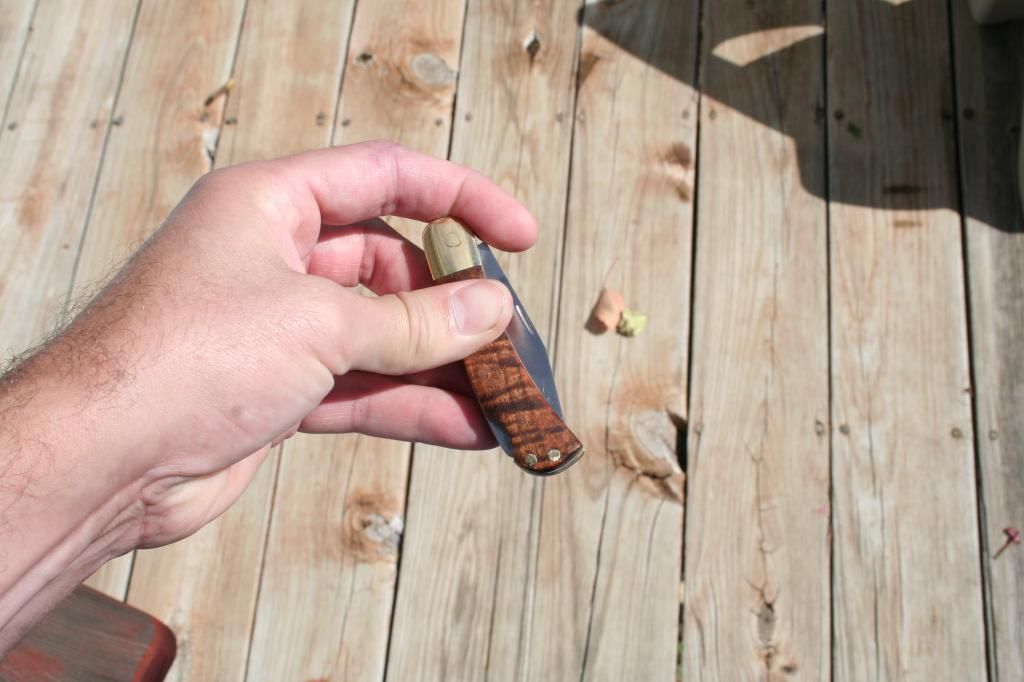
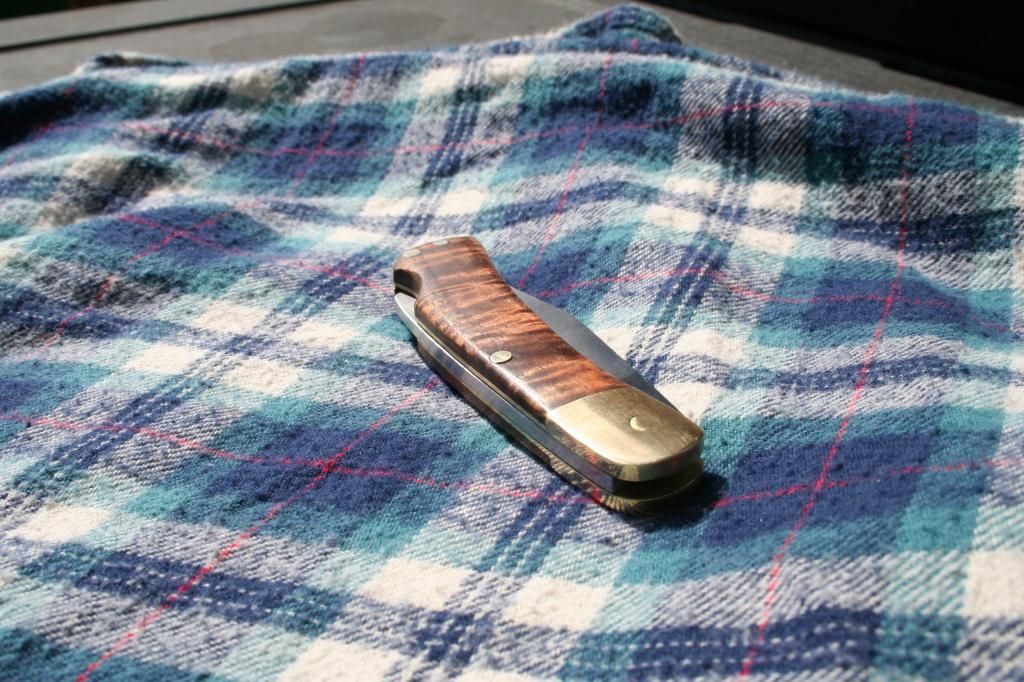
This has been quite a journey and learning experience for me and I wanted to share it with others. It wasn’t smooth and almost nothing worked the first time but eventually I ended up with something I am very proud of, flaws and all.
Below are a bunch of pics that I took and a few links to quick videos of the blade lockup and closing, as well as cutting.
Thanks again for hanging in there for this long how to or maybe I should say what not to do.
John
Paper cutting test
[video=youtube_share;h-0f_1Lct4U]http://youtu.be/h-0f_1Lct4U[/video]
More specifically, 3 blades and two rocker arms before I got it to lock up just right not to mention getting the kick and rocker arm to meet just right so the rocker arm stayed flush with the liner in both the open and closed positions.
Then there was the issue of making that spring shape just right so the blade didn’t make contact with it. All the while not being so thin that it snaps at the slightest force. After the third time I had a workable spring. There was one issue after the other as you can see, but somehow I got it finished.
On to the knife….
I used .130 thick CPM-154 for the blade rocker and spring. By the third blade I had run out of the CPM-154 and just made the blade out of AEB-L that I had sitting on the bench. The liners, bolster and pins are brass. The scales are made from some beautiful stabilized Hawaiian KOA that I recently purchased.
After drilling the holes for the pivot and pin locations I then began cutting out the rough shape with my hacksaw and a vice (decided not to use my portaband this time), No pics of this since it’s the same process for any knife, and I forgot to get out the camera.
Did some grinding outside for a change.

I finished shaping the pieces on my grinder then went to hand filing the blade and rocker. By the third time around I super glued blade #3 to the heat treated blade #2 to use as a filing guide. I had already spent so much time working to get the lockup just right, no since recreating the wheel.

I used a Dremel brand cutoff wheel in the drill and did a light pass back and forth with a small vice as a raised level surface. It turned out decent.

Super glued the blade to a piece of brass so that I had something larger to hold on to as to not cut my cut a tendon again.

Test fitting the blade one last time before heat treating. This is a pic first blade in the pic since by the third time was tired of taking pics of it. This holds true for some of the other pics of the parts.

All wrapped and ready for heat treating!

Put the packages into the room temp furnace.
Ramp up to 1400 at full speed and hold at 1400 for 20 min
Then ramp up to 1950 and hold for 40 min
Then quickly plate quenched using positive pressure and compressed air.
Tempering
In my kitchen oven with an oven thermometer, the blade and rocker bar were tempered at 425 deg for 2 hours. Then repeated again at 425 for another 2 hours
Spring was put back into the Paragon furnace when it cooled back to below 1200 degrees. Then tempered at 1150 for 2 hours just one time.
Yes that is an oven mitt you see there. :biggrin:

Just post the hardening process and a couple of issues right off the bat. First off I ground the blade way too thing and it warped and twisted like a dried out tortilla. The second issue was the kick was ground too short. The third and final issue was the horrible geometry of the spring. But I will get to that soon enough

Test fitting everything and realizing that it doesn’t work in the open and closed position. Blade touches the spring and the kick and the rocker don’t match up in the open and closed position.

Then the final straw happened when the spring snapped. So back to the drawing board again so to speak for all new parts. This time I made the spring much thicker at the base and thinner toward the end as show in the pic below.


Testing out the new spring and rocker arm. Still too strong but some light removal of material and repositioning of the spring on the final liners and it worked out perfect.


Fitment is much better here.


The third and final blade, and it all FINALLY worked together perfectly with the other components.


To go the way the rest of the things are going I put the nail nick on the wrong side of the last blade. Oh well not the worst things one can do.

Time to try to cut out some brass bolsters and solder them on for the first time. I want to give credit to two sources for this. The BoseKnives videos on YouTube and Bill Vining’s tutorial. Thank you guys.
https://www.youtube.com/watch?v=SQEQkz4TjVU
http://www.medawebs.com/knives/tutorials/Slipjoint/Part7_soldering.htm
I ordered some file guides from Bruce Bump but they had not arrived yet. I was impatient and wanted to start so I just used what I had which was my Fred Roe bubble jig. It worked well enough.


The bolster and liner both tinned. Then clamped together and heated again to complete the soldering. I forgot to take a pic of this as I was nervous of messing it up and just forgot.

Here are some of the pics of the liners with their new bolsters. Not very pretty, in fact down right ugly. Not to worry they get better, though I was quite nervous after first sight.


After a bit of cleanup.


Some test fitting again. Starting to look more like a real knife.


Need to remove some material from the liner to make it even with the spring and rocker.

I piece of beautiful stabilized Hawaiian KOA purchased from Burl Source. Which Mr.Svinarich gracefully allowed me to have. Short story, there was a mix-up and we both purchased but he did so 30 seconds before me. Thank you again Mr.S

Traced out the shape of the liners on the then cut them out on my portaband, the attached them via 24 hour epoxy. I ran out of the Acryglass so I thought I would try the West System G Flex epoxy. I then clamped them to a flat piece of 3/16” precision ground 01 tool steel to keep them flat while curing overnight. With a piece of parchment paper in between.


After 24 hours. One step closer.


Time for another test fit.


Good time to grind away the excess handle material to be flush with the internal parts.


Then I realized I forgot a crucial part……… The recess in the handle for releasing the locked blade.

This is where my recently purchased small wheel attachment for my KMG worked out great.

Verifying that I ground it deep enough.


And the file guide has arrived for future projects.

Lightly shaped the wood and bolsters via a slack belt with the platen removed, and worn belts increasing the grits. Then hand sanded the rest of the way to 1500. Also sanding them flat on higher grit paper laid flat on a piece of glass. What a difference from when I first soldered on the bolsters.

Parts ready for assembly. After assembly and before peening anything I ran into a problem. The blade would no longer snap closed and stay that way. It would slightly open enough that the pointed tip would stick out. It took me a bit to realize that the phosphor bronze bushings were too large in diameter and were causing clearance issues with the rocker arm and not allowing it to put the full pressure on the blade. Removed bushing, and that eliminated the problem.
This was the next issue to overcome. How to get the 1/8" .005" bushings to fit. I needed to increase the internal diameter to 3/32 and the external diameter small enough to not interfere with the rocker arm. Very difficult to do with something .005” thin. This was my round about method.
Put bushings onto a 1/8” brass rod and add a drop of super glue. Insert in a Dremel and grind against a belt on the KMG. Then remove with de-bonder.


Next to the more difficult issue of drilling a small razor sharp circle. I’ve got it…. More super glue and a piece of wood. What do you know, it worked great! Then of course remove with de-bonder.


Finally ready to put it all together! Put a slight tape in the pivot location in the bolster with a tapered hand reamer.

I quickly ran into a major issue after peening the blade in place. The pin mushroomed or expanded enough that the blade was very hard to open and close even though there was enough of a gap between the blade and the liners it shouldn’t have. I had to drill out the pin and punch it through and the drill wandered off the center and left a chunk gone on the bolster. Lesson learned.
I tried a second time by spinning the brass pin against the grinder belt until it was thin enough to slide through easily giving me more room for error. I tested the blade action after every couple of hits on the pin. I finally stopped when the blade movement started to stiffen up. Unfortunately the pin look bad as there are gaps around it and the missing chunk on the other side.
UPDATED: I forgot to include that I buffed the wood handle on using the Baldor 3 wheel buffing system.
This has been quite a journey and learning experience for me and I wanted to share it with others. It wasn’t smooth and almost nothing worked the first time but eventually I ended up with something I am very proud of, flaws and all.
Below are a bunch of pics that I took and a few links to quick videos of the blade lockup and closing, as well as cutting.
Thanks again for hanging in there for this long how to or maybe I should say what not to do.
John
Paper cutting test
[video=youtube_share;h-0f_1Lct4U]http://youtu.be/h-0f_1Lct4U[/video]


Last edited:
 your in KC area right?

