You are using an out of date browser. It may not display this or other websites correctly.
You should upgrade or use an alternative browser.
You should upgrade or use an alternative browser.
Lock back build,not a WIP.
- Thread starter Calvin Robinson
- Start date
C Craft
Well-Known Member
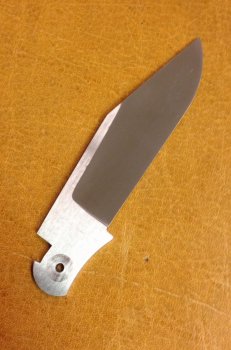
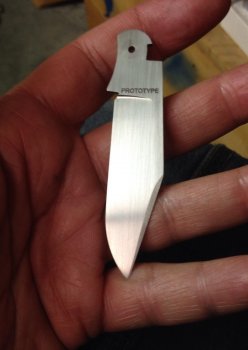
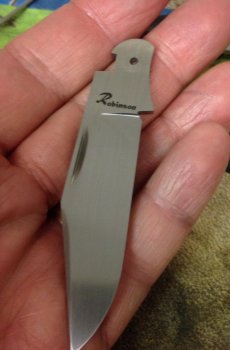
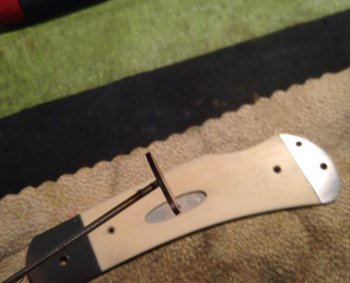
Here are some photos I should have shown at the start. Close ups of the inside of the knife that show how everything fits together.
Here we go, I am late to the party once again!!:5:
Calvin I got some questions, I hope you don't mind!
In pic above the lock on the lock bar when engaged it doesn't fill the slot all the way to the bottom.
Is that normal and why are you leaving the extra gap at the between the lock bar and the lock notch on the blade??? Is that so if the material wears it will still lock? Or is it too allow an extra clearance so the lock is not hard to disengage??
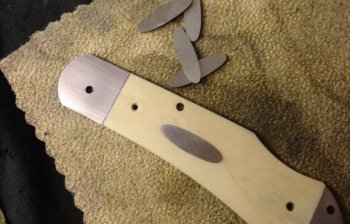
Another question in this pic, what are the pieces marked 7* & 3* for in the pic below??
One final question about the lock bar and the spring. I may have missed it but here goes.
What kind of steel are the lock bar and the spring made from, and do you have to HT them???
By the way love the look of the ivory on that one, very good decision!
Last edited:
Calvin Robinson
Moderator Christian Forum
The gap below the lock lug is to allow for trash,mostly pocket lint to accumulate and not effect the locking of the blade.
There should never be enough wear to make a difference in how this works since the blade and spring are made from the same steel and hardend to 62Rc.
The blade,lock bar and spring are all made from 14C28N,the blade and lock bar are hardened to 62 Rc and the spring/spacer 45Rc.
The two pieces marked 3 degrees and 7 degrees are angle jigs used in my vice to get the proper angles on the lock lug and blade notch.
Calvin Robinson
Moderator Christian Forum
Using screws is a cool way to attach the scales.
I got this idea from Ron Lake in his book How to Make Folding Knives but mine are different,he would grind his flush.
Justin Presson
Well-Known Member
It took me a second read to figure what you were talking about with the pins, that is genius what a great tip.
KuehnKnives
Member
Looking great so far!
Thanks for showing the build and nice pin/machine screw recess. Do you locktite the screws in place?
Thanks,
Jeff<><
Thanks for showing the build and nice pin/machine screw recess. Do you locktite the screws in place?
Thanks,
Jeff<><
Calvin Robinson
Moderator Christian Forum
Looking great so far!
Thanks for showing the build and nice pin/machine screw recess. Do you locktite the screws in place?
Thanks,
Jeff<><
Yes I will use lock tight on these screws.
Calvin Robinson
Moderator Christian Forum
Calvin Robinson
Moderator Christian Forum
Calvin Robinson
Moderator Christian Forum
Calvin Robinson
Moderator Christian Forum
Looking good, Calvin. What thickness liner material do you start with and how much do you relieve / mill out for the intergal bolsters?
Jim
Jim,
It depends on the knife. For this one,.102" thick and I milled out .067 for my scale material. Can you say thin?
Calvin Robinson
Moderator Christian Forum
Sorry for the delay in adding to this thread.
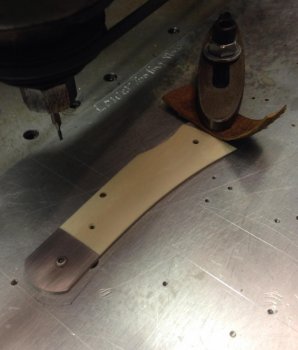
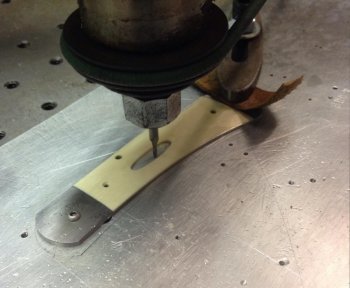
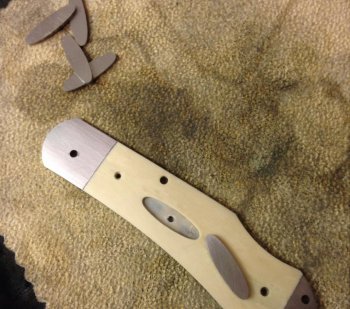
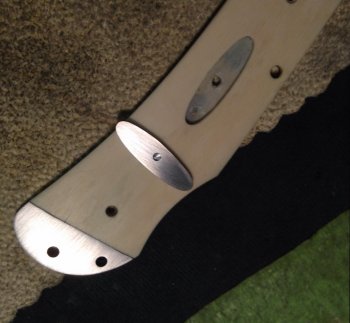
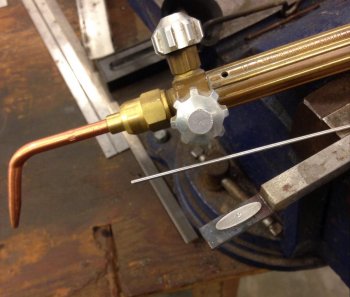
This series of photos show milling the female for the inlay. Before testing to see how my male piece fits I drill a 1/6" hole so I can push it back out after the trial fit. It may need some file work hear and there to fit perfectly. Next I drill back through my hole into the backside of my inlay,just deep enough to solder on my 1/6" pin that will hold it in place. I use 45% silver solder so I must use oxygen and acetelyne in order to get things hot enough. Technically this isn't soldering its brazing. Last photo shows the pinstock brazed to the shield inlay. Now I will cut the pin short and grind it shorter so that it's just long enough to peen on the inside of the knife.
This series of photos show milling the female for the inlay. Before testing to see how my male piece fits I drill a 1/6" hole so I can push it back out after the trial fit. It may need some file work hear and there to fit perfectly. Next I drill back through my hole into the backside of my inlay,just deep enough to solder on my 1/6" pin that will hold it in place. I use 45% silver solder so I must use oxygen and acetelyne in order to get things hot enough. Technically this isn't soldering its brazing. Last photo shows the pinstock brazed to the shield inlay. Now I will cut the pin short and grind it shorter so that it's just long enough to peen on the inside of the knife.
Attachments
Calvin Robinson
Moderator Christian Forum
Calvin Robinson
Moderator Christian Forum
Now,the bad news.
I finished the knife and it had some serious problems.
First,I peend the center pin too tight so the lockbar couldn't move freely. I had been warned by Craig Brewer about this,now I know what,too much, means as it applies to peening the pin on a lockbar.
Second,I had not sufficiently honed the round part of the blade tang. It felt nice and smooth before peening the knife together but felt like driving a bull dozier on hard pavement as I opend and closed the knife after peening. Now I know how much honeing it takes to get this part of the tang smooooth.
Third,I had made my scales too thin and the Ivory revolted in an uprising around the edges,the Conap couldn't keep it down.
Sooooooo...,I put it to the grinder and took it apart and,using all my internal parts over again made another one.
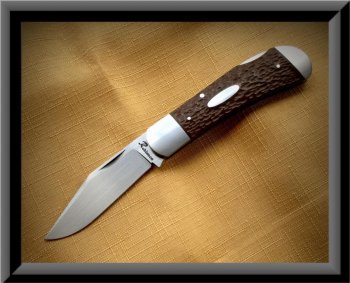
I honed the tang of the blade just right this time and peened the lockbar pin just right too. And used some of my chocolate paper micarta for scales and did a jig job on them. It turned out much better this time. Like I hoped it would at first.
Attachments
Self Made Knives
Well-Known Member
Looks great in the end, must have made you sick on the way though. Would you care to share more about the pantograph and cutting the inlay? I've never seen that done and it sounds like something I need!
Calvin Robinson
Moderator Christian Forum
Looks great in the end, must have made you sick on the way though. Would you care to share more about the pantograph and cutting the inlay? I've never seen that done and it sounds like something I need!
Sick is right! But I did learn so much on this,my first lockback build. Many thanks again to Craig Brewer.
The pantograph is a milling machine that you can use to follow a pattern. Mine is an old, Green D-2, it came out of a WESTINGHOUSE plant that closed in Pensacola many years ago, they used it to engrave the boiler plates for generators they built there.
I make my own patterns to follow for whatever inlays I want to do. They are fun machines to work with and they even make 3-D ones now.

