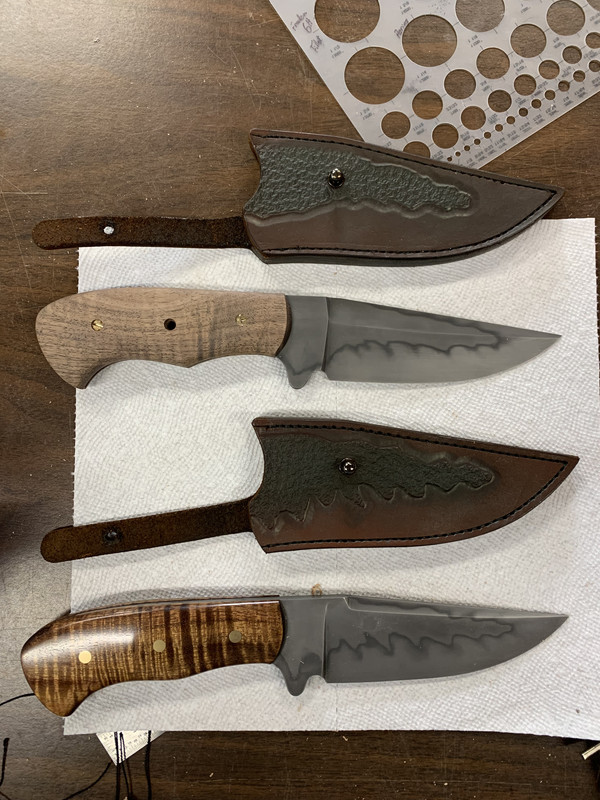
Kimmi’s 2022 KITH

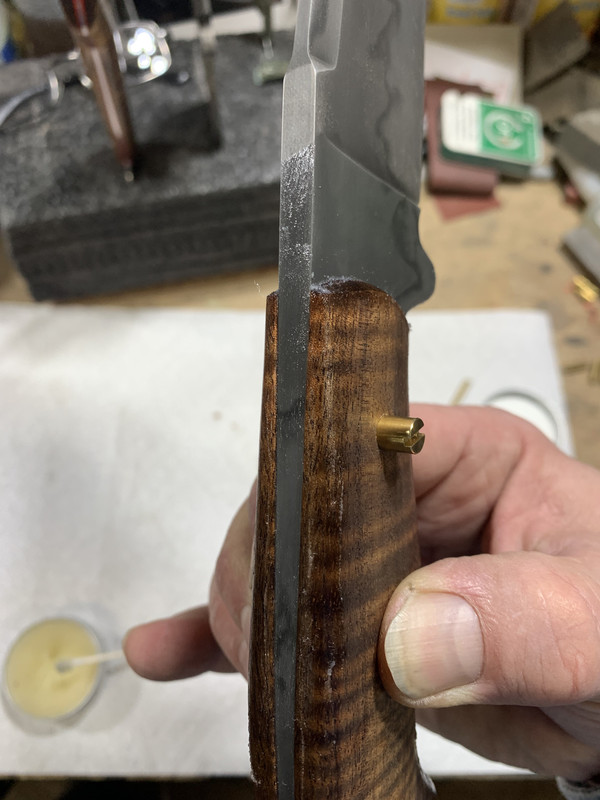
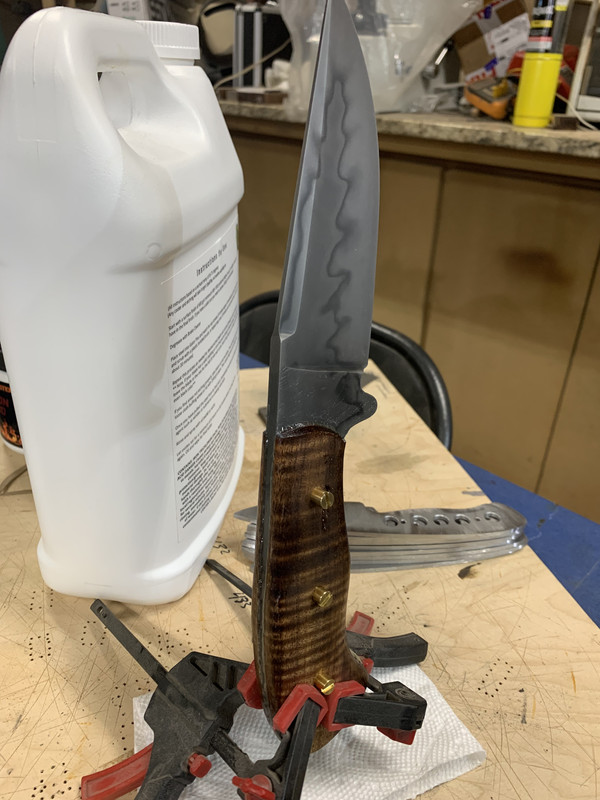
Last night I got the tang and scales prepped for glue up. I always bump the scales on the disc sander with 60 grit and the tang on the 2 X 72 with 50 grit right before glue up. After that, I pre-assemble the scales to the tang and wax any areas that epoxy may squeeze out.


All glued up.


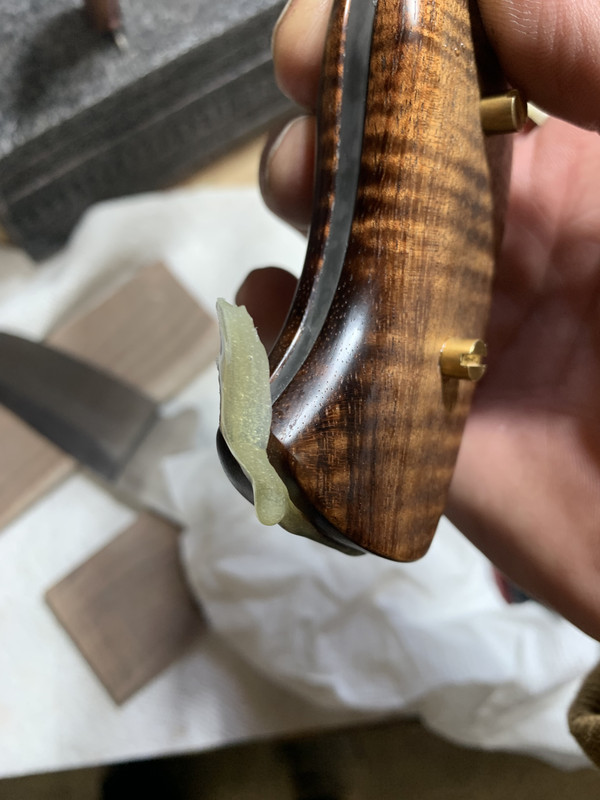
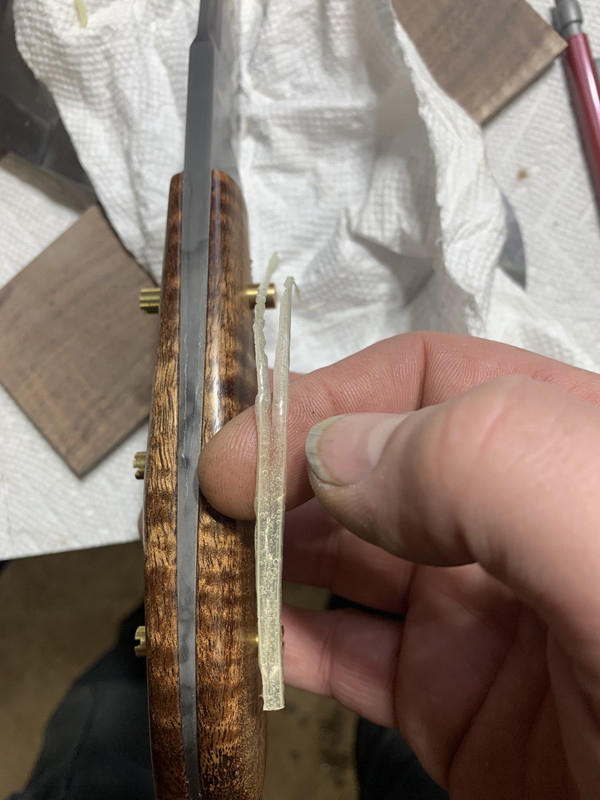
This morning, I peeled the epoxy squeeze out off the knife and cleaned it up. It always amazes me how easy clean up is after using the wax trick.


Absolutely gorgeous knife. I'm going to remember the wax trick. I do it at the ricasso but never thought about the rest of the knife.
 
Absolutely gorgeous knife. I'm going to remember the wax trick. I do it at the ricasso but never thought about the rest of the knife.
I normally just do the front of the scales, but on a damascus or a knife with a hamon, I do heirloom/museum fit scales, so wax the whole thing. This lets me finish and etch the tang of the blade without worry of sanding into it while finishing the scales. I've never had good luck re-etching the tang after asembly. It seems like those spots always show.
 
Gene: That's a really really nice knife. As always, I learn a lot from watching your WIPs. Thanks for taking time to photograph your steps, that's very helpful.
Could you describe your heat treat process on this blade. Did you use electric furnace or gas forge? If you used an electric furnace did you use a foil pouch with the Nuclayer?
 
MTBob,

I used my Jen-Ken kiln for the heat treat. I did use foil for the normalizing and the thermal cycles. Here's the process steps.

1) Heat to 1975 for 10 minutes. Cool to black. The reason I used so high of a heat is that I've heard some of NJSB's W2 needs high heat to break everything up so it will harden right. For forging this is not necessary and may not be for this batch anyways.

2) Heat to 1650 for 10 minutes. Cool to black.

3) Heat to 1450 for 10 minutes. Cool to black. Repeat this step 3 times.

4) Apply clay and let dry overnight.

5) Heat to 1440 for 7 minutes. Quench in Parks 50 for 3 seconds, out until the fireball and back in until cool.

Here's a video of the quench.


If anyone has any other questions about my processes, ask away.
 
Gene, thanks for the detailed HT sequence, very interesting. I've heard stories that Nuclayer can be difficult to get off after HT. What was your experience?
Step #5 - Did you place your blade in the kiln cold and ramp to 1440, or did you place it in on the way up to 1440, or wait until the kiln was at 1440? If was during the ramp up, what was the temperature when you inserted the blade?
I've never heard of that in-out-in quench sequence, interesting.
Ya, that flame shot looks impressive.
Bob
 
The Nuclayer wasn’t bad getting off. I hit it with a wire brush by hand and it came right off.

When I’m heating for the quench, I let my oven run for 15 or 20 minutes to level out before I insert the blade.

The in and out quench is called an interrupted quench. I’ve got an article on hamons written by John White and that was his method of quenching for a hamon. I’ve heard that with the Nuclayer you don’t need to. When I get more time, I’m going to do some comparisons.
 
Quick update. I have the sheath finished and hope to get the knife sharpened tonight. Then it will be ready to send out. Once I get it sharp, I'll get final pictures and get them uploaded.

My wife had surgery on Monday, so that has kept me away from the knife shop.
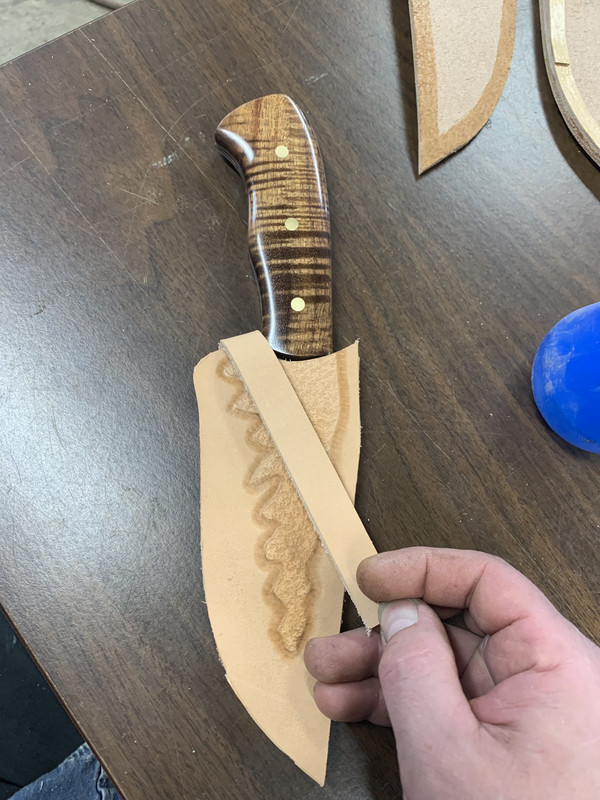
 
Quick update. I have the sheath finished and hope to get the knife sharpened tonight. Then it will be ready to send out. Once I get it sharp, I'll get final pictures and get them uploaded.

My wife had surgery on Monday, so that has kept me away from the knife shop.
Gene- I hope all is well. Please take whatever time is needed. I pray for your wife’s health.
 
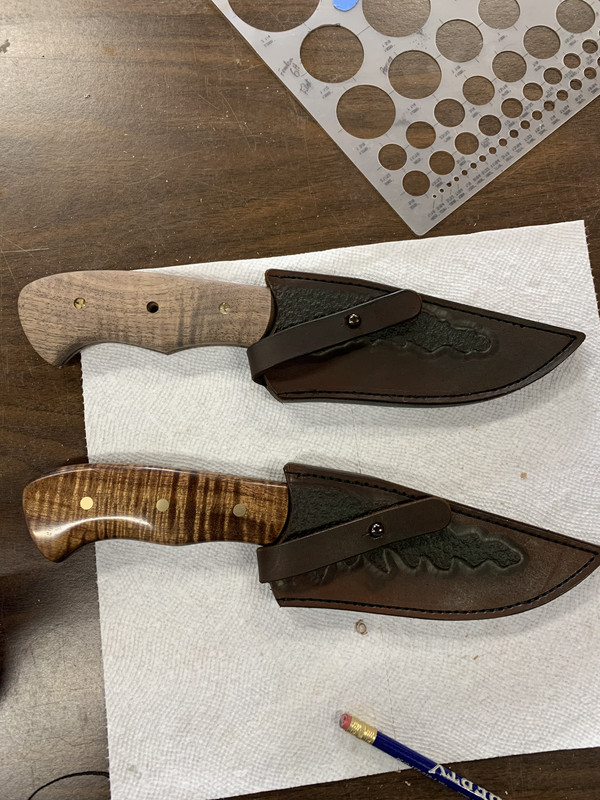
It is done and ready to ship!! First some sheath making. I got ahead of myself and forgot to take pictures early on. For these knives, I’m making what I call a presentation sheath, or display sheath. No belt carry.

First, I made a template and cut the parts out.
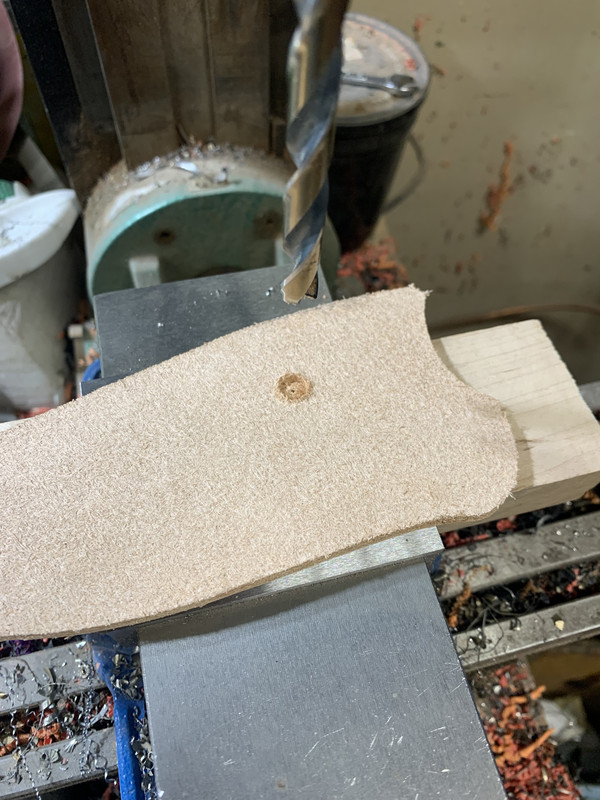
Next is glueing the welt and stamping the front. Then I mark for the retention stud and drill for it.


Here I am countersinking for the screw on the retention stud.


Ready to glue the fronts on.


Glued on and ready to clean the edges up.


Here the edges are sanded and the groove is cut for the stitching.


All sewed and finished! I use a small paint sprayer to dye the leather, which works really well. Then I use neatsfoot oil and axe wax to finish.


Back
Top