Kife with Leopard wood

opaul

KNIFE MAKER
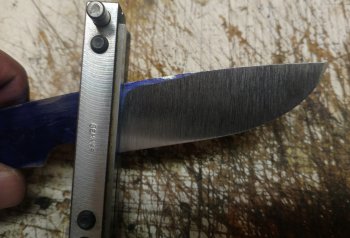
Hey guys. I'm still immensely enjoying my retirement hobby! Still a few more tweaks on this one but I like the way it turned out. There is still more to learn and improve on but it's a pleasure to take a flat bar and turn it into a knife.
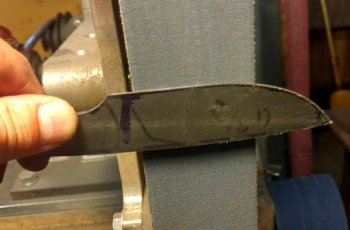
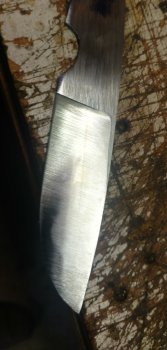
I'm still fussing with the grind lines, especially weak side to strong side. I also tried grinding after heat treat. I'll have to try a couple more before I decide which way I prefer. I do believe the wheel is the best way to rough shape the handle, at least for me.
This knife has leopard wood scales, ss pins and lanyard tube.

I find pre HT high speed 60grit, square full passes work for me. I struggle on long blades, I'm currently chasing one. Looks great.
 
Something that really helped me get the grind lines I was after was marking the lines on the blade so that I had a clear target to grind to. Dykem, or whatever, on the sides of the blade and then draw your grind lines lightly with a scribe. Another thing: and I know this may sound crazy- but getting your lines at the top to be even on both sides is a direct result of getting your plunge lines to be even on both sides. If you think about it, establishing your plunge lines requires you to present the blade to the belt perfectly. If you do that the same on both sides, your top line will also be the same. The second piece of that is getting your body mechanics to be the same on both sides as you draw the blade across the belt. You want to be robotic. Imagine your butt sitting on a track. As you move right / left your butt has to slide along the track. The movement is in your hips. Nothing above your waist moves if you can help it. As you get more robotic, your grinds get more even. Once this becomes second nature you will be able to loosen up some, but by then you will be predicting every pass and you will have a reason for whatever you do.
 
What John Wilson provided is about a perfect explanation to solving this issue. You want both sides of the knife to be the same (exactly the same). To accomplish this, the motion/the movement that you perform on the left side of the blade must match the motion/the movement that you perform on the right side of the blade. You must be able to think and do everything right handed and left handed with consistency. Pretty simple explanation but extremely difficult to accomplish. It takes practice. Lots and lots and lots of practice to become good at it. Even more practice to master it. A small part of grinding is visual and the majority is by feel. You simply cannot see the side that is being pushed against the grinder. My only additional helpful hint is final grind your off hand side first. It will be easier to make them match up using your more dominant side last.
 
Thanks for the tips guys. I have already started grinding on my weak side first. I'm beginning to 'feel' the blade contact the platen/sanding belt after I have started my grind below the 45 degree center scribed bench mark. So at least that's happening. I'm working hard on the mechanics and will definitely take your advise.
What's amazing and disappointing is my 45's look so good and consistent and then, well it just doesn't seem to be the same with the lesser angle grinding.
Thank you.
 
Nice looking!! Your issue is why I ordered that Bubble Jig. Hoping this will help me with the muscle memory needed to repeat grinds!
 
I had this same problem. I'd make this beautiful 45 to my scribed line. Then when I'd go to make my bevels it seemed like I was all over the place. It all came down to getting a nice "flat" to work with.

For me, the key to the whole operation is to make a big, nice, flat angle. Let's say we are beginning at 36 grit. The very first thing I care about is making a flat surface to lay on the belt. I don't even care so much what that angle is. We are beginning at the corner of that 45, no? So right away we are grinding on this corner ridge and that doesn't help us. We need to replace that ridge with a nice "flat".

However many passes it takes, I make the same exact pass, along the same exact contact point. Sure enough, that ridge goes away...and with each pass gets flatter and flatter. Next thing you know, you have this big, wide "flat" at some angle. This flat is very easy to lay on the belt the same way every time. Now the blade is practically grinding itself. The only thing to watch is that we don't get to the center edge scribe line too quickly, and that we don't get to the top of the bevel too quickly. In theory, we would love that "flat" to widen until it reaches the center scribed line and the top of the bevel at the same time. Then we'd be done! Yeah, too bad- that never happens.

But once you have that nice, wide "flat" it becomes so easy to control your grind lines. If the angle of our "flat" is going to reach the center scribed line too soon, we begin using more pressure toward the spine. *Pressure*.. we don't rock the blade off the flat. Pressure to the spine is enough to protect our edge and move the flat toward the spine. Don't worry about blending everything perfectly. We only care about which direction we grow the flat.

I take my 36 grit bevel up to about the middle of the blade. Then 60, then 120. As the grit gets higher the blending takes care of itself for the most part. The last passes are all about reaching the center scribed line exactly and reaching the top line of your bevel. By now you are using very little pressure and tiny little mistakes are not gouging out the blade.

But, however you find your own style, having that "flat" to lay on the belt each time seriously simplifies things. I found that I wasn't gouging the blade anymore and I had much more control over my plunge lines.

This is really, really good advise. I just printed it off and posted in front of my grinder. This is the kind of stuff you don't read about in books.
Many Thanks!
 
Yep I agree with John once you get a good "flat" Then you can start taking of material towards the edge or walk the line up to the spine.

Another thing that helped me is once I have that flat established and Im at my higher grits no more pussy footing it up the the belt. By that I mean I have my thumb on the back side of the blade and I quickly push the blade into the belt so I can hit that flat, before I would hesitantly try to ease the blade into the belt at the correct angle and if I was off I would either remove to much material towards the spine or the edge and would ruin a grind or have to grind more off then I wanted to take out that dip.
Not sure if that makes sense. Also I rarely start at the plunge I try to start off the plunge line and work back to it.

Nice knife.
 
no more pussy footing it up the the belt. By that I mean I have my thumb on the back side of the blade and I quickly push the blade into the belt so I can hit that flat, before I would hesitantly try to ease the blade into the belt at the correct angle and if I was off I would either remove to much material towards the spine or the edge and would ruin a grind or have to grind more off then I wanted to take out that dip.


...Also I rarely start at the plunge I try to start off the plunge line and work back to it.

Excellent points. Once you have that flat, you line it up to the belt by eye and put the blade right on there. That hesitancy we all have in the beginning contributes to chasing our grind lines all over the place. As to plunges, my plunges are just an idea until the end. If you obsess over the plunge from the very beginning, I guarantee you will have a nice deep ditch in front of your plunge that you spend a lifetime trying to blend out.
 
You guys have explained how to grind better than anyone else.
I stopped trying to chase the the grind line off of the 45. Blue fire Norton belts are cheap and I can get 2 or 3 knives out of a 60 grit. I start the grind and try to keep it even down the center of the blade. If I keep the grind even down the center the bevel also stay even. Not sure if I described that very well but it sure did help when I stopped worrying about stripping the grit off the belt and could see the belt making contact with the blade.
IMG_20170912_114327.jpg
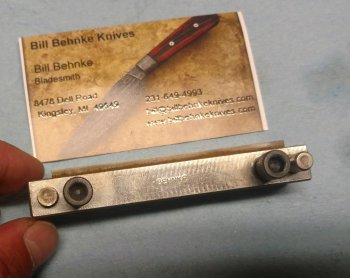
If I had to start over this would be one of the first tools purchased. One less thing to think about while trying to learn how to grind.
 
opaul - From past experience I would guess that the high point above the plunge line is from starting on the plunge cut and moving the blade towards the knife point every single pass. Uneven pressure at the starting point threw you off just a bit.

Try alternating where you start your cut each time. First - plunge to point. Inspect. Second - point to plunge. Inspect. Third - middle to plunge. Inspect. Fourth - middle to point. Inspect. After each inspection you can adjust accordingly depending on if you need more material off the front, middle or rear of the blade.

Just do your best to keep the grind line nice and even along the top and practice different techniques to correct it when you get off a bit. It really is a "practice" thing. Just develop that feel and after a few knives you will get better and better. Just like finishing handles, final sanding, pin placement, etc. Just about any part of knife making. With practice you get better at it.

Just keep grinding.
 
Just another tip to go along with all the other great advice on here. To get the top of your grind line even, slow down, use lighter pressure, and twist your blade slightly counter clockwise in the parts that have a dip. Check your progress after every pass and you should notice the dip disappearing
 
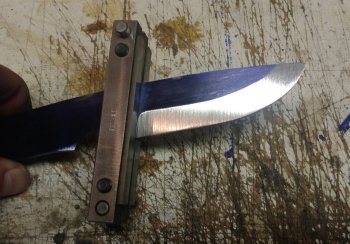
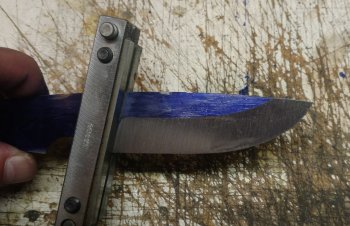
Ok I'm going to try and explain how I grind with pictures. As soon as I started to grind this way my grinds improved 100%. Now all of the belts we're pretty wore out and didn't leave the cleanest grinds.
IMG_20170912_190335.jpg
I scribe my lines down the middle just like everyone else.
IMG_20170912_192844.jpg
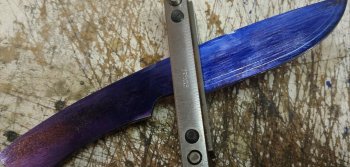
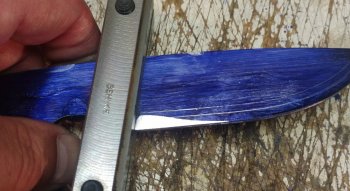
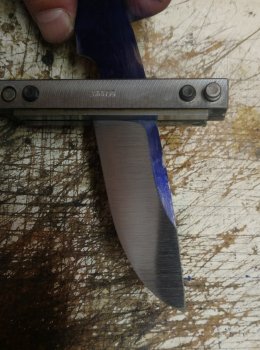
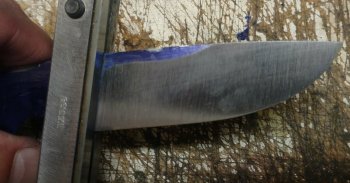
I put on the file guide and get ready to set the plunge. The 2 lines are where you would normally set your initial bevel and the second is where you try to grind to blend it in and save on belts. For me not being able to see material being removed made it difficult to get a constant grind.
IMG_20170912_191006.jpg
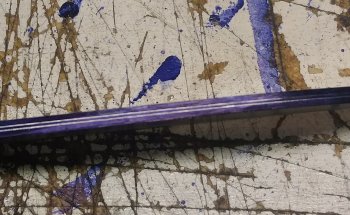
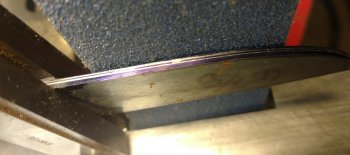
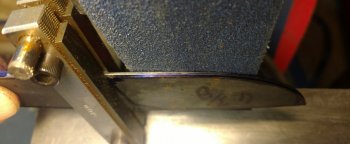
Here's the shadow and gap between the blade and belt.
IMG_20170912_190929.jpg
Here is the blade up against the platen with no gap.
IMG_20170912_193736.jpg
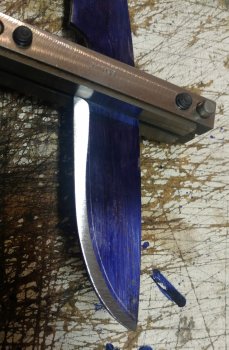
The first thing I do when starting the grind is set the plunge.
IMG_20170912_190601.jpg
IMG_20170912_190836.jpg
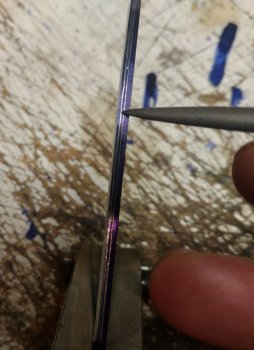
When I start the grind I don't worry about keeping bevel even. I try to keep the thickness from the scribe line too where I'm grinding the same thickness.
IMG_20170912_191139.jpg
IMG_20170912_191217.jpg
IMG_20170912_191316.jpg
The bevels seem to take care of themselves.
 
Had start a new reply the original post got to large.
IMG_20170912_194832.jpg
Once I get to this point the grind starts to look funny. I put pressure more towards the middle of the blade to get a distal taper.
IMG_20170912_191510.jpg
It starts to look better after a couple of passes.
IMG_20170912_191635.jpg
IMG_20170912_191722.jpg
I grind all of my bevels at an angle. So when I get to 220 grit I turn the knife straight against the platen and blend in the top of the plunge lines.

If anyone thinks my way is to hard, and thinks this is the wrong way to go about it let me know.

Edited to add.... Safety first. Gloves are not good around moving equipment. I had my hand sucked into a piece of equipment last summer because I was wearing gloves. I almost lost my left index finger, and still have tendon and nerve damage.
Scrap leather wrapped around your index finger keeps the burned knuckles away.
IMG_20170912_191812.jpg
 
Last edited:
Back
Top