wmhammond
Well-Known Member
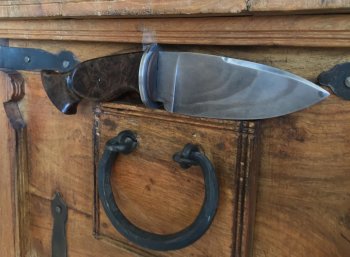
Building this knife was a journey and an exercise in anger management. The pattern I started with looks absolutely nothing like what I ended up with. As usual, I cut out the profile of the blade on the band saw and cleaned up the profile on the grinder. I then flat ground the blade and added the swage and tapered the tang. I wasn’t ready to heat treat it yet because I wanted to easily be able to drill the small pin hole in the handle so I set the blade aside and started on the guard. Guard was easy, just a large oval that I added a modified coined edge to. Then I laid out the guard and drilled and filed it to snugly fit the tang.
Then I started on the handle. I laid out the block and started grinding it on my ¾” roller attachment on my grinder. After I got it shaped up pretty good I laid out the end and drilled and shaped the hole for the hidden tang. The minute I finished that hole and fit the blade and guard to it I knew I was in trouble – the handle was waaaaaaay to big for the blade. What to do: rebuild the blade or try and cut down the handle. I loved the handle so I opted to rebuild the blade (I could always finish the old blade with a different handle.
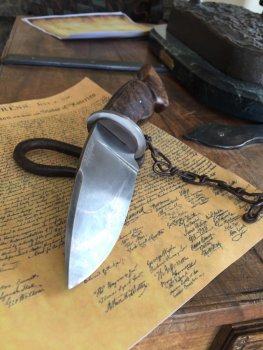
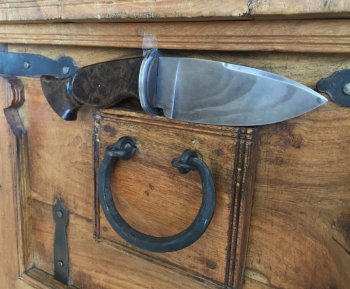
So I totally redesigned the blade to fit the size and shape of the handle. When I got it done the tang fit in the handle hole OK but was too small and left gaps in the guard – now I had to build a new guard to fit in front of the one I had already finished – would that be a fore-guard? J. Got that done and I had always wanted to use Birchwood Casey Plumb Brown so I Plumb Browned the fore-guard.
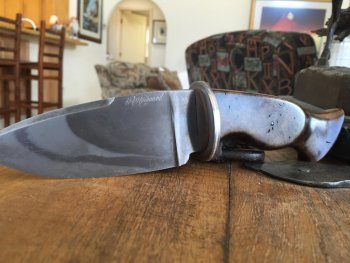
When that was done, I had wanted to try to make a Hamon. So I gooped up the blade with fireplace cement and hardened it. Turned out kinda funky because the cement didn’t stick to the blade all the way through the process. I quenched it in canola oil for 2 seconds, out for 3, in for 2, out for 5 and back in to finish. Tempered it with 2 400* one hour cycles. Etched it in hot vinegar, cleaned it up with #0000 steel wool, heated the blade and applied lemon juice and left it overnight and then hit it with #0000 again.
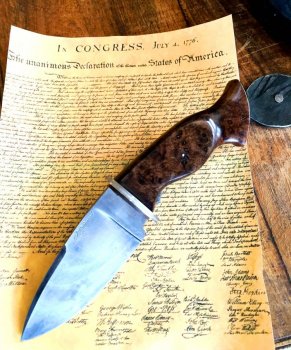
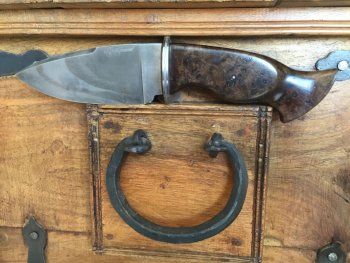
Then started to finish the handle. The thing I like best about hidden tang is that you can almost totally finish the handle before assembly. Anyway, I sanded it to 250 and applied 3 coats of Watco Dark Walnut Danish Oil, wet sanding after each application, 500, 1000, 1200. Then applied 2 coats of Waterlox Original Tung Oil Finish and finished it by rubbing in a coat of paste wax with #0000 steel wool. What you see is what I got. A satin finish with real pop to the beautiful Walnut Burl.
The specs are:
Blade material: W-2
Blade Finish: Hamon Lemon etched with #000 steel wool polish
OAL: 9 7/8”
Blade Length: 4 ¾”
Blade Width at Plunge Line: 1 7/8”
Blade thickness at Fore-Guard: 3/16
Guard Material: A-2
Handle Length: 4 7/8”
Handle Material : Walnut Burl
Single pin: 3/32” Stainless Steel
Time of fabrication: 52 Hours
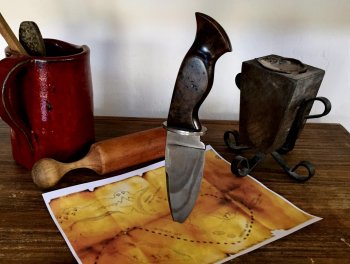
As to what kind of I knife it is, I could use some help. It sure ain’t a kitchen knife and it sure ain’t a dagger. I guess it could be a Hunter but, not really, don’t think it would serve as a Fighter, and it isn’t a Bowie, is it? It reminds me of Pirates, 1790 French Quarter, New Orleans, American Revolution – something like that. Will probably just build a nice wood display and call it a Show Knife. What do you guys think? Any and all comments are appreciated.
Wallace


