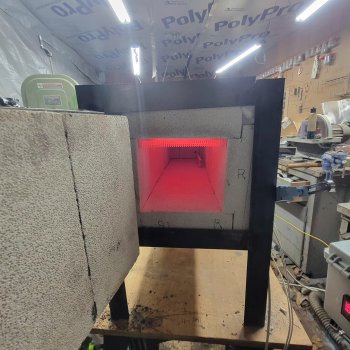
HT oven build!

Taz575

Well-Known Member
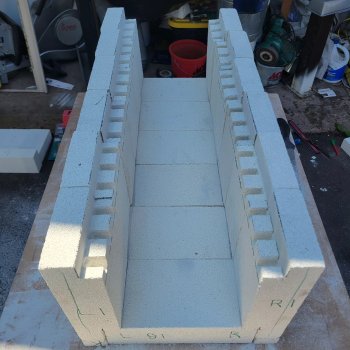
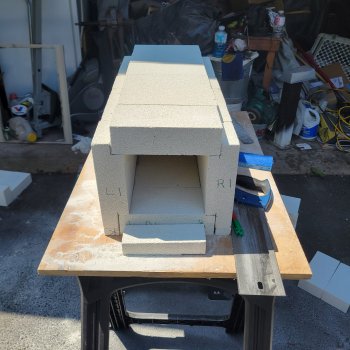
Decided to build up a heat treat oven during my vacation! Chamber is 27" long, 7" wide and 6.5" tall and I used coil over quartz tubes across the top of the kiln like a few others have done. Auber Ramp/Soak/Wifi PID, dual SSR and heat sinks, 240v and a 3840 watt, 16amp element in 13 AWG Kanthal A1. I used RedBeard's wiring style/diagram for the electronics.
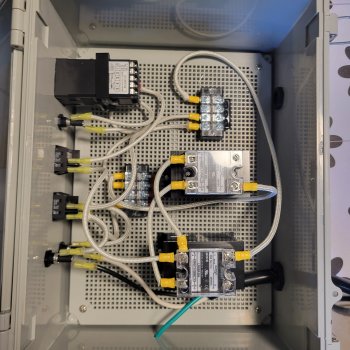
450866083_10102294839021400_4963058374035743297_n.jpg

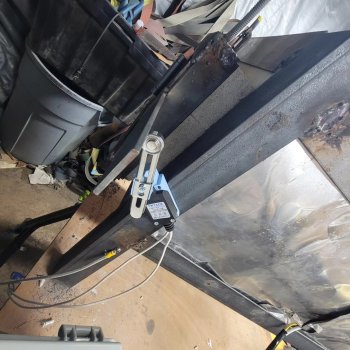
I suck at welding, but I welded up an angle iron frame for it. I used a self closing door hinge and rigged a spring mechanism to hold it tighter. I used a different limit switch as well than what others do.
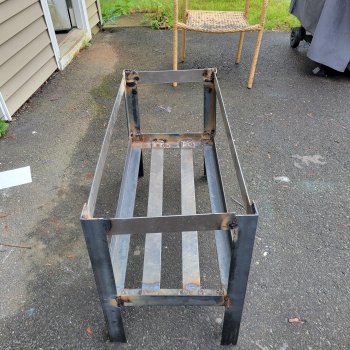
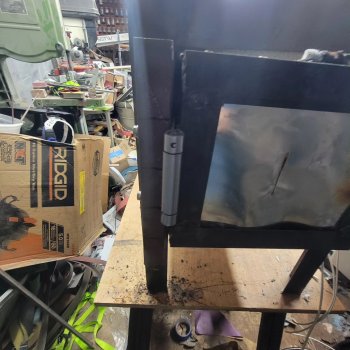
1000008605.jpg

452479712_10102302755711290_348371789460646682_n.jpg

452481900_10102302755721270_7439758613123430039_n.jpg


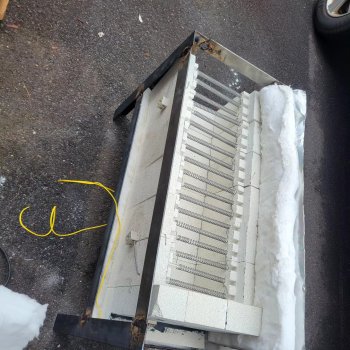
The rest was the generic K23 IFB build:
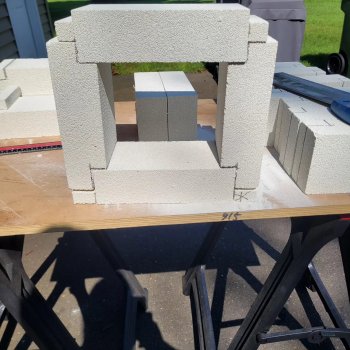
451392230_10102295673059980_6944094401332157747_n.jpg451445364_10102295673035030_4743357897231381861_n.jpg452654726_10102302755726260_4958952632180369335_n.jpg451204827_10102295632346570_8483316272689464980_n.jpg452707126_10102302755716280_355153185637960986_n.jpg

Gotta play with sealing the door better and 4 of the tubes broke when I was taking it up to 1900. The tubes were a very tight fit in the coils, and when I spaced out the coils, my jig was off, so there was a lot of tension between the elements. New element and tubes are ordered already.
 
Interesting design. Most of the ovens I've seen have the elements along the side or the sides and the top. Any particular reason for having your elements just along the top?
 
I saw Jarod Todd's build on BFC.com; he used the coil over tube method and loved it. It keeps the walls full thickness for better insulation and he found it made it more even temperature wise. A few other guys have done them this way and liked them over the coils in the walls. Coil in the wall means some of the heat is blocked in and that can lead to longevity issues with the coils. I was able to use 13 AWG element coils in mine, so it should last a while once I get the right sized tubes!
 
I saw Jarod Todd's build on BFC.com; he used the coil over tube method and loved it. It keeps the walls full thickness for better insulation and he found it made it more even temperature wise. A few other guys have done them this way and liked them over the coils in the walls. Coil in the wall means some of the heat is blocked in and that can lead to longevity issues with the coils. I was able to use 13 AWG element coils in mine, so it should last a while once I get the right sized tubes!
Thanks for the explanation. That makes sense
 
Got the new element and tubes installed and sealed the door better with a rope gasket; I had a 1/8"+ gap between the door and the body firebricks. Took 2.5 hrs to get to 1900 on 240v (same as the first run with the gap in the door!), so something isn't wired correctly somewhere! Going to explore that tonight; I found one of the switches for the elements may be wired backwards; power in to it is on the outbound power leg and the light doesn't light up when the switch is on or off, so that is where I am starting to look.

20240730_192455.jpg
 
Got the DPST re wired, but the light still doesn't turn on. I will put it on the positive leg of the SSR next time and see if that makes a difference instead of being on the negative leg, or run the contacts on the negative side of the switch?

I did another run last night to 1530 in around 80 minutes. I checked and the voltage into and out of the SSRs to the elements is 233 volts, so they are getting pretty much full power. It flies up to around 1000-1200, then really slows down. After I shut it down for the night, I started removing the Kaowool looking for gaps/glowing. Side bricks look good, but at the top, where the roof brick sits into the wall bricks is a lot of heat loss. The Kaowool was MUCH hotter there! With the elements in grooves at the top of the brick, that's to be expected. The grooves for the tubes aren't fully covered by the roof bricks (walls aren't perfectly square) and I used a 1x1" square brick piece to cover those, but they get moved out of the way easily. I cut down some firebricks to make a larger block to square up the top of the oven and seal those corner areas better. I am going to stuff Kaowool into those grooves to plug them up better and try again this weekend. I may end up redoing the bricks, too to give better coverage there, or getting a large piece of insulwool board to use to span the top more completely and then put the bricks on top of that.

I am going to mock up a 3" wide blade in a fake foil packet and see how the height is compared to the coils with my blade holding fixture. When I rebrick, I may make the chamber a little lower. It's around 6.5" high currently, may bring it down slightly to have better overlap with the side walls. I want to make sure I won't hit the coils with the packet though, even though I have the door kill switch working and a manual kill switch, too.
 
So I think I figured out the issue. Even after sealing around the door, stuffing the grooves for the quartz tubes with insulation, larger brick at the corners, etc, it was still slow. Around 3 hours to get to 2200 degrees! On BFC, one of the guys mentioned the Chinese IFB. Yup, mine looked exactly like his! I got them from Amazon, $36 for a box of 6, free shipping. He suggested weighing them, so I weighed a couple. 2.8# per 9" x 4.5" x 2.5" brick; actual K23 are supposed to be around 2# per brick!! So mine are around 40% heavier/denser than actual K23, so it takes longer to get them heated up. It recovers pretty quickly after opening the door to put in or remove blades, so the extra thermal mass is nice for some things, but not for heating speed!

Eventually I will re brick with better K23 IFB and make this body into a 110V tempering oven. I have an extra element and an extra basic PID, these current bricks, so I just need extra quartz tube, project box, wires, etc and I can do a tempering oven to stack on top of the HT oven!

I did some Magnacut blades and some AEB-L blades several weeks ago and it performed great! Aluminum quench plates (18" x 4" x 1" pair and a pair of 30" x 4" x 1"), and Liquid Nitrogen are also in my shop now too!

I got the WiFi PID from Auber working and it's much easier to program from the App than on the PID itself, plus I can monitor the oven and it's temps when I am not at home! I fired it up, set it to 2200 and went to go have my Liquid Nitrogen tank filled, so I was able to watch it and make sure it's holding temp properly even when I am not around! The whole Ramp/Soak process takes a bit to get used to it (need to know the ramp speed so the first step has enough time to ramp up properly to temp) and to use a 0 for time to hold at that temp and if I cool down (like for a DET anneal), the temp is the temp it's at, then the time to ramp down to the next step temperature, then what to do once that step is completed. I also had to Auto Tune it at the 2200 temps. It was auto tuned at 1500 before, but 2200 needed a new Autotune done!
You should consider a used Pottery Kiln. NOT for the kiln but for the bricks. I see them often on Craigs List, etc for cheap or give away. I lucked into one that someone used the wrong clay or something and destroyed the elements. I was extra lucky as it had 2" of extra insulation outside the bricks. So when I built it I used the bricks that already have grooves in them but turned with smooth side in and made my own grooves. The top and bottom was awesome cut to size for the top, bottom and or door of my kiln. I used a HVAC plenum kit to in case it to the exact size I needed. It gets to 1975 in 30 minutes and I can always keep my hand on the external metal skin (plenum kit) except for the door which is only brick thickness. The bottom, sides and top all have the 2" of extra insulation.
For those that don't know a HVAC plenum kit is the sheet metal part that sits on top of a furnace that can be made into a five sided box of the exact size you need. With S cleats and another sheet of flat duct work you can cut to size the "top".
 
Last edited:
I have the coils over tubes in the top of the oven, so I would have to cut those grooves anyway. I was looking at repurposing kilns for the bricks and stuff. It's around $200 for brand new bricks (about $240 for 3" bricks IIRC). I will keep looking and see if I can scavenge the bricks from another kiln. But most kilns are octagonal, so I would have to square up the bricks, which would make them smaller.
 
I have the coils over tubes in the top of the oven, so I would have to cut those grooves anyway. I was looking at repurposing kilns for the bricks and stuff. It's around $200 for brand new bricks (about $240 for 3" bricks IIRC). I will keep looking and see if I can scavenge the bricks from another kiln. But most kilns are octagonal, so I would have to square up the bricks, which would make them smaller.
Yeap TRUE ENOUGH. But for side walls that's not a problem, been there and done that. The top and bottom of pottery kilns are golden for top, bottom and door. But to be truthful mine was rectangular kiln.
 
Last edited:
I'm having problems posting pics from Chrome book. Heat treat oven is blurry in background. Pic is of my favorite handle sanding machine though. Oscillating spindle sander that I use standard paper on instead of factory drums. Dust collection is incredible with standard shop vac and spindle size is great. Grit size is incredible considering standard drum sanding replacements. Oh well. Hopefully you get the idea of my home made HT oven and tempering oven both PID controlled.
 
Last edited:
$200? WOW - you did good... not only a good price, but a very nice looking oven. I like the idea of using a pottery kiln as a vertical HT oven. I've got an 18" EvenHeat and it's takes a LONG time to heat to 1975°F - seems like it's a tad over 2 hrs?
 
Back
Top