
Burl Source
Forum Owner & Moderator
Eventually some of you will come across a burl and want to try your hand at turning it into handle material.
This is a quick and easy way that I cut up a spalted Maple burl. The same process can work with most types of burl.
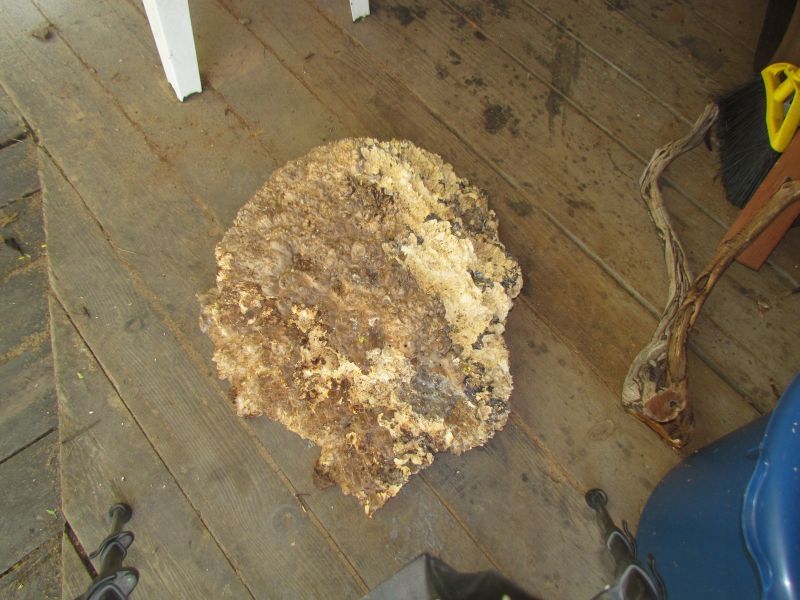
The burl cap shown in the 1st photo was cut from an old dead log that was down in the woods for a number of years.
Even though it was old and dead it was still damp. This gives the conditions that cause wood to spalt.
Spalting is when colonies of fungus infuse the wood. Different types of fungus creates different colors. Sometimes the different colonies will create a barrier that results in black lines.
This is the outer surface of the burl cap after we pressure washed away the bark and soft wood.
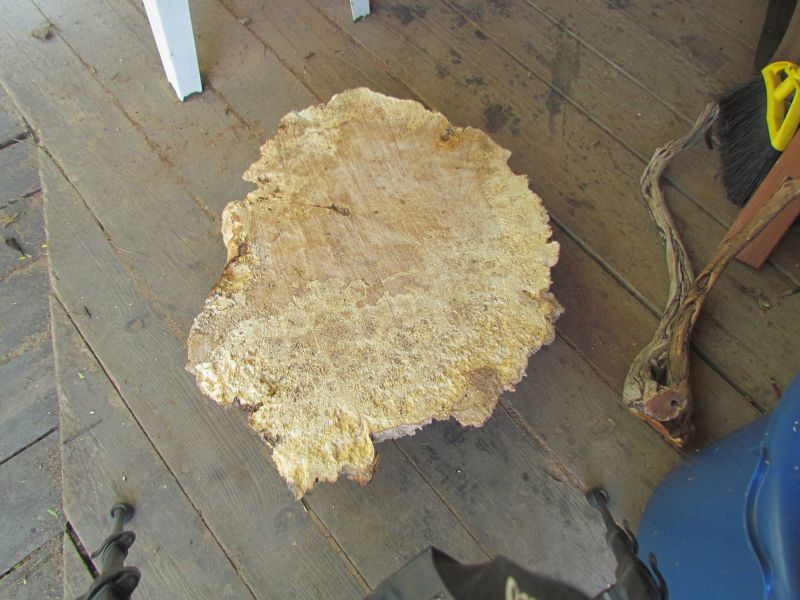
This shows the cut inner surface. You can get a glimpse of the different colors in the wood.
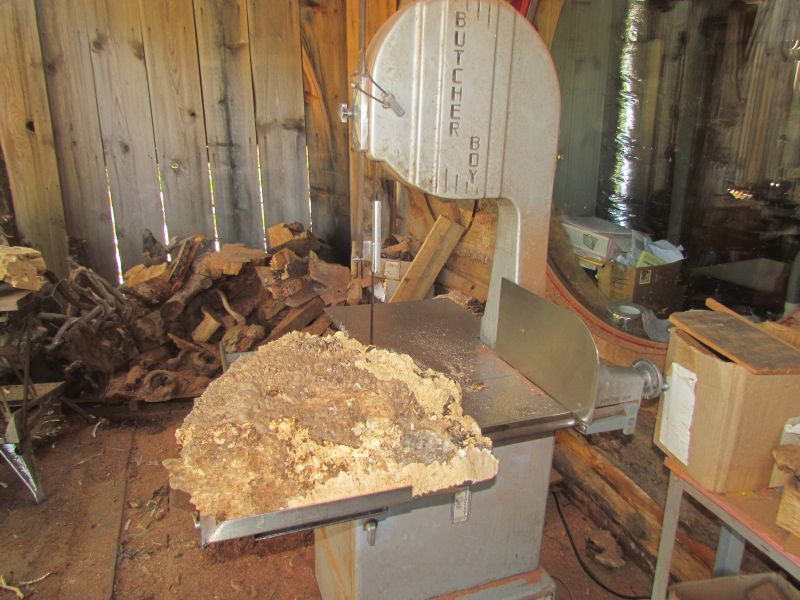
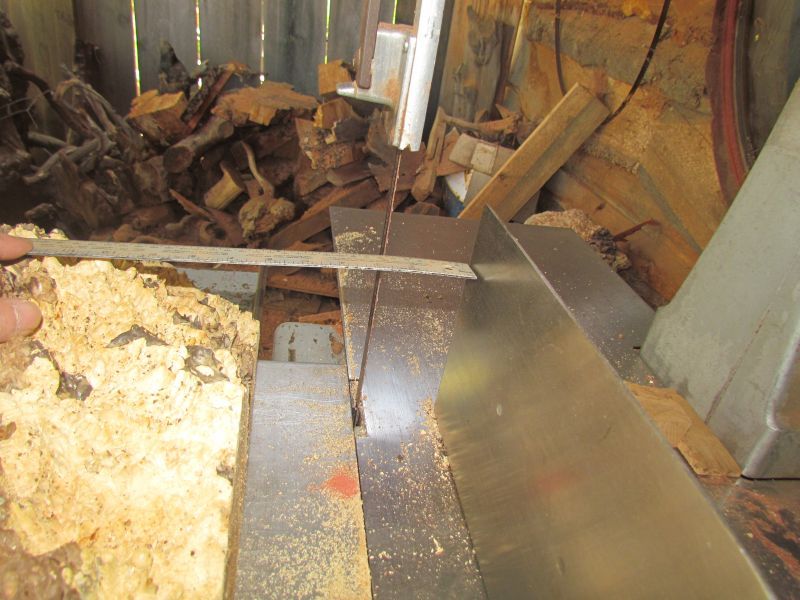
We use an old "Butcher Boy" meat cutting band saw for cutting wood that is not too large to lift, but still too big for my regular band saw. Here I am starting to trim away a bit of the waste to make the burl easier to handle.
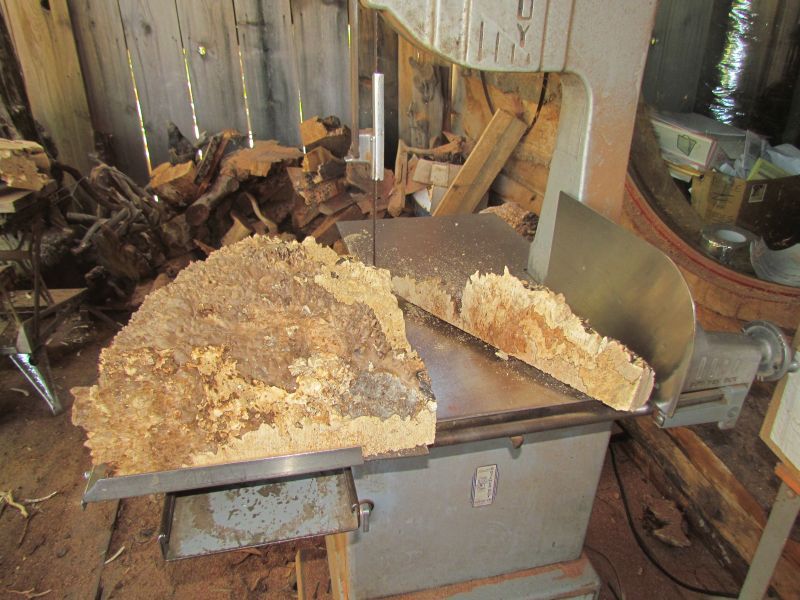
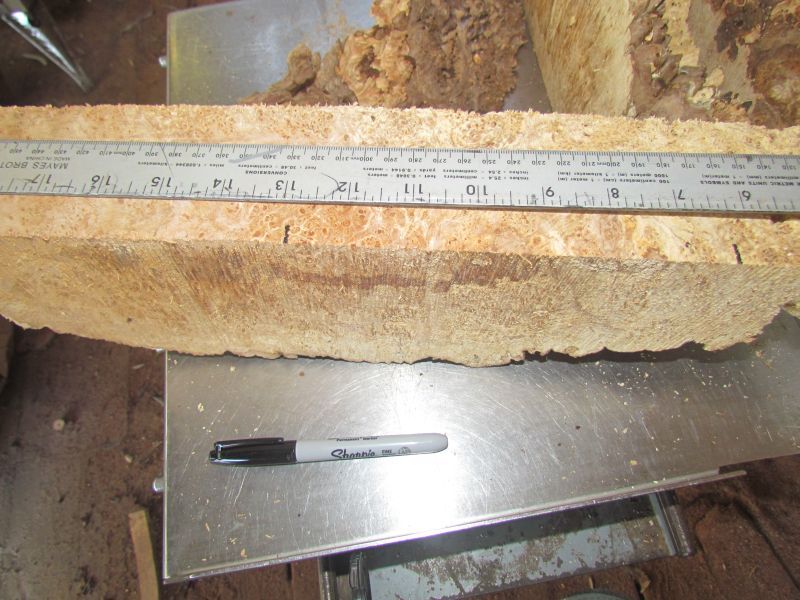
Now I have positioned the burl so I can cut a straight edge that goes the direction that the burl was growing on the tree. This way I am cutting the wood like you would with regular lumber to give the wood the most strength possible.
Now that I have a straight edge to go against the fence, I set the width at just over 2&1/2 inches. This way after I cut the burl into strips, I can still choose which surface I like best for the face of the blocks when I cut them.
Now I cut up the burl into strips.

Now I look at the different surfaces. 1st the side surface.
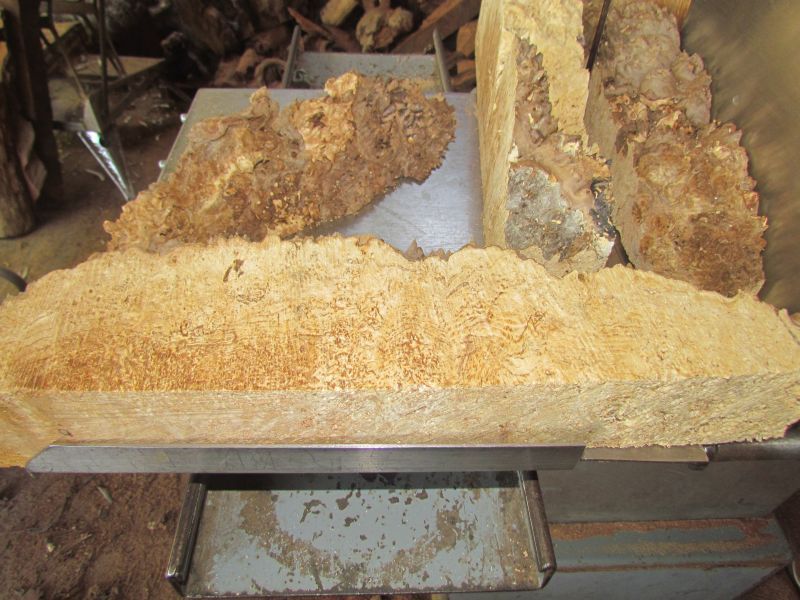
Then the edge surface of the slab. This surface is parallel to the outer surface of the burl and shows off the eyes and burl figure best.
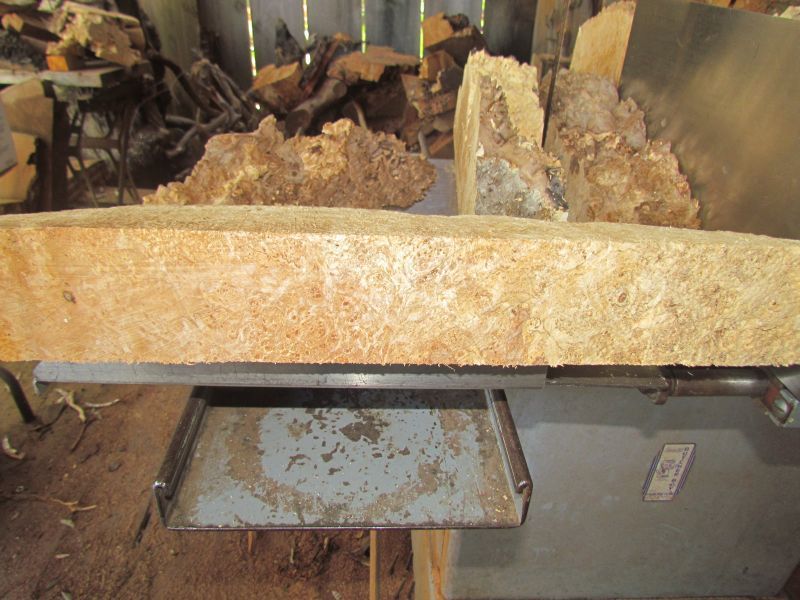
Now I look at the slab and see that a portion of one end is too soft.
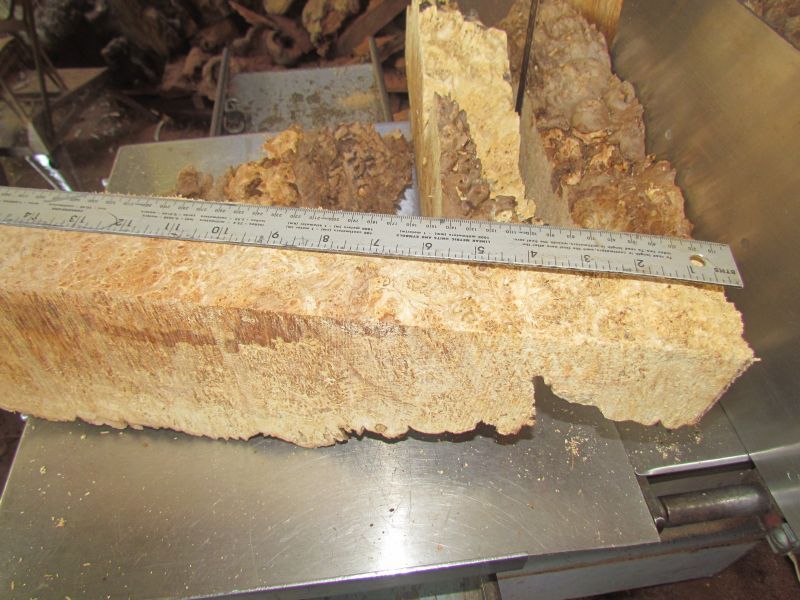
I mark the portions I want to use for blocks so I can cut to length. I leave things oversized to give room for trimming when the wood dries.
Now I have 2 chunks to cut the blocks from.
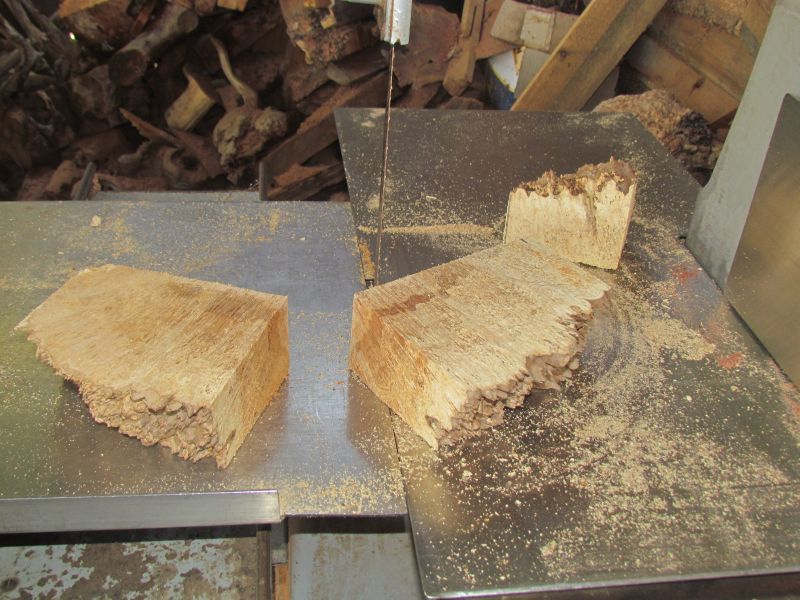
Next I cut a clean edge on the chunks.
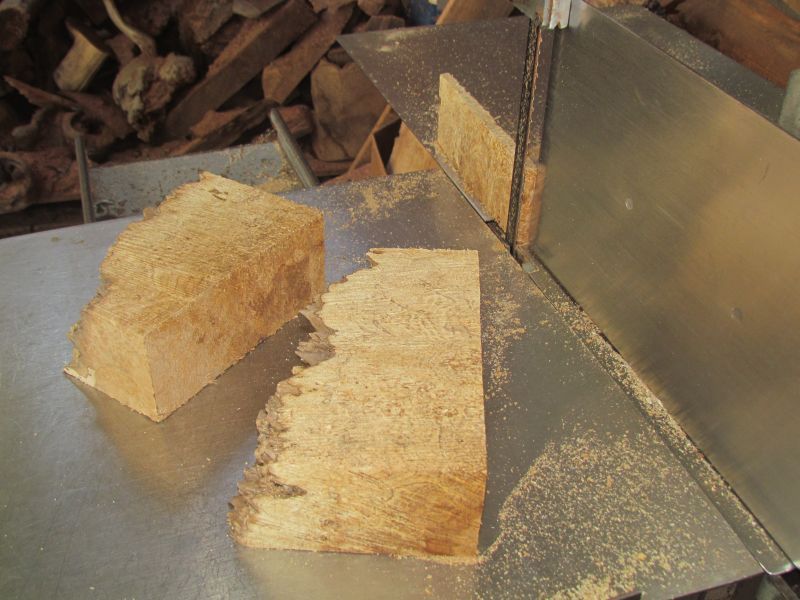
Then with the clean edge against the fence I cut the chunks into blocks a bit thicker than I need.
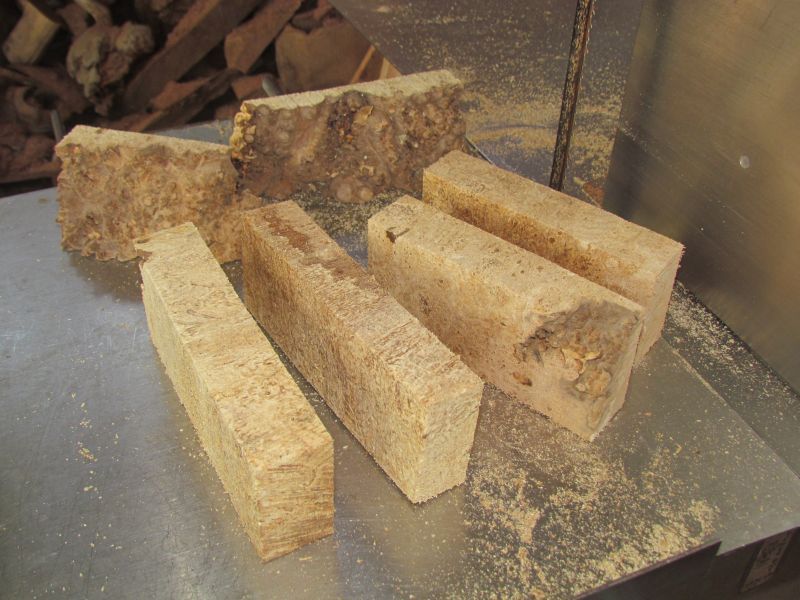
Any questionable material gets cut away and goes into the cut off bins. With spalted wood there is a fine line between what is good and what is junk.
I trim away anything that is soft and just use the wood that is still firm.
This wood is still wet, so I put the blocks on a wire bread rack in my drying room. This room has a high capacity fan blowing through the rack and a dehumidifier to pull the moisture out of the air. Spalted wood dries a lot faster than green wood. I am guessing the current moisture content to be about 30%. I will need to dry the blocks to under 10% before I can send the blocks to K&G for stabilizing.
It is tough to see from the wet, rough cut surfaces what the wood will end up looking like. But I have cut up a lot of burls like this before.
There will be areas of creme color with contrasting chocolate brown and red eyes. One of my favorite looks with spalted maple burl.
This is a quick and easy way that I cut up a spalted Maple burl. The same process can work with most types of burl.
The burl cap shown in the 1st photo was cut from an old dead log that was down in the woods for a number of years.
Even though it was old and dead it was still damp. This gives the conditions that cause wood to spalt.
Spalting is when colonies of fungus infuse the wood. Different types of fungus creates different colors. Sometimes the different colonies will create a barrier that results in black lines.
This is the outer surface of the burl cap after we pressure washed away the bark and soft wood.
This shows the cut inner surface. You can get a glimpse of the different colors in the wood.
We use an old "Butcher Boy" meat cutting band saw for cutting wood that is not too large to lift, but still too big for my regular band saw. Here I am starting to trim away a bit of the waste to make the burl easier to handle.
Now I have positioned the burl so I can cut a straight edge that goes the direction that the burl was growing on the tree. This way I am cutting the wood like you would with regular lumber to give the wood the most strength possible.
Now that I have a straight edge to go against the fence, I set the width at just over 2&1/2 inches. This way after I cut the burl into strips, I can still choose which surface I like best for the face of the blocks when I cut them.
Now I cut up the burl into strips.
Now I look at the different surfaces. 1st the side surface.
Then the edge surface of the slab. This surface is parallel to the outer surface of the burl and shows off the eyes and burl figure best.
Now I look at the slab and see that a portion of one end is too soft.
I mark the portions I want to use for blocks so I can cut to length. I leave things oversized to give room for trimming when the wood dries.
Now I have 2 chunks to cut the blocks from.
Next I cut a clean edge on the chunks.
Then with the clean edge against the fence I cut the chunks into blocks a bit thicker than I need.
Any questionable material gets cut away and goes into the cut off bins. With spalted wood there is a fine line between what is good and what is junk.
I trim away anything that is soft and just use the wood that is still firm.
This wood is still wet, so I put the blocks on a wire bread rack in my drying room. This room has a high capacity fan blowing through the rack and a dehumidifier to pull the moisture out of the air. Spalted wood dries a lot faster than green wood. I am guessing the current moisture content to be about 30%. I will need to dry the blocks to under 10% before I can send the blocks to K&G for stabilizing.
It is tough to see from the wet, rough cut surfaces what the wood will end up looking like. But I have cut up a lot of burls like this before.
There will be areas of creme color with contrasting chocolate brown and red eyes. One of my favorite looks with spalted maple burl.