You are using an out of date browser. It may not display this or other websites correctly.
You should upgrade or use an alternative browser.
You should upgrade or use an alternative browser.
Filling gaps
- Thread starter Guindesigns
- Start date
Johan Nel
Well-Known Member
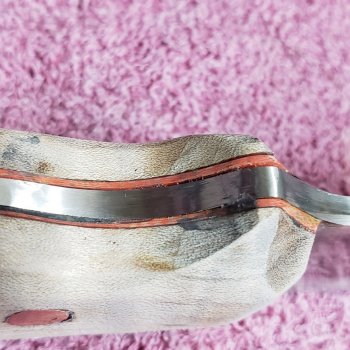
If you can remove them and can reglue them, allow the epoxy to fill up those spaces while hardening. It helps if you can colour the epoxy to match your liner colour, then it just makes the gaps inconspicious.
What you can also do is to reapply some super glue into the cavities and allow to dry and reapply again until the void is filled. Once it has set properly, sand all level.
What you can also do is to reapply some super glue into the cavities and allow to dry and reapply again until the void is filled. Once it has set properly, sand all level.
Last edited:
EdCaffreyMS
"The Montana Bladesmith"
It's a "do it again" situation. You were trying to go too fast and hard, and/or using a dull belt.....and over heated/burnt the liners & scales. This is a prime example of ..... The fastest way to make a knife is SLOWLY.....that way you only have to do it once. You can try all kinds of things to fill those gaps, but they are just going to look plain ugly, and stick out like a sore thumb...... you'll be time and money ahead to remove those scale and do it again.
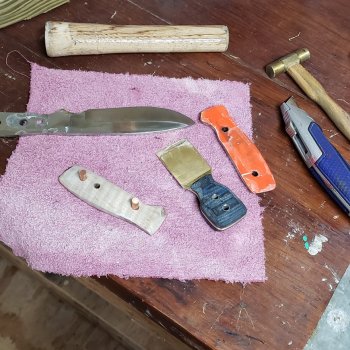
Just what Cliff & Ed says - do that one over. What type of pins do you have? If just a straight pin they'll be very easy to use a drift punch to remove pins, and the scales will pop right off using a sharp knife between the liner and tang. If you used Corby screws they'll be a tad harder to remove, but not much. "IF" you remember which is the screw side center punch one side, drill a hole thru the center of corby pin with a bit larger than the screw part of the Corby and it will cut the screw so the pins can be knocked out.
Casey Brown
Well-Known Member
Also, make sure your tang is completely flat along the edges, and you can never use too many clamps on glue-up.
Guindesigns
Well-Known Member
The dark spot is super glue mixed with some black I used when I first out the scales on.
I used copper pins and it scares the sh!t out of me to think of taken the scales off. The only knife I have tried that with I ended up needing new handle material after wards. This was my only piece of maple also. Is there really no way of getting around it?
I used copper pins and it scares the sh!t out of me to think of taken the scales off. The only knife I have tried that with I ended up needing new handle material after wards. This was my only piece of maple also. Is there really no way of getting around it?
Guindesigns
Well-Known Member
Doug Lester
Well-Known Member
Burning the handle material power sanding with too much pressure and/or a dull belt is the main reason that I like to shape my handles with cabinet makers rasps and files, and I mean good rasp. Not the cheap ones that you get at the tool-in-a-box stores.
Doug
Doug
Guindesigns
Well-Known Member
Should I re-use the same pins??
Johan Nel
Well-Known Member
You can if it is not damaged.Should I re-use the same pins??
Drew Riley
Well-Known Member
I'd make sure you flatten everything out really well. Glue some paper to a piece of glass, a granite block, or even just a piece of 3/4 MDF or anything else you have that's reasonable flat. Take a pencil and shade the mating surfaces before sanding them flat. This will help you see if you have any high or low spots anywhere.
As for using the pins again, I'd probably just cut new pins and leave them a little proud so you can peen them. You don't want to over peen everything too tight, but a a little bit of peening will help to fill the minor gap that appears to be around your pin in the first picture.
If that wood's not stabilized, you're still likely to have some gaps down the line regardless, as temperature and humidity changes.


