Budget belt grinder

I just went to Harbor Freight and looked at the 1x30 grinder. Having started out myself on a little nicer 1x42 I have to say I would never buy that $59 grinder. I think it will only bring frustration and push you away from knife making instead of embracing it.

Sometimes is just best to save up for something that will work better for you. That's my opinion...
 
OP, google Wolfgang Loerchner. He doesn't use a grinder, only files.

I have a wonderfully equipped knife maker's shop, but my next knife will be fashioned with a file and guide so I can make a dagger blade nice and slow and get it done right. I've gotten old and need slow nowadays.
One of the first lessons one learns when using a grinder is that the speed with which irrecoverable mistakes happen to either blade blank or maker is truly astounding.
Files hurt a lot less. Just sayin'. :)
 
Last edited:
OP, google Wolfgang Loerchner. He doesn't use a grinder, only files.

I have a wonderfully equipped knife maker's shop, but my next knife will be fashioned with a file and guide so I can make a dagger blade nice and slow and get it done right. I've gotten old and need slow nowadays.
One of the first lessons one learns when using a grinder is that the speed with which irrecoverable mistakes happen to either blade blank or maker is truly astounding.
Files hurt a lot less. Just sayin'. :)
I will do just that, thank you for the info. I did end up getting the cheap grinder, like I said in an earlier reply, no matter what it can be used for other things so if I don’t like it for knife grinding I can move into something nicer. Just didn’t want to shell out $200+ on a nicer grinder if I didn’t enjoy the process. I am curious about the file guide method though.
 
While we're on the topic of buying equipment to get into the game, the biggest boost I made to my novice knife-making was to get a porta-band (Milwaukee) and Swag table. Having a band saw that can cut metal is a game changer. Before getting it I was roughing out my blade peripheries using straight line cuts with a manual hack saw and then cleaning them up back to the scribe line with my 1x42 Grizzly grinder.

I still don't have a 2x72, but at least I can get the blanks shaped relatively quickly now. At least now when I goof up a bevel on the cheap grinder and toss the blade in the scrap bin, I'm not out all that time and misery of manual hack-sawing to even get to the bevel grinding step.

-andy
Hey Andy, i appreciate the offer. Part of the reason I’m not going the route of a nicer grinder is the fact that they’re bigger. I need something small that can be put away reasonably because I have a small two car garage as my workspace.
 
I will do just that, thank you for the info. I did end up getting the cheap grinder, like I said in an earlier reply, no matter what it can be used for other things so if I don’t like it for knife grinding I can move into something nicer. Just didn’t want to shell out $200+ on a nicer grinder if I didn’t enjoy the process. I am curious about the file guide method though.

You’ll enjoy that little grinder a bunch, I am certain. I made my first three knives on a 3x24” belt sander held upside down in a vise and it was enough to hook me.
Start saving now. You’ll know when and if it’s time.
Above all, have fun. Come share a pic of your first machine-gnawed finger nail!
 
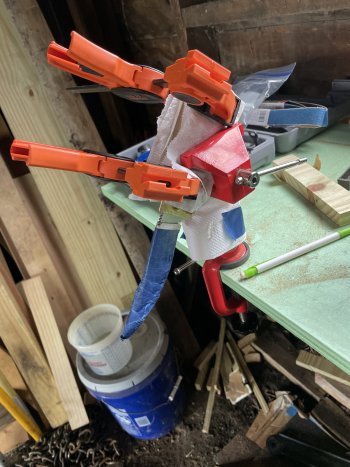
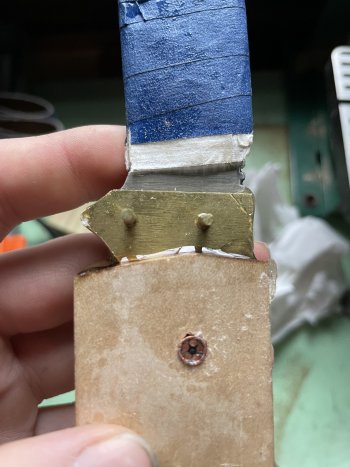
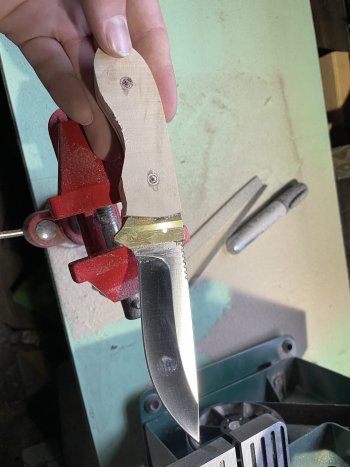
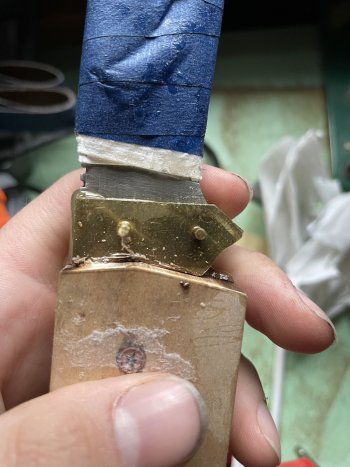
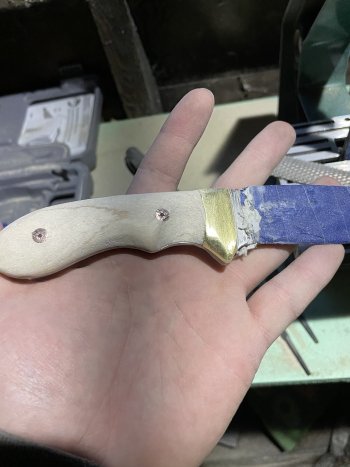
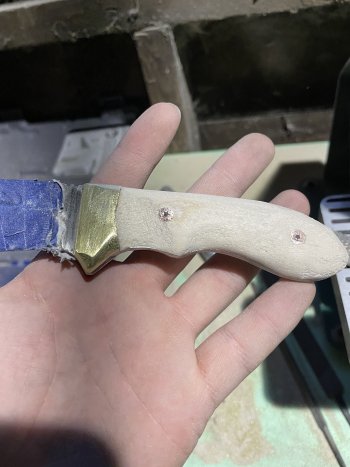
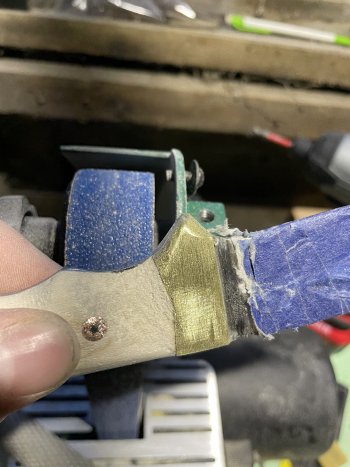
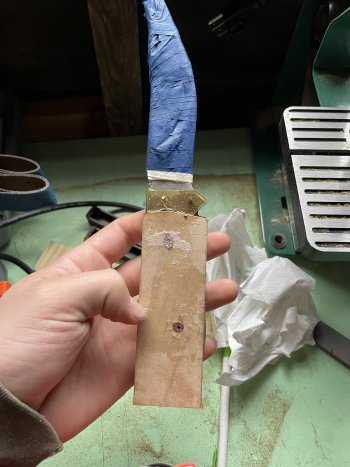
I’m not sure if everyone that has posted on this thread will get a notification but I figured I post a little update. I started my first knife today. It’s just a knife kit that already had the knife itself was done and all I had to do was put the bolster and scales on. The grinder was a big help because I went above my talents and decided to cut a V into the bolster to fit up to the scales. Though I have a lot to learn in the ways of grinding, it was awesome for hogging out the brass instead of using a file. Didn’t bog down once. Still haven’t used any steel on it so we’ll see about that in a week or so. Anyways, the fit up wasn’t perfect as you can imagine but anymore and I would’ve had to scrap the scales. It’s pretty good for a first timer I’d say. Got it all glued up and in the clamps to cure. Tomorrow I’ll start on the profiling of the handle. I’ll post pictures of it before I start shaping it and the final product when I get there. I’ve already learned a ton. Who knew that when you drilled out the holes for the scales that it needs to be straight through and not on an angle and off a sixteenth of an inch? Sorry for rambling on.
 
I see you're in Southern Michigan? I'm in Valparaiso, IN. If you're closer to the southwest end, you may not be that far from me. You're welcome to drop by to talk shop and see my grinders.
I just looked it up, I’m about 2 hours from you! I’m in Marshall, Michigan, just above the border on I69. We definitely should get together sometime and dick around in the shop. I’ll post my progress so far here in a minute.
 
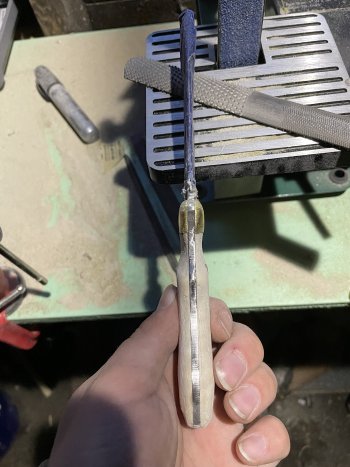
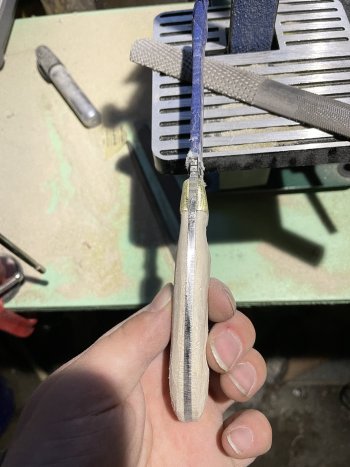
Well here’s my progress so far. The little 1x30 was awesome for sanding out the excess wood on the handle. From there I mostly used files for profiling. I will say this, the rasp does way more damage than I thought it would and ended up taking too much off up by the bolster. I also learned that keeps my everything symmetrical is VERY difficult to do. I basically stopped trying because anymore and I wouldn’t have any wood left. It doesn’t feel terrible in my hand but it’s definitely too narrow now. Overall though, after lowering my expectations about half way through, I’m pretty pleased with it. Definitely learned a lot. Mostly what not to do than anything I was doing right. The two biggest things I learned were this. Use the appropriate grit belt for the application and to slow down. Hopefully you guys have enjoyed my small adventure into knife making so far. I’ll post the finished product hopefully tomorrow. Time for a beer.
 

Attachments

  • D8386411-4672-41B6-AF08-82E287D68FCC.jpeg
    D8386411-4672-41B6-AF08-82E287D68FCC.jpeg
    1.8 MB · Views: 11
  • 53215C74-D1DC-4E3E-90F6-9DC6937AD081.jpeg
    53215C74-D1DC-4E3E-90F6-9DC6937AD081.jpeg
    1.8 MB · Views: 11
  • 9FB017ED-859E-4B6E-8895-97CB31D09F7E.jpeg
    9FB017ED-859E-4B6E-8895-97CB31D09F7E.jpeg
    1.8 MB · Views: 11
  • 1AC51648-3980-4EB1-89B9-4A12403BC190.jpeg
    1AC51648-3980-4EB1-89B9-4A12403BC190.jpeg
    1.8 MB · Views: 11
  • 829EF8A6-2D7B-4618-BCCD-8BA31451B9FC.jpeg
    829EF8A6-2D7B-4618-BCCD-8BA31451B9FC.jpeg
    1.7 MB · Views: 11
  • 8CA581D9-924E-4E44-8C85-E3542253F28E.jpeg
    8CA581D9-924E-4E44-8C85-E3542253F28E.jpeg
    1.6 MB · Views: 12
  • C5E38F95-A2AF-4749-939A-4AF2D56A6B36.jpeg
    C5E38F95-A2AF-4749-939A-4AF2D56A6B36.jpeg
    1.7 MB · Views: 12
  • 5C1EFE17-7EC9-4450-AA60-50E0497B5E88.jpeg
    5C1EFE17-7EC9-4450-AA60-50E0497B5E88.jpeg
    1.7 MB · Views: 12
  • 8B1CD662-CDAD-4213-AB63-C4393C522BB6.jpeg
    8B1CD662-CDAD-4213-AB63-C4393C522BB6.jpeg
    1.9 MB · Views: 11
  • DAC57D89-9E60-423A-9095-A12BD7902B9D.jpeg
    DAC57D89-9E60-423A-9095-A12BD7902B9D.jpeg
    1.9 MB · Views: 11
I just looked it up, I’m about 2 hours from you! I’m in Marshall, Michigan, just above the border on I69. We definitely should get together sometime and dick around in the shop. I’ll post my progress so far here in a minute.
That's not too terrible. My shop's a bit messy, but it gets the job done. You're welcome whenever you want to make the drive. Just shoot me a message and we'll work it out.
 
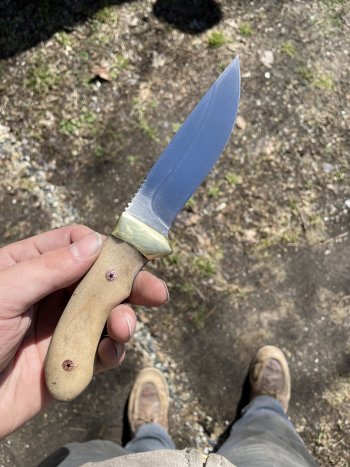
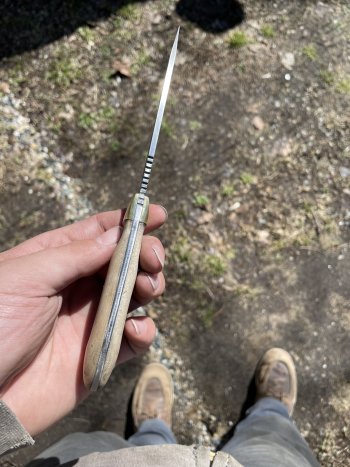
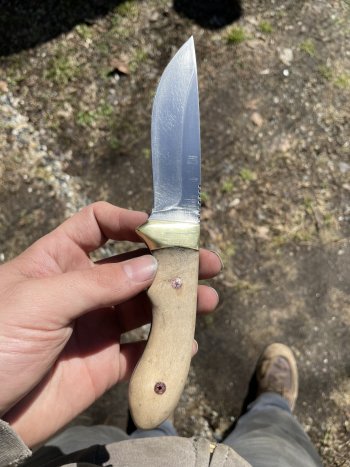
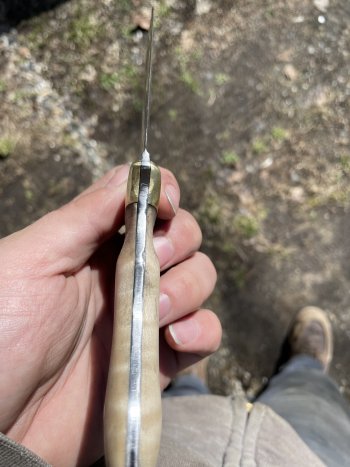
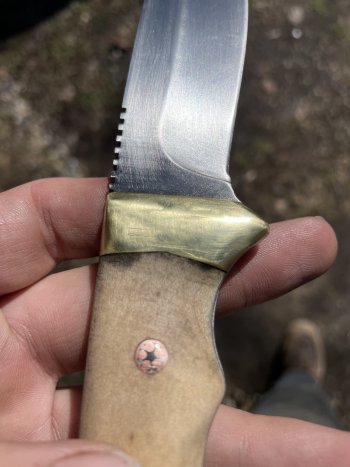
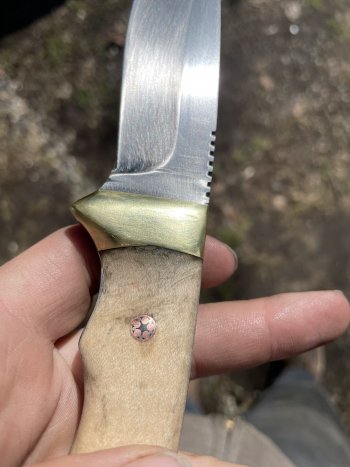
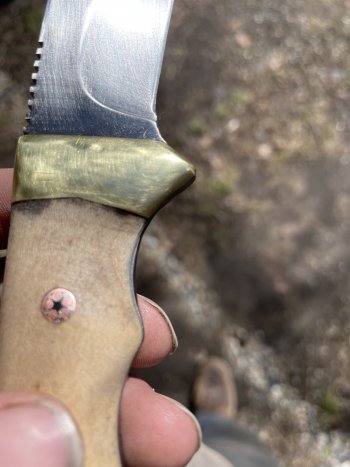
Well, I finished. Please let me know all the things that are wrong with it and what I could potentially do to fix it. All feedback will be appreciated. I plan to post it in the what’s going on in your shop thread as well.
 

Attachments

  • 2E2CA958-95A3-4C38-823E-0EE47D5E7BFA.jpeg
    2E2CA958-95A3-4C38-823E-0EE47D5E7BFA.jpeg
    1.7 MB · Views: 16
  • 6A4266E0-B45D-4E06-9CF1-DFD81DDEF292.jpeg
    6A4266E0-B45D-4E06-9CF1-DFD81DDEF292.jpeg
    1.6 MB · Views: 15
  • 267526A8-68C2-4BEC-AD32-F2DEB66C5D55.jpeg
    267526A8-68C2-4BEC-AD32-F2DEB66C5D55.jpeg
    1.6 MB · Views: 13
  • AE7CF05A-42D1-482B-A01A-E87097637C7B.jpeg
    AE7CF05A-42D1-482B-A01A-E87097637C7B.jpeg
    1.5 MB · Views: 15
  • 22F8A6D2-FDFF-44ED-916F-90F85E3AC1D9.jpeg
    22F8A6D2-FDFF-44ED-916F-90F85E3AC1D9.jpeg
    1.6 MB · Views: 13
  • FBACCBF5-26A7-47F7-BAF2-021642E23152.jpeg
    FBACCBF5-26A7-47F7-BAF2-021642E23152.jpeg
    1.6 MB · Views: 13
  • 71CDFB24-0370-42F3-B14C-E26ED88E6CED.jpeg
    71CDFB24-0370-42F3-B14C-E26ED88E6CED.jpeg
    1.4 MB · Views: 15
Let’s start off with the things you did well.

Your proportions look good. You have a good eye for balance between the handle and blade size. Yes, you got carried away with the rasp and the belt sander, but that’s all part of learning. I can see what you were going for, and had you not overshot, the final dimensions would have been great.

Another good aspect is the flow. This knife has good, interesting lines. It’s a very pleasing design and when your fit and finish skills improve this is a design that you need to try again.

Which leads us to the parts you can improve upon. First, you created a number of headaches for yourself by incorporating elements that are beyond your skill set. This is a really complex design that would be challenging for an experienced maker.

Let’s start with the bolsters / guard. Guys like Dennis Moreland make it look easy. It’s not. I suggest you save guards and bolsters for later after you get comfortable with making good, clean handles that fit tightly with no gaps. As you learned, that’s no small feat. People wouldn’t think that drilling pin holes straight and square is all that hard, and they’d be dead wrong. It is hard, but it is critical. And that starts with flat, square handle scales. It doesn’t matter that no part of the handle will end up flat. If you don’t start with flat material you’ll never get straight holes and you will get gaps.

This also means you need a flat tang. Save the tapered tangs for later. Start by mastering Flat and Square.

Another unnecessary challenge you created was the V notch in the bolsters / guard which made fitting the scales with no gaps incredibly difficult. Flat and square, flat and square, flat and square… that’s hard enough in the beginning. The same thing with the top side. You know what i’m going to say… flat and…. you get it.

I know you’re excited to get grinding. But you see now that a grinder will get away from you. It’s a big mistake to believe that a maker can do everything on the grinder. Hand work is your friend. It’s hard to make a mistake with files that can’t be corrected with a couple of strokes.

Symmetry is everything. You called out your own mistakes here.

This knife is a VERY GOOD first knife. The problems I see mostly came from an overly ambitious design.

For your next one, try a very basic simple knife and put all of your effort into execution. Prove to yourself that you can make it clean, tight, and symmetrical.
 
Last edited:
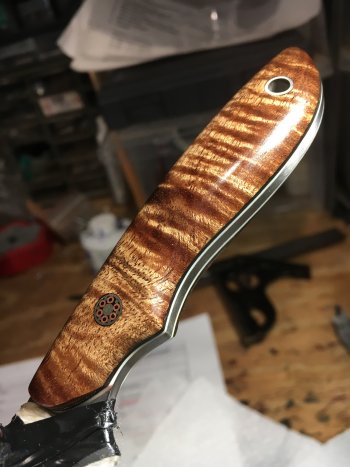
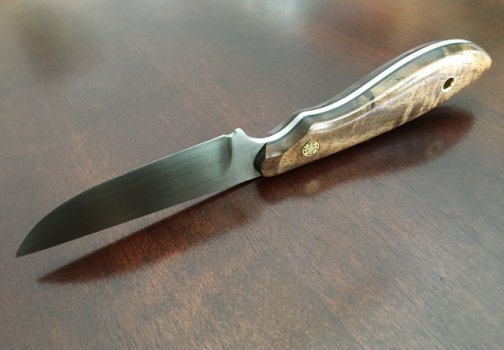
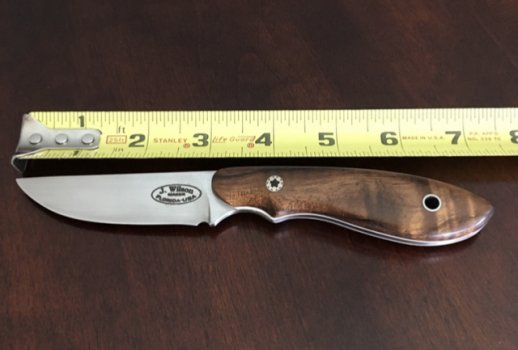
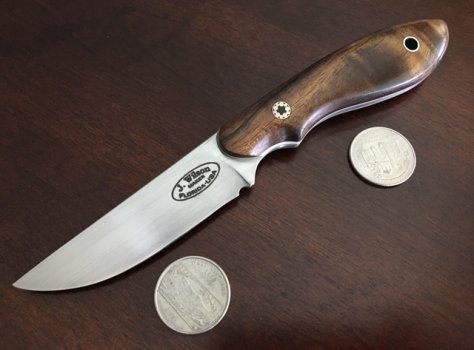
I suggest that you attempt something like this. The design is ultra basic. There is no reason that you can’t do this if you take your time.
 

Attachments

  • F665B726-9306-471E-A582-28C847BFBAA4.jpeg
    F665B726-9306-471E-A582-28C847BFBAA4.jpeg
    708.1 KB · Views: 12
  • 11826B13-F1C6-458A-ABFA-89CF0F8DA56B.jpeg
    11826B13-F1C6-458A-ABFA-89CF0F8DA56B.jpeg
    281.4 KB · Views: 12
  • 8961DA1A-FAE1-4B64-8246-51E07DC9A264.jpeg
    8961DA1A-FAE1-4B64-8246-51E07DC9A264.jpeg
    251.9 KB · Views: 15
  • 13080480-BA22-4D93-9D1B-AC1D29DB45DA.jpeg
    13080480-BA22-4D93-9D1B-AC1D29DB45DA.jpeg
    304.3 KB · Views: 12
Let’s start off with the things you did well.

Your proportions look good. You have a good eye for balance between the handle and blade size. Yes, you got carried away with the rasp and the belt sander, but that’s all part of learning. I can see what you were going for, and had you not overshot, the final dimensions would have been great.

Another good aspect is the flow. This knife has good, interesting lines. It’s a very pleasing design and when your fit and finish skills improve this is a design that you need to try again.

Which leads us to the parts you can improve upon. First, you created a number of headaches for yourself by incorporating elements that are beyond your skill set. This is a really complex design that would be challenging for an experienced maker.

Let’s start with the bolsters / guard. Guys like Dennis Moreland make it look easy. It’s not. I suggest you save guards and bolsters for later after you get comfortable with making good, clean handles that fit tightly with no gaps. As you learned, that’s no small feat. People wouldn’t think that drilling pin holes straight and square is all that hard, and they’d be dead wrong. It is hard, but it is critical. And that starts with flat, square handle scales. It doesn’t matter that no part of the handle will end up flat. If you don’t start with flat material you’ll never get straight holes and you will get gaps.

This also means you need a flat tang. Save the tapered tangs for later. Start by mastering Flat and Square.

Another unnecessary challenge you
created was the V notch in the bolsters / guard which made fitted the scales with no gaps incredibly difficult. Flat and square, flat and square, flat and square… that’s hard enough in the beginning. The same thing with the top side. You know what i’m going to say… flat and…. you get it.

I know you’re excited to get grinding. But you see now that a grinder will get away from you. It’s a big mistake to believe that a maker can do everything on the grinder. Hand work is your friend. It’s hard to make a mistake with files that can’t be corrected with a couple of strokes.

Symmetry is everything. You called out your own mistakes here.

This knife is a VERY GOOD first knife. The problems I see mostly came from an overly ambitious design.

For your next one, try a very basic simple knife and put all of your effort into execution. Prove to yourself that you can make it clean, tight, and symmetrical.
Thank you John. This was all very helpful and reaffirming. I was pretty sure what my mistakes were but didn’t know if I was missing anything. Though the grinder is nice, I’ll stick to only using that to get the excess handle material close to the handle size and leave the actual profiling to the hand tools. After the headache from the bolsters, I’ll be leaving those alone for quite some time as well. It all got away from real fast and the next thing I knew there was no going back. That knife you posted will be exactly the type of knife I do next. Clean and simple. I appreciate you taking your time to write all that out. I look forward to showing you guys the next one to hopefully show some improvement!
 
I think John and CD have the main critiques covered. I'd say it looks pretty dang good for a first knife, much less one that's done with minimal tools. You could definitely make some improvements with fit and finish, though slowing things down would take care of a lot of that.
On the next knife, I'd try to spend some time hand sanding your scratches out of your blade before putting the handle on.
Search "Nick Wheeler hand sanding" on YouTube for some good tips.
Looking forward to seeing the next one.
 
Thank you John. This was all very helpful and reaffirming. I was pretty sure what my mistakes were but didn’t know if I was missing anything. Though the grinder is nice, I’ll stick to only using that to get the excess handle material close to the handle size and leave the actual profiling to the hand tools. After the headache from the bolsters, I’ll be leaving those alone for quite some time as well. It all got away from real fast and the next thing I knew there was no going back. That knife you posted will be exactly the type of knife I do next. Clean and simple. I appreciate you taking your time to write all that out. I look forward to showing you guys the next one to hopefully show some improvement!
Yep. The reason that you are going to be a good knife maker is because you are already well aware of what went right and what went wrong. You are honest with yourself. That's really all there is to it.

The real lightbulb moment for me was this: Instead of focusing on the finished knife, instead focus on the one step you are working on at a time. Break the knife down into elements. What is the desired shape? Start by making the absolute best profile you can make. Make the best, most accurate pin holes that you can. when you go to make the handle scales, make the best and most accurate (flat and square) handle scales that you can make. Then use your nearly perfect blade profile as a template to drill the most accurate, square pin holes in the scales.

You get the idea. Whatever step you are on, do the most accurate and perfect job that you can on that one step. There is no value in rushing through a step just to get to the next one. If you do that, you'll always have a piece of that knife that you could have done better, but it's too late. To Drew's point. While you focus on the step you are on, you also need to think two or three steps down the line. "Once I get this handle on, how am I going to hand sand this blade? I should do that before I put the handle on."

The other side of this coin is "the best you can do (at this point in time) is the best that you can do." Sure, we'd all love to turn out museum quality knives. But nobody starts out there. There will be times that you aren't 100% happy with a step that you're working on. You'll know that it doesn't meet the vision in your head, but you'll have no idea how to get from here to there. So in that case, you do the best you can and accept that there is a limitation here that you need to improve upon. This is also why we all need mentors. It's the greatest thing in the world when you can call somebody and say "Hey, I'm stuck. I'm trying to do "x" and I can't figure out how to do it." and get an answer on the spot that puts you in the right direction. Sometimes it's a method, sometimes it's a tool, and sometimes it's just more elbow grease.

Keep at it. You are off to a great start.
 
I think John and CD have the main critiques covered. I'd say it looks pretty dang good for a first knife, much less one that's done with minimal tools. You could definitely make some improvements with fit and finish, though slowing things down would take care of a lot of that.
On the next knife, I'd try to spend some time hand sanding your scratches out of your blade before putting the handle on.
Search "Nick Wheeler hand sanding" on YouTube for some good tips.
Looking forward to seeing the next one.
I’ll definitely look up Nick Wheeler. I did attempt to sand out the scratches but towards the end I was fighting the vise, the knife kept falling out of it or some grit from the last sanding was left behind and it would make a gouge. It was a mess so I decided to leave it and not make it worse. After lowering my own standards about how my first knife should look like I was happy with how it turned out. I definitely messed up the order that I did things in. The next one I’ll be getting the scales almost complete before glue up and I’ll be doing a better job of prototype blade while glueing. All in all, a lot or hard lessons learned.
 
Back
Top