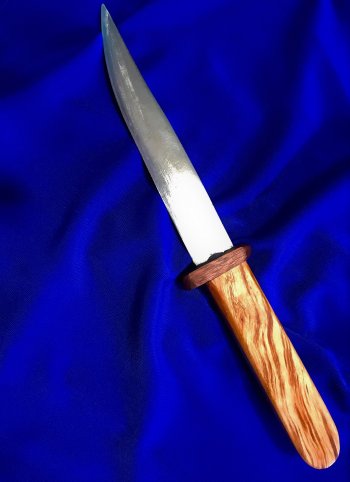
Block handles

Chris Railey

Well-Known Member
Ok I am gonna transition into making some through tang knives because its something I have not done and involves some new skills for me to develop. Can you guys please give me some advice on making block handles. Like do you shape or drill first? Is there a size block you like to start with? Do you draw your intended shape on the block? Anything else you think is important. Thanks.
 
I like blocks to be at least 1" thick, 1 3/4" - 2" wide, they can be narrower depending on handle shape. First thing I do is cut the front end of the block to then angle needed, then transfer the ricasso width and tang width to that end of the block. I also draw a center line on the block from the top of the handle to the bottom. Next I draw the shape of the handle to the block along with the tang outline. All these layout lines are used in the next step, drilling the block for the tang. I use really good brad point bits to do the drilling. With these, I can completely drill out the block and not have to use a broach. Once the tang fits the block, I do the handle shaping.

I make the front of the handle height match the height of the ricasso. I try to shoot for around 1 1/8" for that.
 
Gene covered most of it,I will add that if there is any curve to your tang you wont usually be able to just use a drill so make a broach just in case,you also want the hole size to match as close to the tang size as possible due to the fact that if you make the hole to large with the thought of filling with epoxy you may end up finding it during shaping as in trying to widen the hole with a drill bit by wollering it around the bottom end of the drill bit is usually removing material in a spot you dont realize until your doing your shaping and boom you find it.
 
IMG-5764.jpg


Hidden tangs are my specialty! I will try to add what I can, to what's already been said. First, block size is very important, you will eventually come to your own desired size, based on the type of handles you want to produce. That beings said.....remember.....you can take material off...but if you don't start with a large enough block....you can't add any more.
Cutting the EXACT angle to the front of the block, as the guard in paramount. I fit the guard (still in "block" form, finish off it's face, and install it for the final time onto the tang/blade. I actually use the back of the guard, laid on the block, with the tang positioned as I want it to lay inside the block, then, using the back of the guard as a straight edge....draw a line.

I purchased a 10" Ryobi miter saw with a laser guide for the sole purpose of cutting the front angle of hidden tang blocks. Put the block on the saw, and then with the saw running, I torque the table's roatation to where the laser matches the line on the block....then a slow cut, and keep the saw down while you let off the trigger, and allow the saw to fully stop before raising it! Otherwise the blade can catch and splinter the edges of the block.

I mark the center of the front end of the block, and then make a line for the top and bottom of the tang's width. I looks like... |---| on the face of the block.

I like to use a 6" long X 1/4" bit that I have reground to a 135 degree split point (because I use mostly exotics like Blackwood, Ironwood, etc.) I lock the handle block vertically in a vise, compare the length of the bit with the tang I drew on the block for depth....and mark the bit for depth with a sharpie...... and drill two holes..... that intersect down in the block. One hole is ... |*----| and the other is at |----*|
(* = where the holes are started on the face of the block)

I use battery powered drills (like mikita or Ridgid 18V) I "pull" the bit from one hole to the other to open up the "web" between the holes. Then, if needed, use handle broaches to finish fitting.

Something very important..... make sure you have some "slop" in the fit, and for heavens sake, unless it is a through tang, which will have a buttcap/butt nut installed, DO NOT try to "burn in" or make the fit too tight! With a simple hidden tang, no butt cap, it's essential to leave some room for "glue".

I "glue" everything up as finished blade with front of guard material finished, and the guard, spacers, handle all in block form. (like the pic at the top) After "glue" is cured...everything is ground down as a unit.

PITFALLS:
1. When making the tang.... use 3/4 - 1/4 rule for the tang......

IMG-5765.jpg
 
Based on all the info given, I am guessing the angle of the front of the block is determined by handle shape and the Tang bend or angle is decided by trying to keep the tang closer to the center of the block?
 
For me the angle is determined by the backside of the guard material.... which means I decided the angle when I am finishing the shoulders on the blade.

I ALWAYS build/file/cut those shoulders, and install guards with the upper side noticeably leaning towards the tip of the blade. That is one of the "secrets" to making a blade look "sleek and fast". You can easily goof it up if you try to install the guard at 90 degrees to the blade.....IF you do that, and then finish out the knife, the guard will ALWAYS look like the top is leaning towards the rear of the knife.... (it's an optical illusion) even if it is "dead on" at 90 degrees. I've seen folks fail their JS test for guards with the tops that LOOKED LIKE they were leaning backwards. (gotta remember, there are no measuring devices or straight edges in the judging room.... only the eyes of the judges) So it's to your advantage to always try to lean the top of the guard forward. ;)

At this point the blade and front of my guard material are completely finished..... I seat the guard material into it's final position, then use the back side of the guard material as a straight edge.

IMG-5767.jpg


IMG-5768.jpg


IMG-5769.jpg


Make sense?

JUST TO CLARIFY THE LAST PIC!! The only cut is across the end of the block where the guard and handle material meet.... "Cut line and tracing of where tang will lay in block" could be misunderstood to say something else!
 
Yes.... even with a single "quill" guard, if you try to put it on a hidden tang dead nuts square... the top will look like it's leaning backwards..... and the knife type that we seem to make a lot of... Drop points, intensify the optical illusion.

Those parts/pieces in the pics are a teaching aid that have been in the shop for over 10 years. It was a failed San-Mai.... so I decided it would make not only a good example of weld failures, but also for what we are discussing now!
 
Last edited:
I was just thinking about posting something I found the other day on this exact subject. When drilling out the block for the tang, the best way I have found is to use 6mm pen blank drill bit from woodcraft. They are $4 and 6mm is just under 1/4". These pen blank drill bits are super sharp on the edges and makes easy work of stabilized wood. I drill 2 holes, one on the top of the slot and one on the bottom using a handheld drill, then the bit makes easy work of connecting the two.
 
Man, I wish this thread had been written about six weeks ago. I just finished my first hidden tang. A friend had the blade, made from a saw blade, and the full tang at the rear was twisted too much to salvage (for me at least). I cut the tang down and did my first hidden tang. Biggest challenge was finding the right kind of drill bit to "wallow out" the slot for the tang. It's not a slick knife, but given what I started with, I'm relatively pleased. Didn't have the right metal to make a guard, so I made it out of walnut. This knife will mostly sit on a shelf or fireplace mantle, so I'm relatively pleased with it.IMG_2620.jpg
 
IMG-5764.jpg


Hidden tangs are my specialty! I will try to add what I can, to what's already been said. First, block size is very important, you will eventually come to your own desired size, based on the type of handles you want to produce. That beings said.....remember.....you can take material off...but if you don't start with a large enough block....you can't add any more.
Cutting the EXACT angle to the front of the block, as the guard in paramount. I fit the guard (still in "block" form, finish off it's face, and install it for the final time onto the tang/blade. I actually use the back of the guard, laid on the block, with the tang positioned as I want it to lay inside the block, then, using the back of the guard as a straight edge....draw a line.

I purchased a 10" Ryobi miter saw with a laser guide for the sole purpose of cutting the front angle of hidden tang blocks. Put the block on the saw, and then with the saw running, I torque the table's roatation to where the laser matches the line on the block....then a slow cut, and keep the saw down while you let off the trigger, and allow the saw to fully stop before raising it! Otherwise the blade can catch and splinter the edges of the block.

I mark the center of the front end of the block, and then make a line for the top and bottom of the tang's width. I looks like... |---| on the face of the block.

I like to use a 6" long X 1/4" bit that I have reground to a 135 degree split point (because I use mostly exotics like Blackwood, Ironwood, etc.) I lock the handle block vertically in a vise, compare the length of the bit with the tang I drew on the block for depth....and mark the bit for depth with a sharpie...... and drill two holes..... that intersect down in the block. One hole is ... |*----| and the other is at |----*|
(* = where the holes are started on the face of the block)

I use battery powered drills (like mikita or Ridgid 18V) I "pull" the bit from one hole to the other to open up the "web" between the holes. Then, if needed, use handle broaches to finish fitting.

Something very important..... make sure you have some "slop" in the fit, and for heavens sake, unless it is a through tang, which will have a buttcap/butt nut installed, DO NOT try to "burn in" or make the fit too tight! With a simple hidden tang, no butt cap, it's essential to leave some room for "glue".

I "glue" everything up as finished blade with front of guard material finished, and the guard, spacers, handle all in block form. (like the pic at the top) After "glue" is cured...everything is ground down as a unit.

PITFALLS:
1. When making the tang.... use 3/4 - 1/4 rule for the tang......

IMG-5765.jpg
This would make a great video Ed!
 
Back
Top