You are using an out of date browser. It may not display this or other websites correctly.
You should upgrade or use an alternative browser.
You should upgrade or use an alternative browser.
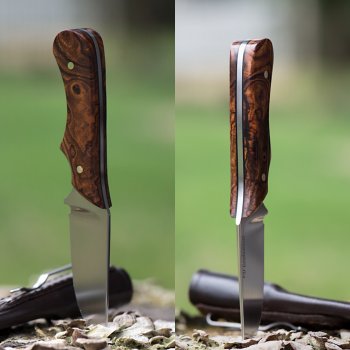
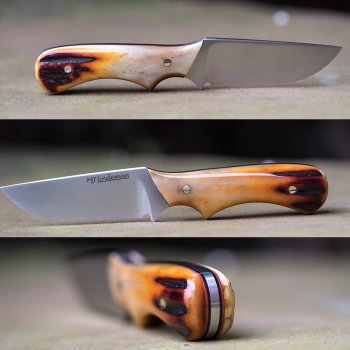
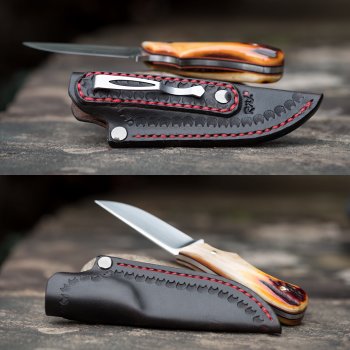
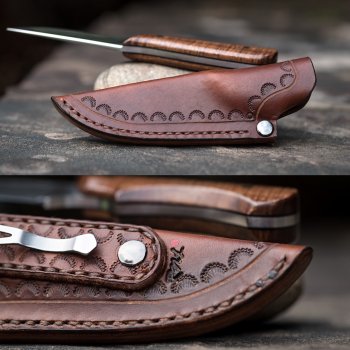
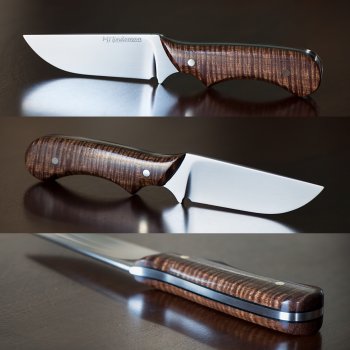
A couple more
- Thread starter MikeL
- Start date
Dennis Morland
KNIFE MAKER
Mike - post them all. They look good!
MikeL
KNIFE MAKER
Thanks Dennis.Mike - post them all. They look good!
I’m working on one more and then have to take a little break from them.
MikeL
KNIFE MAKER
Thanks Opaul.
Von,
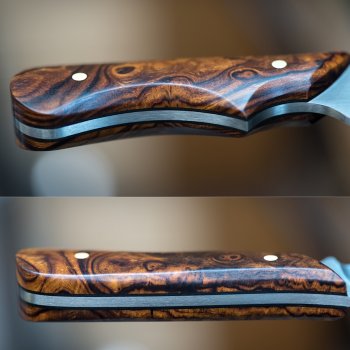
I guess it could be possible to break off but I hope these small knives wouldn’t see that kind of hard use. The top sharp looking edge edge is filed over slightly and the leading edge of the handle has a facet and so does the top side (spine side). See picture. But, you might be right, perhaps it could be a weak point. Thanks for the input. I need to think about that.

MikeL
KNIFE MAKER
It is not necessarily hard use Mike but an accidental knock against something would be my thought/concern for damage
I see where you’re coming from. Edges were softened some but it may not be the best solution. I’ll ponder over design. Thank you.
Sean Jones
Well-Known Member
That's beautiful....very nice!
doug adams
Well-Known Member
Those look great Mike! What is the over all length of your pocket carry knives?
MikeL
KNIFE MAKER
Those look great Mike! What is the over all length of your pocket carry knives?
Thank you. 5.5” OAL, 2.5” cutting edge.
M
Michael Minto
Guest
Nice wood. Nice antler. She said. Knice knives.
John Wilson
Well-Known Member
Keep posting them! Those are stunning!
Love them, particularly the ringed Gidgee version. Mike, would you mind sharing your satin finish progression and any tips as I really love look of what you are producing? I am working on a blade at the moment hand sanding through the grits working up to 1000 grit and then stepping back down to 800 which will be with a firm leather backed paddle. I will post some pics when I’m done but doubt I am going to achieve as nice as what you have here.
MikeL
KNIFE MAKER
Thank you Ian.
What has really helped me on satin finishes is to have a more gradual plunge line. Not sure what you call them, sweeping plunge line? When I tried to put satin finish on a sharp 90 degree cut plunge I could not get into the corners very well. Also, an abrupt plunge, in my opinion, makes it harder to drag straight scratch patterns across the blade. There are some great successful satin finishes out there with the hard plunge lines. But I found it very difficult. Bad technique or just not as skilled or maybe lack of patience perhaps? I was just never very happy with my results. But, when I changed to the gradual plunge I had a much easier time. Easier to clean up the plunge line area. Easier to get straight scratch pattern when riding the gradual ‘ramp’ plunge verses the ‘cliff’ plunge. Just using descriptive words. Not sure what the official wording is. Still takes time but I attribute an easier time to the seeping plunge. I go up to 600 on the belt grinder. Move to hand sanding after that point. I do go back to 400 as the first step on hand sanding because I always still have a few stray scratches the 600 belt grind didn’t get. I sand diagonally like I think most do. 400, 600, diagonal and then 800 straight. I stop at 800.
I do hollow grinds 95% of the time. I made a wood handle with a radius matching the wheel I use. Glued leather on the radius as the backing. I use a thick piece of G10 as backing for the flats.
Last edited:
MikeL
KNIFE MAKER
I forgot to mention Ian, I also use these as a last step to help get scratch lines across the blade more consistently. They are fairly firm rubber yet pliable. It is what helps me ride the scratch lines down the plunge line as my last step. Still not the perfect solution but i have found them to be pretty helpful.
I also use them while sanding/shaping the handle.
Mike
https://www.woodcraft.com/products/angle-sanding-pads-4-pack
I also use them while sanding/shaping the handle.
Mike
https://www.woodcraft.com/products/angle-sanding-pads-4-pack
Last edited:
Dennis Morland
KNIFE MAKER
Very nice. You take great pictures. I wish I could do that well.
MikeL
KNIFE MAKER
Very nice. You take great pictures. I wish I could do that well.
Thanks Dennis. I do enjoy photography. I don’t have a lot of skills but have a good camera and lense to cover for the skills.

