J. Doyle
Dealer - Purveyor
Okay....a few more pics. But first, I want to point out that this is only a brief look into the way I do things. It isn't the right way or the wrong way, or the best way or the worst way. Definitely not the fastest way. But it's my way. In fact, I spend about half my time walking around my shop muttering to myself, "There HAS to be a better faster way to do this!" 
I start out with all my handle pieces, including the wood perfectly flat, square, and with all sides parallel. This adds a considerable amount of time to the process but it's much easier to keep everything 'right' if I do that. With a knife with this many different parts, the precision is a must for me. If something is 'off' I can check every part against every other part and see where the issue is. It's just easier in general to keep everything straight and true.
So, back on track:
Here the blade is all finished ready for fittings. I use blue shop towel and electrical tape to protect the blade from scratches and scuffs and protect my hands from cuts. The blade is not at it's final wicked sharpness yet, but from finish grinding and sanding and etching, it's plenty sharp enough to slice me open.

This particular knife has a little spacer before the actual main guard. So I lay out a center line and two lines parallel to it with my height gauge, marking the width of my guard slot. I use black sharpie rather than layout dye. Just easier and cheaper.

Next I lay the tang across the spacer and make a small mark where my tang will go to mark the ends of the slot.

Use the height gauge to make those marks true.

The spacer now has the complete location of the slot laid out.

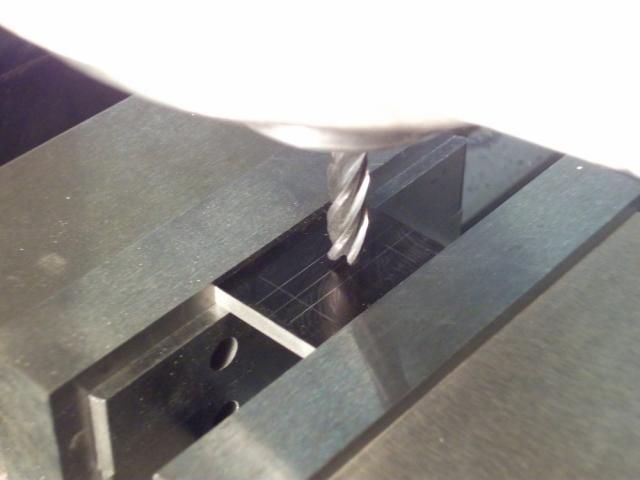
Next It's chucked in the mill vise. An undersized end mill is used to remove the bulk of the material, leaving enough room to hand file the slot for a perfect press fit so that there are no gaps whatsoever.
More to come later:
I start out with all my handle pieces, including the wood perfectly flat, square, and with all sides parallel. This adds a considerable amount of time to the process but it's much easier to keep everything 'right' if I do that. With a knife with this many different parts, the precision is a must for me. If something is 'off' I can check every part against every other part and see where the issue is. It's just easier in general to keep everything straight and true.
So, back on track:
Here the blade is all finished ready for fittings. I use blue shop towel and electrical tape to protect the blade from scratches and scuffs and protect my hands from cuts. The blade is not at it's final wicked sharpness yet, but from finish grinding and sanding and etching, it's plenty sharp enough to slice me open.

This particular knife has a little spacer before the actual main guard. So I lay out a center line and two lines parallel to it with my height gauge, marking the width of my guard slot. I use black sharpie rather than layout dye. Just easier and cheaper.

Next I lay the tang across the spacer and make a small mark where my tang will go to mark the ends of the slot.

Use the height gauge to make those marks true.

The spacer now has the complete location of the slot laid out.

Next It's chucked in the mill vise. An undersized end mill is used to remove the bulk of the material, leaving enough room to hand file the slot for a perfect press fit so that there are no gaps whatsoever.

More to come later:


