Did someone say Neo Tribal KITH ?????

Josh i crown thee king of the wip just saying you should get a doggie just for that. the wip rocks cuz i sayeth so!!!!!
 
Thanks alot fellas :1: Y'all are making me blush ,LOL

Prince of wip M-A-Y-B-E ..... Bruce Bump is the King of wip in these parts :3:

Heading out to the shop now but I think the Chief may still be a little tacky from the wood hardener.

Take care y'all - Josh
 
Spent some time in the shop HT-ing another blade while the chief dried up a little more but I got back to it for awhile.

The wood hardener leaves a thick plasticy surface on the wood that needs to be removed. Kinda nasty but worth it for a soft wood Like Poplar IMHO

008-14.jpg


Oooops This ain't the Chief ! BAM... Rocking some hamon action

011-13.jpg


Sanded out the Chief with 600x and gave it a little with some 800x for good measure. When you stain something and then sand at these high grits it REALLY highlights the poor job I did with the 220x :shush: The sanding lightened the stain up nearly back to unstained condition and the dark areas are low spots. While offensive to my ego this isn't gonna be a problem for the Chief so I'm moving forward anyway :cool:

012-12.jpg


While the Tribal Chief is essentially a complete knife at this point he's still a nekkid completed knife and just as Tribal Warriors adorn themselves for the hunt or the battle such is the destiny of the Chief. What better way to begin our battle dress than with a beautiful and warm product of our mother earth... copper , believed by the tribe to put the warrior at one with nature and on the side of the gods.

I picked up the roll of .003 copper foil from my local Ace Hardware. Cut a piece sized for wrapping the center bead

013-12.jpg


Crumple it up to give it some character

014-12.jpg


Unravel it and hammer flaten any offensive spots

015-10.jpg


This stuff is just too dang shiny. Flashed it with the MAPP gas to age it a bit

016-10.jpg


Also picked up these copper tacks at the hardware. The heads are funky shaped and flat so I tuned up the head on an 80x slack belt and shortened the shank so it doesn"t bottom out on the Chief's tang

017-5.jpg


I lined up the copper so I'll have some overlap past where the tack will be and started pre-forming the copper to the center bead. Also folded the far end over so I've got a double layer where the tack will be

018-5.jpg


I haven't really started forming the copper around the bead yet just pulled it tightly around so I can do the forming after the tack is in place. I used this longer thinner tack to make a starter hole for the other one similar to drilling a pilot hole

019-4.jpg


Tacked the copper in place then I used this 1/4" aluminum rod and a hammer to mold the copper around the sides of the bead

021-3.jpg


The 1/4" was just a touch too big to get the copper tight so I burnished it in with a piece of 1/8" 416 pinstock

023-2.jpg


Once I had the copper tightly wrapped on the bead I LIGHTLY brushed the high spots with some 600x to really bring out the 3-D texture of the wrap

024-2.jpg


027-2.jpg


And our token Parting Shot for the night... tune in for more action tomorrow fellas

028-2.jpg


Hope y'all had a great night- Josh
 
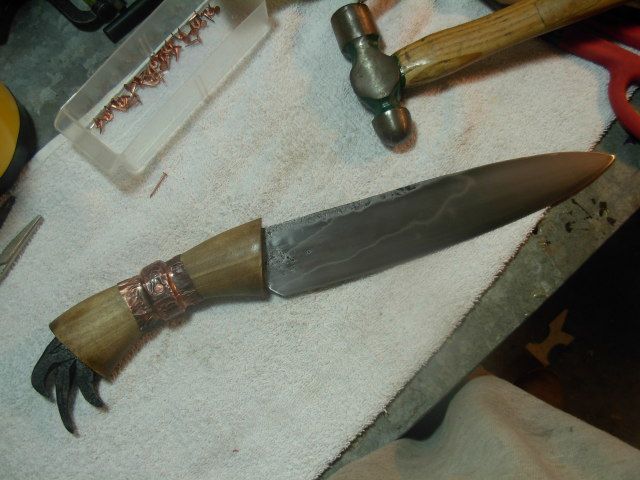
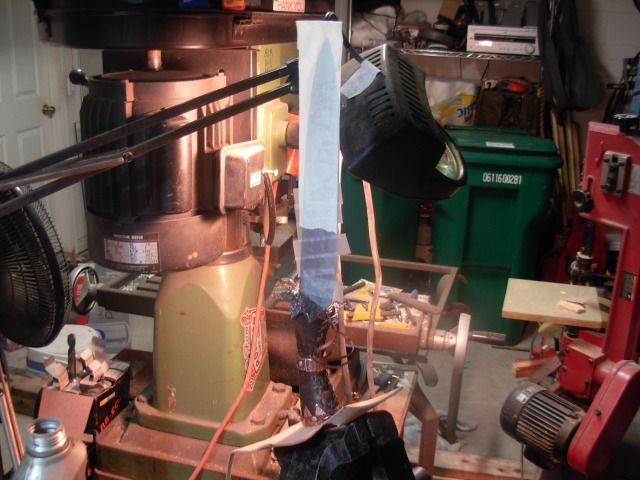
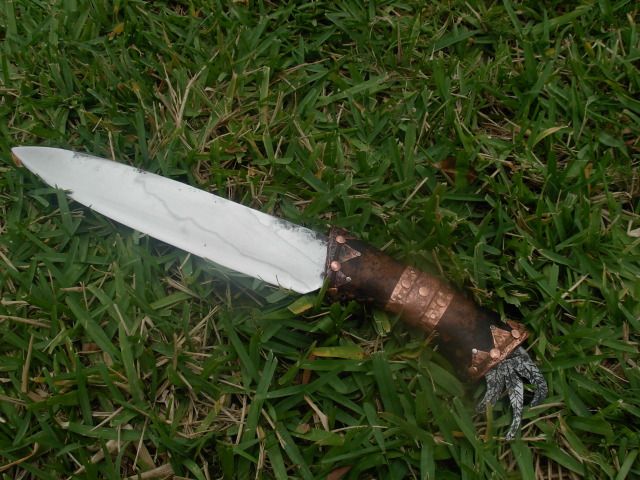
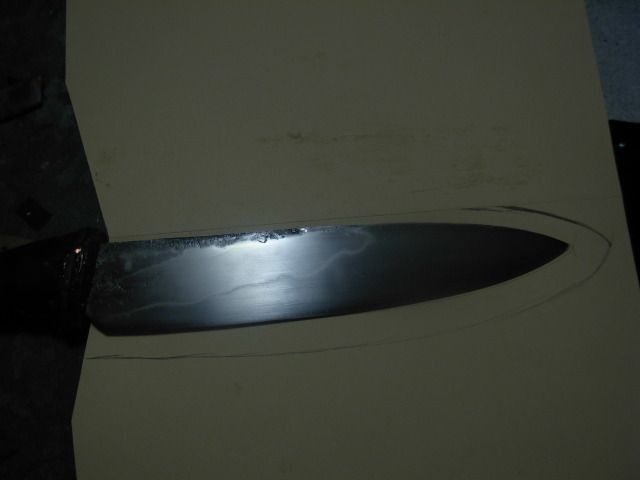
Spent a bunch of time in the shop today and took a bunch of pics.

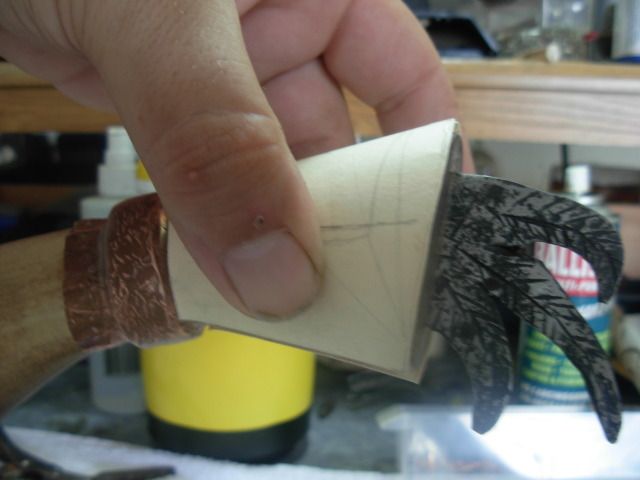
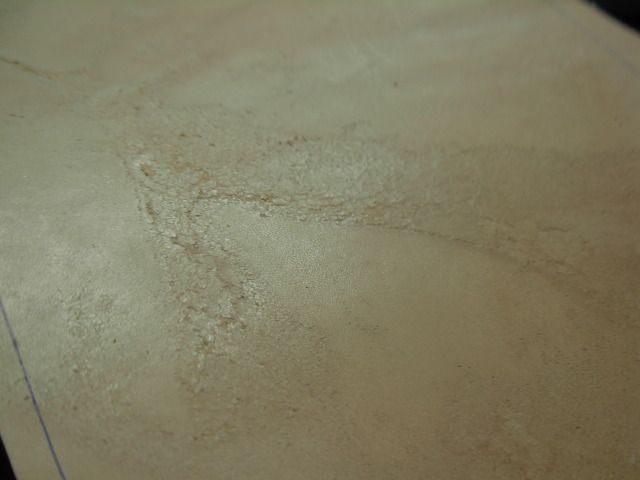
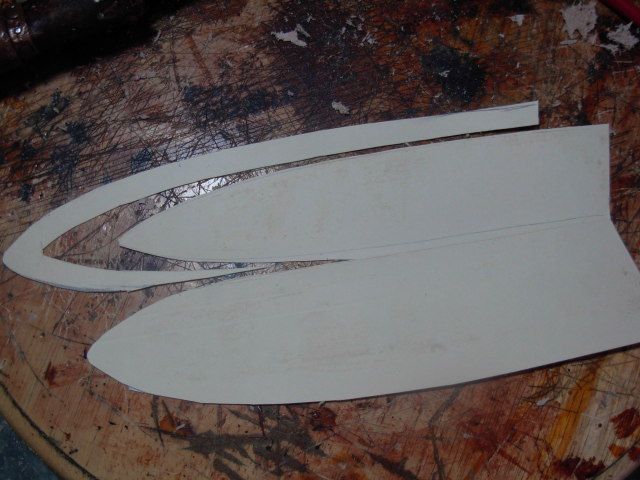
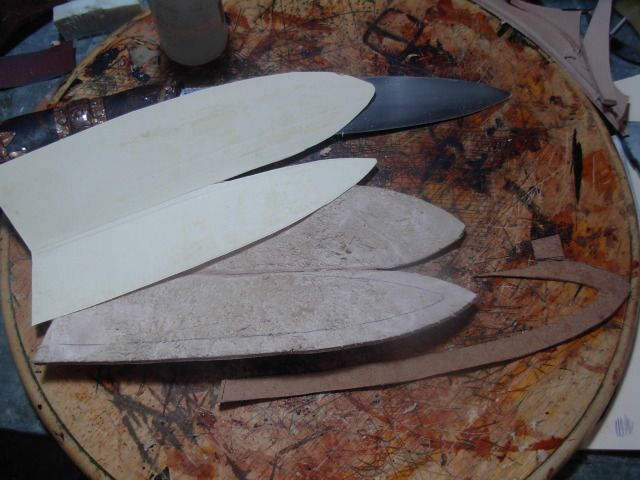
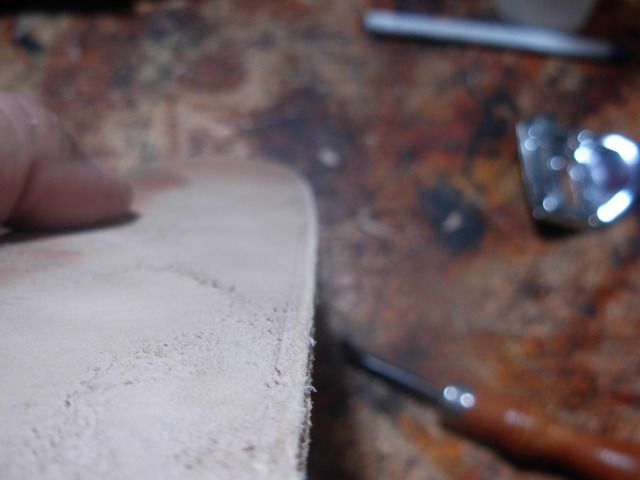
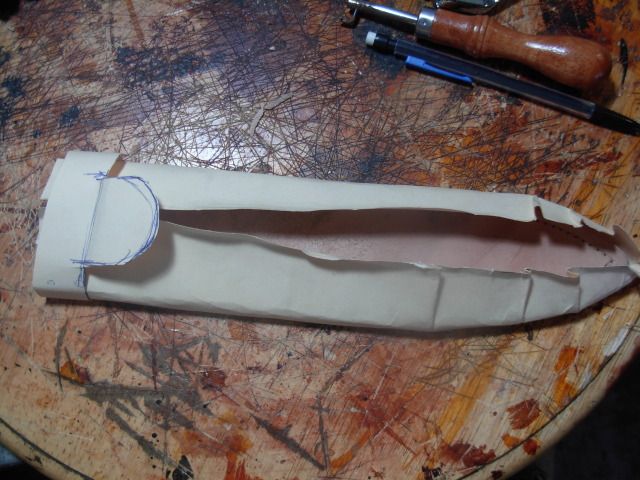
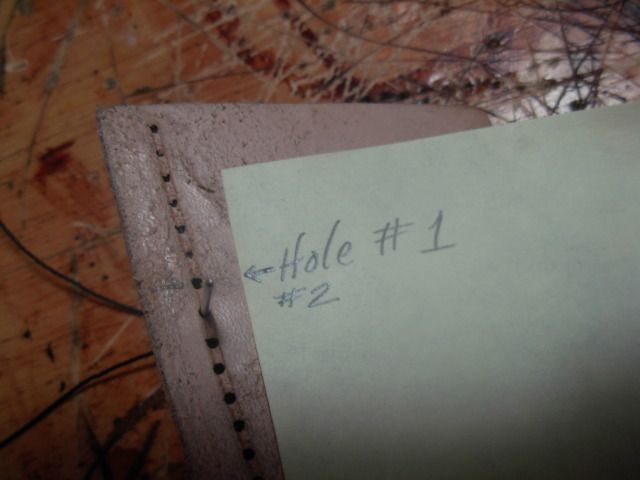
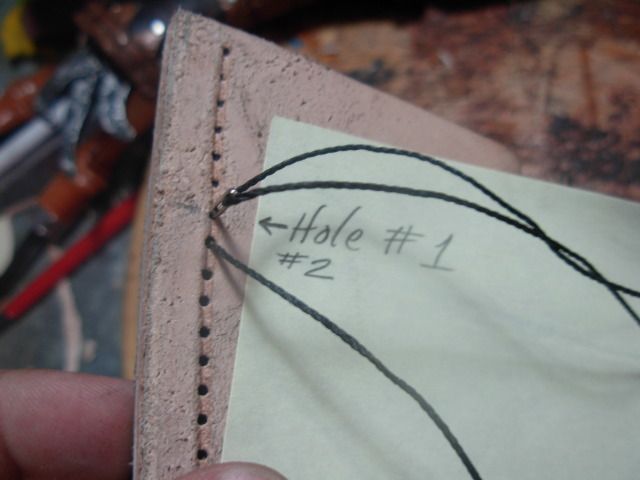
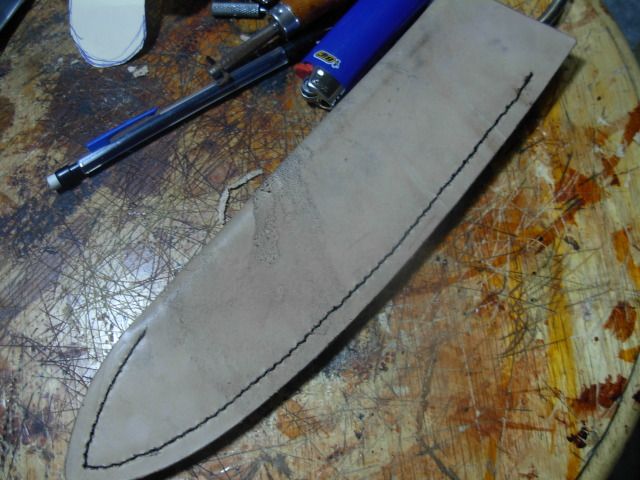
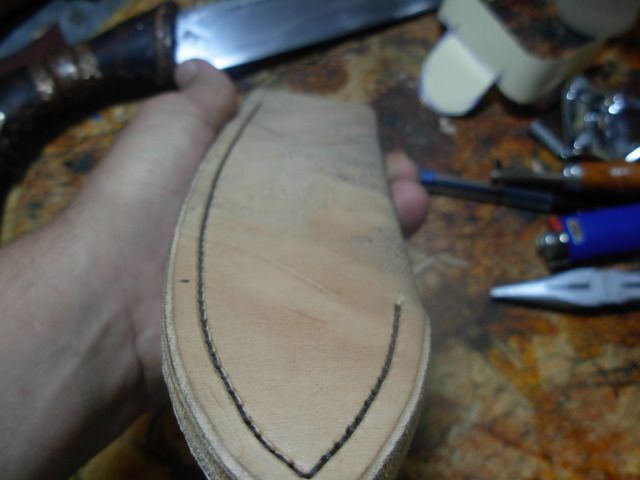
Making a file folder template to get the shape of my rawhide wrap

002-20.jpg


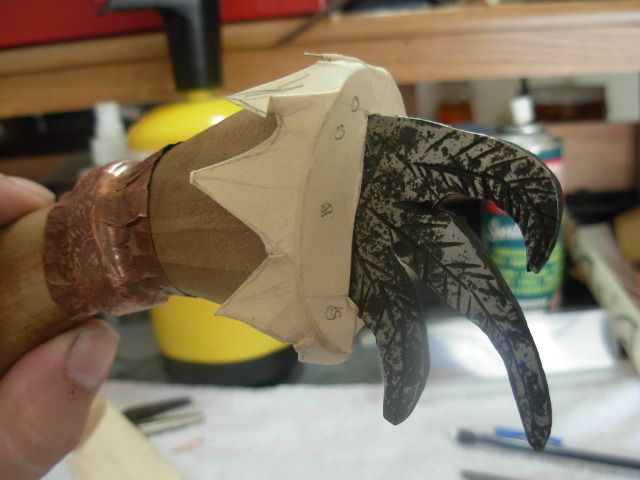
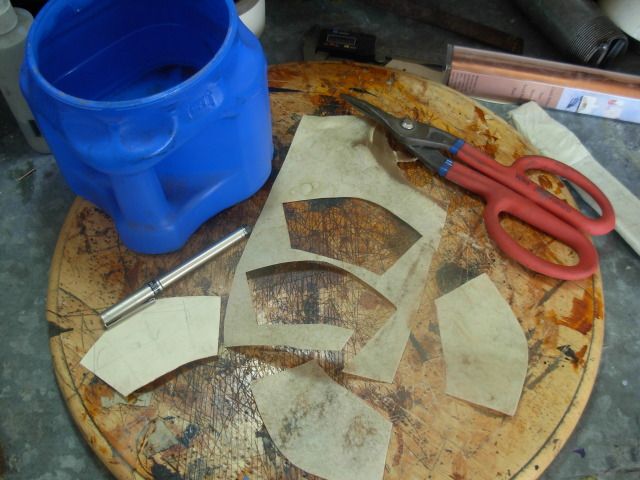
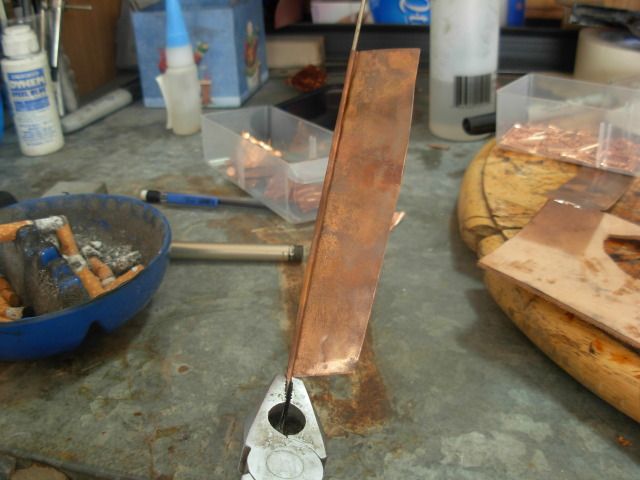
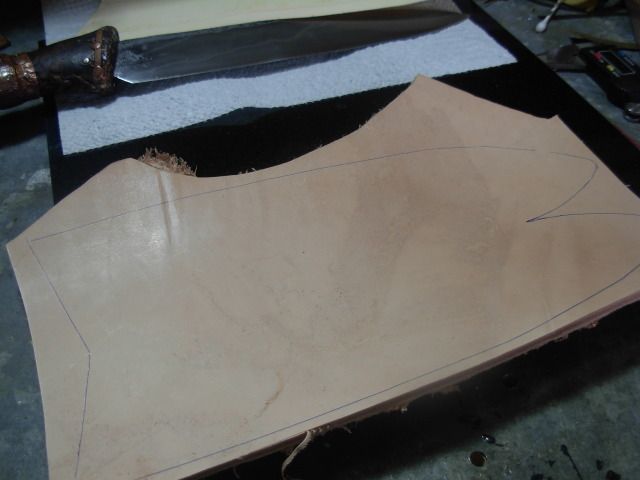
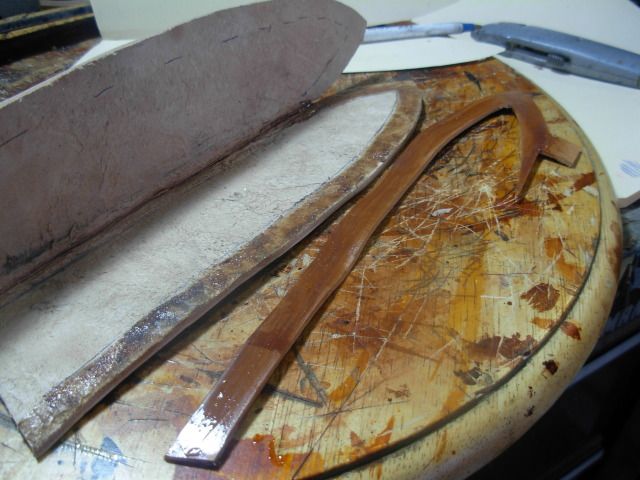
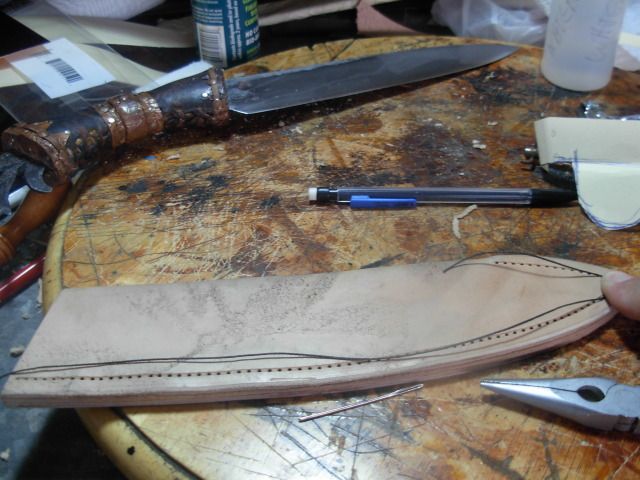
Template for the copper overlay

001-18.jpg


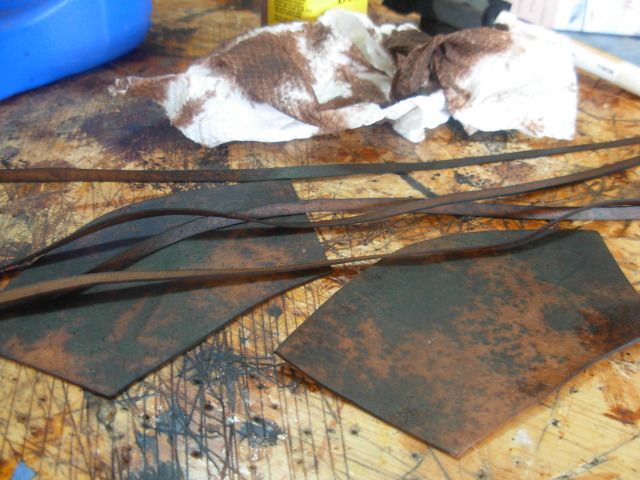
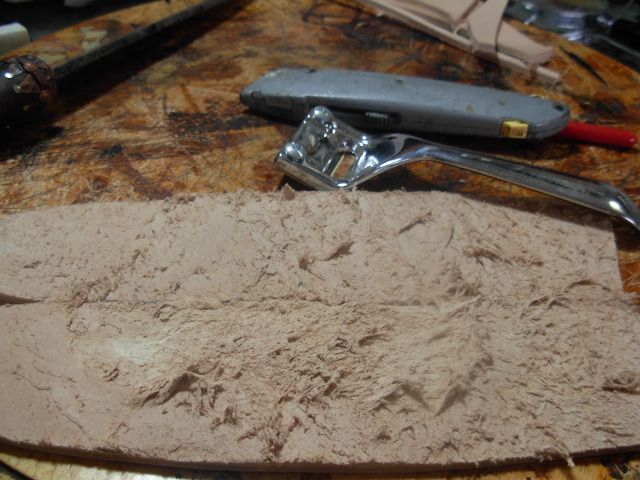
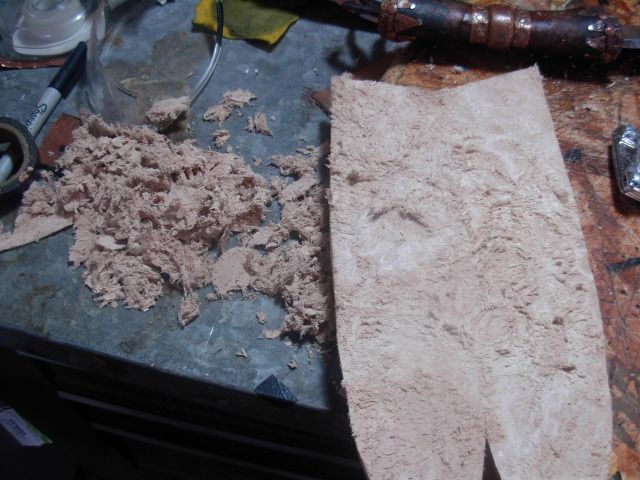
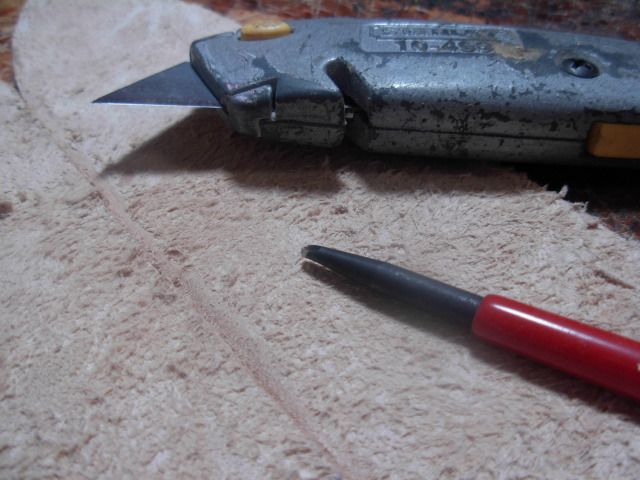
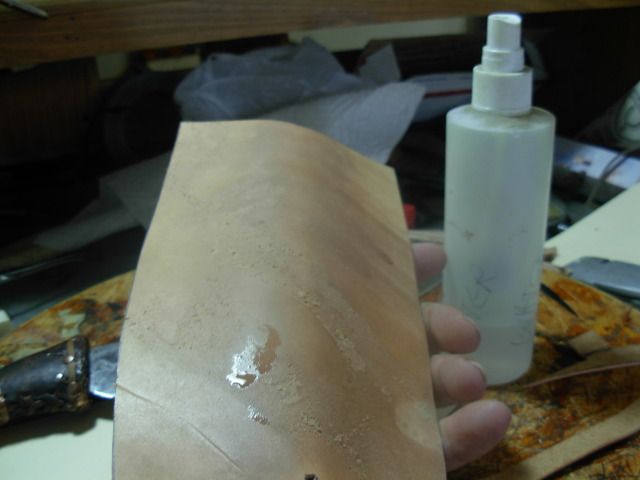
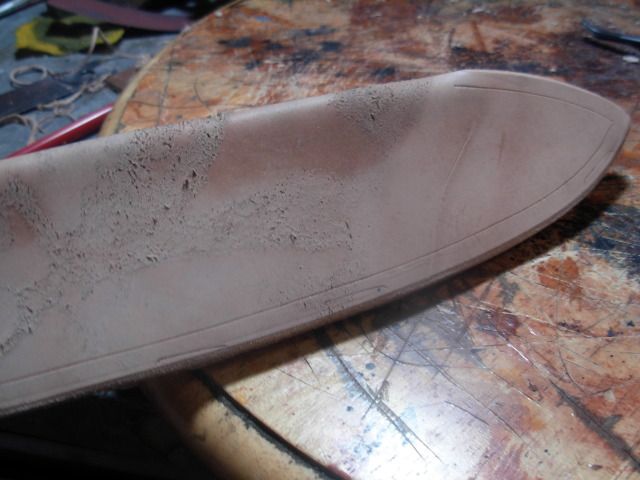
Dry rawhide is a tough material to cut but tin snips make short work of it. Traced my patterns with the rough side out for front and back with a red ink pen. The dye will cover the red ink if any is left on the rawhide. Also got my coffe can of hot water to soak the pieces in to soften them up.

004-19.jpg


I also cut some rawhide lace. Soak everything in the hot water and pull it out and dye it while still wet. I only dyed the outside of my wrap pieces so I'll end up with some color variation and a kinda translucent effect.

007-20.jpg


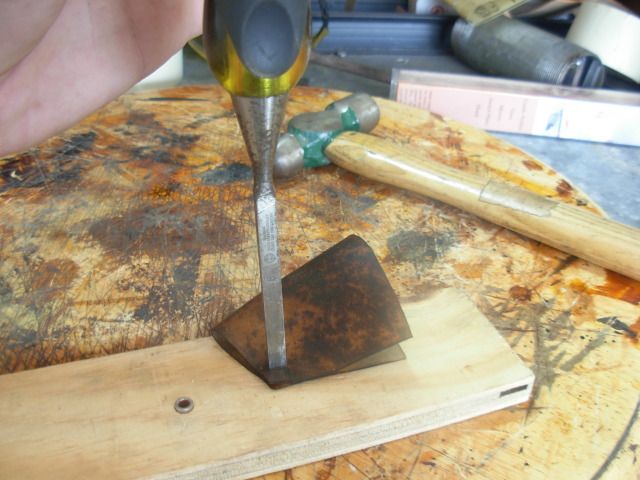
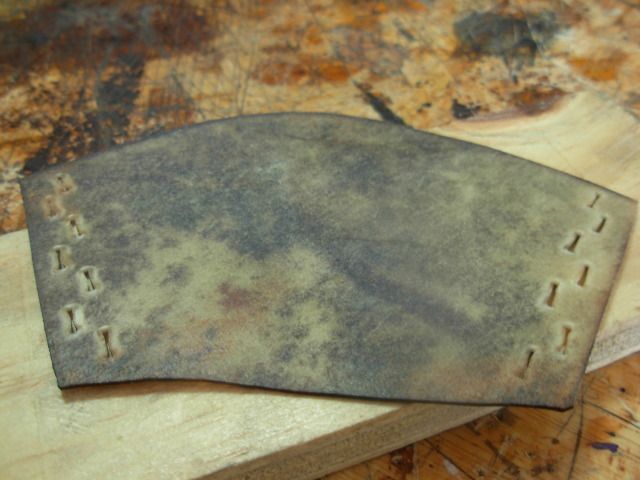
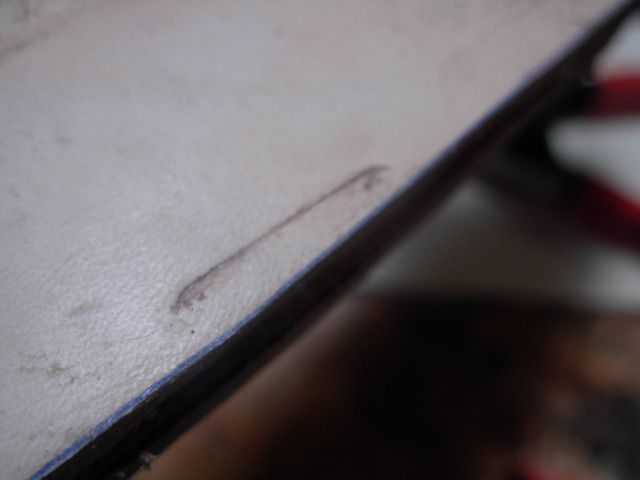
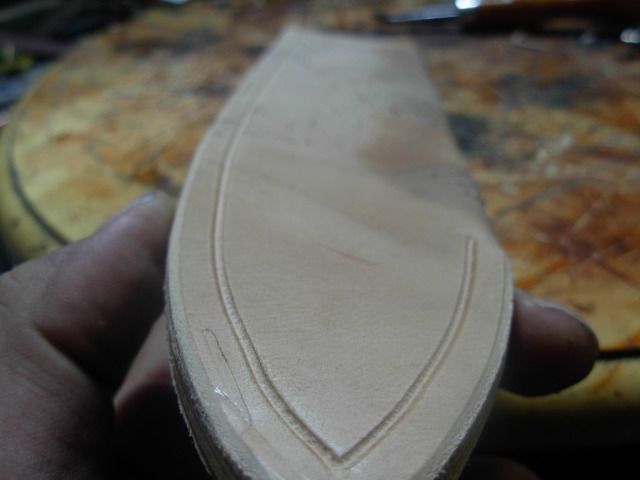
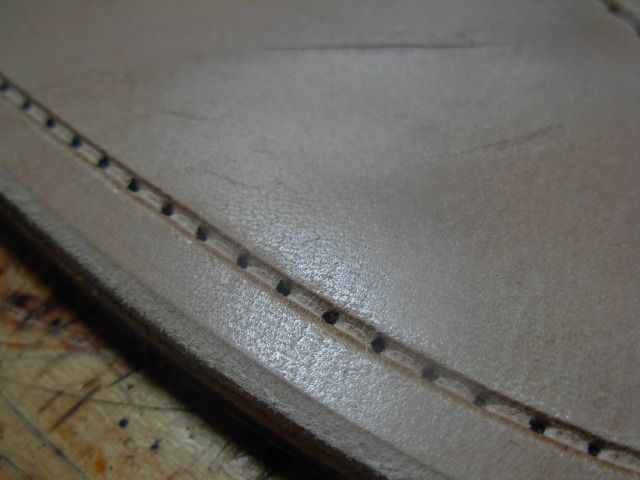
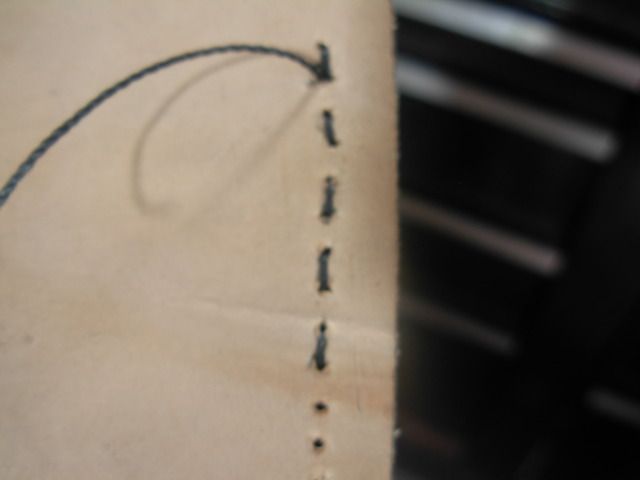
I don't have a special lacing chisel so I just used this 1/4" wide wood chisel. Folded the piece around and chiseled both sides at once so I've got a matching pattern on both sides.

008-15.jpg


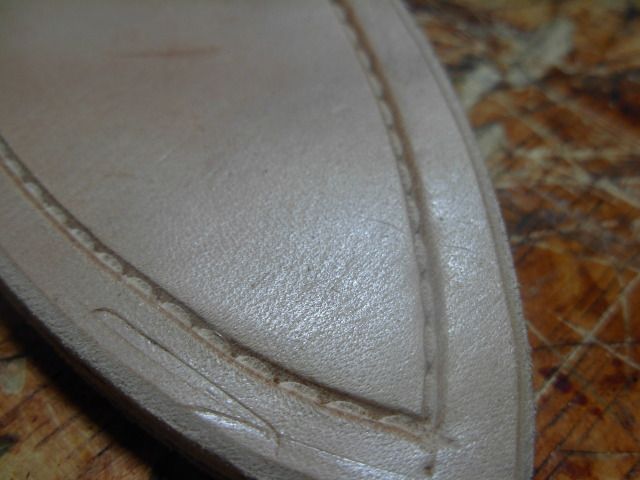
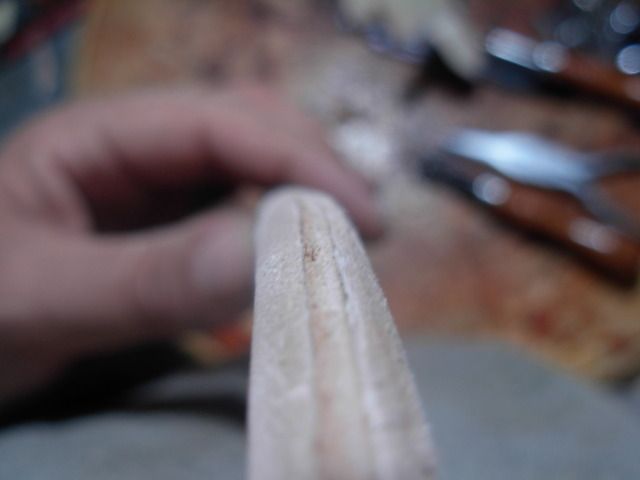
Here's a shot of the inside of the wrap. Had I dyed the inside it would come out a far more solid color

009-13.jpg


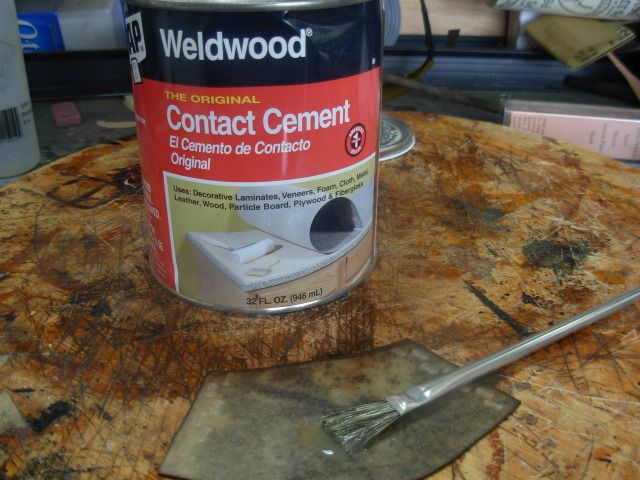
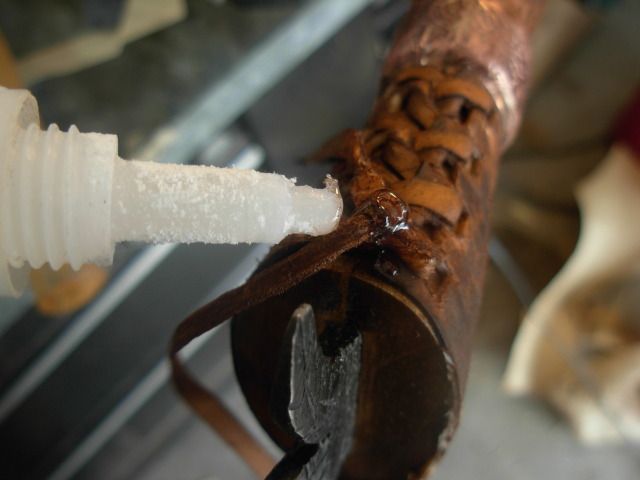
This is what I use for gluing leather. Weldwood contact cement which is a direct replacement for Barge cement thats cheap and available just about anywhere. I glue both pieces then let the cement tack up for a fe minutes then stick them together

010-13.jpg


Getting the wrap placed where I want it. I didn't cement the area where the lacing will be

011-14.jpg


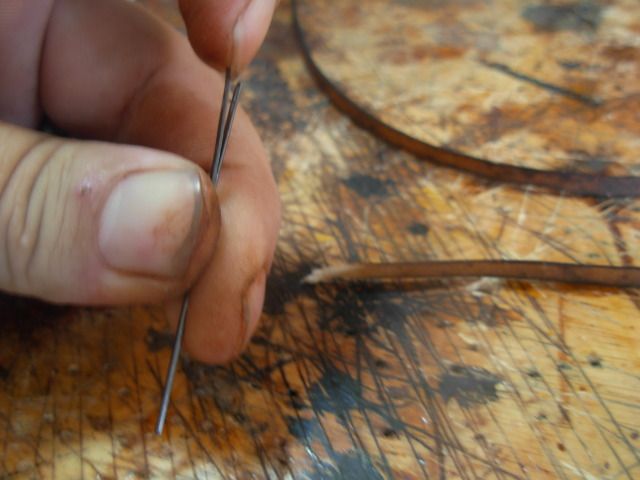
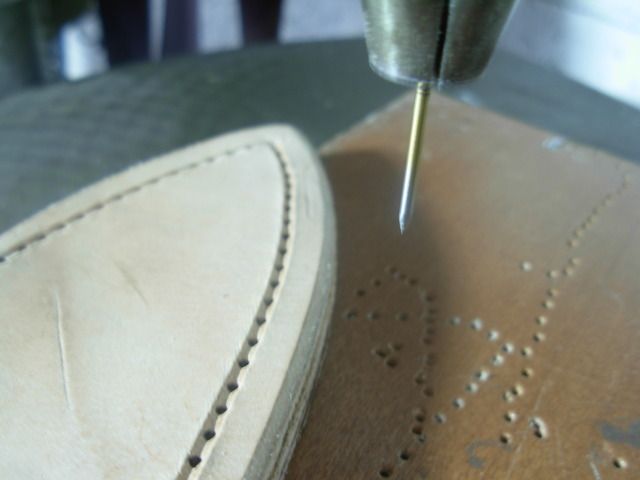
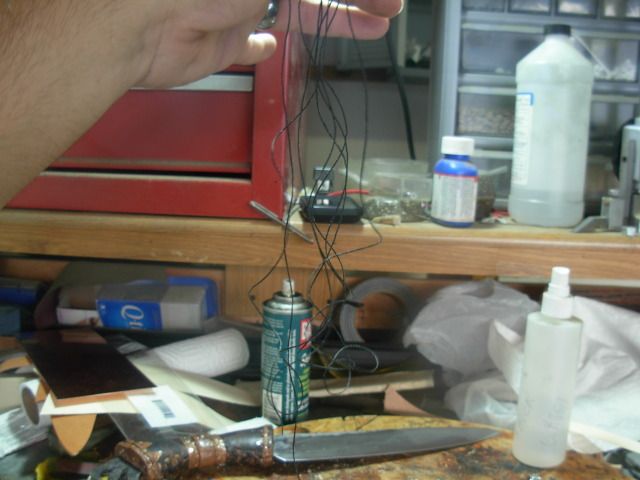
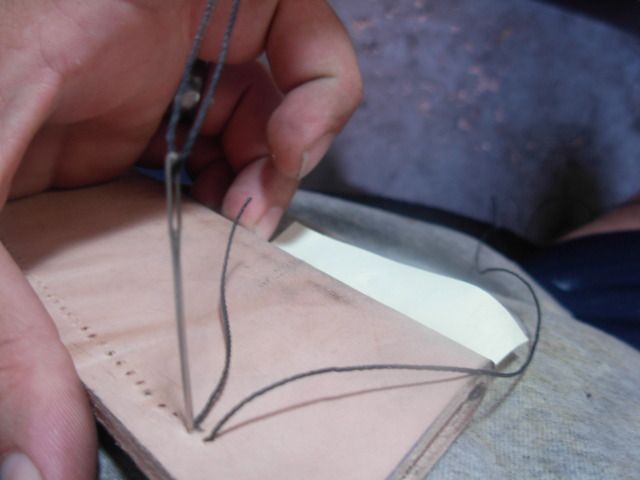
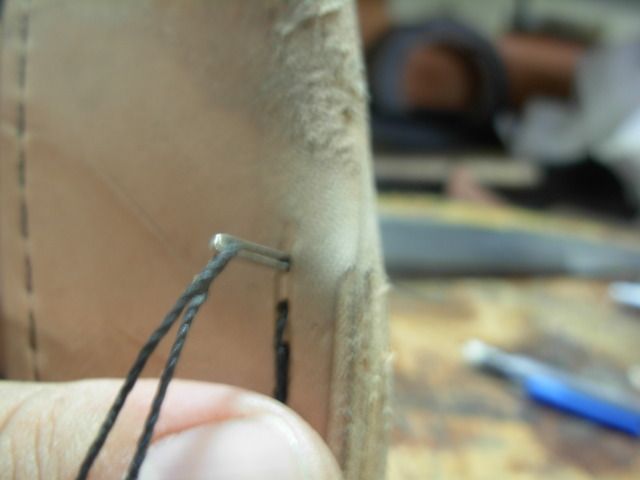
I thought I'd throw in a pic of a Lacing needle just in case some folks aren't familiar with them. They are the ticket for anything "lacing"

012-13.jpg


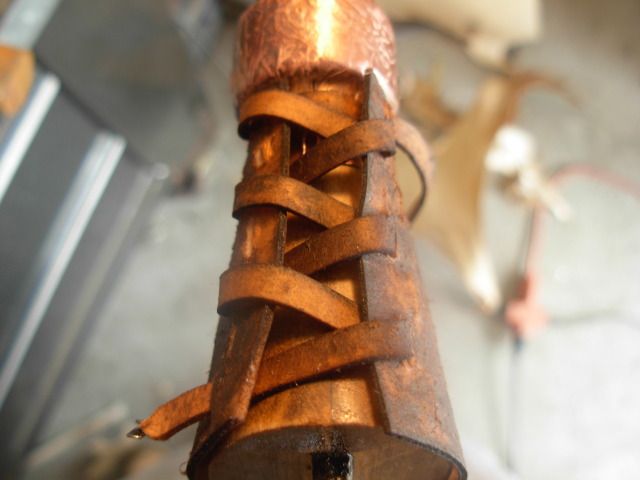
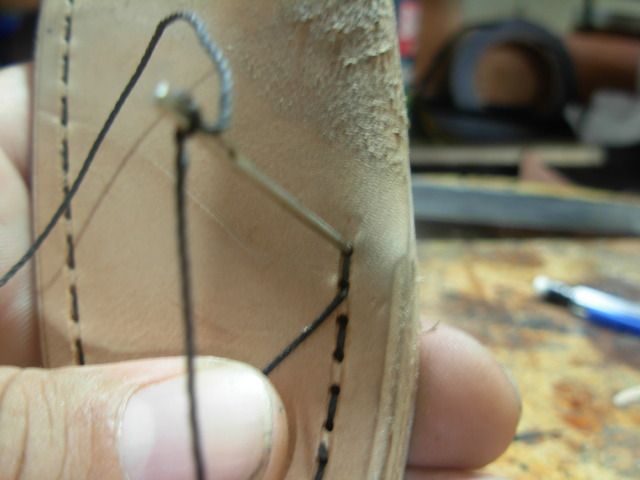
I probably should've got another needle and laced it tight as I went but on this short run I just laced one side then the other then pulled the lace tight one stitch at a time

013-13.jpg

014-13.jpg

015-11.jpg


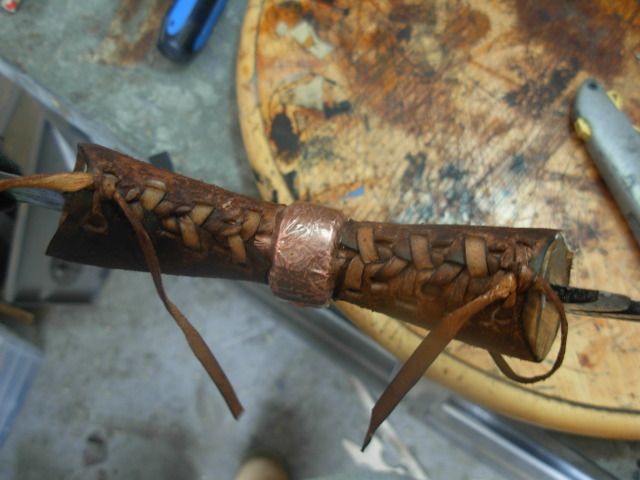
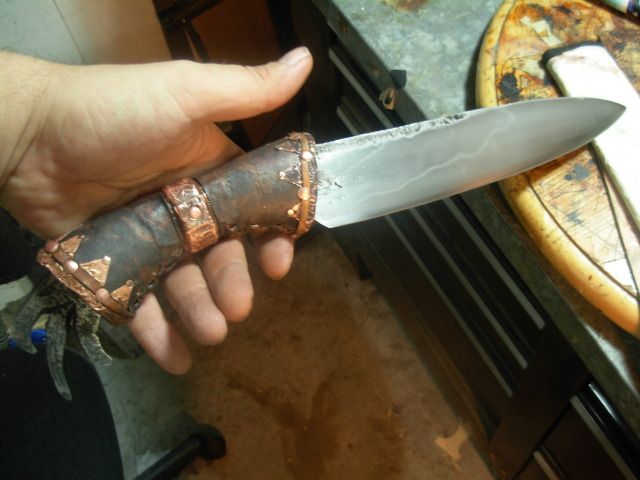
Repeat these steps for the front side and here we are with our rawhide wrapped handle

018-6.jpg

019-5.jpg


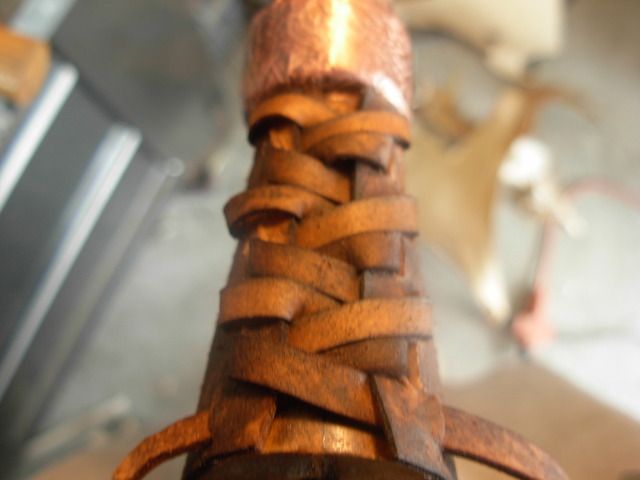
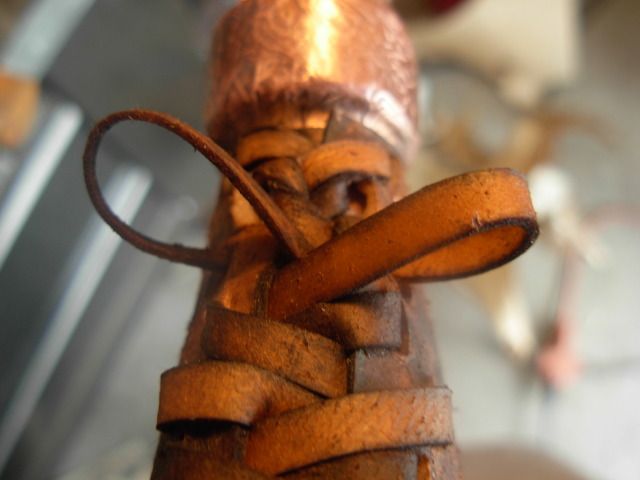
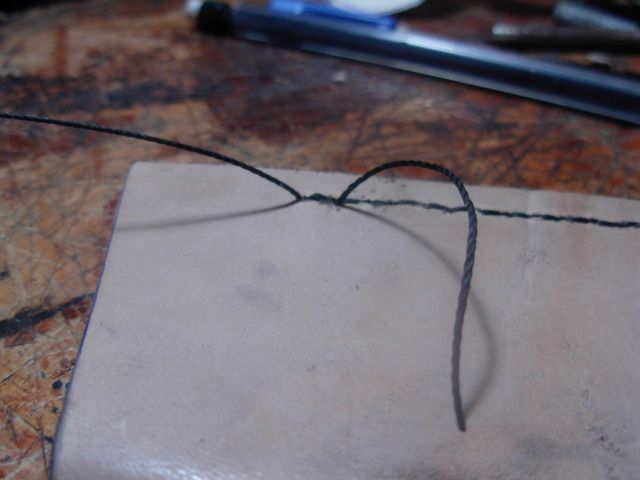
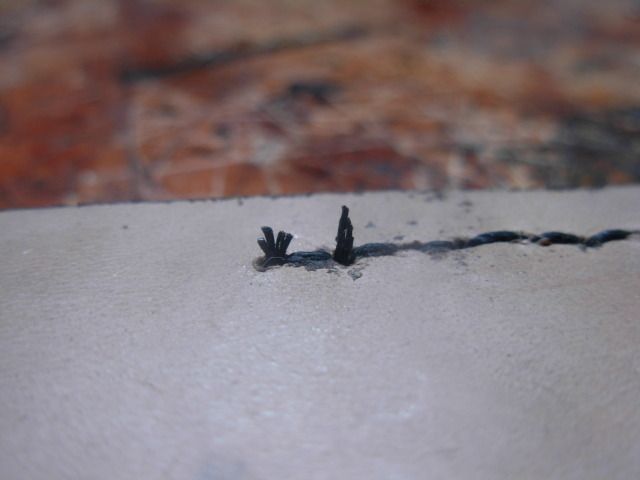
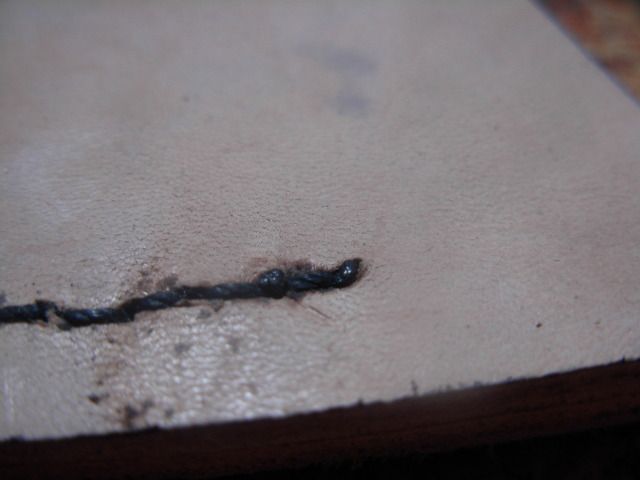
I tied my lace off with a box knot (I think) then soaked with superglue and worked the glue into the knot with a flux brush to lock the knot in place

021-4.jpg


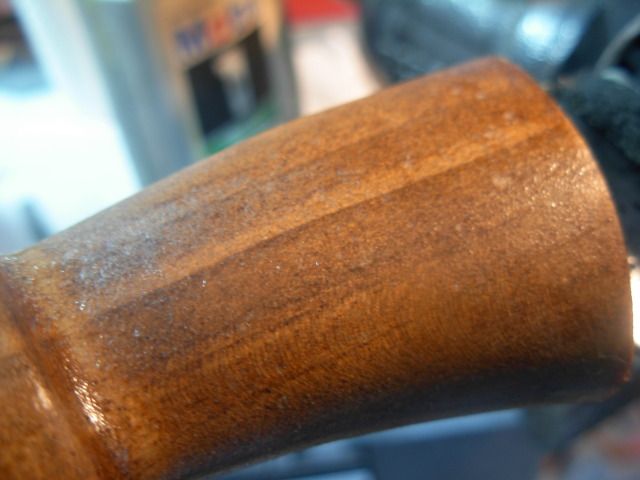
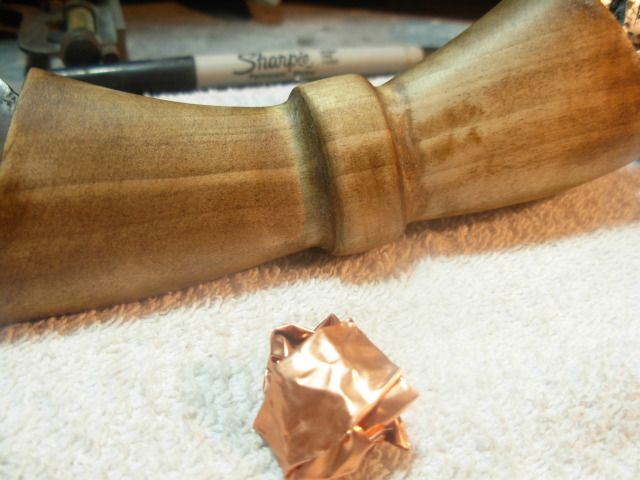
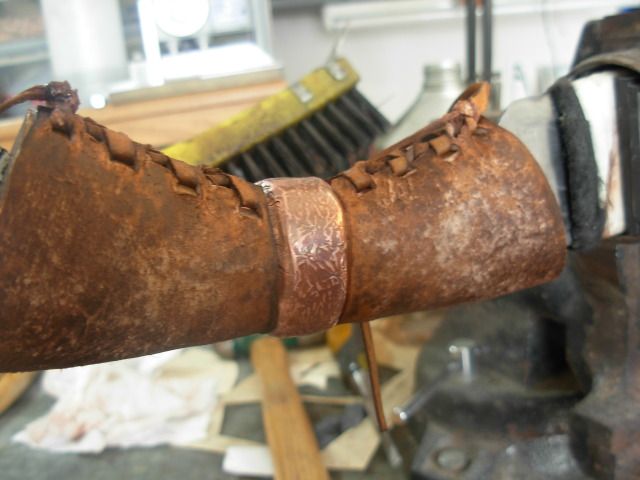
Adding some character to the rawhide with a wire brush

022-3.jpg


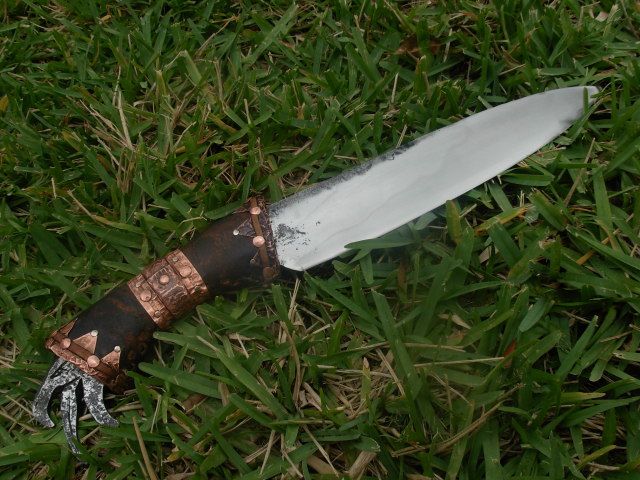
Trimmed the edges nice and neat to complete the rawhide wrap

023-3.jpg


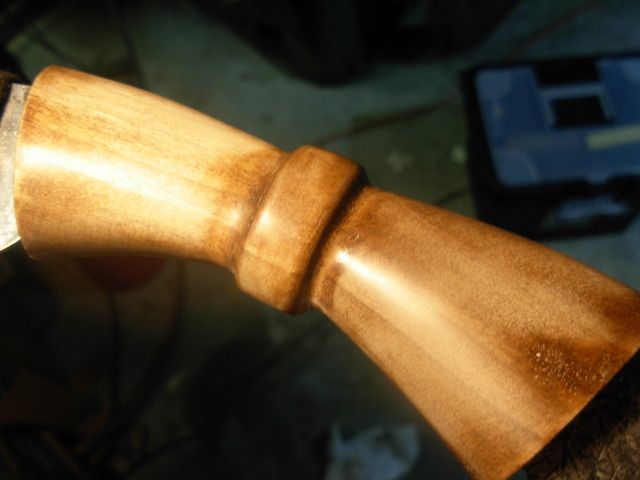
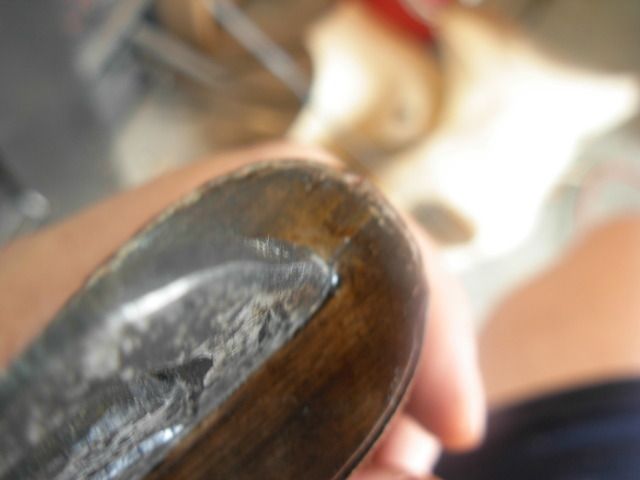
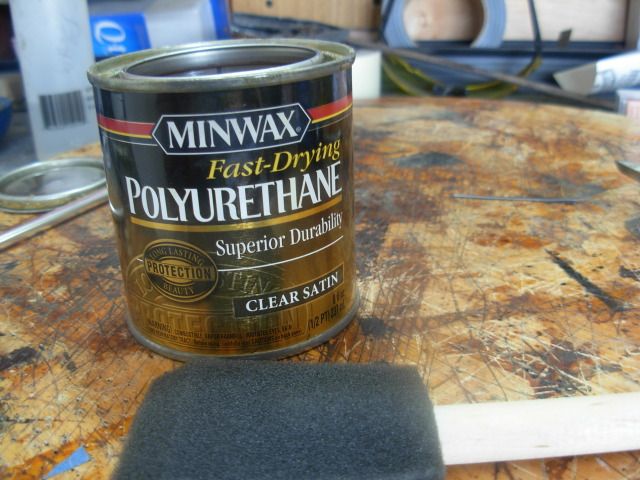
Finish coat for the rawhide

024-3.jpg

025-4.jpg


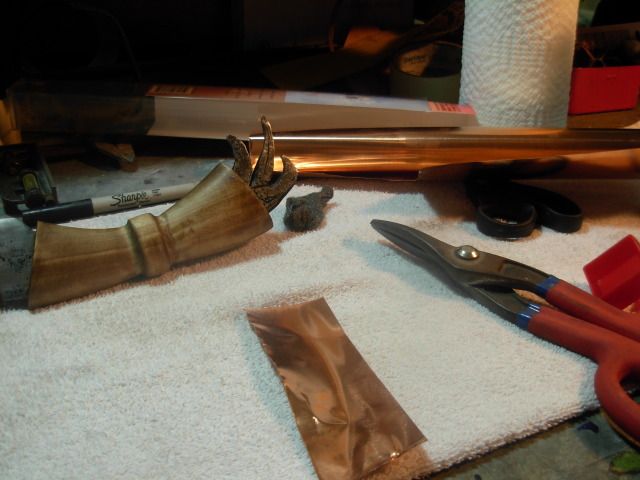
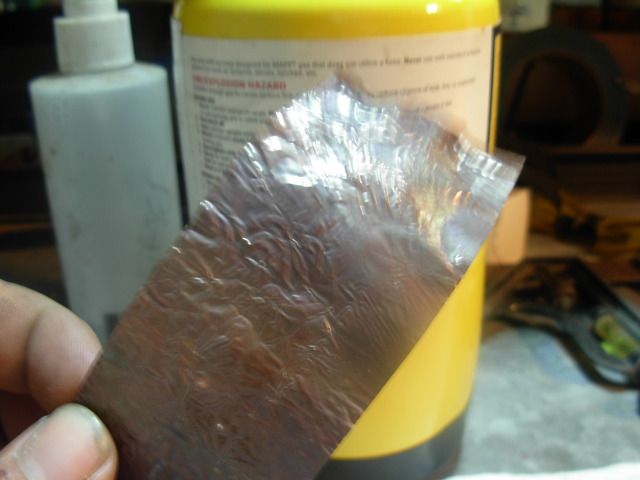
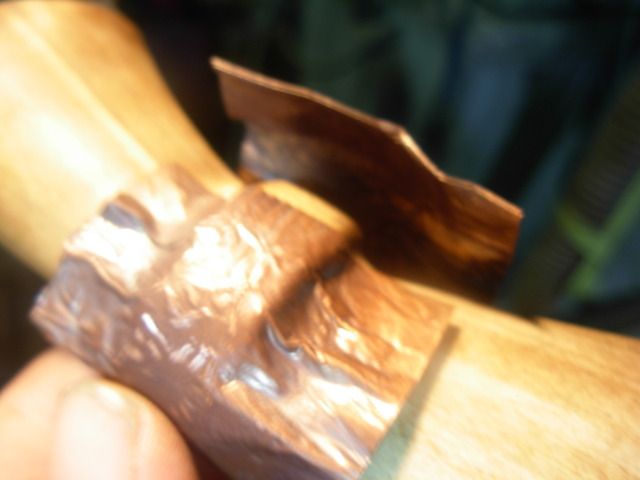
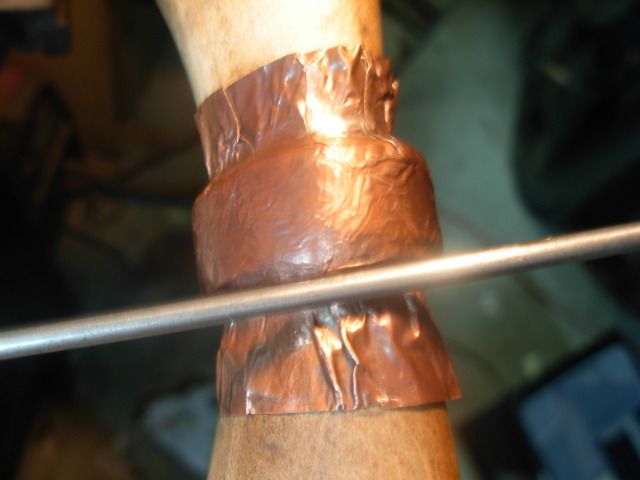
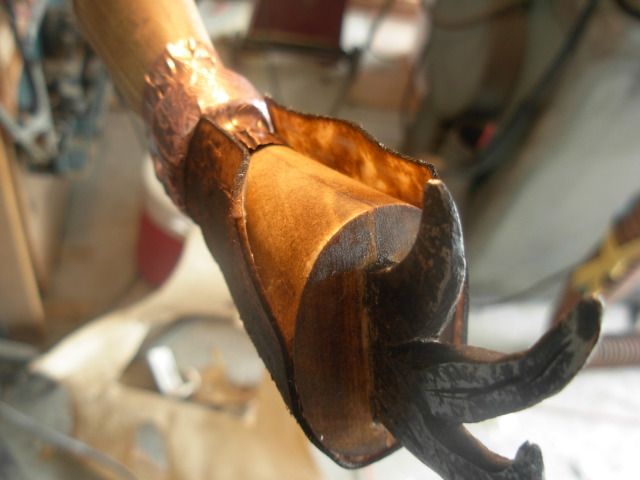
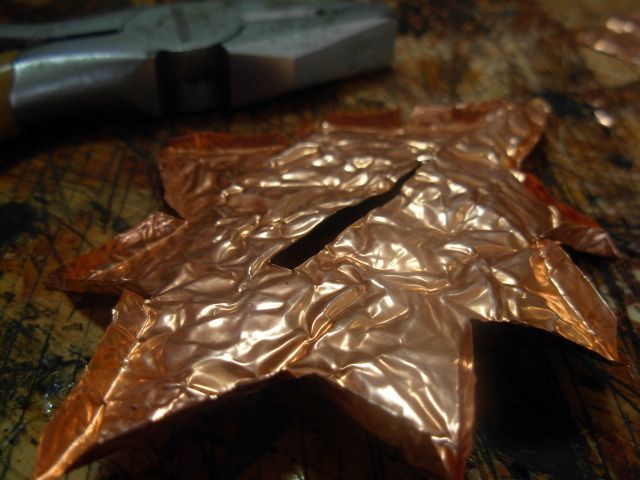
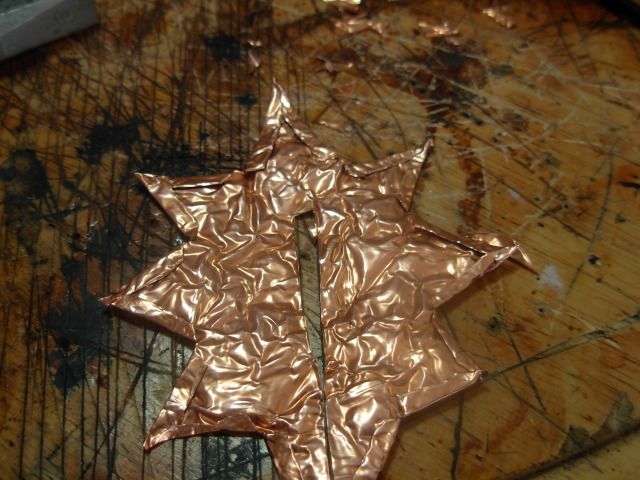
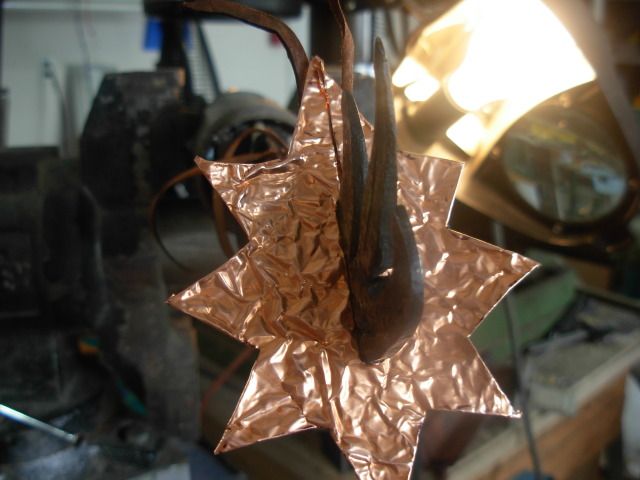
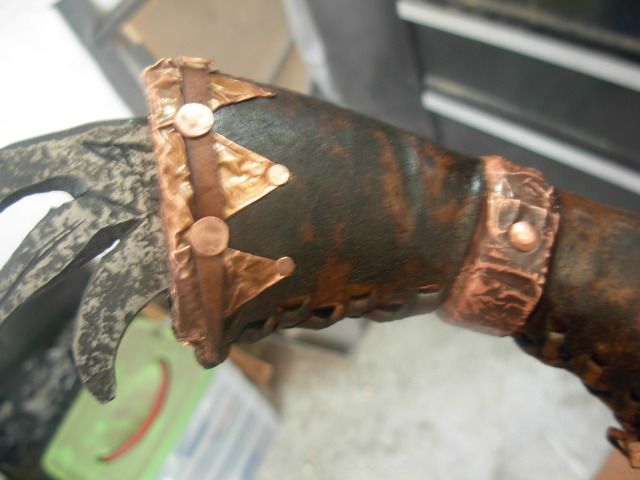
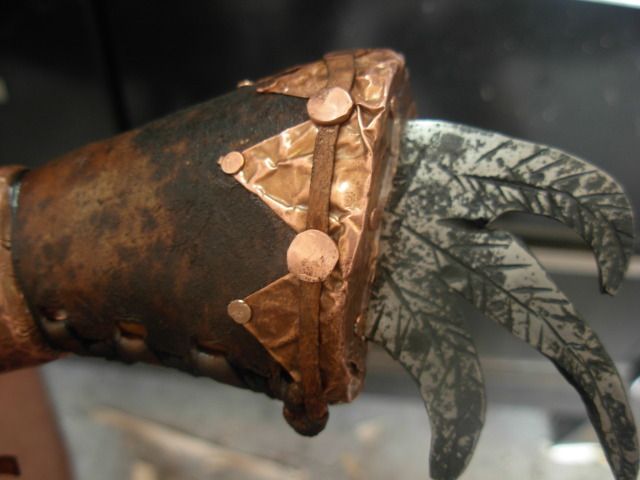
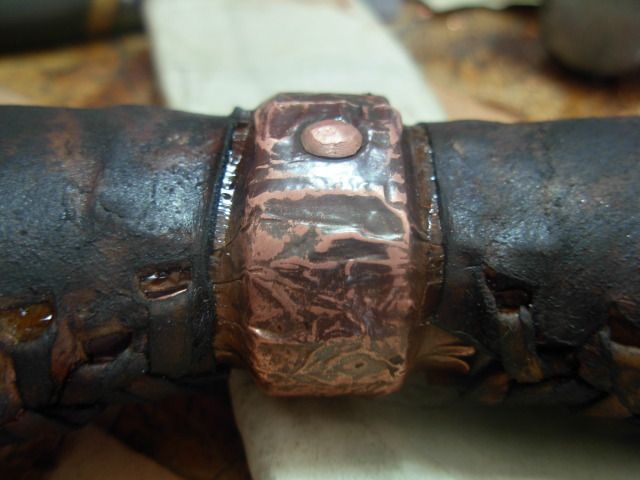
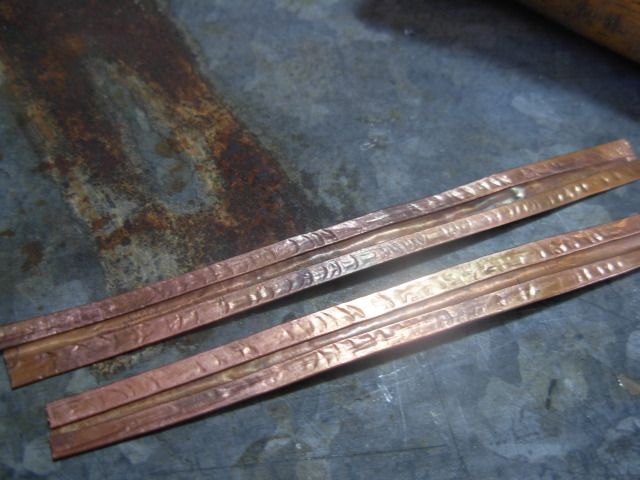
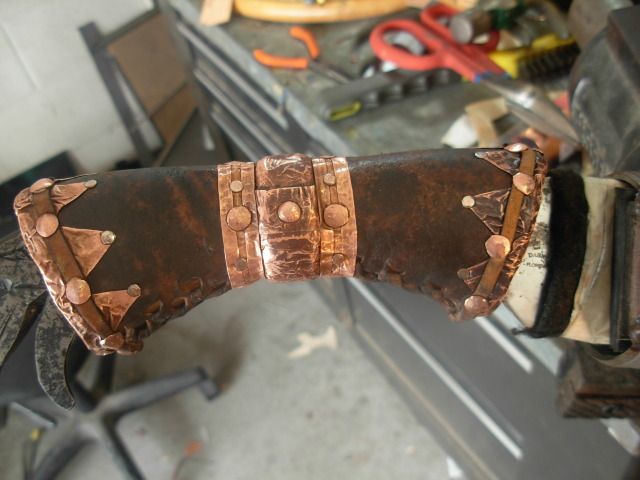
Cut some copper, crinkled, flatened, traced paper pattern, cut oversize, folded edges under, flash with heat, fit to handle

028-3.jpg

029-2.jpg

030-2.jpg

031-1.jpg


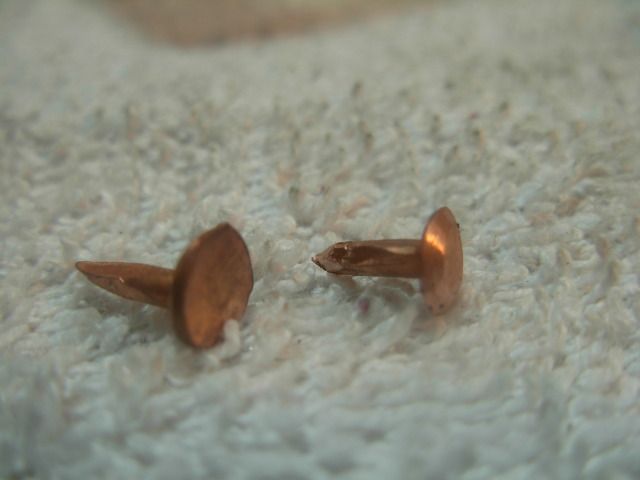
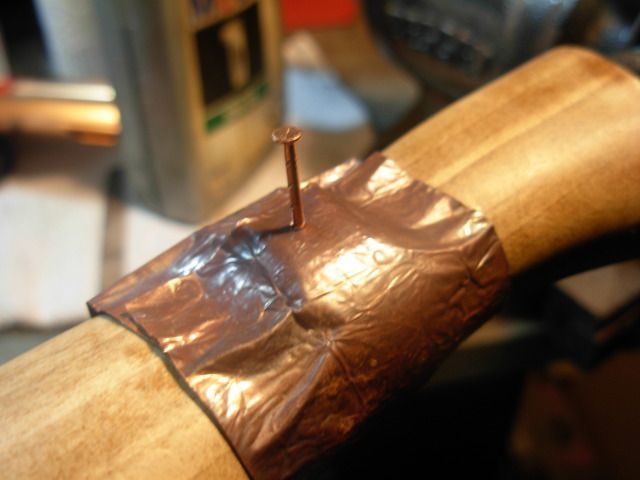
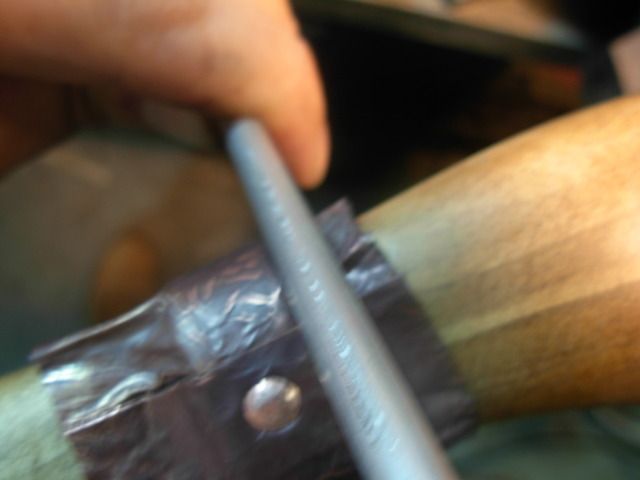
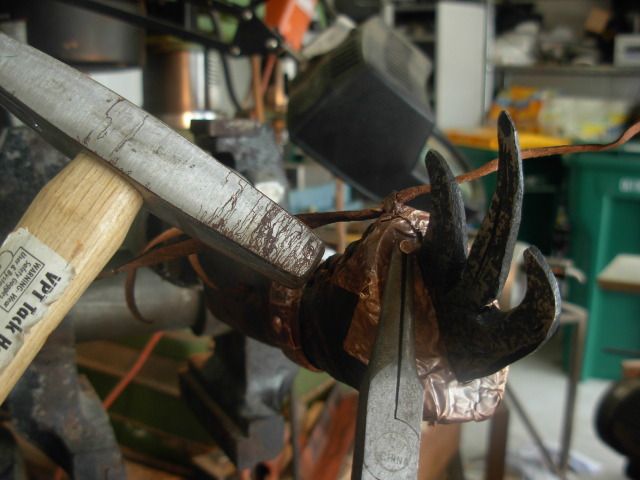
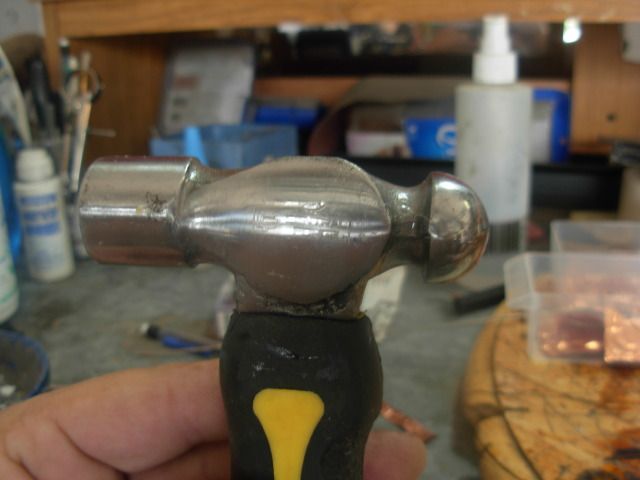
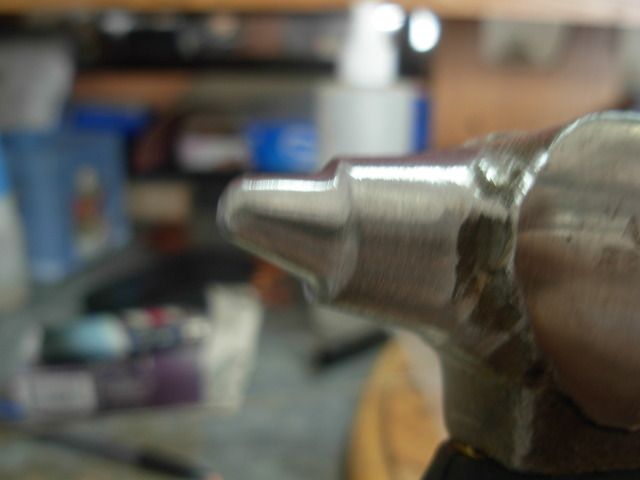
Using a tack hammer and some needle-nose pliers to set my copper tacks. Had to shorten the shank on all the ones with the small diameter head. Snipped the shank off with dykes and ground a chisel point back on.

032-1.jpg


Wrapped the ends of my lace around the handle and secured with tacks

033.jpg


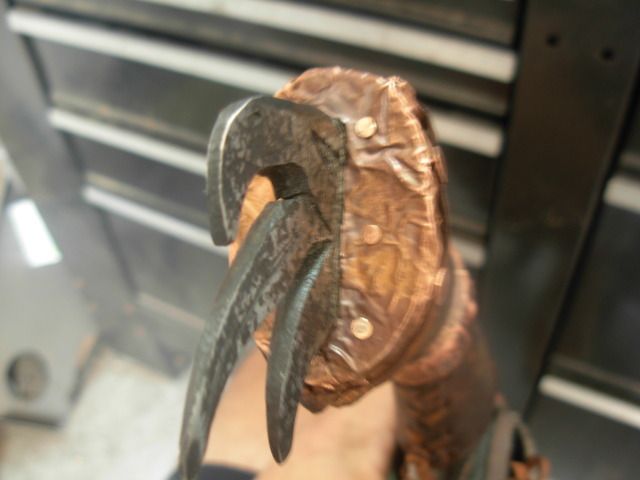
Also tacked the butt end

034.jpg


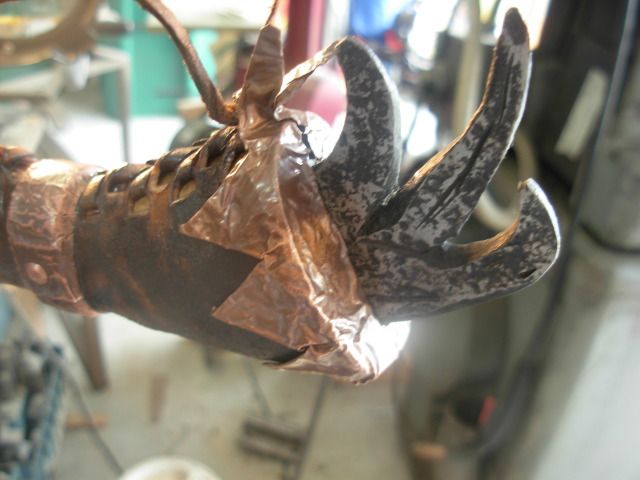
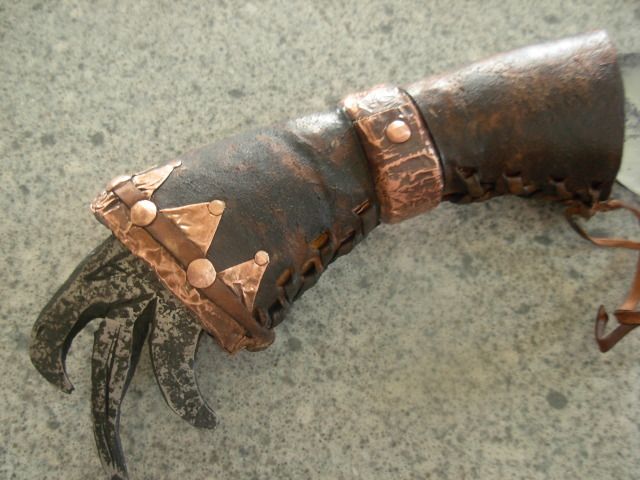
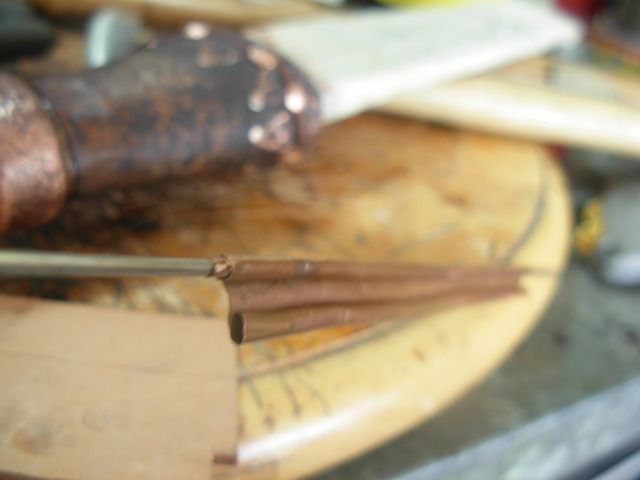
And the points of the copper sun rays

035.jpg


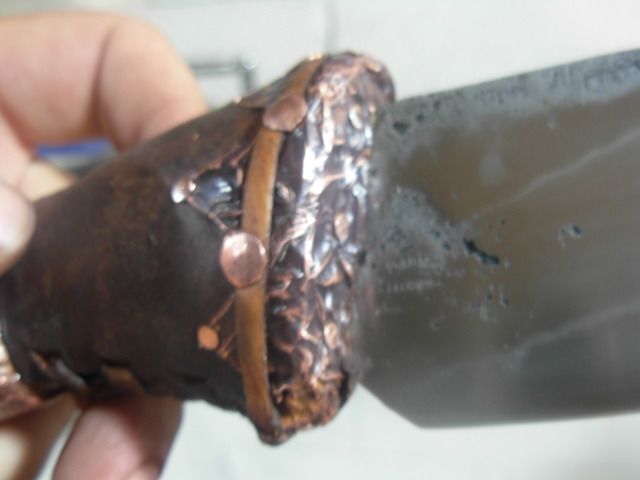
Here's a close-up of what the tacks look like before being hammer domed

036.jpg


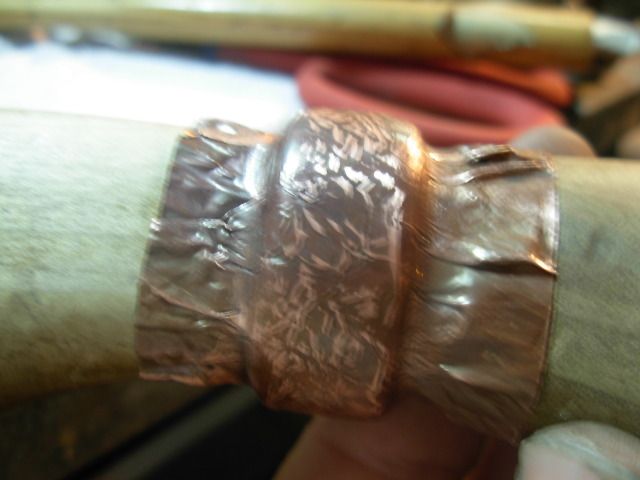
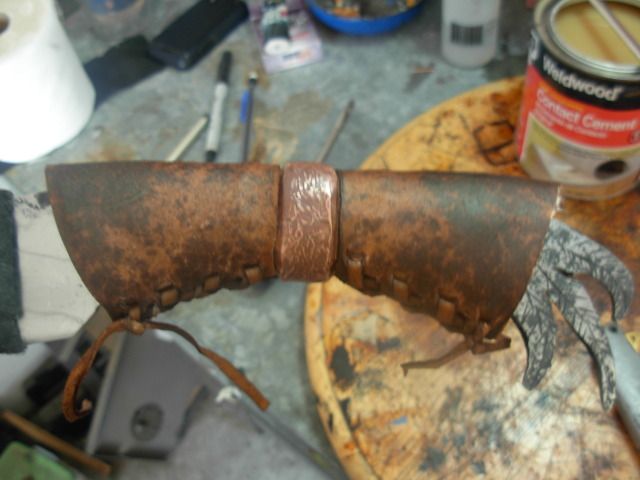
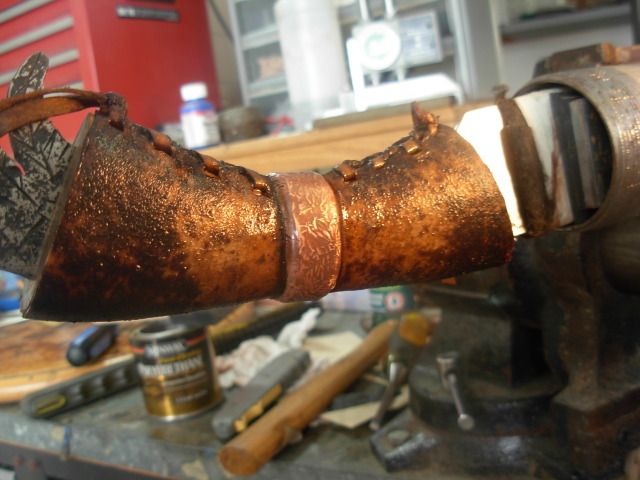
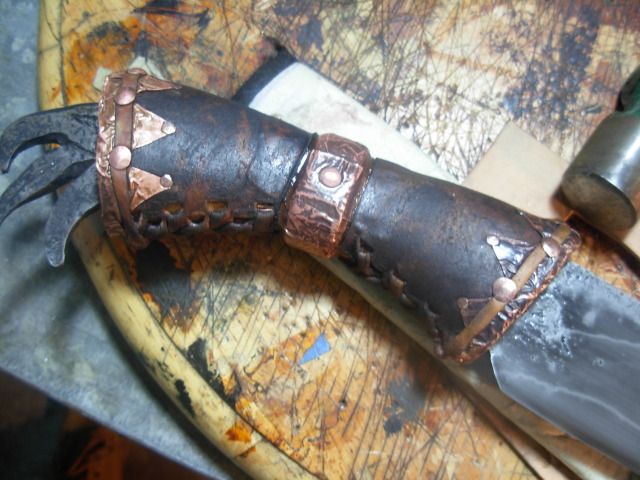
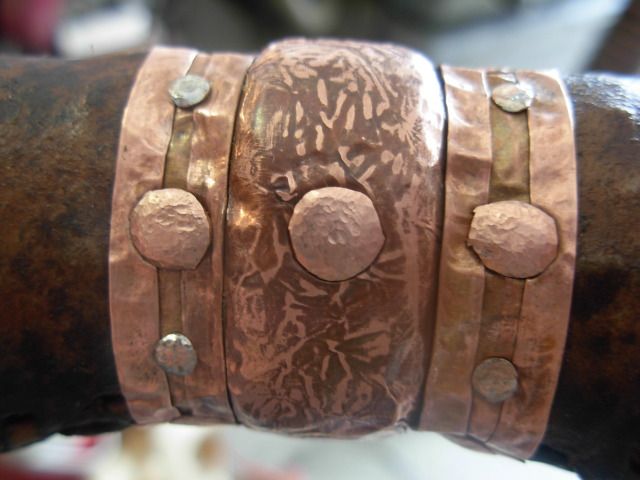
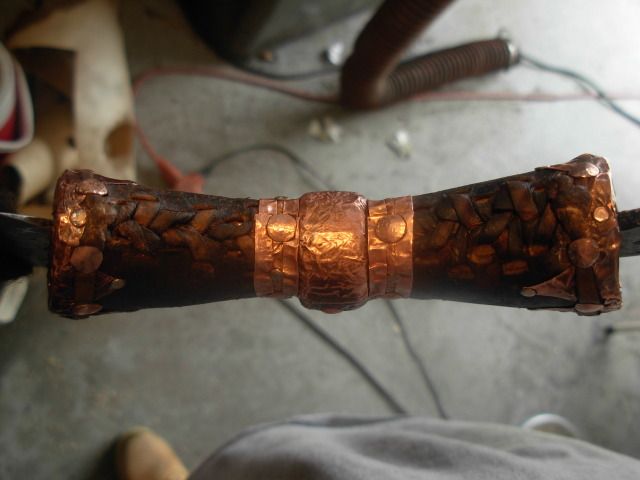
And here we are with the back end wrapped and tacked

037.jpg


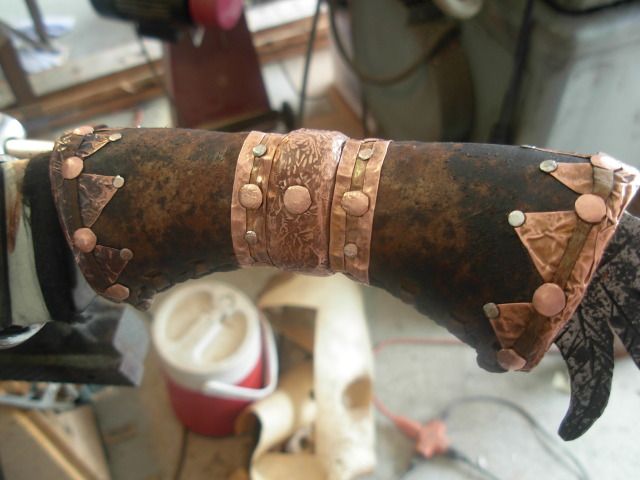
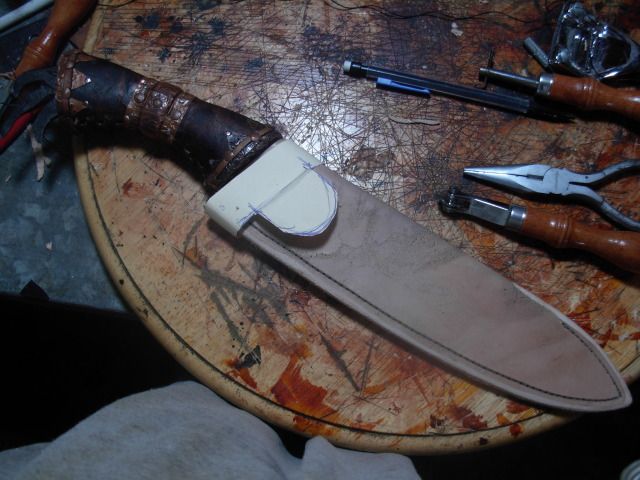
This was my afternoon session in the shop. I also pulled some evening duty and have the front copper wrapped and tacked to match the back. Still gotta upload those pics to Photobucket.

Take care fellas, -Josh
 
I needed something super thin to protect the blade while tacking the front of the handle. I taped it up and got it done while experiencing some pucker factor ;)

001-19.jpg


Did all the same steps to the front as the back.

002-21.jpg

003-19.jpg

004-20.jpg


I've got a little more to do with the Chiefs handle today but it's getting close to finished.

I guess just maybe I should start thinking about a sheath for this thing huh ? :)

Have a great day everyone- Josh
 
Sometimes even the most well laid plans suprize ya a little. It's been some time since I worked any rawhide and while the fact that it shrinks when it dries is great for getting a nice tight wrap the shrinkage caused the rawhide to pull back from my center bead a bit too much for my liking.

005-20.jpg


I've got an idea for a decorative copper wrap on each side of the bead. Cut some copper long enough to make the full wrap. Then I rolled the copper around a 1/16" piece of pinstock to create a beaded edge

006-20.jpg


Then bead the other edge

007-21.jpg


Then peen it flat to finish off the triple tier collar and make it a twin

009-14.jpg


Each collar got 8 hammer domed tacks, 4 big and 4 small.

015-12.jpg


I had a bit of an issue peening the heads on these collars because they were so close to the side of the center bead there wasn't enough room for the ball pein to get at the inside of the tacks head so some custom tooling was required.

This is a small ball pien I picked up on clearance for a buck at Harbor frieght eons ago. Tried it once and didn't like the stubby handle so it's been in a drawer forever.

010-14.jpg


And this is the new-and-improved tight quarters ball pein brought to you by 50x blaze and 80x Jflex :)

012-14.jpg


And here's some pics of the Chief and all 62 hammer domed tacks completed

013-14.jpg

014-14.jpg

016-12.jpg

018-7.jpg

019-6.jpg


Aside from the Shaman comming out looking like Kilroy The Chief came together pretty well for shooting from the hip.

What do y'all think ?

Still trying to decide just what I want to do for the sheath but once I get a plan going we'll continue on with that from here.

Take care Gents ! Josh
 
Well, I think it is mighty impressive..You have taken obstacles, overcome them and produced
functional art with materials readily available...Neo-Tribal
 
A great deal of well executed detail. Knife has an interesting spirit and seems to have a lot of motion. Great work!
 
Well gents, as per usual my knifemaking has been sidelined for a little while. Couldn't pass on the oppertunity to do a bathroom remodel and make a little extra spending change for the Bladeshow ! Got that out of the way so now the Chief here needs a pair of pants ;)

Got started by making the pattern for the sheath body with a manilla file folder. This is gonna be a Butterfly style design sheath from 10 oz veg tan. I make my pattern 1/2" to 5/8" past my blade's profile. This gives me plenty of leather to get the welt and stitch line exactly how I want it.

017-8.jpg


This simple pattern is the basis for the sheath body and welt and sticking to the pattern should result in a perfectly fitting sheath

018-8.jpg


This leather is Tandy's cheapest grade. It's some pretty rough stuff so I use the the areas like this spot with some range marks for projects like this and reserve the nicer areas for spit and polish sheaths. I bought this stuff on sale for a song so I'm using it but I'll go with something a bit better next time I buy leather.

019-7.jpg


I normally use a red pen for leatherwork but I hadn't used it in so long it was all dried up. Not gonna matter on this sheath so I just used a blue pen to trace my pattern on the leather

020-6.jpg


This is the part of the cheap leather thats most annoying but even this can be delt with to a certain degree. I skived a ton of the fuzzy crap from the backside and then ground it on an 80 grit and the flat platen to clean it up a bit

021-6.jpg


022-5.jpg


023-4.jpg


Now that I've got my sheath body done I cut my pattern for the welt right off my original template

024-4.jpg


I want this sheath to fold nice and tight around the spine of the blade so I used the freehand groover to cut a groove down the centerline and skived the edges of the groove out with a razor knife

025-5.jpg


Now I use my template to "locate" the welt on the body and trace it so I know exactly where to put the cement and will end up with perfect placement of the welt during glue-up. I also have my welt cut and ready. As a general rule of thumb a welt thats 3/4 the thickness of the blade will give a nice friction fit on the sides of the blade. I'm actually only about 1/2 the thickness of the spine here but should be fine do the sweet thin edge and this being a fold over style body and not a 3 piece style.

026-4.jpg


I use this little spritz bottle alot while working leather. Here I'm mainly focusing on the spine area to wet form the fold nice and tight.

027-4.jpg


This is something I've gotten away from but I did it here so I thought I'd show y'all. I'm usung spring clamps to get a test fit of my sheath before glue up. I've gotten away from this due to experience and not having many fit issues and the fact that these spring clamps will serieously mark up your leather. Not gonna matter here so a threw'em on to see if I needed adjustments

028-4.jpg


This is why I rarely do this anymore

029-3.jpg


It takes a few minutes longer but I like to glue-up one side at a time. Instead of a 3-piece slimy welt sandwich I prefer to focus on two pieces at a time and this has cured flaws in the welt for me.

030-3.jpg


All glued up and dried for a little bit I grind the welt smooth on my 80 grit belt then hit the sharp corner with the edge rounding tool to give me a nice smooth, consistant surface to run my edge groover along to create the stitch line

033-1.jpg


I ALWAYS do a dry run with the edge groover by pushing it backwards to check exactly how my groove will look.

034-1.jpg


Satisfied with that I cut the groove

035-1.jpg


Then I start at the tip and use my overstitch wheel to mark the stitch holes

036-1.jpg


Then I use a fine tip sharpie to mark the holes in black which just makes them easy to see while "drilling" the holes on the drill press.

037-1.jpg


Thats as far as I went last night but there'll be more to come fellas.

Have a great day- Josh
 
Kevin, I think the drawing will be June 11 th or thereabouts and will be conducted by the main man Johnathan Creason.

Before I get too excited about stitching up this sheath I need to finalize my plan a bit. I'm planning to finish the sheath with a center seam rawhide wrap and a copper "throat frog" (for lack of a better term) The throat will be pinned through the welt so I need to determine where it will be to decide exactly how high I want my stitch line to go. A bit more of that file folder and I've got a working plan and patterns for the rawhide and T/F

001-20.jpg


Since hand stitching is something with a bit of a learning curve to get a really attractive result so I thought I'd do a complete rundown of my process. That said it is actually really easy to get a very functional stitch job so newbies should feel confident in just going for it on their first sheaths. Most of my own frustrations have come from getting the stitching to LOOK good ;) and following these simple procedures give me the result I'm after.

My method for "drilling" the holes is the standard method of sharpening the shank end of a 1/16" drill bit to a point and drilling them with the drill press running. This method doesn't remove any leather and merely seperates the fibers and results in nice tight holes that'll look great once stitched. Of course use a wood backer and go slow while drilling

002-22.jpg


To determine the length of the thread needed I make my thread 8 times the length of the stitch line then add about a foot of extra. I do waste a bit of thread with this system but I'm ok with that as insurance against running short

003-20.jpg


004-21.jpg


This is how I go about doing a saddle stitch. I find this method GREATLY prefferable to using the two needle method ! I start by comming from back to front in the second hole and pulling all the thread through except a couple inches of tail that will be left hanging out of the second hole on the back side.

005-21.jpg


Then go back down through hole #1

006-21.jpg


Then back through hole #2 completing the first stitch and locking the tail in place.

007-22.jpg


Then continue stitching all the way to the other end. On this first trip around it'll go quick and have a skip line appearance

008-17.jpg


I always double stitch the first and last stitch on my stitch lines so when I get to the other side I go through the last hole once

009-15.jpg


And then twice

010-15.jpg


Then continue back around to the beginning where I finish by completing the second stitch between the first and second holes and have my final tail hanging out of hole #1 on the back side.

011-15.jpg


Now I pull my tails tight and cut them off about 3/32" to 1/8" in length

012-15.jpg


Then melt the tails in nice and neat with no giant unsightly melty blobs

013-15.jpg


And there she is with stitching complete-
back side-

014-15.jpg


Front side-

015-13.jpg


Grind the welt to a pleasing round shape

017-9.jpg


And here's the Chiefs sheath body ready for the rawhide wrap.

018-9.jpg


Take care fellas !

Josh
 
nice tutorial on the sheath. thanks. I still only work with wood (which reminds me, I need to make a sheath for a short sword that I have been avoiding.)

kc
 
Thanks for the kind words Fellas ! They are appreciated !

Kevin, What was that ...... ? ..... Your going to do do an in-depth wooden sheath WIP for our sheath section here in the DogPound while sheathing your sword. EXCELLENT ! You sir are a gentleman and a scholar ! Oh... I read too much into your post :( LOL. In all seriousness though I'd enjoy it if you did and would encourage you to give it some thought ;)

This thing should start really reseambling a sheath tonight !

Thanks again ! Josh
 
hey josh i think i read that in kevins post allso or was that just you?
Anyhow i sure would like to see that allso.
And josh your whole wip looks great!!!
 
Back
Top