
You are using an out of date browser. It may not display this or other websites correctly.
You should upgrade or use an alternative browser.
You should upgrade or use an alternative browser.
Did someone say Neo Tribal KITH ?????
- Thread starter Josh Dabney
- Start date
Josh Dabney
Moderator
Wish I had something cool to report but alas ... it is not so ")
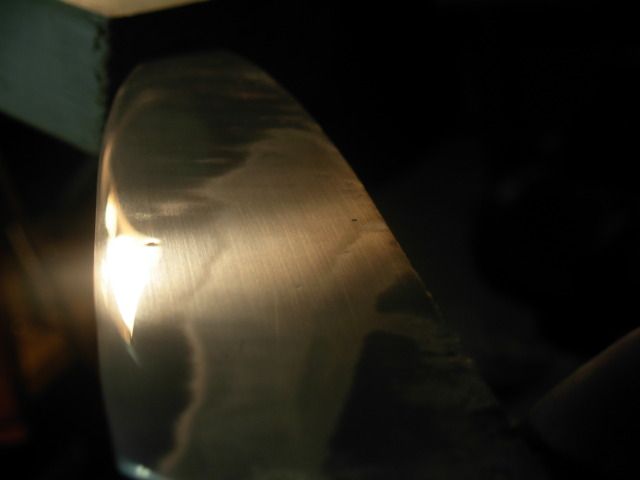
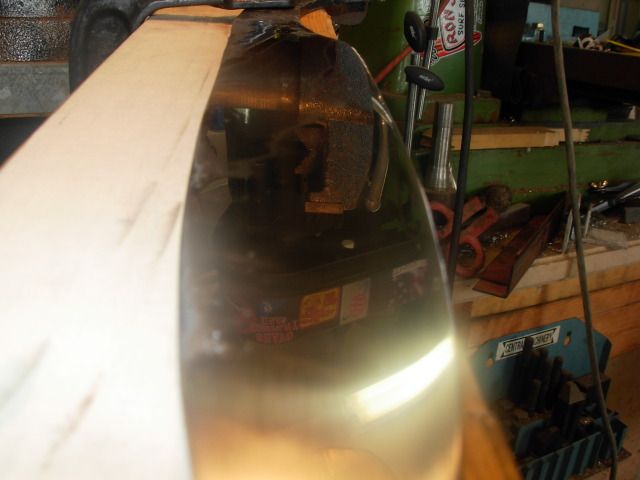
The only real report is that I'm fed up completely with junk sand paper as I'm in a situation where either the 600x Klingspore is too rough or the 800x Klingspore is too fine for a sane polish on my blade
I took it back to 600x 45 degrees the other direction and I'm back to this- The 800x paper just is not cutting the mustard.
Soooooo.... I FINALLY took the plunge and ordered up a bunch of Rhynowet Redline from Supergrit in 220x to 1500x this morning so I'm throwing project Tribal Chief on the back burner until the new paper gets here.
Hopefully next week will bring some more progress on her !
Take care, Josh
Josh Dabney
Moderator
Well the Rhynowet showed up in the mailbox today so I'm back in the game as of tonight. If you guys haven't took the plunge and ordered some Rhynowet Redline paper yet I HIGHLY rocommend giving some a shot. A friend gave me a few sheets to try out and I was sold on it instantly.
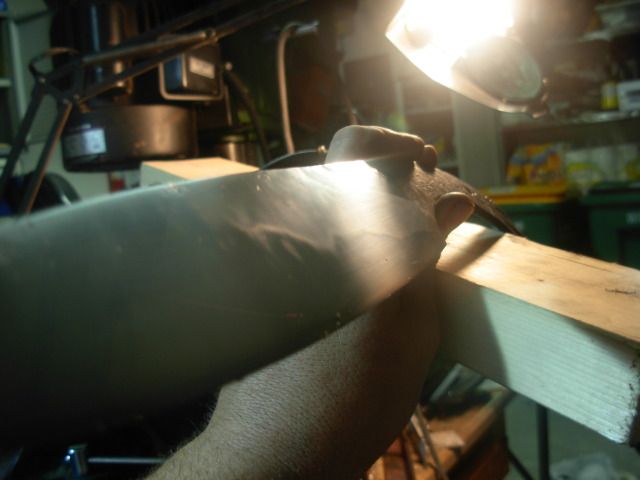
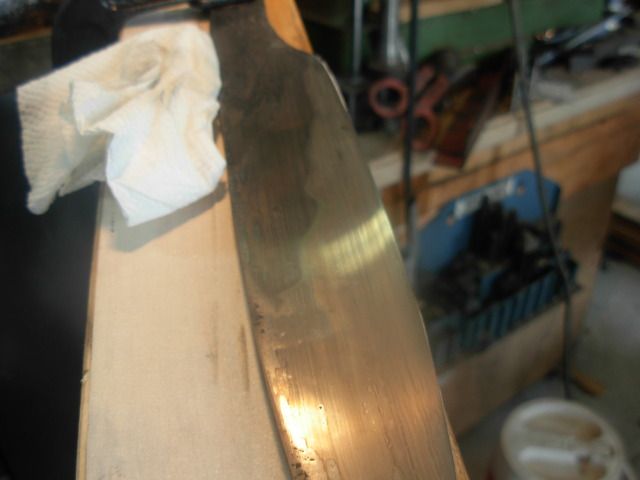
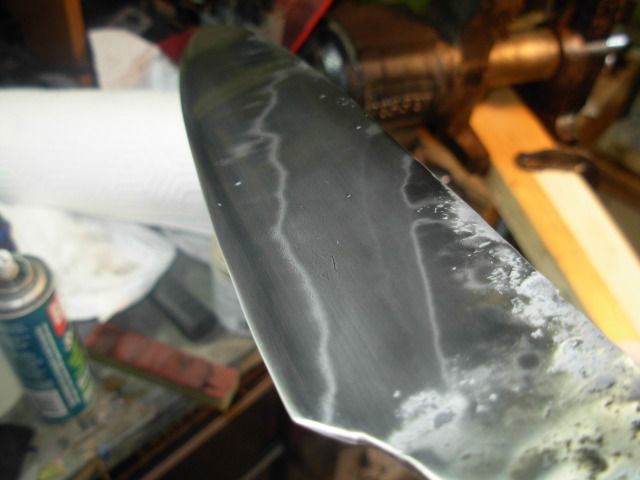
While I'm stuck with the paper the TRUE Tribal Bladesmith would use verious natural stones to polish the blade but ALWAYS get the final polish done on the ribs of his enemies. Polished on bone and etched in blood ! Brutal !
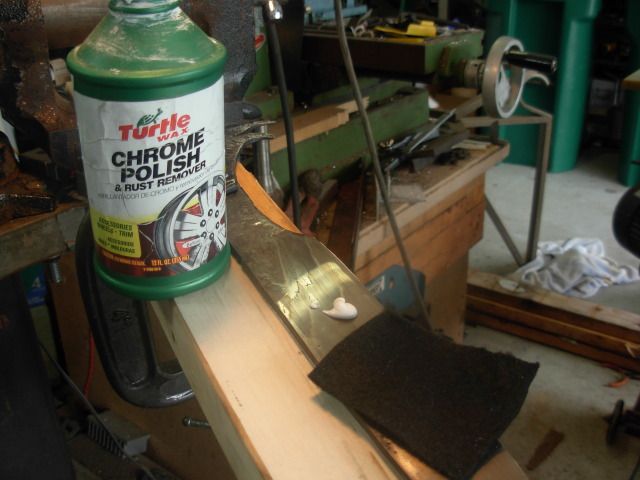
Anyway I started back at 600x then went 800x, 1200x, and finished up at 1500x. Another 10 second etch in the Ferric followed by carding the blade with 0000 steel wool and a little Mobile 1 oil then cleaned and polished with Turtle Wax Chrome Polish on a piece of felt. I still have to do the other side of the blade so I'm done with this side until side 2 is caught up them I'll etch and polish until I get lucky and see someting I like.
Snapped a bunch of pics to get a few good ones. When she's done I'm gonna have to set up the light box and try for some decent pics but this will do for now-

Take care Fellas- Josh
While I'm stuck with the paper the TRUE Tribal Bladesmith would use verious natural stones to polish the blade but ALWAYS get the final polish done on the ribs of his enemies. Polished on bone and etched in blood ! Brutal !
Anyway I started back at 600x then went 800x, 1200x, and finished up at 1500x. Another 10 second etch in the Ferric followed by carding the blade with 0000 steel wool and a little Mobile 1 oil then cleaned and polished with Turtle Wax Chrome Polish on a piece of felt. I still have to do the other side of the blade so I'm done with this side until side 2 is caught up them I'll etch and polish until I get lucky and see someting I like.
Snapped a bunch of pics to get a few good ones. When she's done I'm gonna have to set up the light box and try for some decent pics but this will do for now-
Take care Fellas- Josh
Wade Hougham
Well-Known Member
JOSH,
Looking good!!!!!! :clap: Wade
Looking good!!!!!! :clap: Wade
Josh Dabney
Moderator
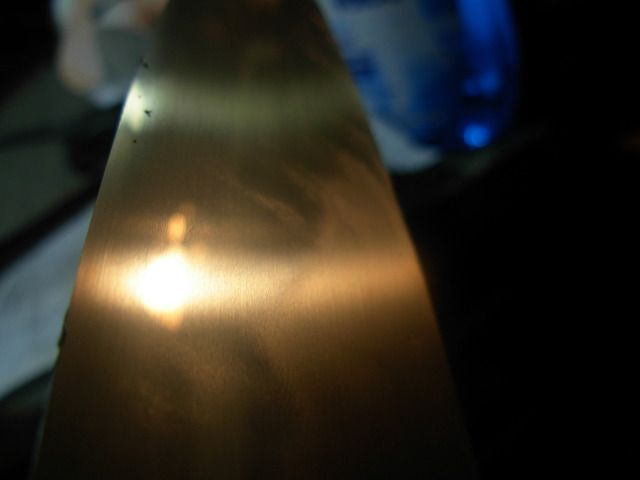
Progress has been a little slow. Mother-in-law's birthday party tues night but got a good bit of work done on the opposite side of the blade last night.
The hamon's not an perfect match to side one which makes for an interesting blade. Kinda like beautiful twin sisters that aren't identical. Both beauties and 99% the same but each with their own unique qualities that make them one of a kind.
I've still got some work to do at 1500x to tune up my lines and get the last few scratches out but I'm getting very close on the blade and looking forward to moving onto handle work.
I'm still not 100% sure where I'm going with this handle but I've got some crazy ideas that may or may not pan out. I've got a feeling this will evolve as I go and the materials let me know what they wanna do
Take care all - Josh
Josh Dabney
Moderator
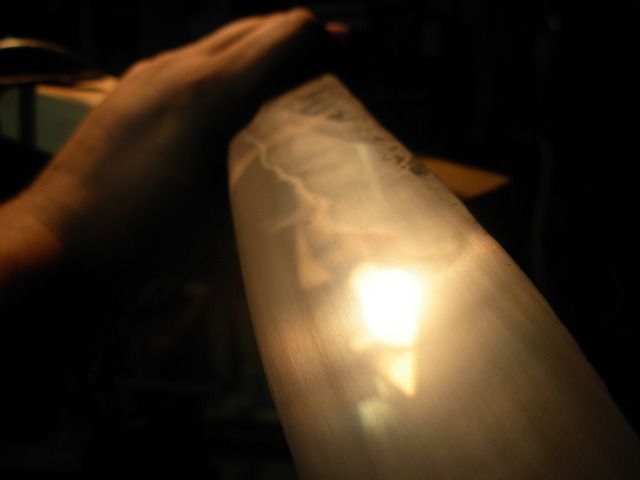
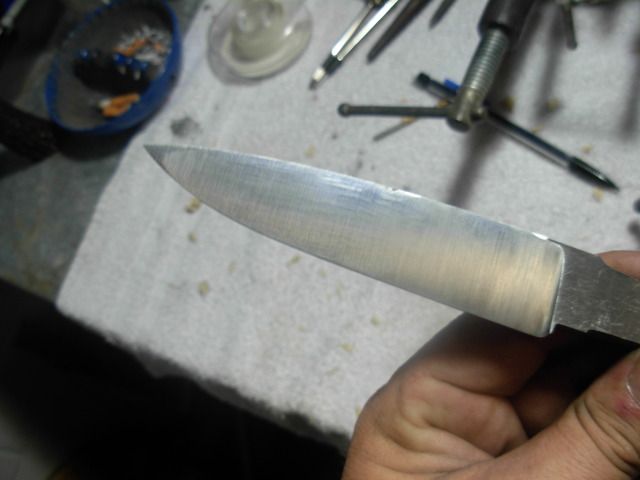
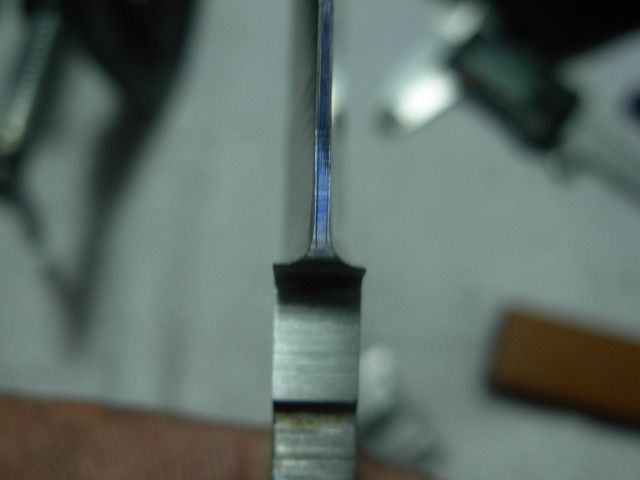
I continue on with this adventure in polishing as much as time allows. Getting to a true 1500x finish is an exersize in sheer tenacity, LOL, But I'm FINALLY there with the Tribal Chief.
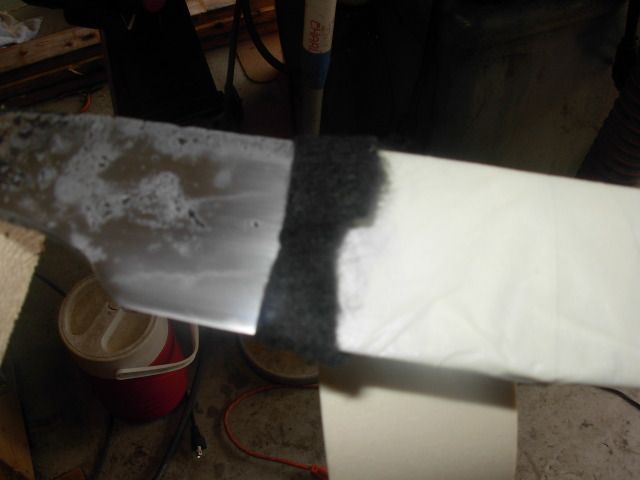
My methods are admittidly a bit crude but I'm making due with what I've got for the time being :3: Here we are at 1500x with a rubbed on vinegar etch
Followed that etch up with alot of polising with chrome polish and a felt pad and then my bare finger
She's really startin to POP now
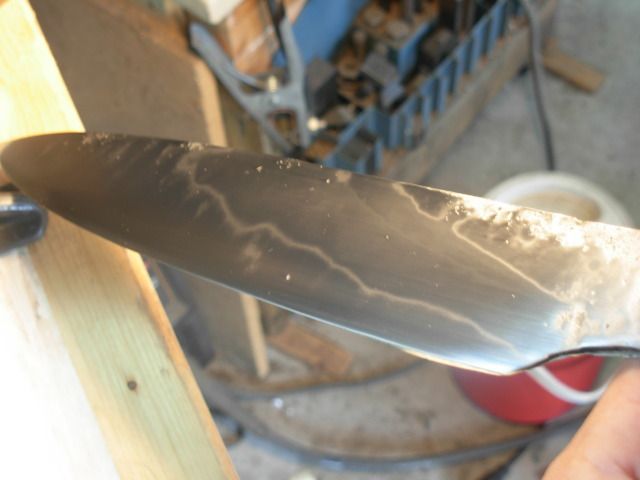
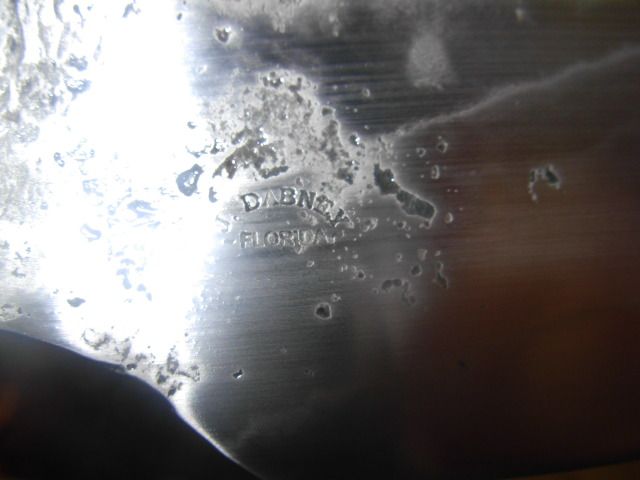
Squeezed my makers mark on in a somewhat subtle way near some hammer marks
Still not positive I'm thrilled with my etch. I may etch it with vinegar and polish again tomorrow.
Getting to this point is major progress. Well worth it but still looking forward to some handle work :3:
Take care- Josh
My methods are admittidly a bit crude but I'm making due with what I've got for the time being :3: Here we are at 1500x with a rubbed on vinegar etch
Followed that etch up with alot of polising with chrome polish and a felt pad and then my bare finger
She's really startin to POP now
Squeezed my makers mark on in a somewhat subtle way near some hammer marks
Still not positive I'm thrilled with my etch. I may etch it with vinegar and polish again tomorrow.
Getting to this point is major progress. Well worth it but still looking forward to some handle work :3:
Take care- Josh
Josh Dabney
Moderator
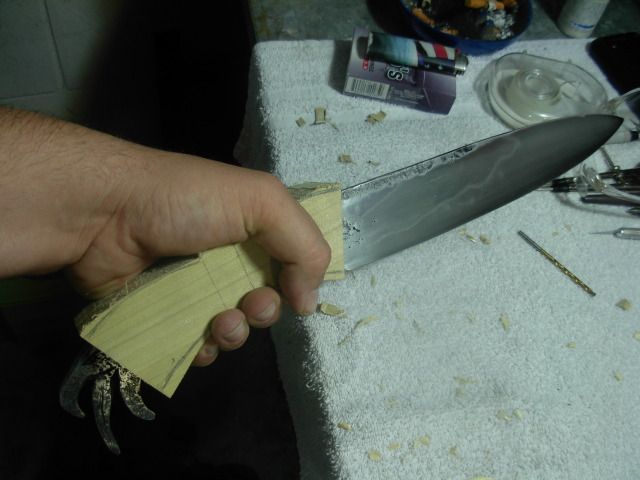
Having worked so long polising my blade I'm going to make every attempt to keep from scratcing this sucker while working on the handle. I decided to make a slip sheath to give me some extra protection for the blade for the duration of the build.
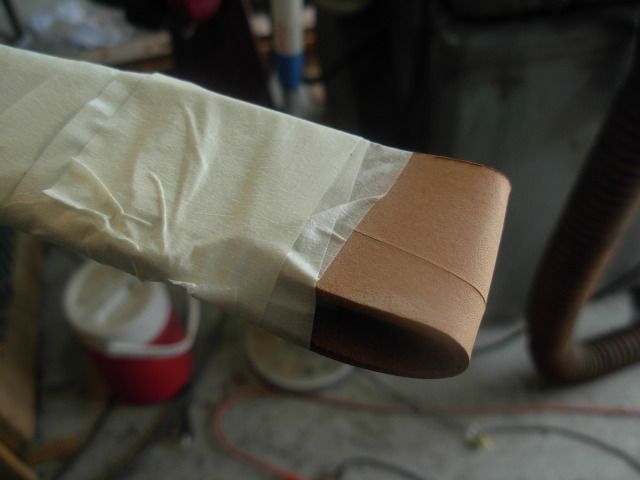
Nothing too fancy here. Two pieces of felt and some masking tape.
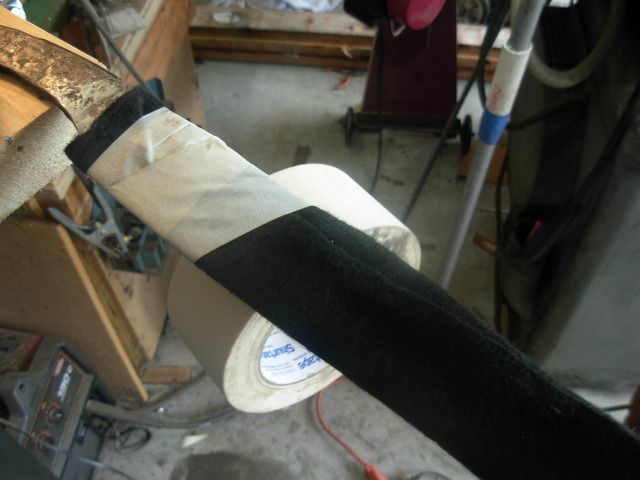
Did a full wrap down to the tip and back then folded the felt over the tape and secured it with a few wraps.
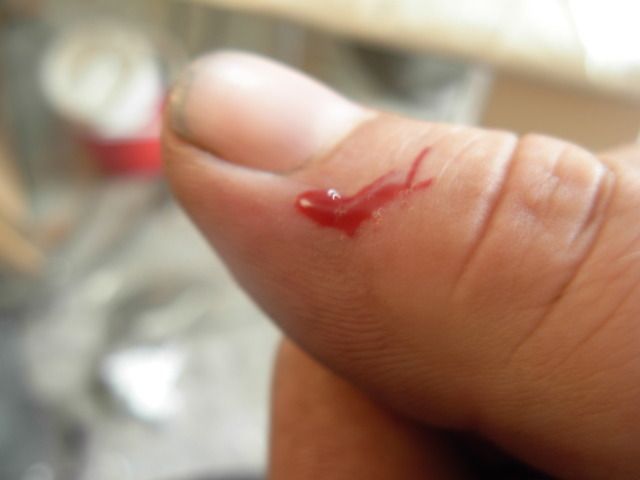
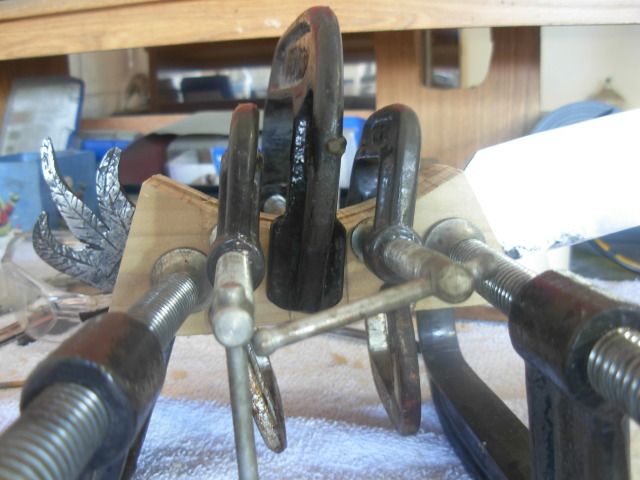
To make my slip sheath I did something thats always preached as a no-no. I clamped the Tribal Chiefs handle to my board with the blade hanging out in free air. I know better than to walk away leaving a situation like that and this happened as I was putting my slip sheath together AND being very careful while doing it. Being careful I still managed to bump my thumb againt the tip of the Chief and he was quick to correct me and put me back in my place This is a clear example of how dangerous this type of scenario can be. The Chief got his first taste of blood-
Thought maybe it would be a good idea to add a leather tip protector to the slip sheath
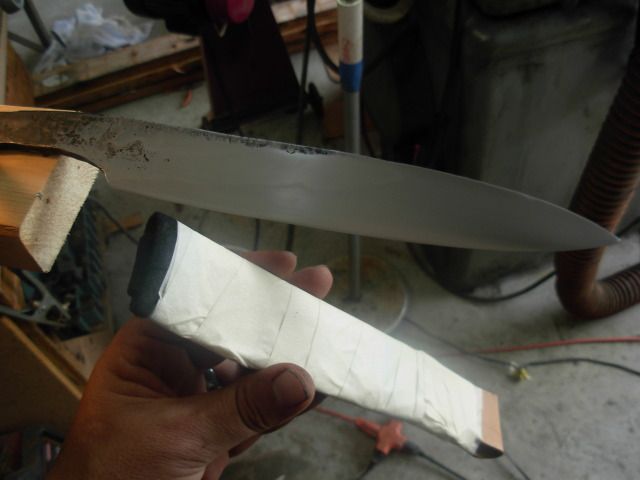
There she is. A felt slip sheath that can be easily removed and put back on to protect my finish during handle construction
I forged the Chief out with the intension of doing a double wrap of rawhide over veg-tanned but as the Chief progressed I started having a dream of this handle design. The more I thought about it the more I liked this idea for the handle so I've decided to ditch the leather handle and go for this design instead.
I had intended on the blade being forged to shape completely but as the Chief evolves it effects the rest of the design so I'm going to thin the tang down with the grinder and probably drill a couple pin holes in the tang.
I ran out and picked up some Poplar for use as handle material and a new bandsaw blade so I'll be in business as soon as I can get back out in the shop.
Let me know what y'all think about the handle design.
Take care fellas ! -Josh
Nothing too fancy here. Two pieces of felt and some masking tape.
Did a full wrap down to the tip and back then folded the felt over the tape and secured it with a few wraps.
To make my slip sheath I did something thats always preached as a no-no. I clamped the Tribal Chiefs handle to my board with the blade hanging out in free air. I know better than to walk away leaving a situation like that and this happened as I was putting my slip sheath together AND being very careful while doing it. Being careful I still managed to bump my thumb againt the tip of the Chief and he was quick to correct me and put me back in my place
This is a clear example of how dangerous this type of scenario can be. The Chief got his first taste of blood-
Thought maybe it would be a good idea to add a leather tip protector to the slip sheath
There she is. A felt slip sheath that can be easily removed and put back on to protect my finish during handle construction
I forged the Chief out with the intension of doing a double wrap of rawhide over veg-tanned but as the Chief progressed I started having a dream of this handle design. The more I thought about it the more I liked this idea for the handle so I've decided to ditch the leather handle and go for this design instead.
I had intended on the blade being forged to shape completely but as the Chief evolves it effects the rest of the design so I'm going to thin the tang down with the grinder and probably drill a couple pin holes in the tang.
I ran out and picked up some Poplar for use as handle material and a new bandsaw blade so I'll be in business as soon as I can get back out in the shop.
Let me know what y'all think about the handle design.
Take care fellas ! -Josh
Josh Dabney
Moderator
I gotta be the ONLY guy around dumb enough to be doing this AFTER finishing to 1500x Bwaaa haa haa
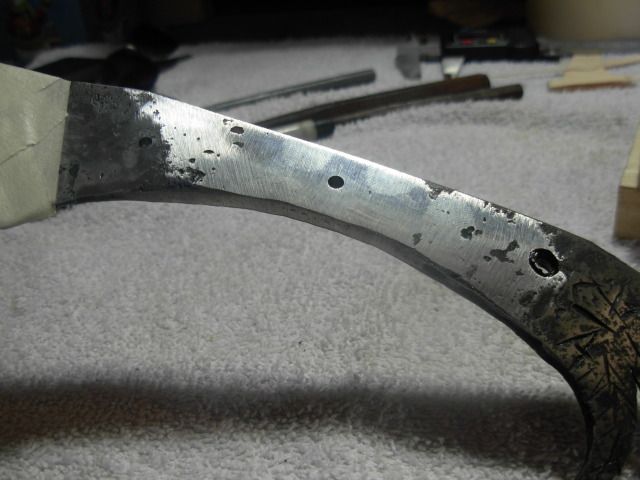
Added a couple more pin holes with an 1/8" solid carbide endmill.
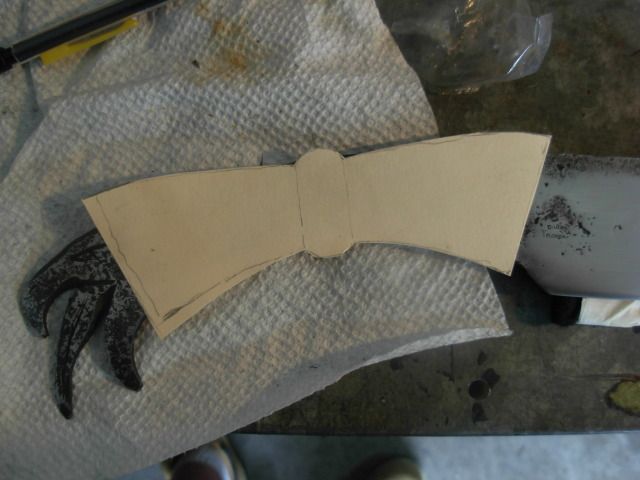
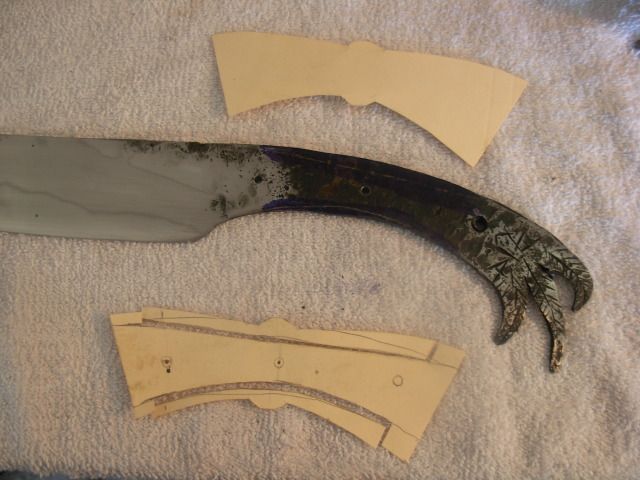
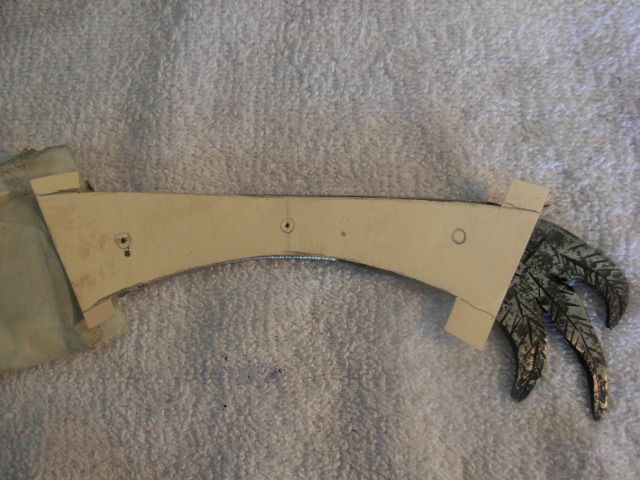
I made a spare template for the handle and used the original to locate my pin holes and decide exactly where I wanted my tang ground too.
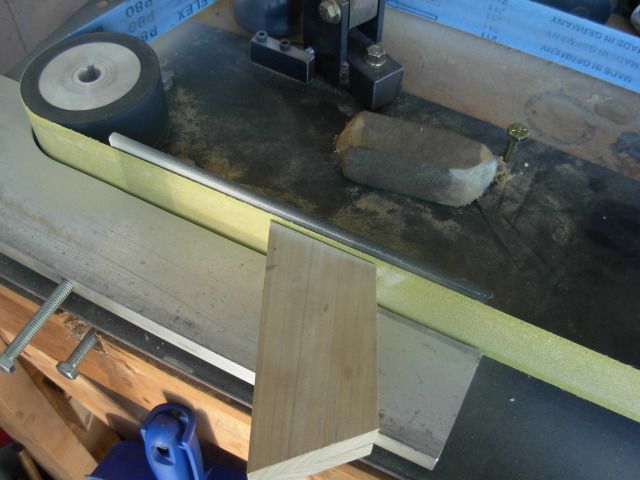
Thinned the tang with the rotary platen and an old 50x Blaze belt
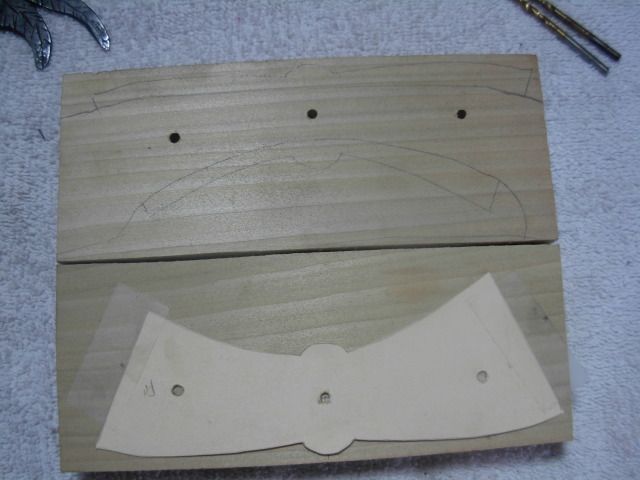
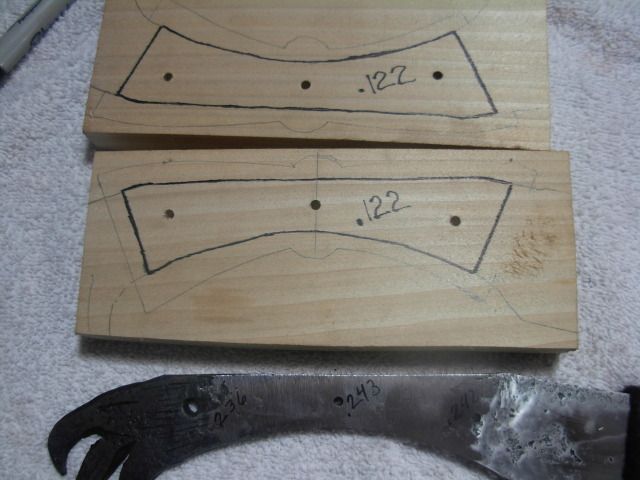
Cut a set of oversized scales and drilled the first scale for the 3 internal pins. I used my file folder template to tranfer the pin hole to scale two to get a perfect match
And here we are with the scales drilled for internal pins
Cleaned up the sides of the tang a bit. I just wanted to level things out so I can get a nice tight fit on my mortises.
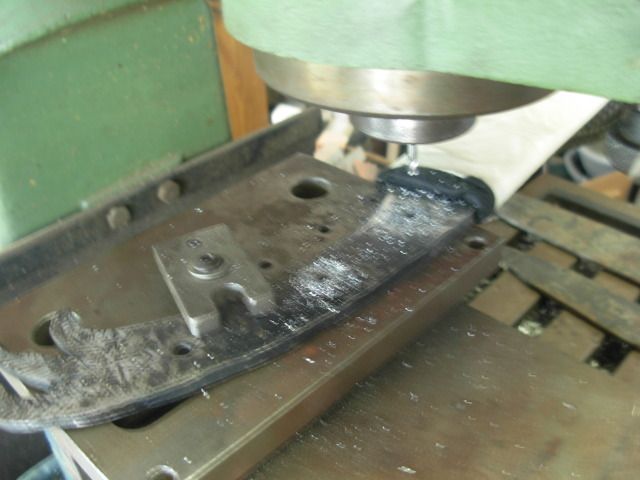
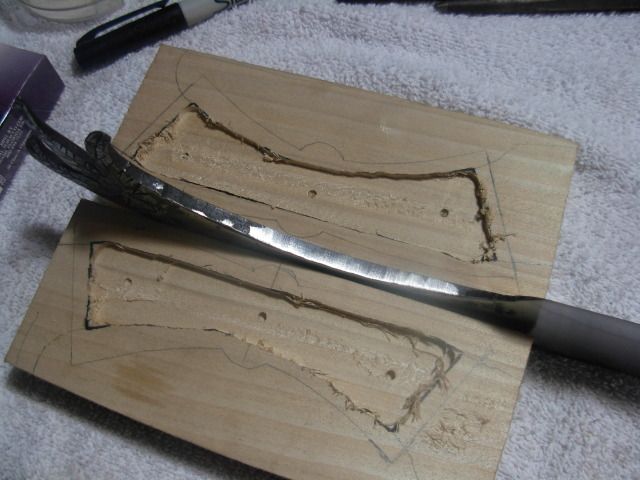
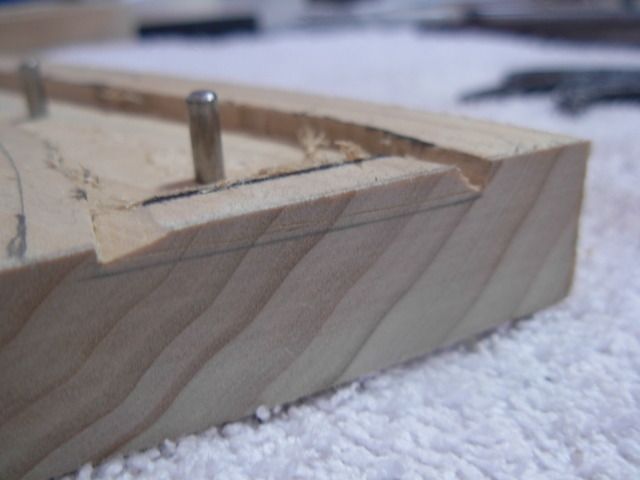
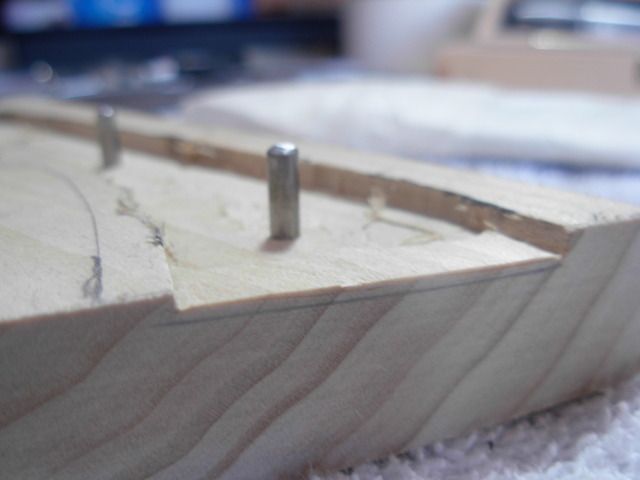
Prepped for mortising. The sharpie line is where I wanna cut with the mill. You can see I stayed back from the ends of my handle a bit and left some wood for hand finishing the scale to blade fit on the ends.
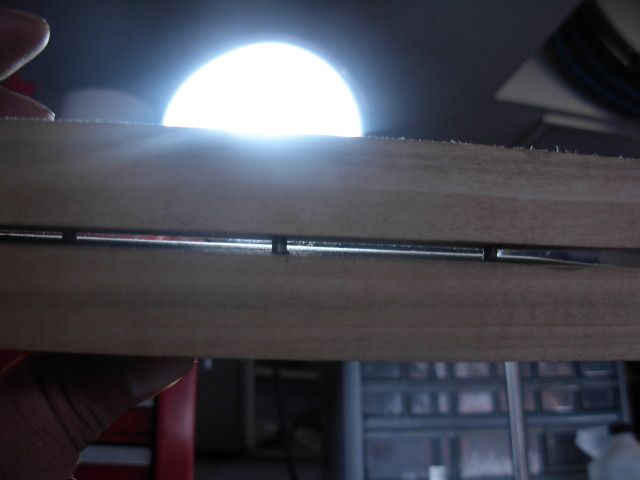
And here we are fresh off the mill. I'll need to tune up the profile a little and fit the ends but the mill did 90% of cutting these mortises :3:
Thats where the Tribal Chief remains for the night. Tomorrow night I'll get busy fitting these guys to the Chief's tang
Take care fellas ! -Josh
Added a couple more pin holes with an 1/8" solid carbide endmill.
I made a spare template for the handle and used the original to locate my pin holes and decide exactly where I wanted my tang ground too.
Thinned the tang with the rotary platen and an old 50x Blaze belt
Cut a set of oversized scales and drilled the first scale for the 3 internal pins. I used my file folder template to tranfer the pin hole to scale two to get a perfect match
And here we are with the scales drilled for internal pins
Cleaned up the sides of the tang a bit. I just wanted to level things out so I can get a nice tight fit on my mortises.
Prepped for mortising. The sharpie line is where I wanna cut with the mill. You can see I stayed back from the ends of my handle a bit and left some wood for hand finishing the scale to blade fit on the ends.
And here we are fresh off the mill. I'll need to tune up the profile a little and fit the ends but the mill did 90% of cutting these mortises :3:
Thats where the Tribal Chief remains for the night. Tomorrow night I'll get busy fitting these guys to the Chief's tang
Take care fellas ! -Josh
Wade Hougham
Well-Known Member
Nice work, Josh. The knife is coming to life nicely. Wade
Josh Dabney
Moderator
To begin fitting up my handle material I need the ends of my scales trimmed to finished dimensions so I whacked em off with the bandsaw and took'em to the horizontals platen for truing up
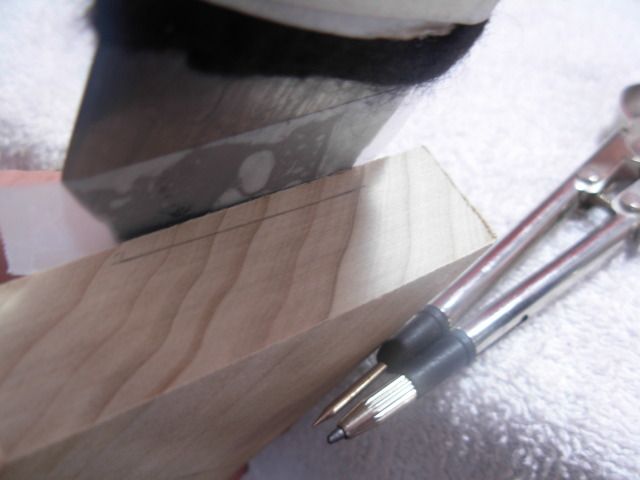
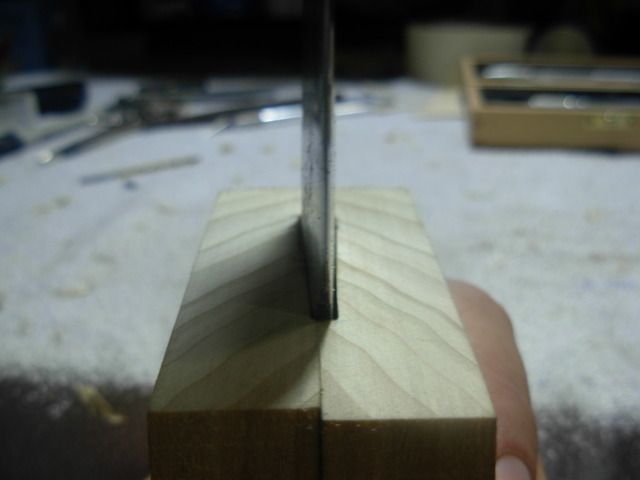
Next I put each scale on the blade and scribed tightly around the tang with an exacto. I used a piec of scotch tape here to protect the blade and used the compass to get a line parallel with the side of the blade on the face of the scale front and back. This is a reference line only not necessarily the correct depth for the cut but it should get me close on the shape
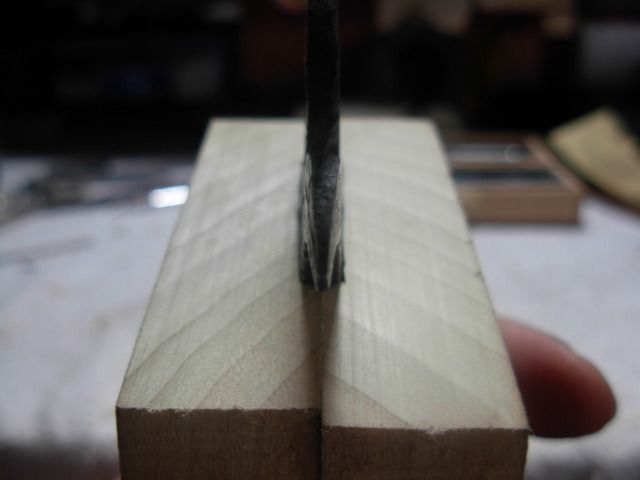
Took a swag at my depth and cut the corners in
Then cut the bulk out and begin the process of putting the tang in check ... adjust... check adjust
Being basically a rough forged blade this was a real challenge and while I got it close it's FAR from perfect :3: I'm totally happy with the fit of the mortise as the scales fit nice and tight with no slop or rattle but there are some wood to metal gaps in my fitting the scales It's a good thing ALL Tribesman adorn their blades which just might possibly hide any unsightly gaps :biggrin:
Now we can start getting a 3-dimentional feel for where the Chief is headed with the scales fit to the blade
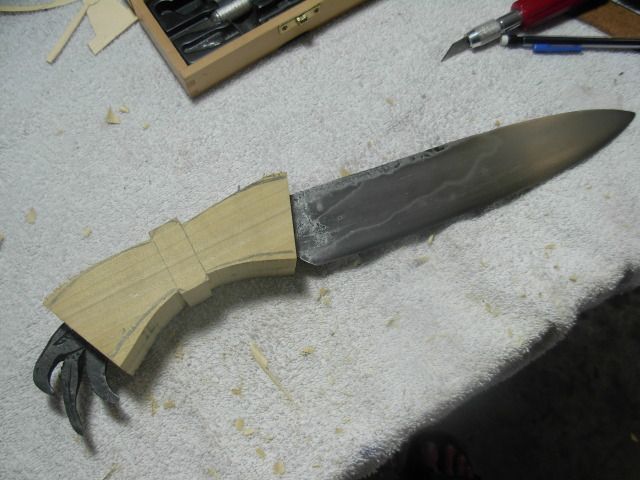
Back side-
Front side-
Bottom-
In the hand shot for the heck of it-
Thats all she wrote for this evenings addition of the Tribal Chief. Hopefully there'll be more tomorrow :biggrin:
Take care all ! -Josh
Next I put each scale on the blade and scribed tightly around the tang with an exacto. I used a piec of scotch tape here to protect the blade and used the compass to get a line parallel with the side of the blade on the face of the scale front and back. This is a reference line only not necessarily the correct depth for the cut but it should get me close on the shape
Took a swag at my depth and cut the corners in
Then cut the bulk out and begin the process of putting the tang in check ... adjust... check adjust
Being basically a rough forged blade this was a real challenge and while I got it close it's FAR from perfect :3: I'm totally happy with the fit of the mortise as the scales fit nice and tight with no slop or rattle but there are some wood to metal gaps in my fitting the scales
It's a good thing ALL Tribesman adorn their blades which just might possibly hide any unsightly gaps :biggrin:
Now we can start getting a 3-dimentional feel for where the Chief is headed with the scales fit to the blade
Back side-
Front side-
Bottom-
In the hand shot for the heck of it-
Thats all she wrote for this evenings addition of the Tribal Chief. Hopefully there'll be more tomorrow :biggrin:
Take care all ! -Josh
Josh Dabney
Moderator
Messerist,
Thanks buddy. The wood is Poplar.
Take care- Josh
Thanks buddy. The wood is Poplar.
Take care- Josh
Josh Dabney
Moderator
Not really alot to report other than I git the Chief glued up. I was considering pre-shaping the scales a bit before glue-up but decided to go for it with the scales till unshaped so I'd get a clamp on them
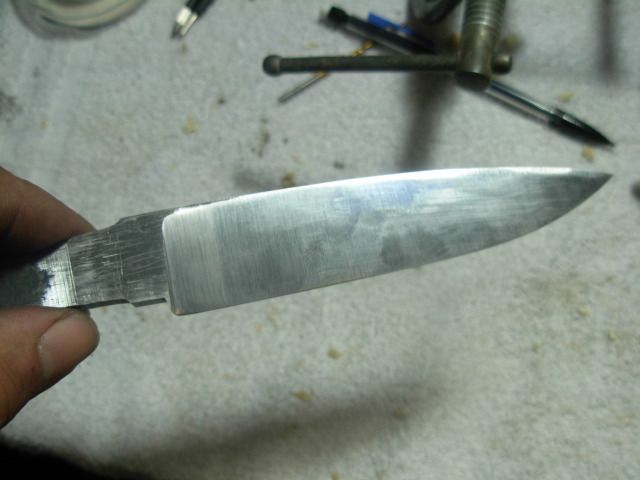
Previous to having gone all tribal I've been working on some skill building to get myself ready for the JS judging table. I've been feeling for awhile that my plunges were my Achillies heel that was holding me back from being ready.
I recently resurfaced my flat platen and tuned up the edges attempting to get my idea of the perfect plunge geometry. In addition to that I picked up a Bruce Bump carbide file guide in the effort to get my plunges right.
After gluing up the Chief I started working on this blade I forged out last weekend so I thought I'd share the results of this effort with y'all. This one is Aldo's 1095 and is now ready for a clay coated HT. While not 100% perfect they are extremely close right off the grinder. After HT I'm gonna push the plunges back a little more I was just nrevous for the first time grinding with the file guide on so left it a touch forward of where I want it just in case Very excited about the result so I thought I'd share with y'all
Back at it with the Chief tomorrow
Take care- Josh
Previous to having gone all tribal I've been working on some skill building to get myself ready for the JS judging table. I've been feeling for awhile that my plunges were my Achillies heel that was holding me back from being ready.
I recently resurfaced my flat platen and tuned up the edges attempting to get my idea of the perfect plunge geometry. In addition to that I picked up a Bruce Bump carbide file guide in the effort to get my plunges right.
After gluing up the Chief I started working on this blade I forged out last weekend so I thought I'd share the results of this effort with y'all. This one is Aldo's 1095 and is now ready for a clay coated HT. While not 100% perfect they are extremely close right off the grinder. After HT I'm gonna push the plunges back a little more I was just nrevous for the first time grinding with the file guide on so left it a touch forward of where I want it just in case
Very excited about the result so I thought I'd share with y'all
Back at it with the Chief tomorrow
Take care- Josh
jonathan creason
Well-Known Member
I'm about as far from an ABS judge as you can get, but those plunges look great to me.
Josh Dabney
Moderator
Jonathan, Those plunges are Awwwwwwwful close and it's a result I'm extremely excited about. However there is a very slight variation due most likely to the fact that I hand filed and shaped my platen edges. I'm thinking I'll be able to hand finish them to perfection without a ton of work but we'll see how that washes out
Back to The Chief... This is always an exciting part of any knife. It was exiting for the Tribal smiths as it is for us today. While the soul and spirit of the knife is determined by the steel and it's qualities the personality and attitude is determined by the handle and its relationship with the steel.
The Chief shant be a gentile blade... but a warrior. As such this handle will be an exersise in aggression with an unwavering constitution that becomes one with the warrior and inspires resolve.
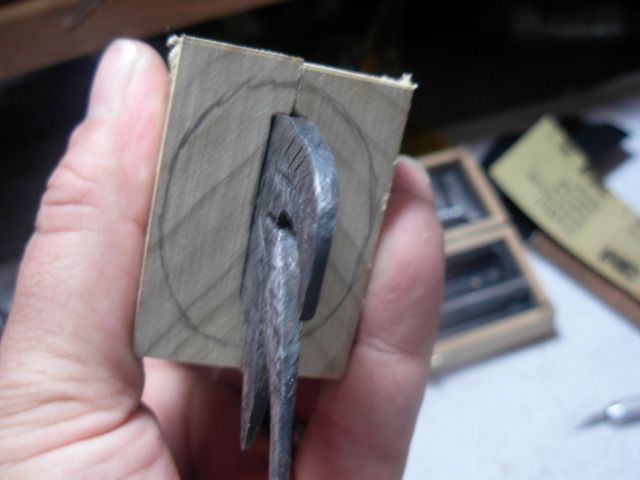
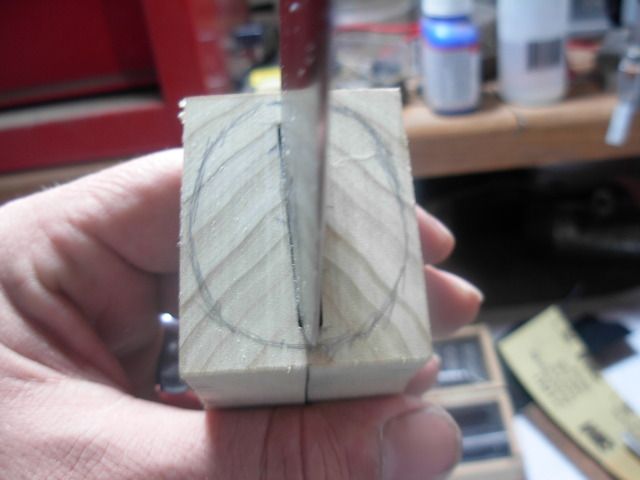
We begin this journey with some creative bandsawing
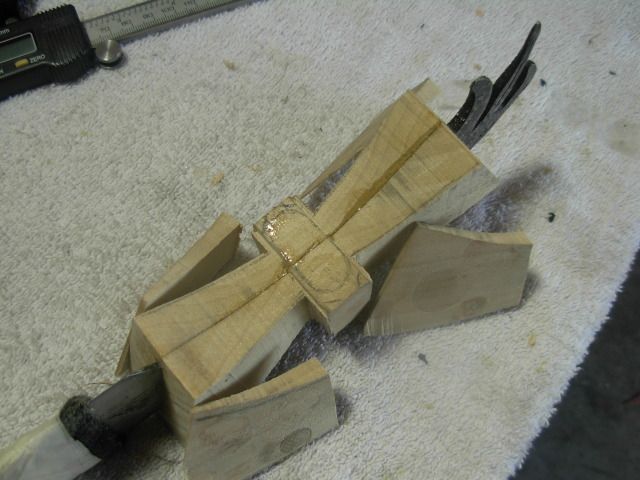
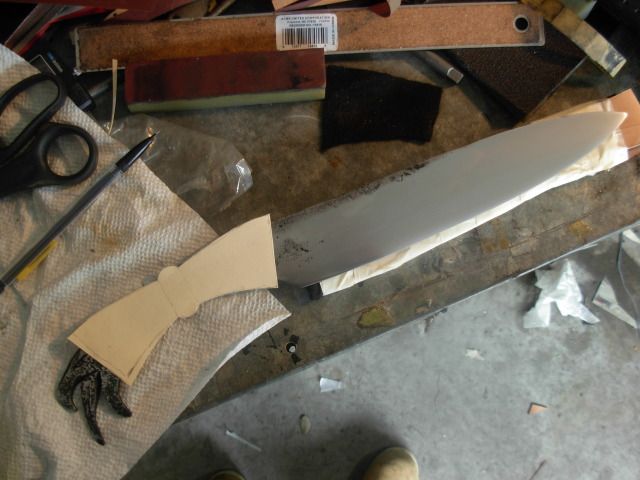
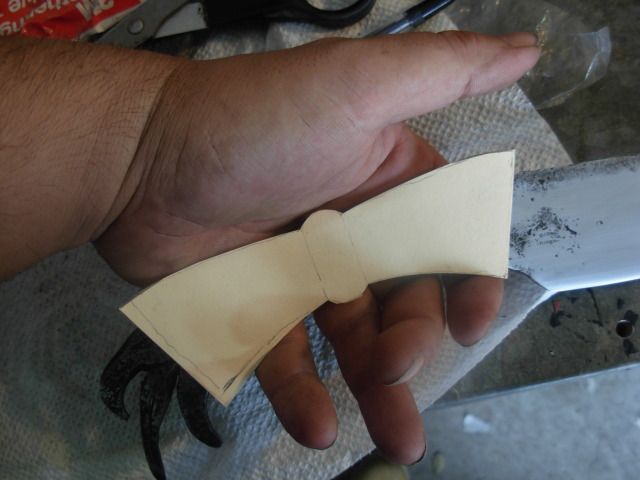
This is the quick and dirty version of this trick for getting guards symetrical and centered on the blade. A simple template made from a file folder that gets traced on one side then flipped and traced on the other. Just a quick guide to get us where we wanna be
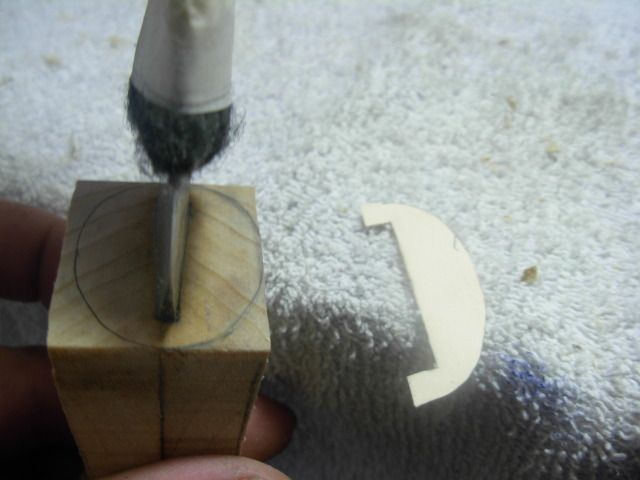
Doin a bit whittling with a sharp 50x blaze on the rotary platen
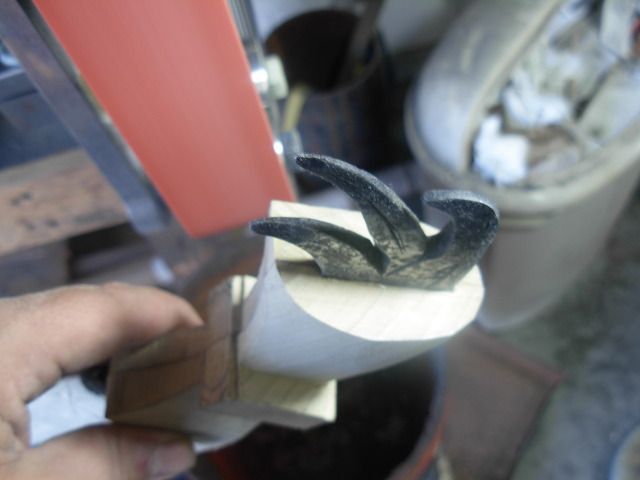
Roughed in with the 50
Begining hand work with a round rasp truing up the center bead
Got the back side rasped and filed to rough shape and shoeshined with 80 and 220
Where we stand
Now that I'm vaguely rough shaped I think The Chief in gonna be more comfortably in the hand than I was anticipating. Thats a nice suprize LOL
Take care fellas, Josh
Back to The Chief... This is always an exciting part of any knife. It was exiting for the Tribal smiths as it is for us today. While the soul and spirit of the knife is determined by the steel and it's qualities the personality and attitude is determined by the handle and its relationship with the steel.
The Chief shant be a gentile blade... but a warrior. As such this handle will be an exersise in aggression with an unwavering constitution that becomes one with the warrior and inspires resolve.
We begin this journey with some creative bandsawing
This is the quick and dirty version of this trick for getting guards symetrical and centered on the blade. A simple template made from a file folder that gets traced on one side then flipped and traced on the other. Just a quick guide to get us where we wanna be
Doin a bit whittling with a sharp 50x blaze on the rotary platen
Roughed in with the 50
Begining hand work with a round rasp truing up the center bead
Got the back side rasped and filed to rough shape and shoeshined with 80 and 220
Where we stand
Now that I'm vaguely rough shaped I think The Chief in gonna be more comfortably in the hand than I was anticipating. Thats a nice suprize LOL
Take care fellas, Josh
Josh Dabney
Moderator
Messerist, Thanks buddy. I haven't pre-planned what else I'm gonna do with the handle but I do have some stuff on hand to use on it so I'm sure I'll come up with something
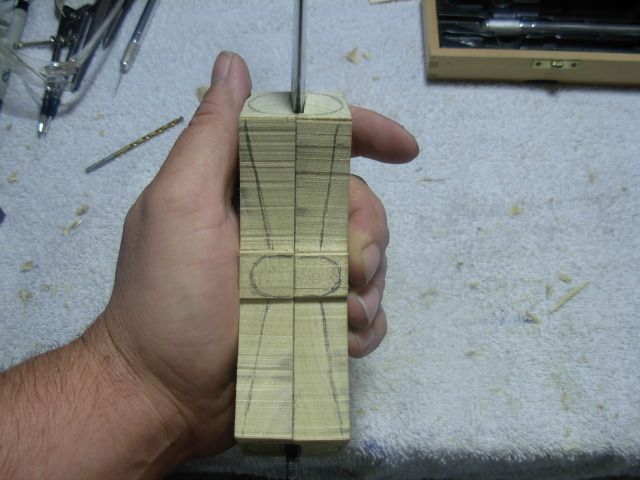
Made some good progress on the Chief tonight :1:
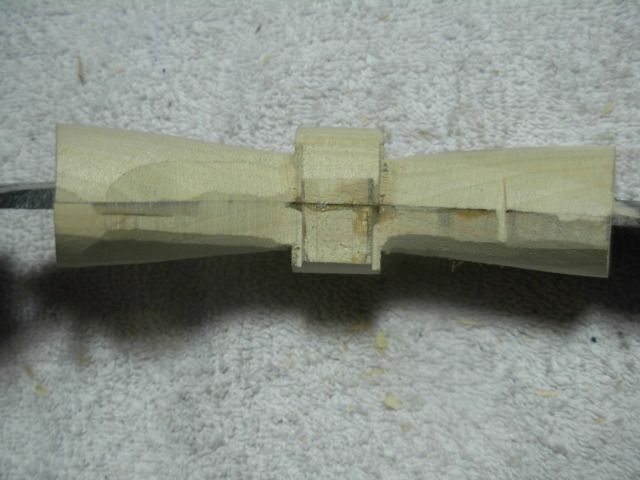
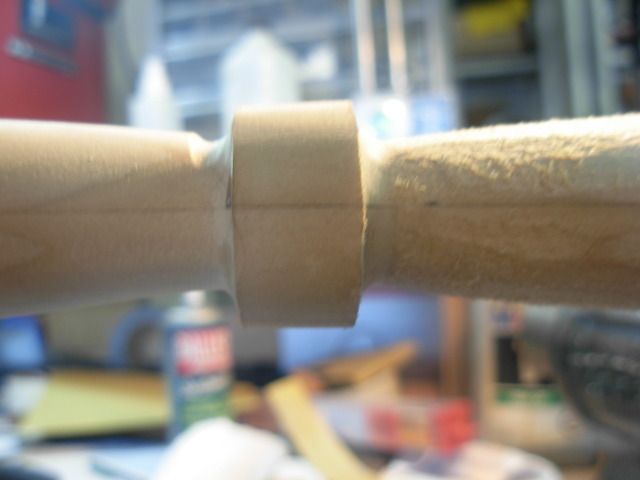
I started by finding center on the handle and laying out the front edge of the center bead
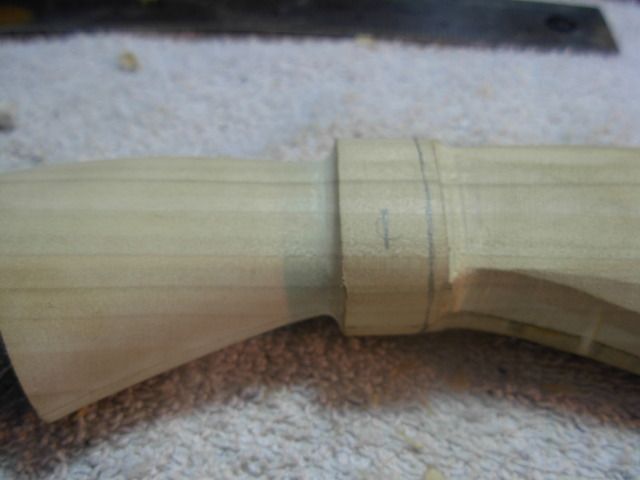
I've sworn off Harbor Freight for most everything but I still have a few of their tools laying around. Used the HF coping saw to cut around my layout line and cut out the bulk with a utility knife. Made for quick rasp work :3:
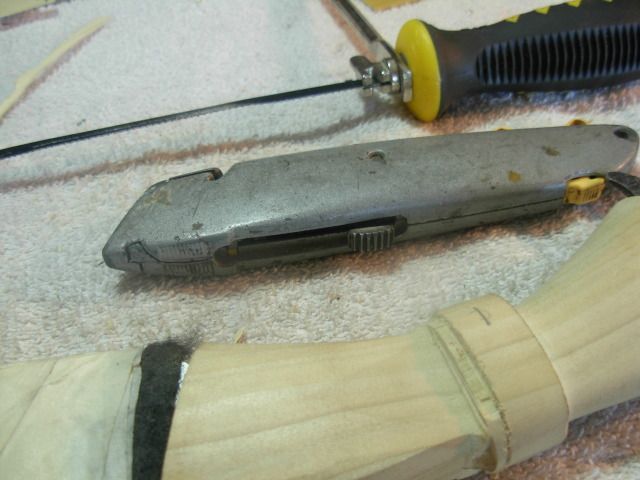
Something about like this aught to do it
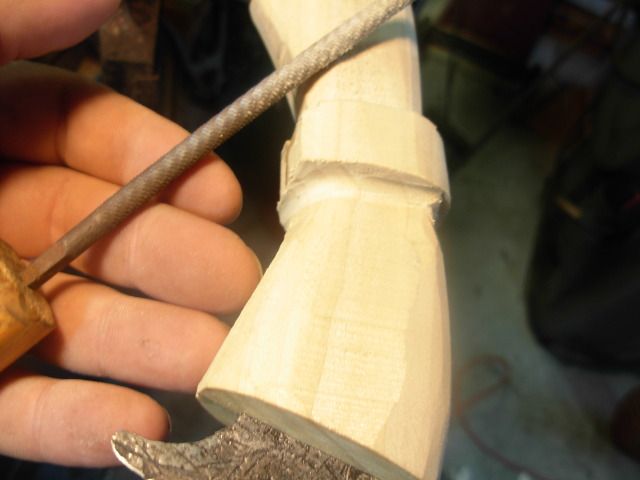
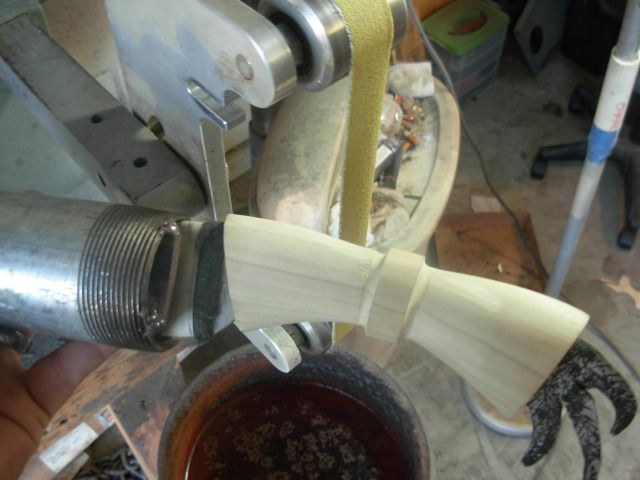
This old Nicholson 4-way rasp makes quick work of blending the handle down to the center bead
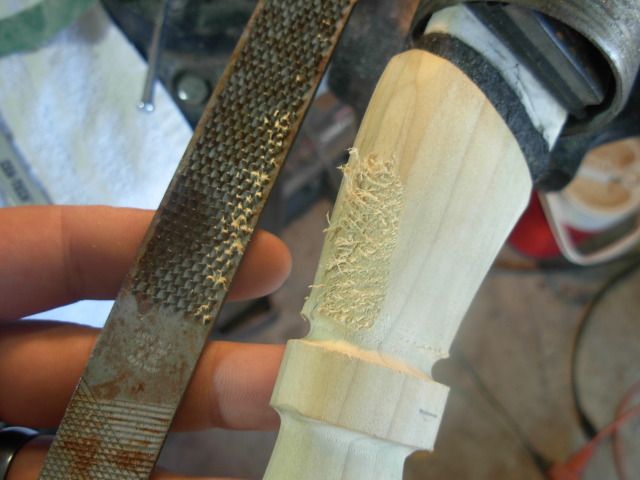
Rasped down the front side and had to make an adjustment on the back to match it up with the front
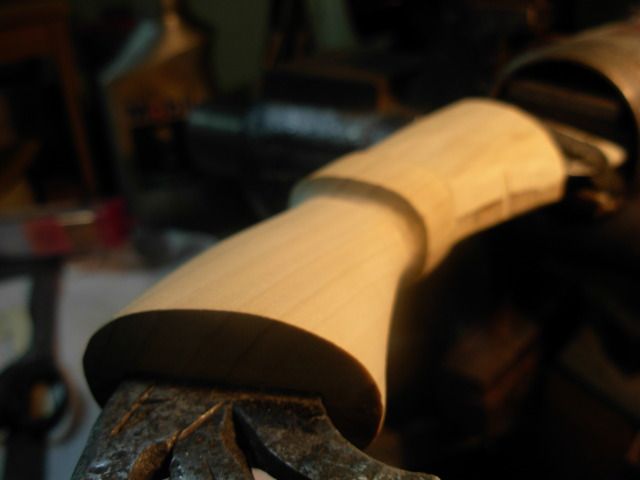
Used an 80x slack belt running slow to clean up the rasp work
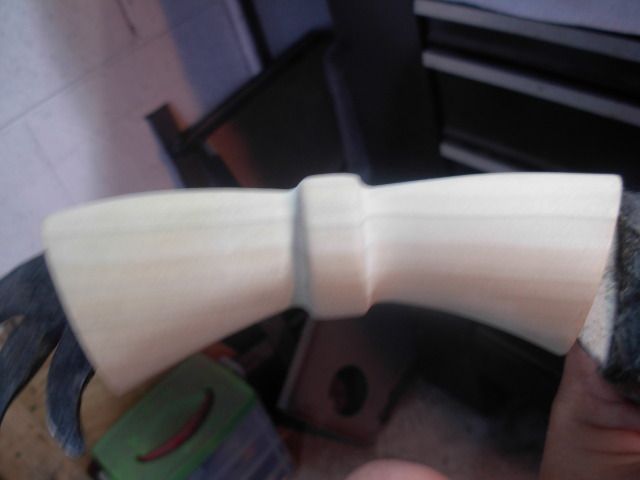
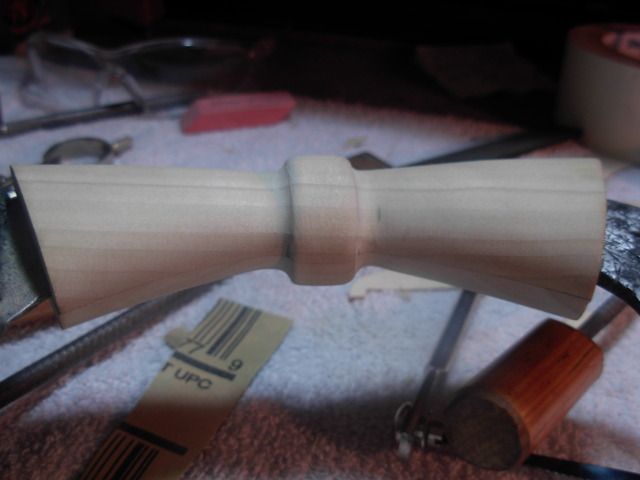
Lying out the center bead for final shaping
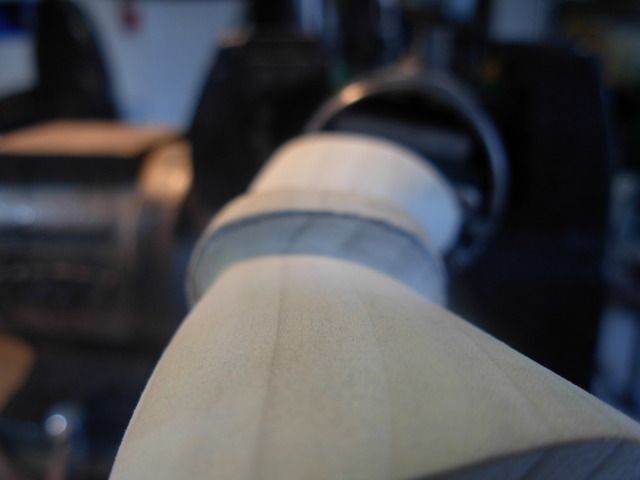
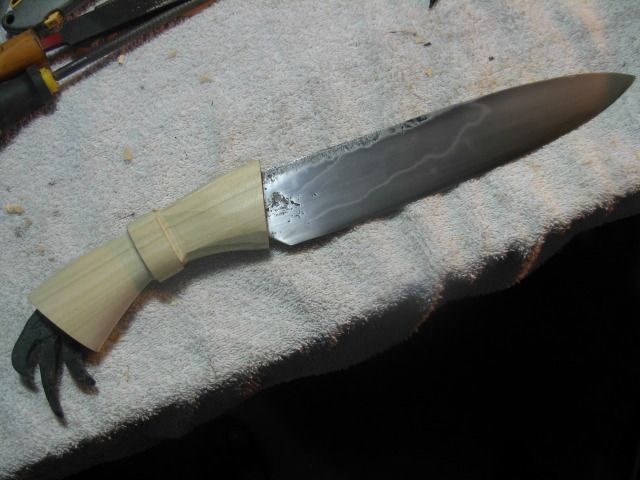
Blurry pic but we're gettin there now with the hand sanding
Staining with some stain I had leftover from some non-knife project and sealing up the handle with the wood hardener. The hardener isn't going to fully penetrate like stabilizing but If I happen to end up with a nice hard sealed up shell on the handle so be it
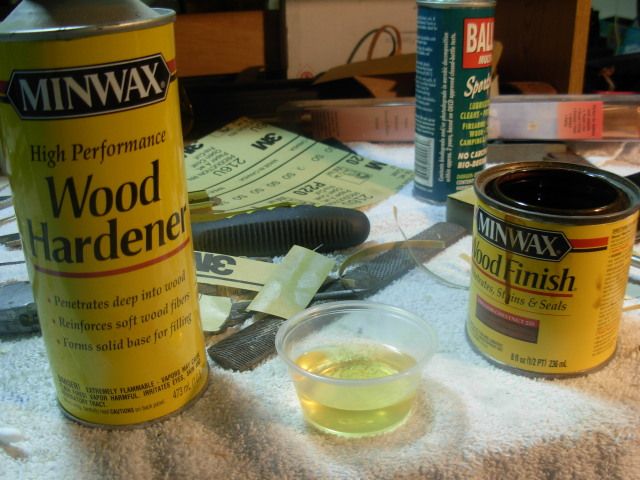
Staining
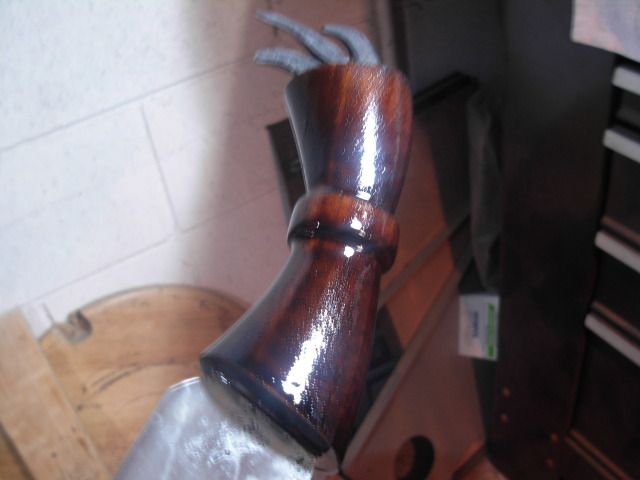
Let the stain soak in for a while then gave it a wipe down with apaper towel
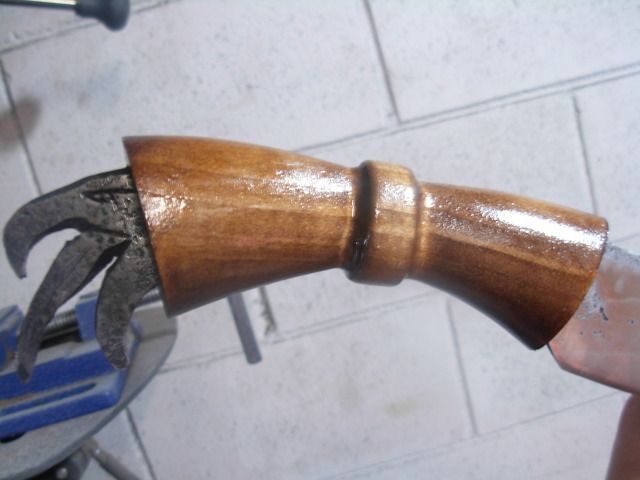
Coated with the wood hardener a few times and left to dry for the night
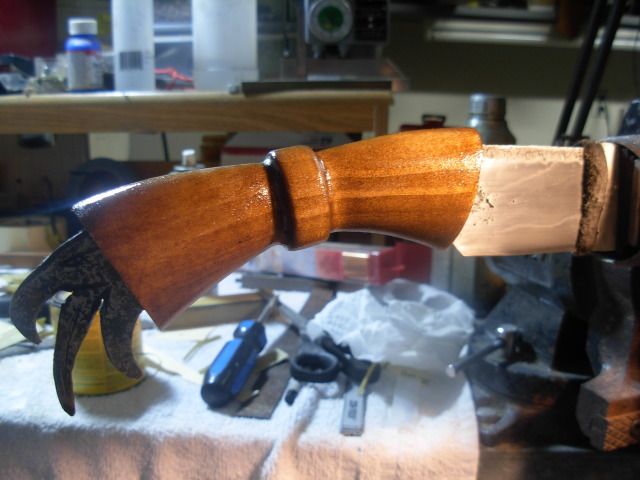
I believe The Tribal Chief is startin to reseamble knife now :biggrin:
Made some good progress on the Chief tonight :1:
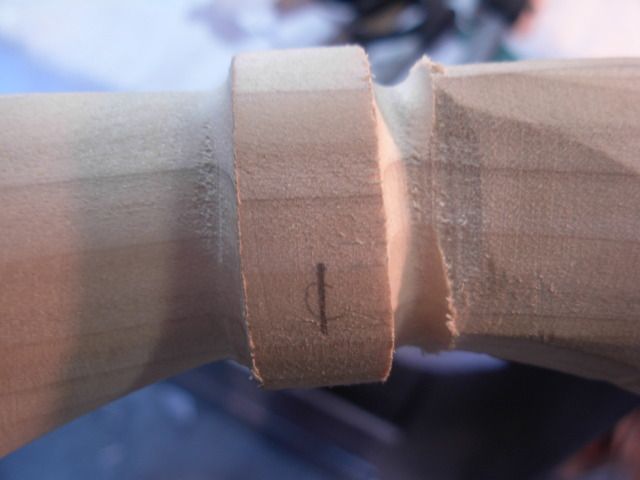
I started by finding center on the handle and laying out the front edge of the center bead
I've sworn off Harbor Freight for most everything but I still have a few of their tools laying around. Used the HF coping saw to cut around my layout line and cut out the bulk with a utility knife. Made for quick rasp work :3:
Something about like this aught to do it
This old Nicholson 4-way rasp makes quick work of blending the handle down to the center bead
Rasped down the front side and had to make an adjustment on the back to match it up with the front
Used an 80x slack belt running slow to clean up the rasp work
Lying out the center bead for final shaping
Blurry pic but we're gettin there now with the hand sanding
Staining with some stain I had leftover from some non-knife project and sealing up the handle with the wood hardener. The hardener isn't going to fully penetrate like stabilizing but If I happen to end up with a nice hard sealed up shell on the handle so be it
Staining
Let the stain soak in for a while then gave it a wipe down with apaper towel
Coated with the wood hardener a few times and left to dry for the night
I believe The Tribal Chief is startin to reseamble knife now :biggrin: