Couple of slip joint WIP

Thanks for the thoughts on the spring guys, beats tapping it in with hammer.
Wanted to post a few more pictures mainly shaping. I screwed up the first set during shaping. I took too much off the front to where the lock showed in the half stop position.

knives720.jpg

knives723.jpg

knives723.jpg

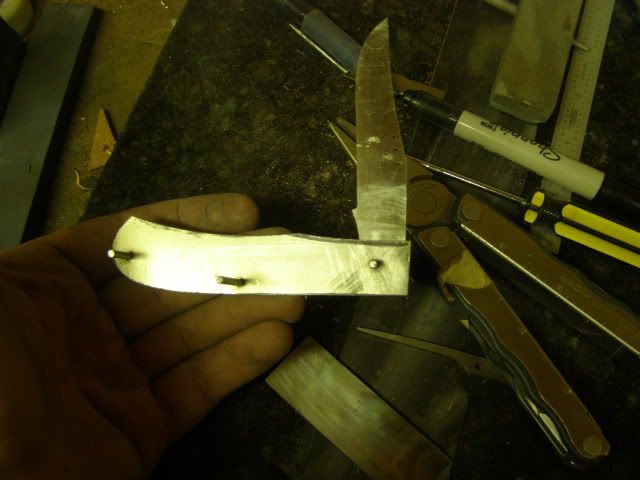
Here's some with the new liners shaped and the blade is rough ground here. I ground it on a 14" wheel.
knives742.jpg

knives743.jpg

knives741.jpg

knives739.jpg

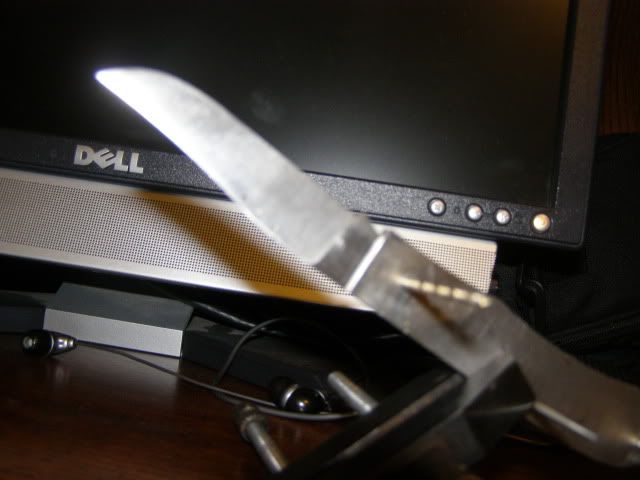
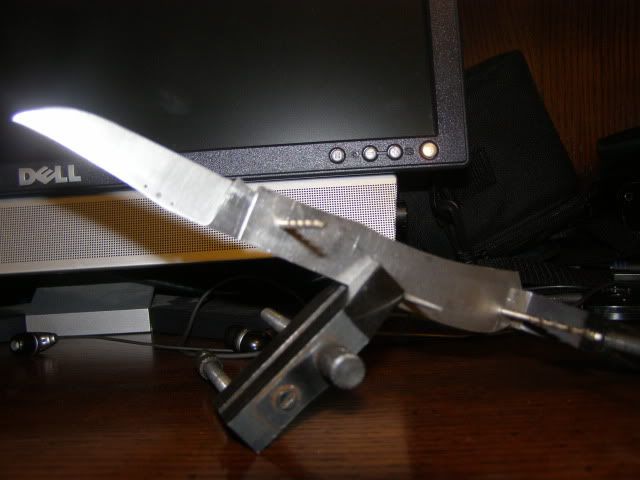
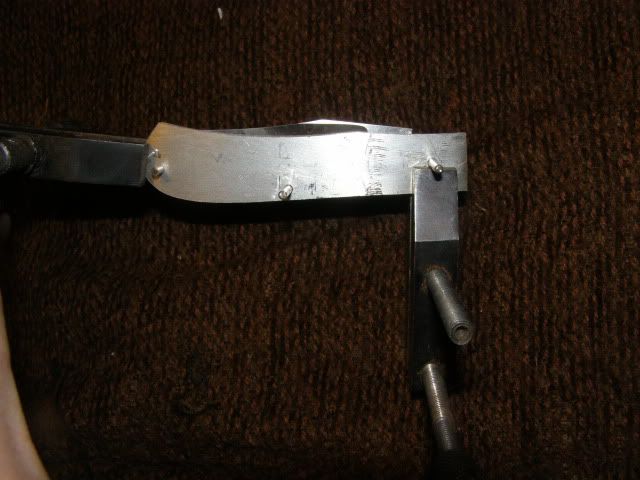
I'm using the parallel clamps to clamp to see what it looks like when closed. So far it's all lining up centered, fingers crossed it stays that way
knives740.jpg


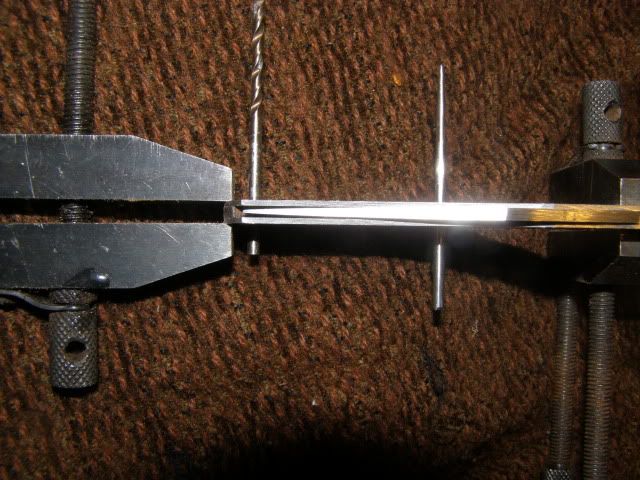
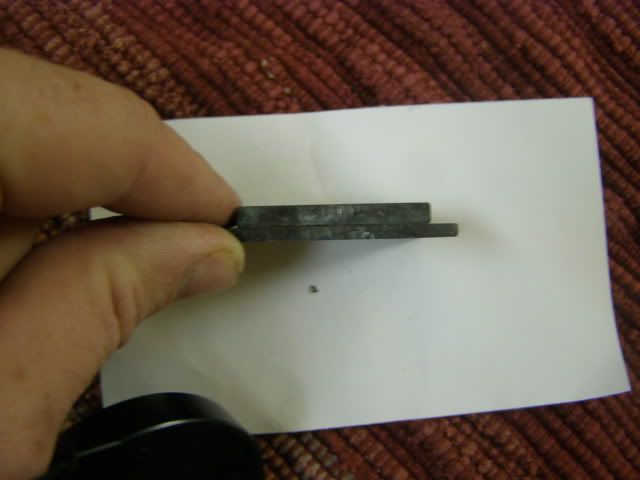
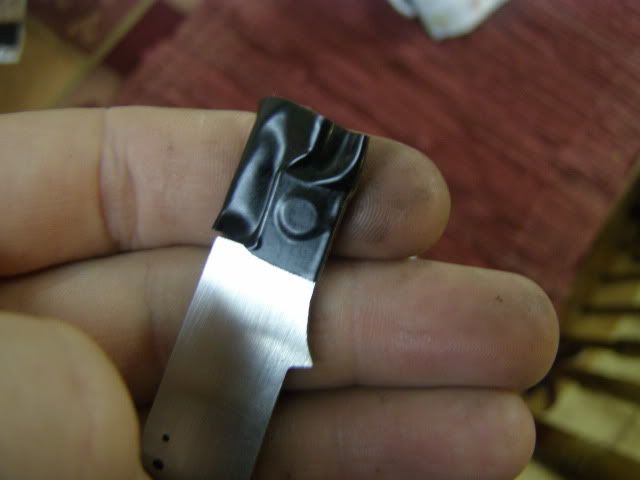
I've got a little more on the other two to catch them up to this point so it maybe a couple days before I post some. In the closed position on this knife the spring sticks up a hair so I'll be showing how I'm going about correcting that problem. I worked on it some last night, hopefully I'll work on it a little more after work tonight.
 
Thanks for more Ryan. :)

This is a perfect example of the adage, "ask 5 knifemakers how they do something and you'll get 9 answers." This is good stuff guys, thanks for the recommendations. Now I have a pocketful of ways to attempt that step, at least. :D
 
Glad ya'll are enjoying this.
Don't quiet have the other 2 caught up, but wanted to show a problem I ran into. I ordered the phosphorus bronze bushings a while back and I had used 3 of them no problems until now. The hole that was supposed to be 3/32" is not even close. That was the first problem. Second problem is I couldn't figure out how to hold the little turds without damaging them. Here was my solution
I took two pieces of metal and flattened them. I drilled a #30 hole in one and a 3/16" hole in the other. I put the #30 hole piece on bottom and lined up the 3/16" hole over it. This gave me a place to put the bushing and a hole underneath it to let the bit and reamer pass through. I spot welded the pieces together. I push the bushing into the 3/16" hole to where it bottoms out then placed a small drop of super thin glue to hold it in place while I reamed the hole to 3/32". Afterwards I use a benzomatic to heat the metal and push the bushing out with a piece of 1/8" rod through the #30 hole.
knives756.jpg

knives757.jpg

knives758.jpg

with bushing in place
knives759.jpg


Another tip that may or may not help. Like I said I"m working on 3 of these knives and the bushings are lapped for that blade. I don't want to get them mixed up or lose them little suckers so when they are laying on the bench I placed tape on them to hold em in place
knives760.jpg
 
Ryan
How are those bushings holding up? Have you worked a knife with them alot to see if they will get sloppy? Just wondering, I havent tried one with them yet.

Great WIP, its always good to see how someone else does things, you have given me a couple of real good ideas.

Sean
 
The two guys who have had the slip joints I put the bushings in have had them for 6 months. Neither of them has complained and still love the knives. It's easy to say top makers use them so there should be no problems, but I still want to judge for myself. After this WIP I'm making one for myself. It will have more abuse than the average slip joint, strictly to see how well the bushings hold up.
During mock up I assemble and disassemble approximately 450 million times (sure seems that way anyway) and didn't notice any change in the action or fit. That doesn't compare to using the knife and the forces that go along with it, but I felt good about it.

Thanks for the comments. Ryan
 
I'll second Sean's comment, it's always great to hear how other makers solve problems. I don't have a welder, so I'd probably have superglued the two pieces of metal together too. ;) Or, that's what I'll do when I run across this issue.

Ryan, thanks for stopping your work to show us how it's going. I know how much time it takes to get photos, clean them up, save them to your host and make the post. It's valuable time that you're devoting to us here, and I really appreciate it.

Take care, and have fun.
 
The two guys who have had the slip joints I put the bushings in have had them for 6 months. Neither of them has complained and still love the knives. It's easy to say top makers use them so there should be no problems, but I still want to judge for myself. After this WIP I'm making one for myself. It will have more abuse than the average slip joint, strictly to see how well the bushings hold up.
During mock up I assemble and disassemble approximately 450 million times (sure seems that way anyway) and didn't notice any change in the action or fit. That doesn't compare to using the knife and the forces that go along with it, but I felt good about it.

Thanks for the comments. Ryan

Thanks Ryan. I know Mr Bose and several other top makers use them, for several reasons. I think maybe the biggest reason is you can really set that pivot pin and close up the back of the knife. Tony's knives have no lines.:)

Im on the fence:confused:, on one hand it is a bigger pivot, which would provide some mechanical advantage but it is also an extra joint, so to speak, with more chance of failure. And it is bronze against steel.

Keep us updated Im curious to see how it holds up for you.

Sean
 
I appreciate that you guys want to test the bushing before committing your guarantee to it, but one thing that occurs to me is that the bushing is lubricated bronze, right?, which should reduce wear. And the way Ryan's building this the contact surfaces are exceptionally well finished, again reducing causes of wear. Plus, the pivot force is distributed over a much larger surface - more help reducing wear. I'm pretty confident personally, but naturally I'll be interested in learning how Ryan's hard use testing goes. (Which is my way of saying he'll probably build all these knives and his own before I can make one that works. :))
 
I appreciate that you guys want to test the bushing before committing your guarantee to it, but one thing that occurs to me is that the bushing is lubricated bronze, right?, which should reduce wear. And the way Ryan's building this the contact surfaces are exceptionally well finished, again reducing causes of wear. Plus, the pivot force is distributed over a much larger surface - more help reducing wear. I'm pretty confident personally, but naturally I'll be interested in learning how Ryan's hard use testing goes. (Which is my way of saying he'll probably build all these knives and his own before I can make one that works. :))

Very good points, I guess I need to get off my butt and try it for myself.cool 1

Great WIP Ryan

Sean
 
I'm interested myself. Ya'll brought up the pros and cons I had of using the bushing. One more thing that makes it more difficult. Instead of one hole that needs to be square to the knife, you have two. One on the tang of the knife and one in the bushing it'self.

Over the next couple of days I'm going to try to get pictures of the bolsters and the handle fitting posted. Might have to bear with me on this part. I"m using blacklip pearl that has to be shaped to a curved bolster. Neither I have done before so I'm a little nervous and slow about it.
 
Tony Bose uses bushings and Reese Bose doesn't.

I did use them, now I do not, just my preference.

Either way you can make a good knife, it's all in the fit.

They can help a little when you go to pin the knife together. - A little?

Todd


.
 
Thanks for the tutorial -- A slipjoint was one of my "new year's resolutions" for this year and I don't have much time left!
 
I'm interested myself. Ya'll brought up the pros and cons I had of using the bushing. One more thing that makes it more difficult. Instead of one hole that needs to be square to the knife, you have two. One on the tang of the knife and one in the bushing it'self.

Over the next couple of days I'm going to try to get pictures of the bolsters and the handle fitting posted. Might have to bear with me on this part. I"m using blacklip pearl that has to be shaped to a curved bolster. Neither I have done before so I'm a little nervous and slow about it.

Ryan I know you have to take your time and believe me, I'm nowhere near actually doing any of this anyway, so no concern about me catching up to you and asking a bunch of dumb questions before you get to them. :D Bolsters are one thing I've been wondering about, so looking forward to that day.

One thing that occurs to me is I need to go back to see whether you mentioned the stock thickness you're using. I checked steel yesterday and even if I wanted to I don't think I have the right stock for a project like this. I need to find out what to order. First things first. :rolleyes:
 
Ryan,
After many blisters:( I found an easy way to put the pivot pin in. I put a piece of stock the same thickness of the blade and spring in the vice then put the liners and spring together with the center and rear pins, slide it over the stock and press down, this moves the spring up and you can slide the pivot pin through. Ill try to get a pic posted tomorrow. Hope this helps.

Sean

Sean some makers will tell you not to load the spring that way. They say that is what causes the scale to crack on the pivot pin. Pin the pivot pin last and it will also affect your blade spring connection.

If you think about the mechanics of a slip joint you only have to push the spring out enough so the hole in the tang lines up. When you are opening and closing the knife the spring will get pushed up further than you need to do to get the pivot pin through.

Alistair
 
Dave
I cant speak for Ryan, but I use 3/32" for the blade and spring. and .040 for the liners, 1/8 for the bolsters.

Hope this helps.

Sean
 
Thanks Sean, that helps a lot, and it's about what I'd expected. I was really wondering about the liners too. This is a great thread. Naturally, I don't have any stock for a project like this so in addition to a few new tools I need to order some steel! I love steel though, and tools.

Presumably you guys solder the bolsters onto the liners. Lately I've had a lot of trouble getting the surfaces clean enough for the solder to flow; don't know what my problem is because years ago I was a soldering fool. But not anymore. I think Tony Bose tins the surfaces and uses a pencil to mask the solder. That's what I would try unless you guys have a better idea. I'm sure open. How do you clean your surfaces?

Also, it'll come up soon but I'm wondering how you hold onto the blade while grinding. Other than building a jig of some sort to clamp it to I can't think how that would work without a handle to hold onto. Only having made fixed blades, I'm a bit nervous about grinding a) such a small blade and b) one without something to hold onto it with. :)

This weekend I made a couple of manicure knives (don't laugh! :D). My brother is my computer savior, has spent untold hours dealing with my various machines, so when he asked for something to replace his pocket knife for this task I got to it. It was a fun project but the blades are tiny - half an inch long - and I did not grind them well. That's sobering.
 
I use the same size stock as Sean. As far as the bolsters I actually spot weld them on. I needed a spot welder for other projects and the harbor freight model was on sale. That said I would use the Tony Bose way if I were soldering.
For grinding I grind the blade after the handle is made, gives me something to hold onto. I also use Blaze belts for the initial bevels, run cool and cut a lot. Depending on my mood I may use a dowel rod with a step ground in it to support the blade.
Any of yall have tips for working blacklip? I plan on working it wet and cutting it with a jewelers saw.

Glad yall are enjoying this, I am learning new things as I go along.
 
Great WIP Ryan

Dave, I made my bushing lap out of some pre hardened 4140 it doesn't matter if its hardened or not, then I turned the pusher rod on my lathe but if I was to do it over I would use some 3/16" drill rod and drill and locktite it into the handle end alot simpler then lap the rod in the holder.
 
Back
Top