The Saga Continues

tkroenlein

Well-Known Member
Well, by the time folks get to a point where they can say they know me, they'll understand that "deliberate" and "measured" are rarely over statements of my more prolific personality traits. So, it takes me awhile to move away from a known quantity 1 thing at a time until I know my results are consistent with the changes.

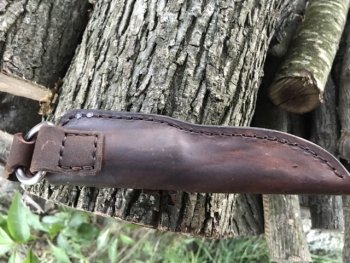
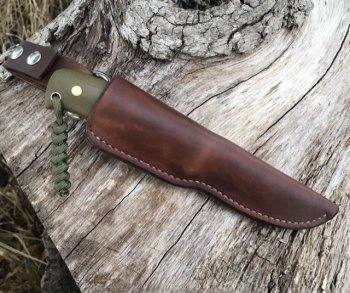
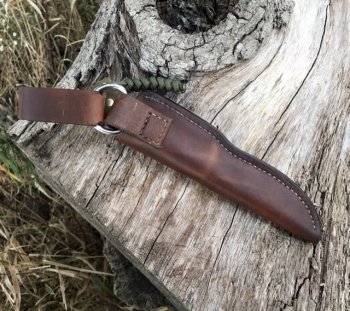
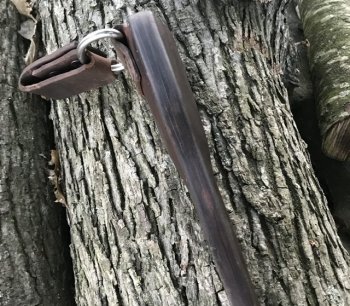
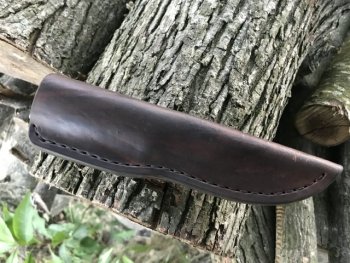
I've made a few more sheaths minding the advice I was given by a few folks here. This is the results of the same Tandy shoulder (which I am thoroughly convinced is of a quality less than I desire), Eco Flo Oil dye, and finished with Lexol leather conditioner. I'm liking this finish much better, and feel the remaining inconsistencies are due to leather. I will likely try the Fiebings Pro Dye once I see where W&C leaves the finish with the Eco Flo


I also used the spinning punch drill press method to make the holes. Very pleased with the front side. The stitch line is...exquisite. The back side, however, was left with the little pucker flap that was left from punching through. I believe that was due to not punching through far enough.

I also added the double thick welt that tapers. Not sure what that's called, but it worked pretty well.
A9A2F168-2722-4411-96BE-3838C0A71FB4.jpeg42382182-7815-40A1-9BB1-86EED7003F28.jpegBE1DD0C3-C9E3-4EF1-B379-963249D75649.jpeg
 
Your stitches on the front look really good. Your edge slicking is awesome. With hand stitching you have to master pulling your thread with the same tension. Over and over and over and over again. On the back side, after you punched your holes, how or did you cut your stitch line? Your stitches look to be setting up/proud on the leather. If they were setting down in a stitch line, I think they would look a bit better. Other than that issue, I think the sheath looks really good.
 
Your stitches on the front look really good. Your edge slicking is awesome. With hand stitching you have to master pulling your thread with the same tension. Over and over and over and over again. On the back side, after you punched your holes, how or did you cut your stitch line? Your stitches look to be setting up/proud on the leather. If they were setting down in a stitch line, I think they would look a bit better. Other than that issue, I think the sheath looks really good.

So I use the line groover on the front, mark, then punch. On the back, I run that same line groover over the row of holes, which it does not deal with well at all, especially with the little pucker flap left from punching through. So the result is what you see there, I very, very shallow line groove with the little flap at each edge of the hole. I suspect working out a cleaner hole punch and a different style groover would fix it. That's my hope anyway. I'm making a list of small tools to grab the next time I do a leather order, to include some radius cutting punches, different grooving tool(s), overstitch tool, and whatever else looks handy when I order. Always taking recommendations!
 
What works for me is laying out and making the grove in the front, layout and complete the stitch holes. I then turn the sheath over and make the groove over the exit holes in the back of the sheath.
Your sheath looks good.
 
What works for me is laying out and making the grove in the front, layout and complete the stitch holes. I then turn the sheath over and make the groove over the exit holes in the back of the sheath.
Your sheath looks good.
What tool are you grooving with? I did it the same. My stitch groover is horrible with the interrupted effect of cutting across the holes.
 
tk-I use a very similar process. 1) Cut groove on front 2) Chisel the holes 3) Smooth the edge 4) Cut the groove on the back by following the chiseled holes. 5) Color the cut groove. 6) Hand stitch. 7) Tamp down the stitching.
 
I also just run over the stitching on the back with the groover after the holes have all been punched/drilled. After I do that the holes get a little squished in, clogged up, or something, so I just take it back to the drill press and go through the holes from the back, smoothing everything out. You can sharpen your groover on a strop, just run it backwards a couple times, not sure how many times you can do this, but it saves you from having to buy new blades for it all the time.
 
Well. I am new to it all- knives and leather, but if you want that super clean look, you do your grooves, front and back, then mark your holes with the stitch wheel spacer thingy being sure to start from the same place on both sides. All the holes will then line up. Punch them individually. The stitches will sit down in there front and back perfectly.
 
I've been working on various "drill press" methods. One thing I'm about decided on is I want a thread that is between the "waxed braided" and the "waxed" nylon that I have.

I made up a hardened awl to spin in the press. It worked ok, but still a bit of "flap" more than I could deal with. Then I watched more Weaver leather videos and he mentioned using a metal backer to help make a clean hole. Did that with the "spinning awl" and it helped a bit. Then I tried just a 1/16" bit on the backer and that was best. I've gone up to 6 threads an inch with the smallish thread. I think if I had just a bit heavier thread it would be spot on.
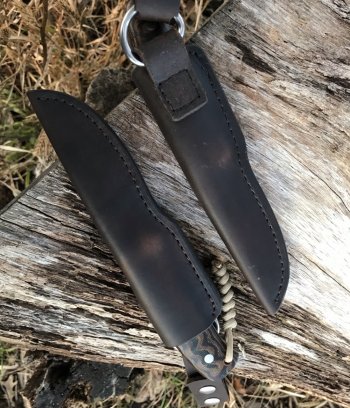
60023359-1032-4309-977E-05B9ABD8D6A1.jpeg20F53571-0D1D-4FA7-8E7D-F9E0EC85C6C6.jpeg
 
Back
Top