MTBob
Well-Known Member
I finally replaced a very very old worn out drive belt on my lathe. There are a bunch of YouTube videos that describe disassembly of the lathe headstock and drive pulley to install a new belt. Another approach to replacing a belt is the use of connecting staples to join the ends, or lacing the ends. I didn't want to add a "bump" in the belt with staples or use a lace connection. I also didn't want to take the machine apart to install a new belt. So I found a company that sells custom cut nylon drive belting that can be connected by gluing the ends in place.
This belting seems to have solid review for longevity, though time will tell how it lasts. The belt has 3 layers, two outer layers of rubber and an inner layer of nylon webbing. It's the nylon webbing that give it strength, the rubber offers friction.
Not knowing whether anyone is interested in this, I'll just show a couple of photos of this belt replacement.
If anyone wants more details just let me know and I'll post a full set of photos with details of the process.
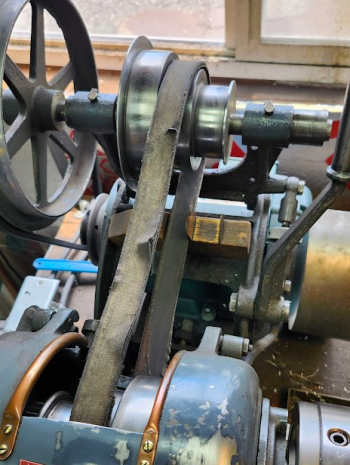
The worn out belt:

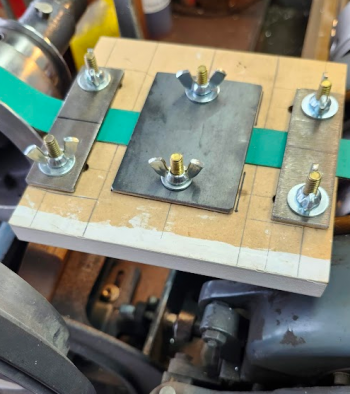
The glue-up fixture:

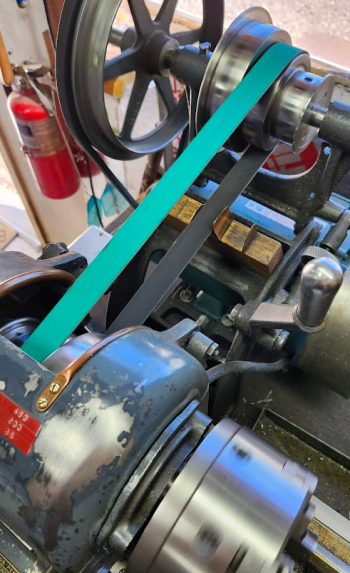
The new belt in place:

This belting seems to have solid review for longevity, though time will tell how it lasts. The belt has 3 layers, two outer layers of rubber and an inner layer of nylon webbing. It's the nylon webbing that give it strength, the rubber offers friction.
Not knowing whether anyone is interested in this, I'll just show a couple of photos of this belt replacement.
If anyone wants more details just let me know and I'll post a full set of photos with details of the process.
The worn out belt:

The glue-up fixture:

The new belt in place:

Last edited:
