You are using an out of date browser. It may not display this or other websites correctly.
You should upgrade or use an alternative browser.
You should upgrade or use an alternative browser.
Important San-Mai tip!!
- Thread starter Chris Railey
- Start date
springer82
Well-Known Member
Spark test??
I've never made san-mai.
I've never made san-mai.
springer82
Well-Known Member
Sounds good to me. Ya never know. To each there own! lol,,,,
Chris Railey
Well-Known Member
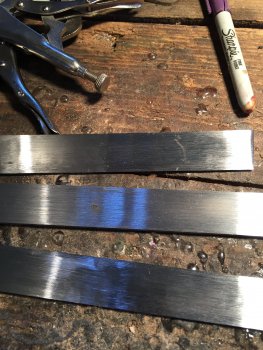
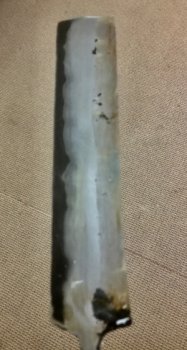
That is two pieces of mild steel with one piece of 1084. When I cleaned them up to prepare for forge welding I cannot tell the difference between them. The 1084 has to go in the middle or else it will be a butter knife.Spark test??
I've never made san-mai.
EdCaffreyMS
"The Montana Bladesmith"
With the combo you used, etching is the best method so you can see what's going on.
When you use a stainless as the exterior layers it's very obvious in a cleaned billet (no etch needed)
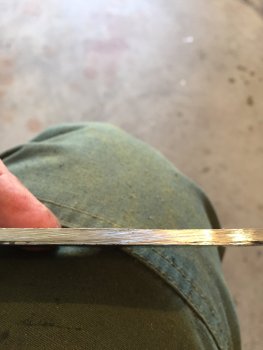
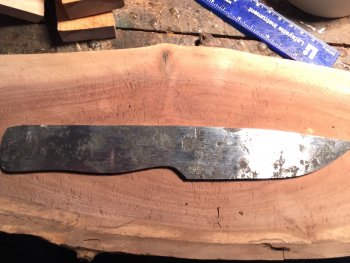
Likely the biggest issue that folks have when making their first few billets of san-mai is keeping the core centered...... it involves much more then a visual of the edge(s)...... If the core isn't centered throughout the billet, things will get off center when ground.....often time leaving the san-mai beginner scratching their heads.
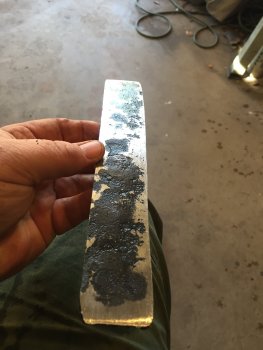
Yep - that billet looks just like the billet I did yesterday with mild steel outside with 15N20 core. Until it's etched, no way to tell it's not just mono-steel billet.
Ed, you're right about difficulty keeping the core centered - that's my biggest problem. Chris mentioned yesterday about using a flattening iron to prevent so much hammer marks and I do think that will help, just got to get a flattening iron. Now to figure how to hold billet, hold flattening iron, and swing hammer with only 2 hands {g}. Also when grinding to clean up billet got to be sure about grinding even on both sides to help keep core centered.
When setting the welds it seems like it's easy to thin the outer layers with core staying same thickness. Any comments on how to deal with this?
This forge welding is getting to be fun - never thought I'd be doing any type of forge welding!
Chris Railey
Well-Known Member
So far I have not had problems keeping it centered but I always work both sides of the billet so that may help I am not sure this is only my second billet.
Chris Railey
Well-Known Member
Jason Volkert
Well-Known Member
Nice billet Chris!!
I've read lots about this spark test to tell high carbon from low carbon steels, but it's never really worked all that good for me. I've watched the videos showing how the high carbon has sparks that branch (sorta "sparkles") while the low carbon sparks are more just dull, blobs of orange. Or, something like that. I just have a hard time telling the difference in them.Spark test??
I've never made san-mai.
Etch it - that's the difference. With the 1084 sides and 15N20 core I'm not sure how much difference there will be in the etch since both will tend to turn black. Here's my first billet, and if I remember it's got a 1095 (or 15N20?) core with mild steel outer layers. I'm using scrap mild steel that's laying around so no telling what it really is, but it won't harden.
this is lightly ground and etched.
EdCaffreyMS
"The Montana Bladesmith"
We all will usually approach things like San-Mai..... from a given direction, based on the tools and experience with have with it. I tend to always come at with my usual thought...... "I can always grind it off.....but it I don't have enough material, I can NEVER put any back." So what I do is make the core a bit over the finished thickness I desire, but I ALWAYS make the exterior layers way over thick.....that way if I have to fix a mistake along the way, or even after the billet is finished, I have the materail to do it. 
Sice I do a lot of stainless on the outsides/exterior, it's not uncommon for me to leave the outside layers of stainless 2 or even 3X thicker then I think I need. (With stainless you build up an incredible amount of surface scale when forge wedling San Mai)
You all keep bringing up thoughts when I read each post...... Since I've not been well enough to forge for several months now..... it help when I write these types of posts...... keep the "lights" comin!!!!
Last edited:
springer82
Well-Known Member
I always check my damascus billets. I have never heard it called that before. A spark test is something all together different for me.I've read lots about this spark test to tell high carbon from low carbon steels, but it's never really worked all that good for me. I've watched the videos showing how the high carbon has sparks that branch (sorta "sparkles") while the low carbon sparks are more just dull, blobs of orange. Or, something like that. I just have a hard time telling the difference in them.
Etch it - that's the difference. With the 1084 sides and 15N20 core I'm not sure how much difference there will be in the etch since both will tend to turn black. Here's my first billet, and if I remember it's got a 1095 (or 15N20?) core with mild steel outer layers. I'm using scrap mild steel that's laying around so no telling what it really is, but it won't harden.
this is lightly ground and etched.
View attachment 67273
Chris Railey
Well-Known Member
I'm not sure what you're saying. You check your Damascus billets with spark test? OR do you mean Etching? Could you explain what your spark test is for and how you do it?I always check my damascus billets. I have never heard it called that before. A spark test is something all together different for me.
Thanks for that tidbit - it confirms what I have found with the 3 billets I've made - the core stays about the thickness as the core thickness before setting weld, while the outer layers will get thinner. MUCH thinner if not careful.So what I do is make the core a bit over the finished thickness I desire, but I ALWAYS make the exterior layers way over thick.....that way if I have to fix a mistake along the way, or even after the billet is finished, I have the material to do it.
OK, that confirms what I found with the single SS billet I did. I had a layer of .070" AEB-L on one side and by the time I got finished it was THIN!!! Lots of scale. The other side was an 1/8" 416 SS and there was enough of it left to do ok. BUT, by the time I got the blade profiled and ground with bevels, the side was just barely thick enough.it's not uncommon for me to leave the outside layers of stainless 2 or even 3X thicker then I think I need. (With stainless you build up an incredible amount of surface scale when forge wedling San Mai)
Please Ed, do keep chiming in. Your posts are ones I ALWAYS pay attention to. While you and I don't always agree on everything (That I have enough knowledge to even think about disagreeingYou all keep bringing up thoughts when I read each post...... Since I've not been well enough to forge for several months now..... it help when I write these types of posts...... keep the "lights" comin!!!!
Ken H>
Last edited:
springer82
Well-Known Member
I'm not sure what you're saying. You check your Damascus billets with spark test? OR do you mean Etching? Could you explain what your spark test is for and how you do it?
Ken I always etch my billets to see what I ended up with or for alignment. You saw my last billet on Nothing Ventured Nothing Gained. I have spent along time working on cars and bikes. That is where a spark test "to me" comes from.
Last edited:
Oh, "spark test" from spark plugs on cars - of course. Done that many times myself, but never like my Uncle who stuck his finger inside plug cap to make sure it was sparking and how strong it was. Heck, that dummy could kill a 4 cly tractor by grabbing all 4 spark plugs - NOT ME!! I was either not tough enough, or not dumb enough.
Yep, etching is the only way I know about checking San Mai.
Yep, etching is the only way I know about checking San Mai.

