Electro Etching Makers Mark

BrandantR

Well-Known Member
For the two years that I have been making folders, I have been putting my signature on the inside of the back spacers through chemical etching. It's really a pain to mask off the spacer with acid resist, scratch the signature through the resist, and etch the mark into the steel with acid. I have been able to get some fairly good results, but for every good etch I have two or three mediocre ones. So, in order to improve results, I'm entertaining the idea of using an electro etcher. I know that there are many out there that use electro etchers, so I want to pick your brains and get your opinions.

I have been looking at the differences between the Personalizer and the Personalizer Plus units. Apparently the major difference between the two is that the Personalizer Plus has variable output voltage. Is the variable voltage worth the significant difference in price?

I have also considered building my own since there are a few plans floating out there in cyberspace to do so. I have some electrical skills, so I'm not afraid to try. Has anyone here built their own and does it work as well as a commercially made unit? Any insights to consider when building one?

I'm also open to other options and units that may out there. I really want to get a good, consistent mark so I can start marking the blade instead of hiding it inside the back spacer. I appreciate any feedback and advise that you may be willing to share.
 
I made my own, as did many others on here. It's pretty easy and a whole lot cheaper. So, first decision is build or buy?
 
I built my own as well using Chris Crawfords and Ernie's plans. I have never used one before the one I made so I have nothing to compare it to, but it works. Radio shack had a sale going on when I bought my supplies and with buying a sodering iron I think I spent under $75.
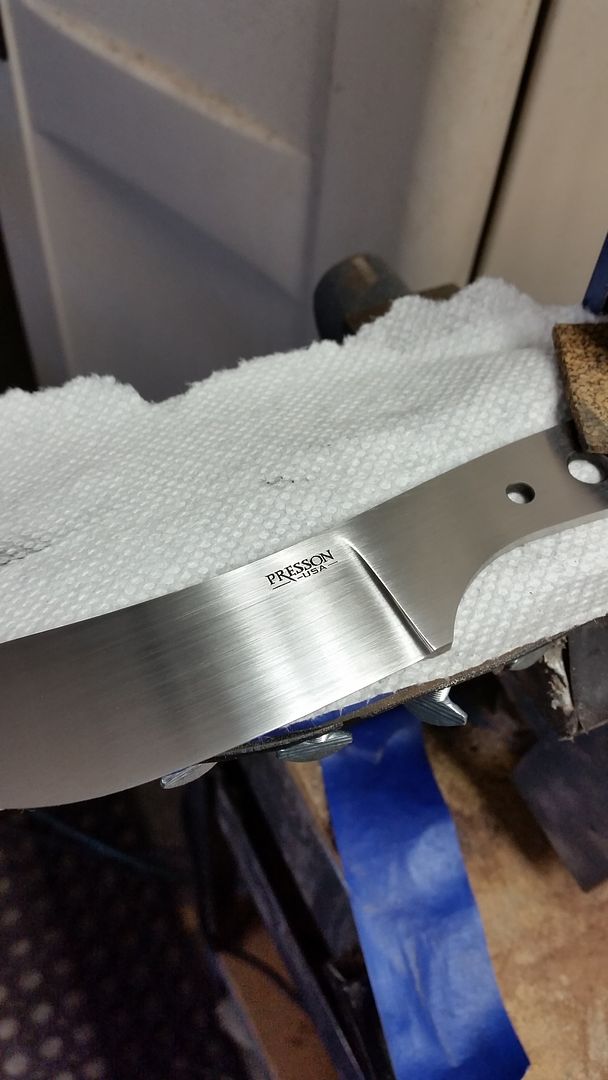
Here is a a pic of a knife i etched with it.
 
I also made my own earlier this year using Earnie Grospitch's and Chris Crawford's plans. Think I spent about $100 by the time I bought the etching solution. I had been using a battery charger and the difference is night and day. I haven't used a professional machine either so no comparison. As for if the Personalizer Plus is worth the extra cash, most people I've heard talk about it say they never change the voltage.
jrgPhw7.jpg

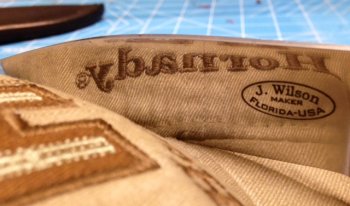
These were some of the first I did with my new machine.

Chris
 
I have the Personalizer- NOT the Plus. Works fine every time. At the end of the day it's just a voltage source. I think your chemicals, stencil, and quality of your contact brush is what determines the quality of the etch (if you do your part).


Sent from my iPhone using Tapatalk
 
Well, it sounds like several here have made their own etchers and put them to good use. Justin and Chris, those are nice looking etches! I sure don't see any difference between etches made by shop-made versus commercial units. I think I'm leaning way over to the "build-my-own" side of the fence.

Does anyone have an opinion on the variable voltage issue? I've been doing some more research and it sounds like most only use one voltage setting on their etchers, so the variability might not be necessary.

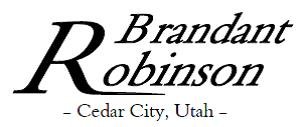
Anyone else have any more thoughts on the matter that they would like to share? I have a couple of new folders that I will be finishing up in the next week or two that I would like to mark, so I need to make a decision soon. I am in the process of ordering some stencils from Ernie as well. I guess that's kind of putting the cart before the horse, but I figure it might take a week or two to work out the design details of my mark. Here's a pic of my design for my maker's mark. I wanted something simple, yet identifiable. What do you think? Any suggestions?

Maker's Mark.jpg

Thanks for everyone's comments and for taking the time to help a fella' out.
 
Mine doesn't have variable output and I've never ruined a stencil. I use Ernie's stencils, too. Contact time (how long you leave the pad down / lift up) is all the control I've needed. Once you get your system process down, you just stay consistent. I etch for five, 3-second holds. Then I switch to Mark, and I apply for 20 seconds, lift, rub, apply 20 seconds, lift, rub (x5).
4in drop point finish.JPG
 
Brandant, I'd say you logo looks fine, except I think the font for the town is too small in comparison to the rest. I'm afraid it will get lost or not come out clear. If you shrink the whole thing down to fit a folder, that font is going to be micro! As far as building one, I think we all used about the same plans. I bought the transformer and bridge at Radio Shack and scrounged/repurposed everything else. If you're resourceful, you can build one for less than $50 easy, maybe $30. If you think you want a higher voltage, the transformers are center tapped, so you could add a switch to apply the whole winding and have 2 voltages. I don't think you really need it though.
 
Mine doesn't have variable output and I've never ruined a stencil. I use Ernie's stencils, too. Contact time (how long you leave the pad down / lift up) is all the control I've needed. Once you get your system process down, you just stay consistent. I etch for five, 3-second holds. Then I switch to Mark, and I apply for 20 seconds, lift, rub, apply 20 seconds, lift, rub (x5).

Thanks for the info, John. I'll be sure to experiment with the hold time before I try marking a knife that I have spent hours on.
 
Brandant, I'd say you logo looks fine, except I think the font for the town is too small in comparison to the rest. I'm afraid it will get lost or not come out clear. If you shrink the whole thing down to fit a folder, that font is going to be micro! As far as building one, I think we all used about the same plans. I bought the transformer and bridge at Radio Shack and scrounged/repurposed everything else. If you're resourceful, you can build one for less than $50 easy, maybe $30. If you think you want a higher voltage, the transformers are center tapped, so you could add a switch to apply the whole winding and have 2 voltages. I don't think you really need it though.

The font size of my home town in my design was my concern as well. I want it fairly small since I don't want it dominating the mark. I'm waiting for some feedback from Ernie on this same matter before I make a final decision. I may end up eliminating the town info altogether since it's really not absolutely necessary.

I guess it's time to start scrounging for parts. Wish me luck. I'll be sure to post some pics of what I come up with. It might be fun to do a whole WIP on the subject along the way.
 
Yep. Ernie will tell you what you need to do or give you some options. I want to start working on folders as well, so I have to think about coming up with a different mark. I would like a clean, simple mark - one that would fit on the ricasso instead of the side of the bevel. My problem is that there are about 90345 gazillion Wilsons out there, so WILSON isn't going to cut it.
 
Yep. Ernie will tell you what you need to do or give you some options. I want to start working on folders as well, so I have to think about coming up with a different mark. I would like a clean, simple mark - one that would fit on the ricasso instead of the side of the bevel. My problem is that there are about 90345 gazillion Wilsons out there, so WILSON isn't going to cut it.

You think you have it bad? My name is Chris Jones..... I think the only name that might be more common than mine would be Bill Smith or something! lol

Chris
 
I have built one had one built for me and finally got fed up and bought the personalizer from midwest knife supply and have never been happier. I know many people are happy with home brew etchers but personalizers are really affordable. I wish I would have bought mine from the get go rather than wasting time money and materials.
 
Being a beginning "assembler" everything I do seems to be a beta test including etching the makers mark. The first ones I did were as low class as it gets, a 9volt battery, a Qtip and salt water, truly lowest of the low. Then I got the idea of using a transformer from somewhere and I thought it was high tech until I discovered it was producing AC instead of DC, duh..... Making heavy, dark marks that I didn't like. Then I bought a small DC power supply from Radio Shack and made the "applicator" from Ernie's page. MUCH better results and then I "discovered" the salt water isn't the best etcher to use and I found some Ferric Chloride, again at Radio Shack, MUCH, MUCH better results.
I use DC to get my mark to look "frosted" instead of dark which I prefer. I didn't want the mark to overwhelm the blade and frosted looks better to me. I use Vinyl die cut designs from my local sign shop and get acceptable results. The sign shop I use charges me 20.00 for a sheet of 40 so the cost is affordable and repeatable.
So no matter which way you go keep it simple, repeatable and clean.....
 
I sure appreciate everyone's advice and the time it took for you to respond. After lots of deliberation, I decided to save a few bucks and build my own etcher. I followed Chris Crawford's plans and found them quite easy and straight forward to follow. My local Radio Shack had all of the components that I needed right there in stock, so it only took me one trip to gather up all the parts I needed. I think I only spent about $70.00 for everything, so that was lest than half the cost of most commercial models. I spent an evening drilling, stripping wires and soldering and was able to come up with something that looks a lot like an etcher.

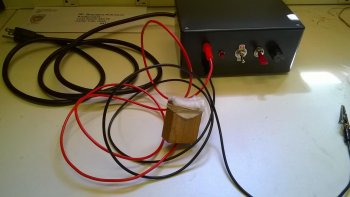
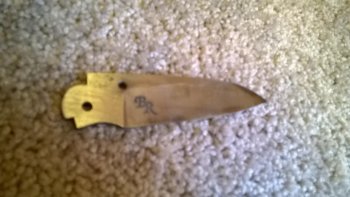
As for the maker's mark, I worked with Ernie and came up with a design that I think will work for me, at least for now. My original design was too big to condense down in order to fit on a folder blade, so I had to settle for my initials. I know having your name on a knife, not only initials, is important, but when you have a long name like Brandant Robinson, it's kind of hard to fit on a small blade. I think I'll still engrave my signature inside the back spacer, but the initials on the blade will give my work immediate recognition. Here's a couple pics of my etcher and the first mark using my new stencil. There's a little ghosting on the mark, but this was a trash blade that had only been finished to 120 grit, so I think that's part of the problem. I also did some research and found that many use windex under the stencil which is supposed to help with the ghosting, so I'll try that a few times before I mark a good blade.

WP_20150613_15_19_57_Pro.jpgWP_20150613_15_56_41_Pro.jpg
 
Looks great! Sometimes I feel so short on time, I question building tools, but I always enjoy using something that I made myself. That, and I'm a huge cheapskate,
 
Looks great! Sometimes I feel so short on time, I question building tools, but I always enjoy using something that I made myself. That, and I'm a huge cheapskate,

Thanks, Anthony. Most all the tools I use in my shop are ones I've made myself or modified in one way or another. There is really a feeling of accomplishment building a knife with tools you have made with your own two hands. And to quote you, I'm a big cheapskate too! Poor men have poor ways is what I always say.
 
Looks good Brandant! Glad it worked out. I found that the windex along with swiping the etching pad across multiple times instead of holding it on flat for a 3 second count works best for me.
 
Back
Top