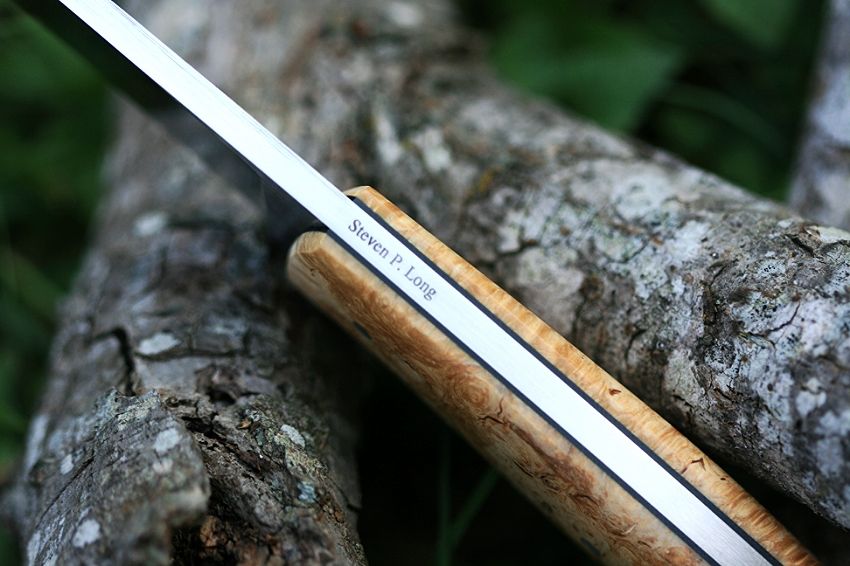
Spalted Box Elder Burl and O1... #10

Steven Long

Well-Known Member
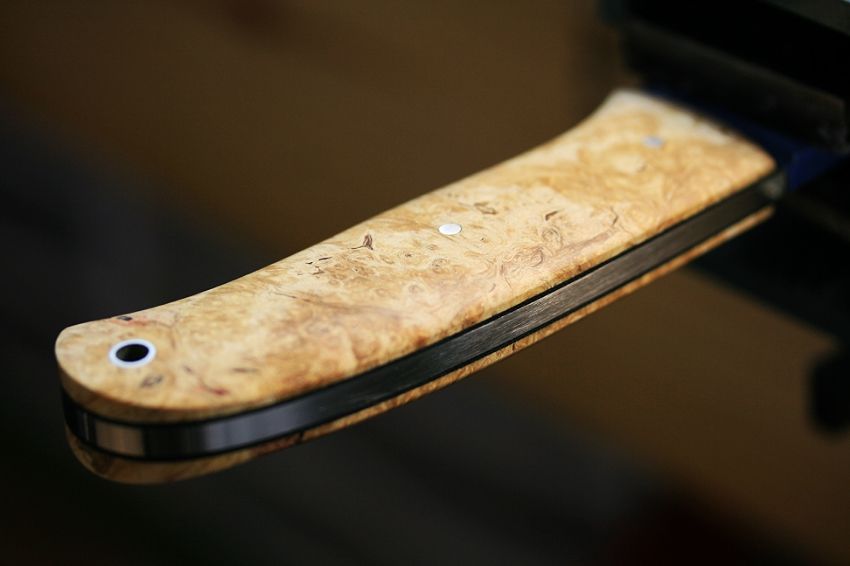
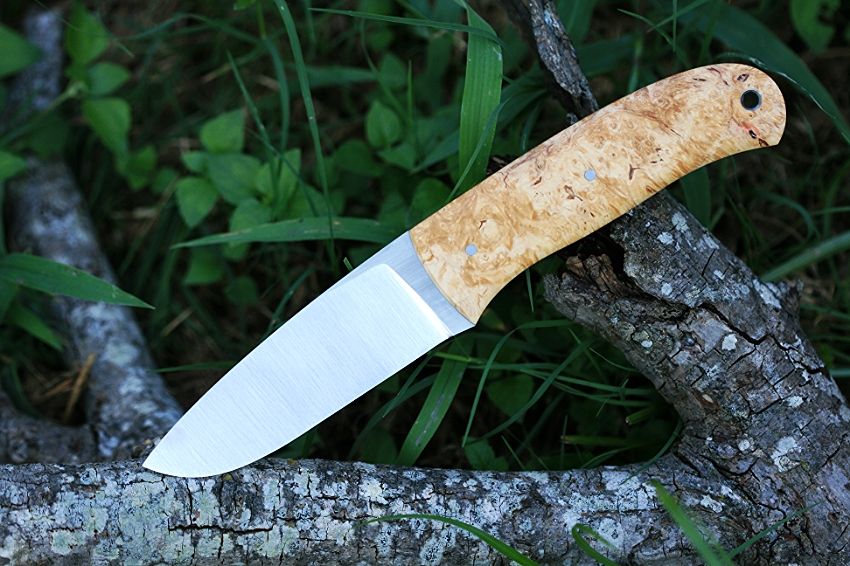
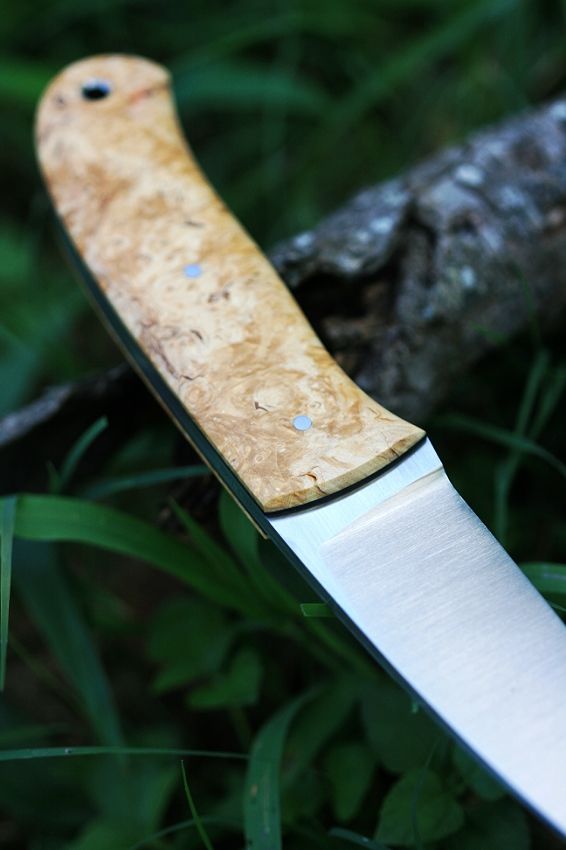
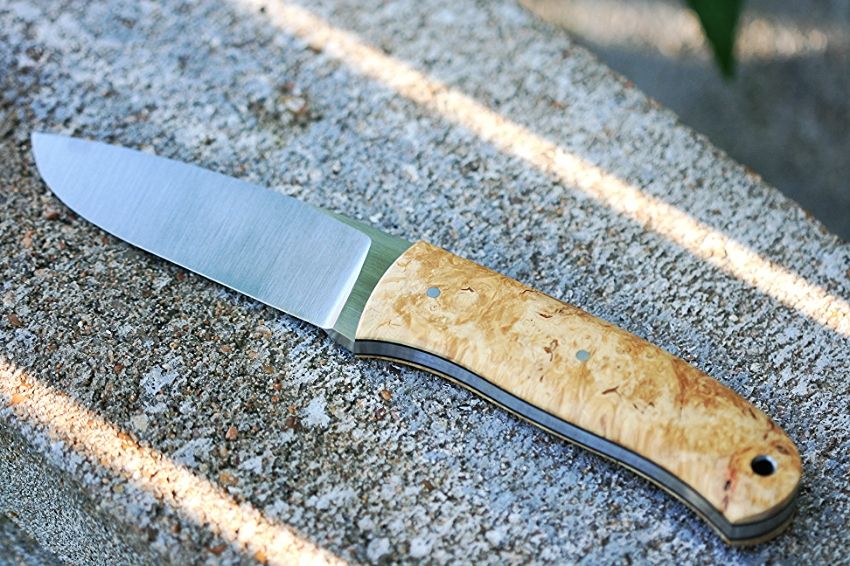
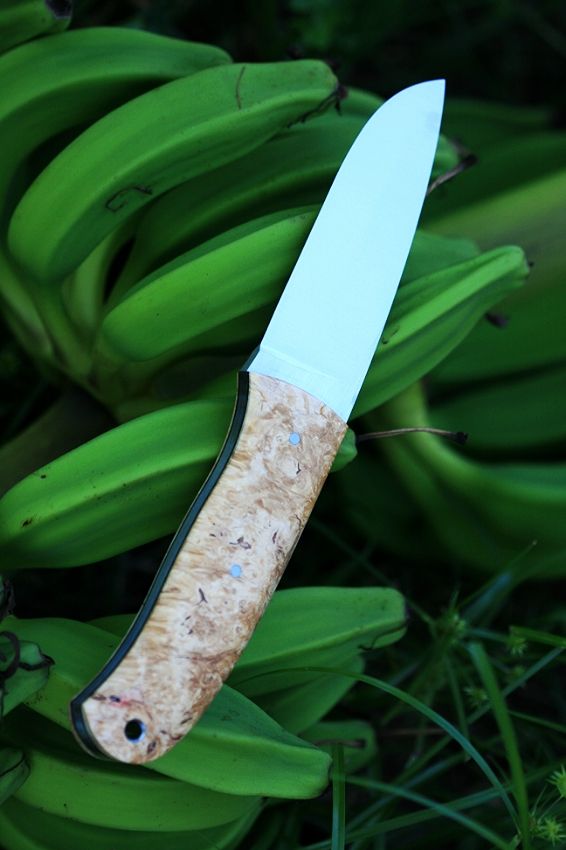
Here is #10 almost done. This one was a custom order based on Stefan Aberg's bushcraft pattern. The design has grown on me.

- 3/16" O1
- OAL 8.75"
- Cutting Edge 3.75
- Stabilized Spalted Box Elder Burl
- Black G10 Liners
- 1/8" SS Pins and 1/4" SS Lanyard Tube (countersunk)
- Flat Grind

2013Progress042_zpsf7484a86.jpg


2013Progress045_zps7ee05e89.jpg


2013Progress046_zpsccb377ea.jpg


2013Progress047_zpsba3d60ba.jpg


2013Progress049_zps76fb4f03.jpg


2013Progress053_zps05a9a1bd.jpg


2013Progress056_zpsf47114ce.jpg


2013Progress060_zps76f9bf6f.jpg


2013Progress062_zps10177c50.jpg


2013Progress066_zps0053cb12.jpg


Thanks for checking it out!
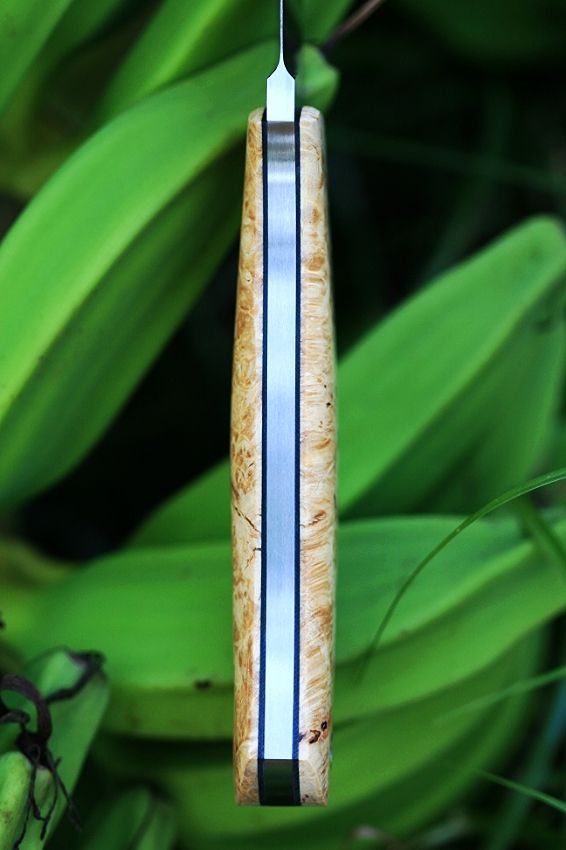
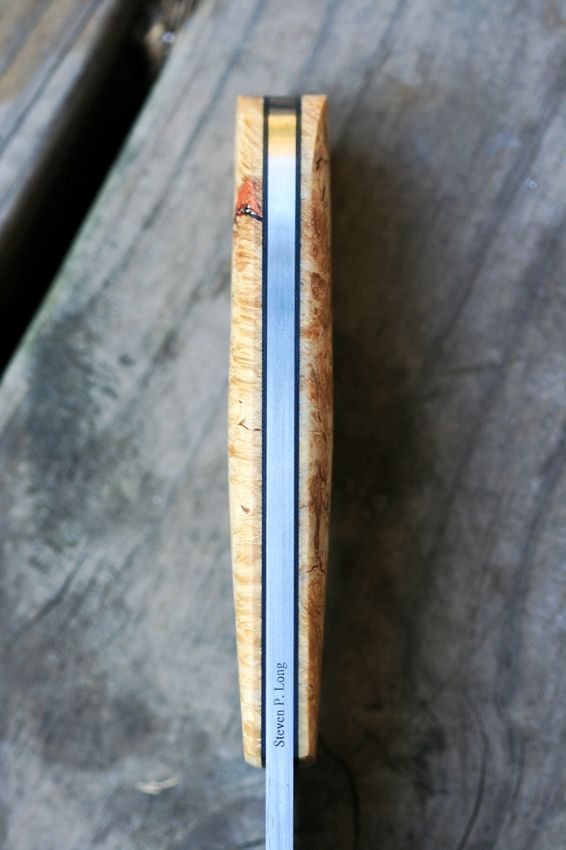
 
That one is really nice Steve . Lots to talk about on this one .. Starting with those perfectly even plunges. Lovin the prop point , and the scales are just beautiful .. Really nice job !

On a side note , one day you may wanna hand finish a few of your blades , it will give your knives a completely look .

Lovin your progress .. Your knives are getting better and better with every one.
 
Steven,
One of my favorite things, since starting bladesmithing, is watching others and their progress. You are on a great path.
Nice knife!!!

Wade
 
That one is really nice Steve . Lots to talk about on this one .. Starting with those perfectly even plunges. Lovin the prop point , and the scales are just beautiful .. Really nice job !

On a side note , one day you may wanna hand finish a few of your blades , it will give your knives a completely look .

Lovin your progress .. Your knives are getting better and better with every one.


Thank you, Mike!

The plunges have been my nemesis since I started. I think I finally kind of figured out a trick while working on this one.

I was actually going to do that to this one but the new owner was complaining about scratches on his mirror polished one and I wasn't sure how the hand rubbed look would hold up. He does a lot of bushcraft related tasks so I thought this might be a good finish for him. Still a lot to learn.

Thanks a bunch, man.
 
Steven,
One of my favorite things, since starting bladesmithing, is watching others and their progress. You are on a great path.
Nice knife!!!

Wade


Thank you very much, Wade.

That has become one of my favorite things too. Its great to see how everyone's work gets better and better with each one.
 
Steven, I like that knife - and really like how you put your name on the back edge. I think I'll try that - do you use a stamp? or is that etched?

Ken H>
 
Steven, I like that knife - and really like how you put your name on the back edge. I think I'll try that - do you use a stamp? or is that etched?

Ken H>


Thank you, Ken!

I got the idea from Shawn Hatcher. I think it looks much cleaner on the spine. It is etched. Still trying to figure out how to get consistent results with the etcher though
 
Thank you, Mike!

The plunges have been my nemesis since I started. I think I finally kind of figured out a trick while working on this one.

I was actually going to do that to this one but the new owner was complaining about scratches on his mirror polished one and I wasn't sure how the hand rubbed look would hold up. He does a lot of bushcraft related tasks so I thought this might be a good finish for him. Still a lot to learn.

Thanks a bunch, man.

Ya know , i used to hand finish to a really grit and shine up the blade real good , but as I started messin around with my satin finishes , Ive been bringing my gritts up to 1200 or so and then Id step down to 1000 or even 800 to give that finish.

I still love it anyway .. you're doing great !
 
That is a great tip! I bet it leaves a way better finish. I am going to have to try that.

Thanks Mike!

I learn as we all learn ( trial and error ) I'm sure other guys have their way of doing it but this is what I do.
Yeah, I have a piece of micarta 1/4 x 2 x 5" or so that I use as a sanding block. . I walk up through all the grits from 220 right on up to 1000 to 1500 depending on how it feels and looks. And after I'm done , I use an eraser ( the ones that we had in school ) I'd wrap a piece of paper around it ( step down a few grits )and drag right through the ricaso and through the blade a few times and you'll see a good result. It'll take a few times but I think it adds a nice touch and look to the blade. Oh yeah I forgot to mention , use a drop of Mobil 1 oil between each grits, it makes a big difference. Obviously wipe blade between each grit.. Give it a try.. You'll be hooked in no time.lol

I also forgot to mention to grind a 45 on on another piece of micarta . You can use that to get into your plunges.
 
Last edited:
I can't afford one of your knives so posting this kind of stuff is just unfair. In all seriousness though, I look at your knives and they make me want to make knives instead of just wantig to own knives.
 
awesome work. I love the handle material. your lines are clean and the shape is great. I really like the Idea of etching the name on the spine. My only "but" is that with no marking on the blade its hard to easily see who made it. If I borrowed the knife and liked it I would look for the makers mark. If you just had a quick second to check out the knife it might go unnoticed. Great work I look forward to see your next piece.
 
Back
Top