Josh Dabney
Moderator
Hey all,
There's some info out on the web about installing digital readout's on mills but I figure why not catalog my experience here in our shoptalk forum as each persons experiences can vary quite abit depending on their mill, experience, and which perticular dro they got.
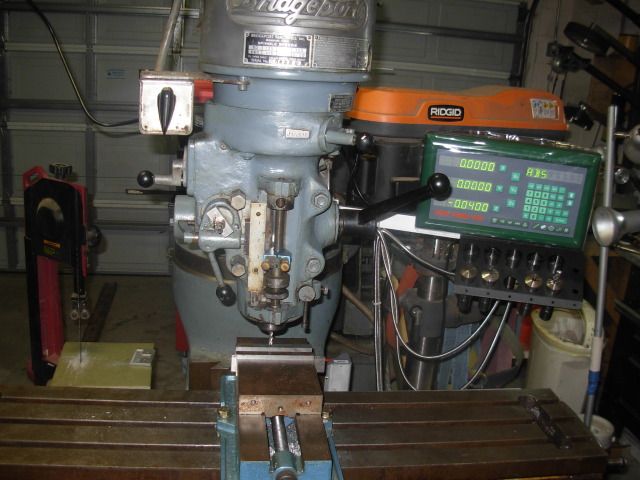
I did some research an opted to go with this DROPROS 3 axis kit with glass scales for the new Bridgeport-
http://www.dropros.com/DRO_PROS_Milling_Machine_Digital_Readout#DRO_PROS_3M
It was a hard descision but I decided to avoid both the e-bay specials and the higher priced units and go middle of the road with this kit.
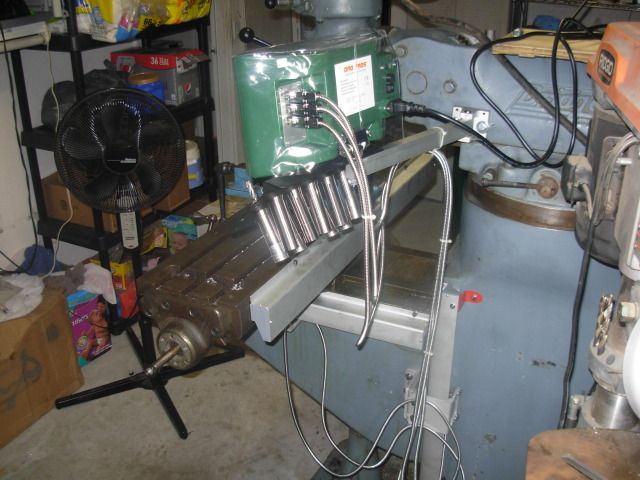
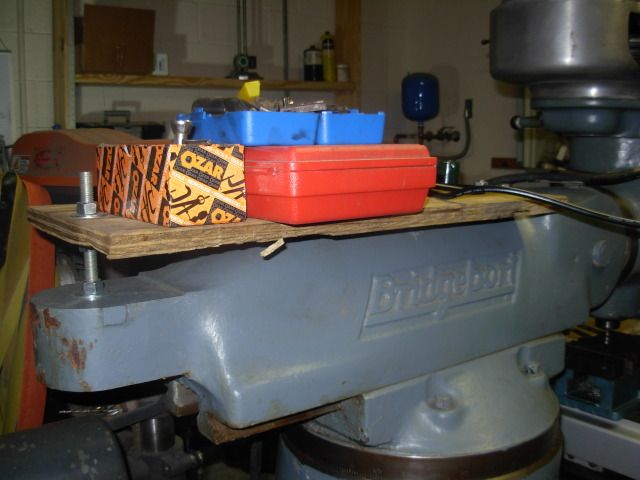
Checking out whats in the box-
http://www.dropros.com/DRO_PROS_Milling_Machine_Digital_Readout#DRO_PROS_3M
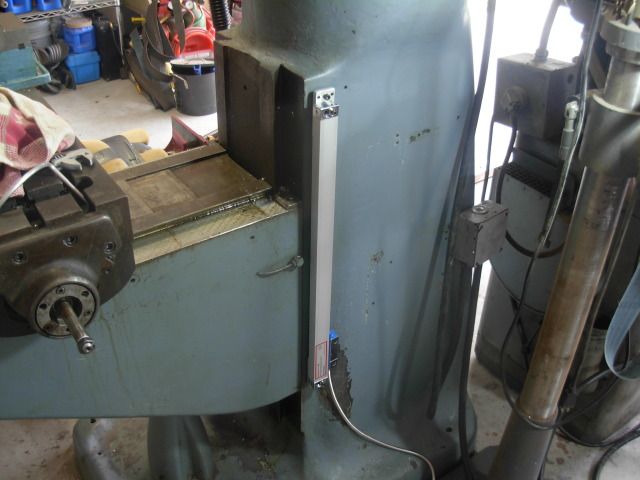
I went with a 450mm scale on the knee for my z axis. If one preferred they could go with a shorter scale and mount it on the quill but I figured it best to have digital on the full travel of the knee knowing I can always add an in-expensive quill dro down the road or learn to use the knee for all precision z axis movement.
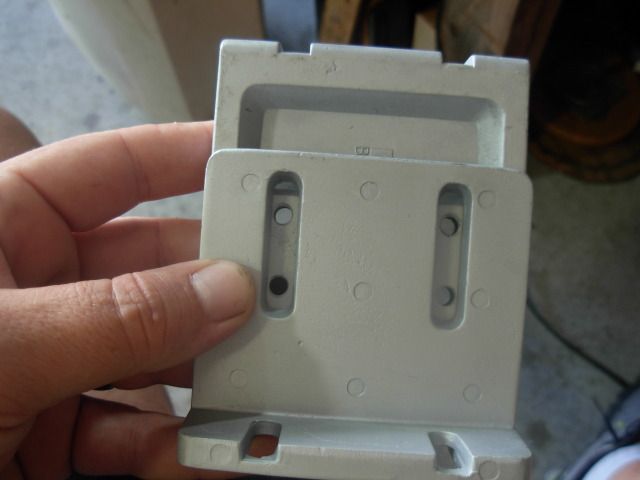
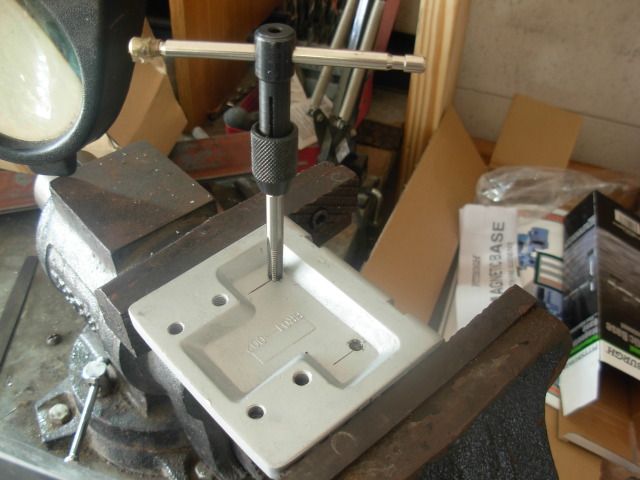
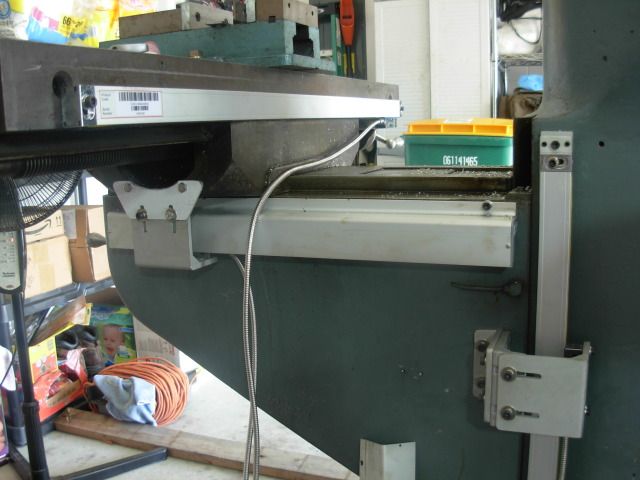
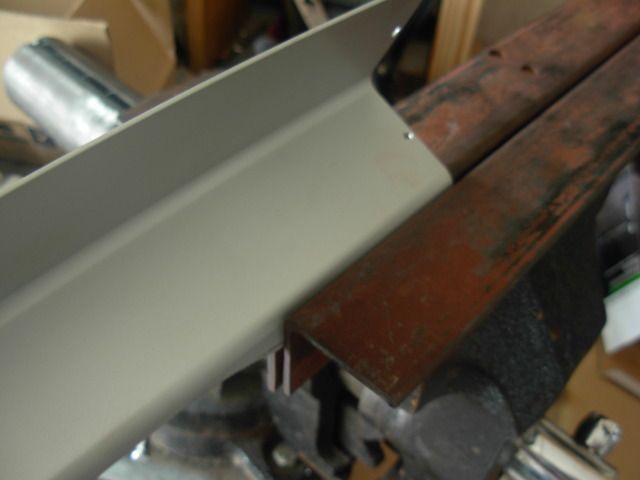
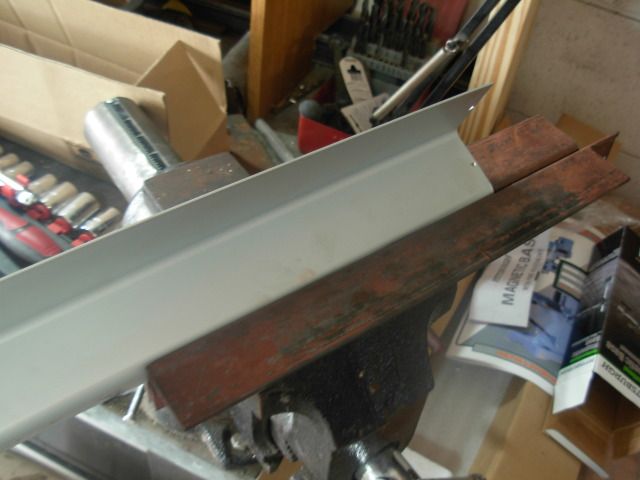
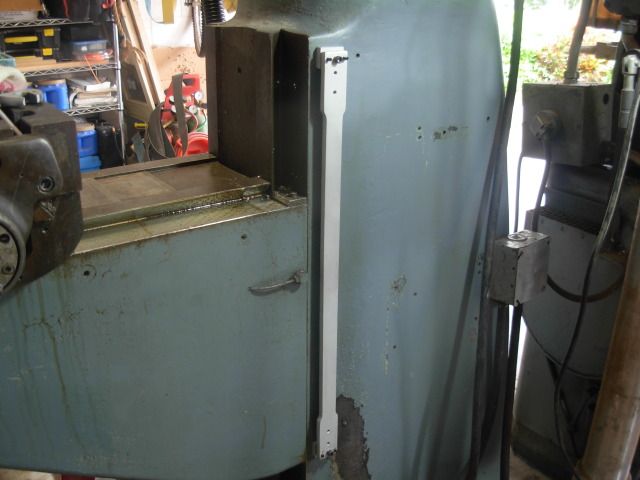
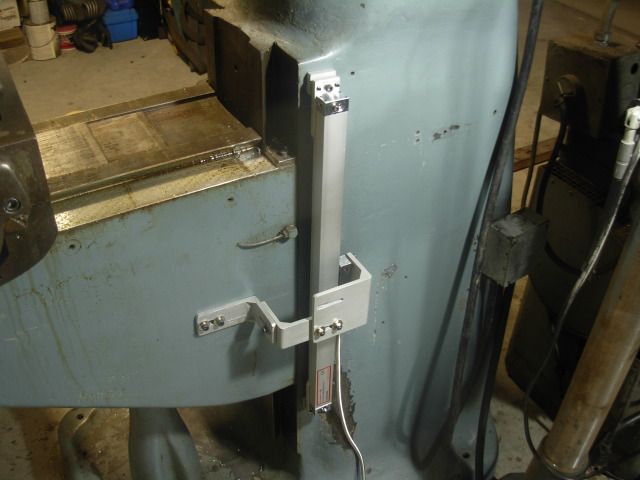
Due to the shape of the machines base the backerbar for this scale is a must to get it squared up to the knees travel. The top hole was already drilled and tapped so I just went with spot because of that
This kit's directions are in english and easily understandable but incomplete as to which brackets go where etc. so it's the installers problem to figure all that out but they do at least forewarn that instructions are NOT machine specific and the consumer will need to be creative in mounting the brackets.
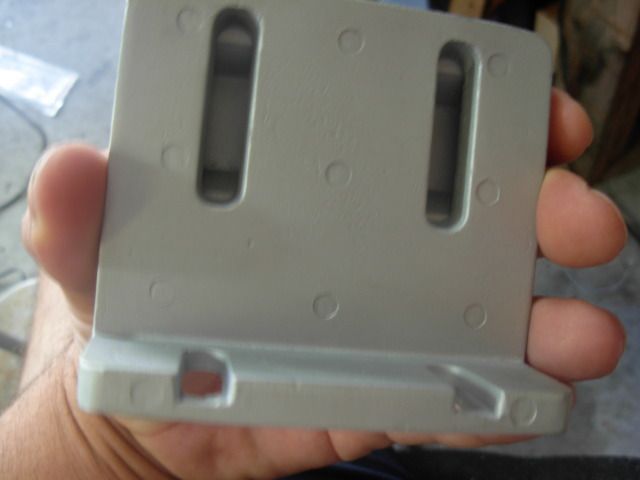
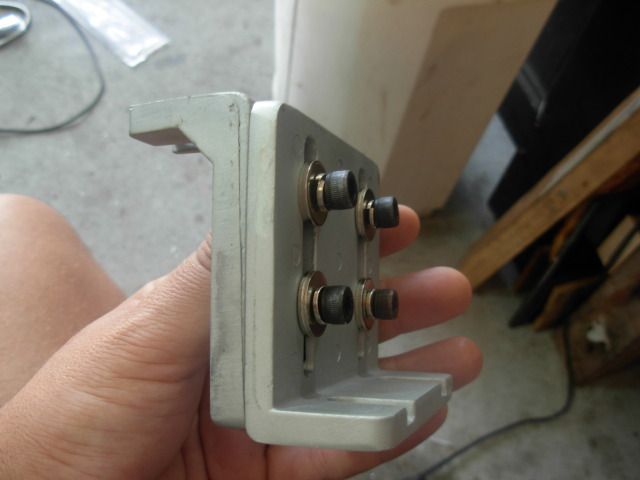
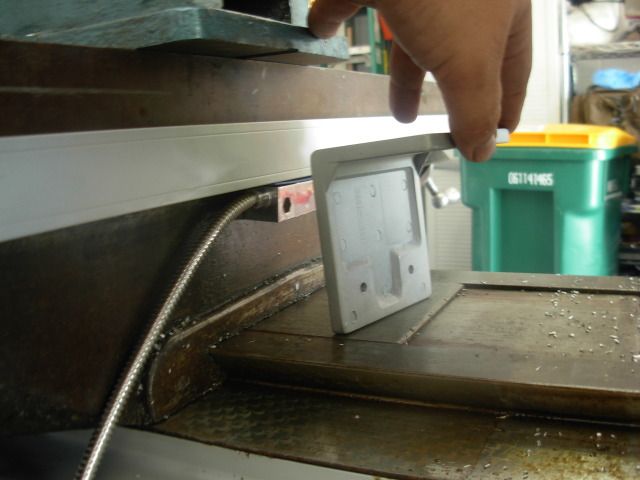
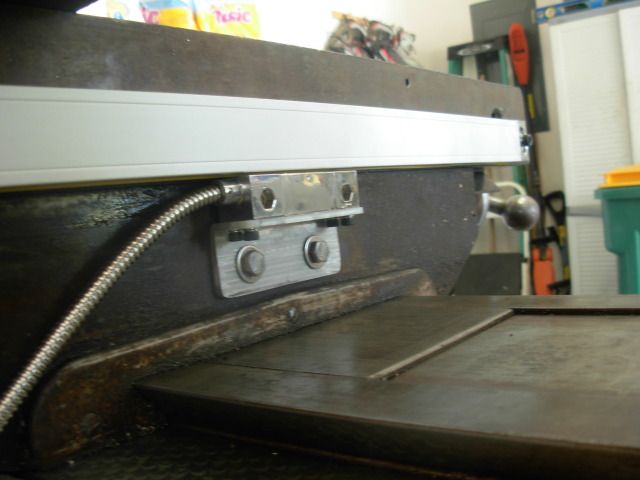
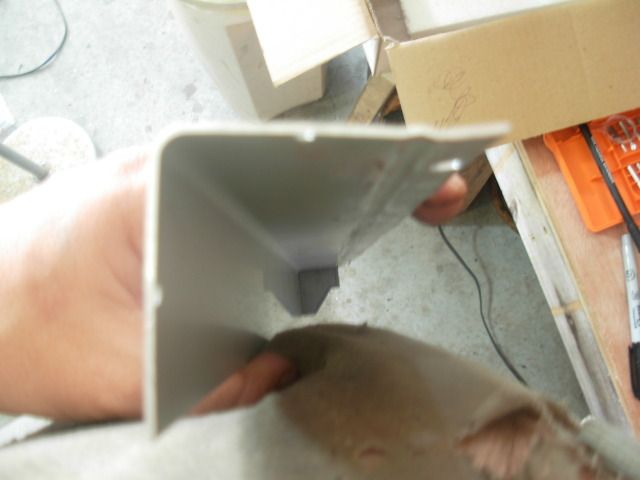
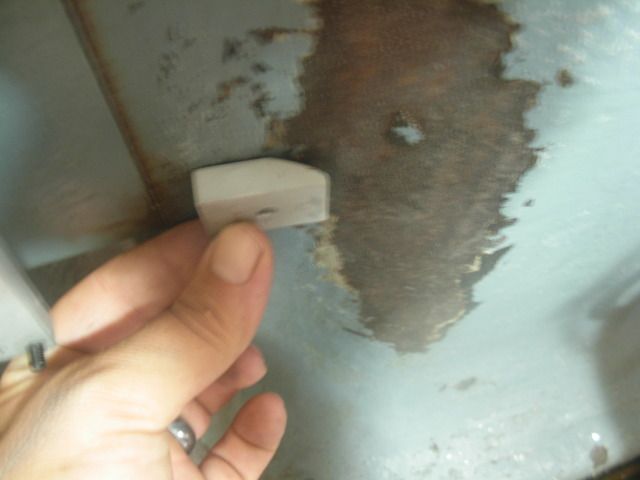
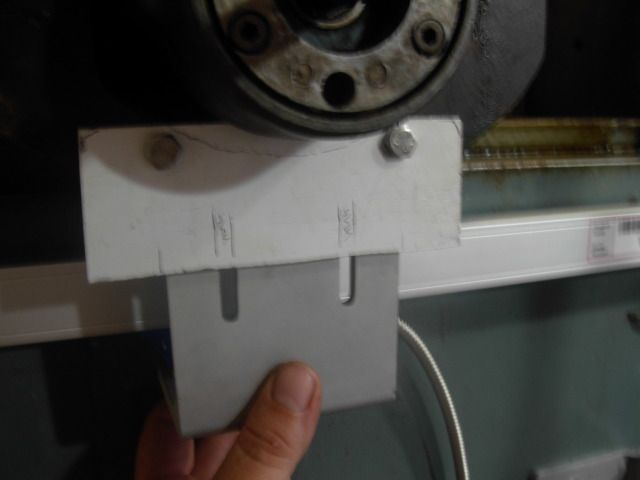
Here you can see that even with the backerbar installed my trolly is just bumping into the mills base and I still need room for the trolly bracket to bolt on in that spot. Included are these two spacers to pull the scale even further away from the machine base to gain the needed clearance.
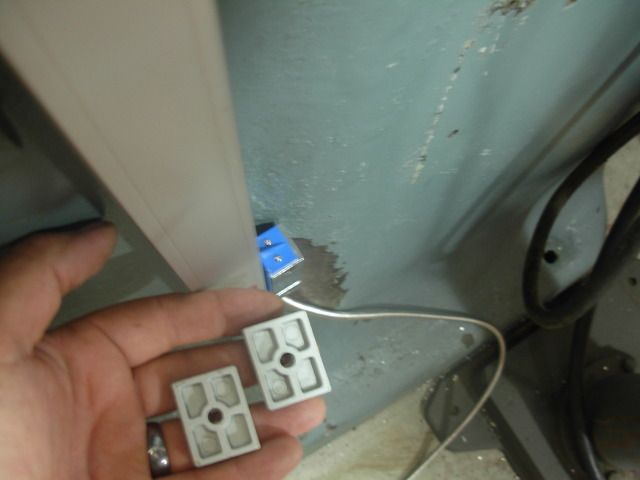
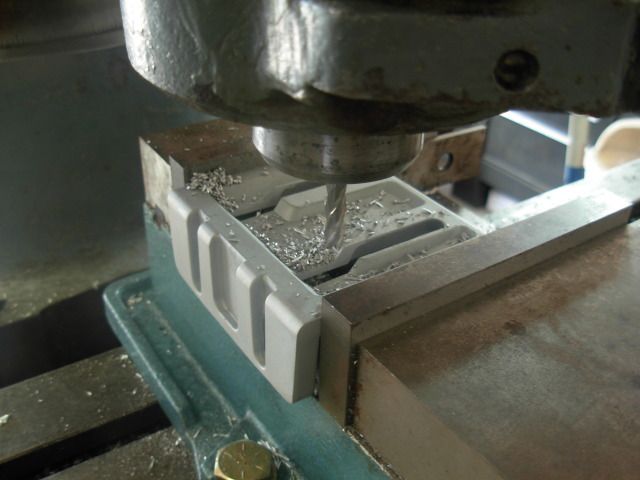
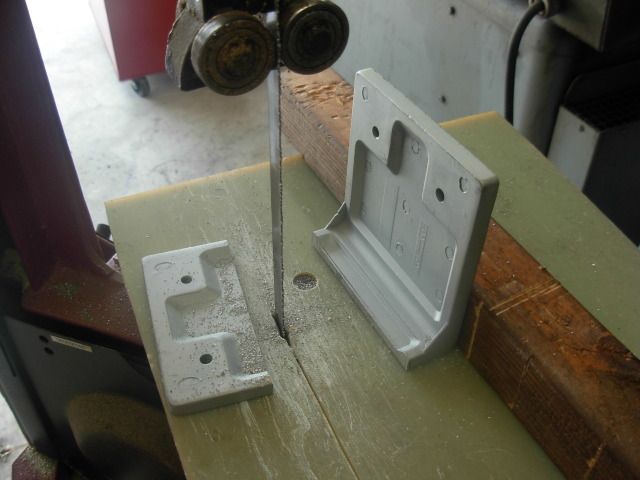
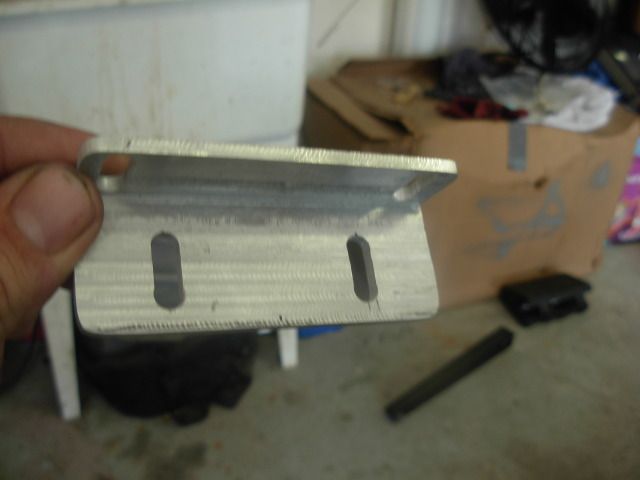
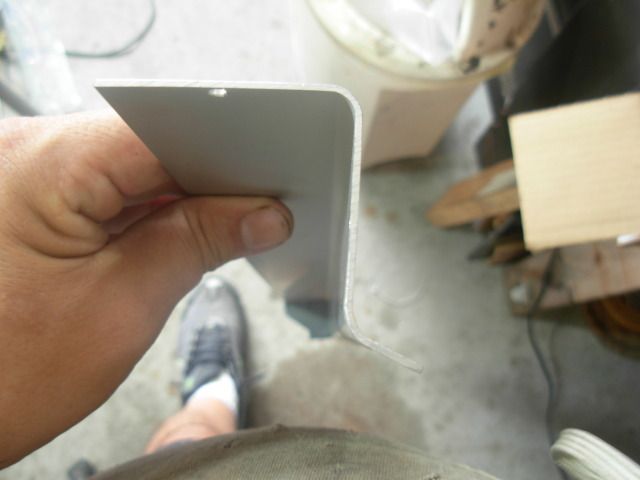
A slight mod on the KMG to get the bottom spacer to fit the base and I'm ready to re-install the scale
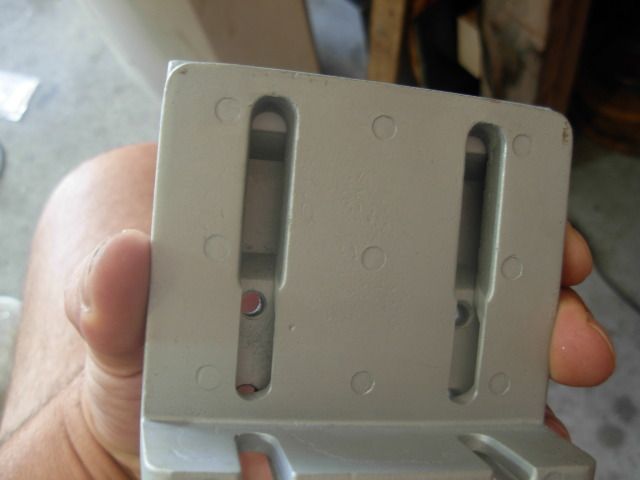
Here we are with the backerbar and spacers re-installed and ready to bolt the scale in place
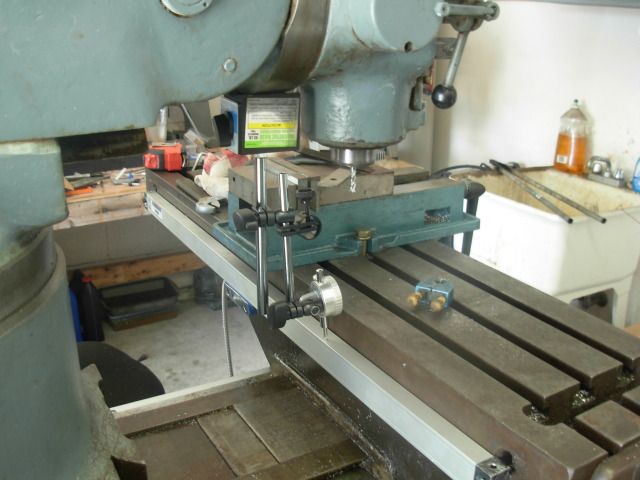
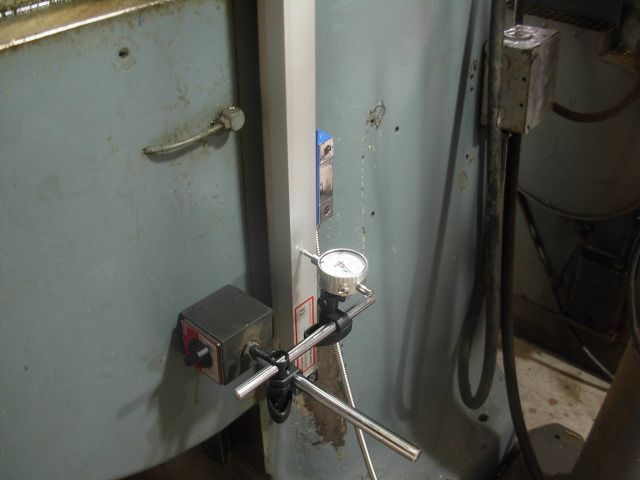
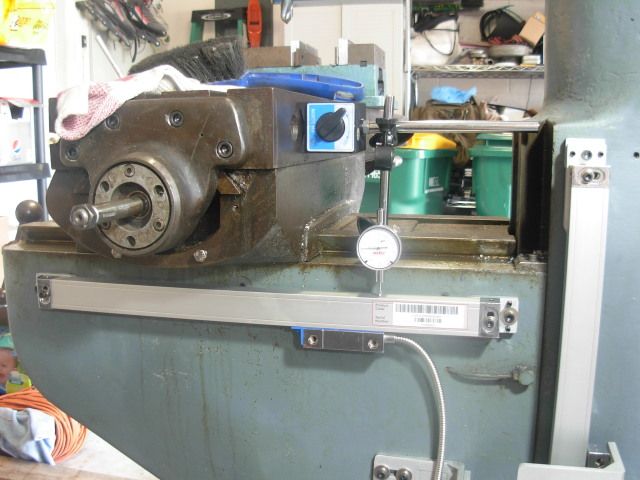
Using the dial indicator to alliagn the scale with the knees travel. This is a trial and error affair which begins by eyeballing it originally, checking with the dial, making an adjustment by loosening the the backerbars bolt and adjusting the gibb screws, then tightening down the backerbar bolt and re-checking with the dial. When you can move the knee up and down without the dial moving your golden in this axis of allignment
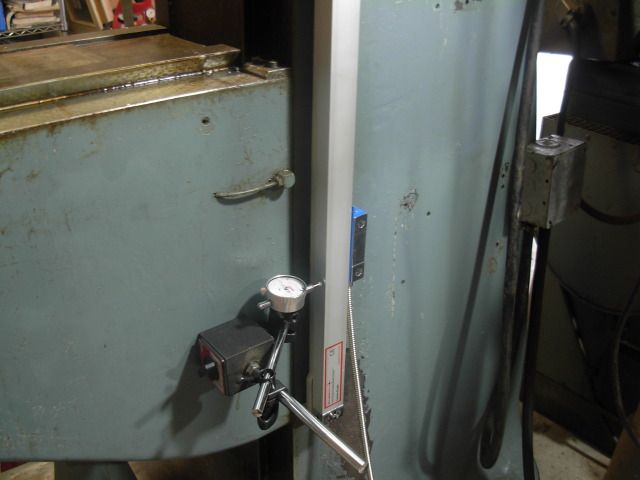
The scale must also be parallel with the knee travel in this axis. Adjusting was a much simpler affair than with the gibb screws. There are slots for the scale mounting bolts so it's a simple matter of moving one end of scale until the dial stays put through the knee's travel.
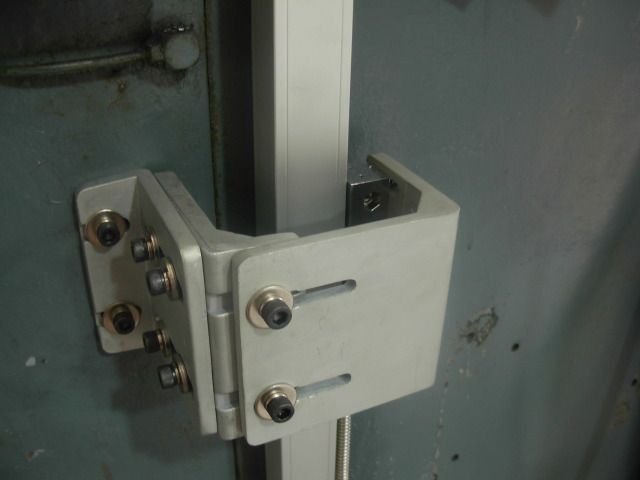
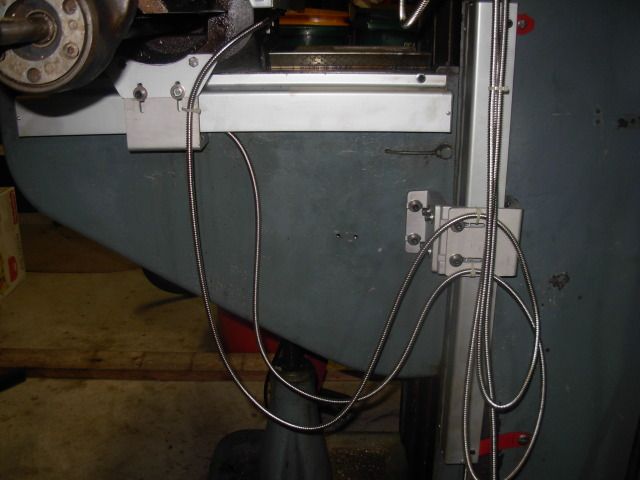
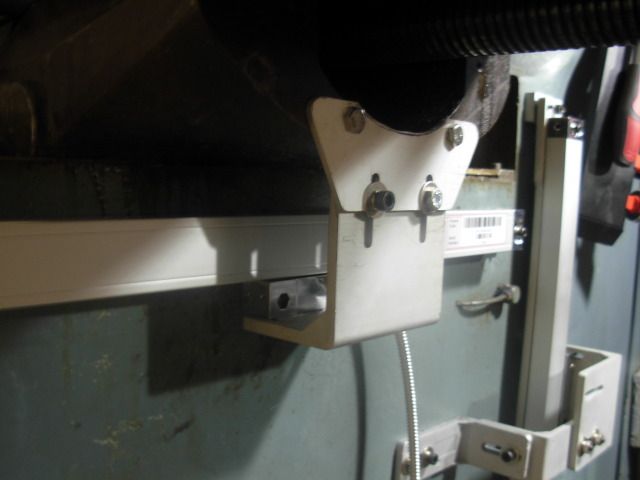
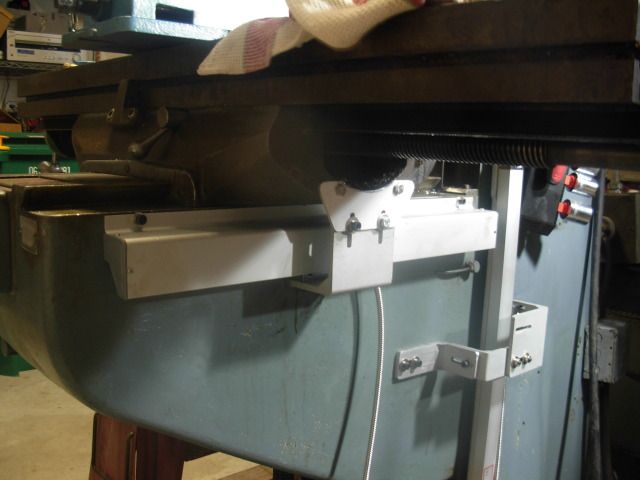
Now I've got my brackets all mounted and bolted in place. I used these two skinny brackets here to get it mounted but I'll either be modifying some of the provided brackets or making new full width brackets after installing the other axsis. There is also a protective cover to protect the scale from debris that is going to fit under this bracket set-up but do to the position the scale is in it will need to be modified for mounting
Although the side of the knee is a flat surface and the backerbar isn't actually required here I decided to use it anyway for two reasons -
1. Hopefully any way oil that runs down the side of the knee will seep behing the backerbar and never actually get to the scale itself
2. Do to my need to attach the trolly to the saddle and the length of the brackets it's going to be beneficial to have the scale a little further from the actual knee. I could overcome this in a different way but using the backerbar is the quickest and will hopefully also provide the other benefit as well.
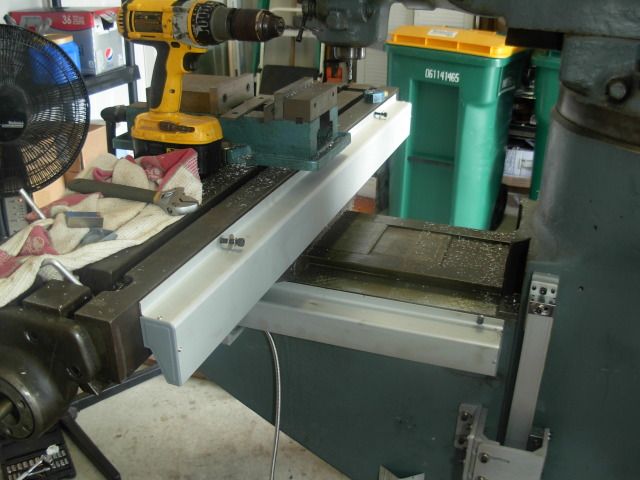
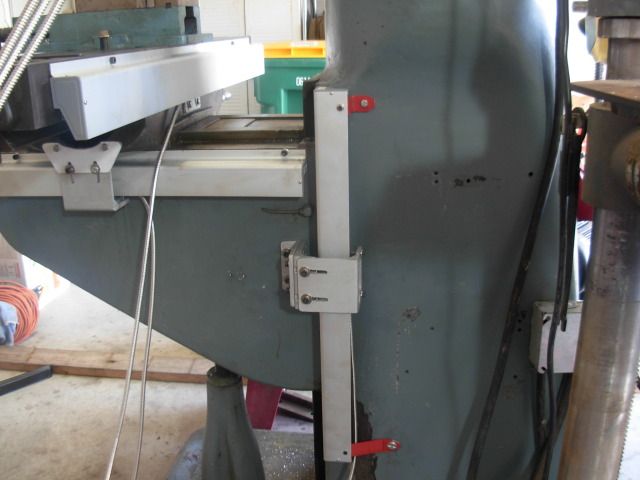
Here she is mounted up, although I am going to flip the scale around before dialing it in so the cord will be facing towards the back of the machine. I also mounted the scale low enough on the knee so I have room for the protective cover here also.

Thats my first night on the install but I'll be back at it tonight.
Of course ALL questions, comments, and suggestions are welcomed so don't be shy.
Take care All,
-Josh
There's some info out on the web about installing digital readout's on mills but I figure why not catalog my experience here in our shoptalk forum as each persons experiences can vary quite abit depending on their mill, experience, and which perticular dro they got.
I did some research an opted to go with this DROPROS 3 axis kit with glass scales for the new Bridgeport-
http://www.dropros.com/DRO_PROS_Milling_Machine_Digital_Readout#DRO_PROS_3M
It was a hard descision but I decided to avoid both the e-bay specials and the higher priced units and go middle of the road with this kit.
Checking out whats in the box-
http://www.dropros.com/DRO_PROS_Milling_Machine_Digital_Readout#DRO_PROS_3M
I went with a 450mm scale on the knee for my z axis. If one preferred they could go with a shorter scale and mount it on the quill but I figured it best to have digital on the full travel of the knee knowing I can always add an in-expensive quill dro down the road or learn to use the knee for all precision z axis movement.
Due to the shape of the machines base the backerbar for this scale is a must to get it squared up to the knees travel. The top hole was already drilled and tapped so I just went with spot because of that
This kit's directions are in english and easily understandable but incomplete as to which brackets go where etc. so it's the installers problem to figure all that out but they do at least forewarn that instructions are NOT machine specific and the consumer will need to be creative in mounting the brackets.
Here you can see that even with the backerbar installed my trolly is just bumping into the mills base and I still need room for the trolly bracket to bolt on in that spot. Included are these two spacers to pull the scale even further away from the machine base to gain the needed clearance.
A slight mod on the KMG to get the bottom spacer to fit the base and I'm ready to re-install the scale
Here we are with the backerbar and spacers re-installed and ready to bolt the scale in place
Using the dial indicator to alliagn the scale with the knees travel. This is a trial and error affair which begins by eyeballing it originally, checking with the dial, making an adjustment by loosening the the backerbars bolt and adjusting the gibb screws, then tightening down the backerbar bolt and re-checking with the dial. When you can move the knee up and down without the dial moving your golden in this axis of allignment
The scale must also be parallel with the knee travel in this axis. Adjusting was a much simpler affair than with the gibb screws. There are slots for the scale mounting bolts so it's a simple matter of moving one end of scale until the dial stays put through the knee's travel.
Now I've got my brackets all mounted and bolted in place. I used these two skinny brackets here to get it mounted but I'll either be modifying some of the provided brackets or making new full width brackets after installing the other axsis. There is also a protective cover to protect the scale from debris that is going to fit under this bracket set-up but do to the position the scale is in it will need to be modified for mounting
Although the side of the knee is a flat surface and the backerbar isn't actually required here I decided to use it anyway for two reasons -
1. Hopefully any way oil that runs down the side of the knee will seep behing the backerbar and never actually get to the scale itself
2. Do to my need to attach the trolly to the saddle and the length of the brackets it's going to be beneficial to have the scale a little further from the actual knee. I could overcome this in a different way but using the backerbar is the quickest and will hopefully also provide the other benefit as well.
Here she is mounted up, although I am going to flip the scale around before dialing it in so the cord will be facing towards the back of the machine. I also mounted the scale low enough on the knee so I have room for the protective cover here also.
Thats my first night on the install but I'll be back at it tonight.
Of course ALL questions, comments, and suggestions are welcomed so don't be shy.
Take care All,
-Josh
")