You are using an out of date browser. It may not display this or other websites correctly.
You should upgrade or use an alternative browser.
You should upgrade or use an alternative browser.
Cowboy kitchen utility knife in the forge WIP...
- Thread starter TacticallySharp
- Start date
rhinoknives
Well-Known Member
Fall will be here before you know it! LOL.
Hang in there George, You will make it!
Hang in there George, You will make it!
TacticallySharp
KNIFE MAKER
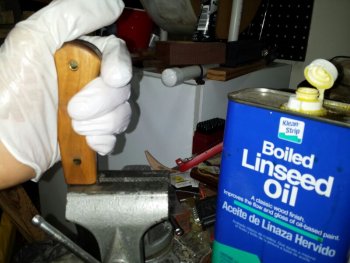
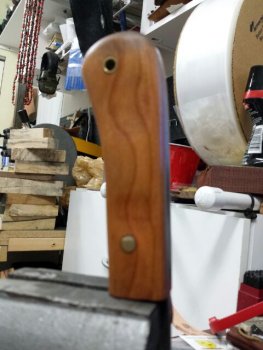
Just a quick update, still working on handle finish. After 40 coats of boiled linseed oil using heat gun to warm the handle pus hand rubbing it in I still do not have the medium gloss worn look I am going for. I'm going to try a couple of coats of tung oil as a top coat to see if that gives me the effect I am looking for. I wonder if all the rainy weather we have been getting is affecting the process.
After the next coat I'm going to draw of the template for the sheath. My understanding is that fixed blade knives can not be worn in the EU. That being said I'm designing a sheath with a detachable horizontal loop. The loop will attach via post screws, and ship as a accessory for the sheath. Something to give the user a better grip on the sheath. I'm going to use 7 oz Herman Oak for the body of the sheath and possibly some exotic trim (gator or shark) . NPD speak up if I got it wrong and you can use a regular style belt sheath.
After the next coat I'm going to draw of the template for the sheath. My understanding is that fixed blade knives can not be worn in the EU. That being said I'm designing a sheath with a detachable horizontal loop. The loop will attach via post screws, and ship as a accessory for the sheath. Something to give the user a better grip on the sheath. I'm going to use 7 oz Herman Oak for the body of the sheath and possibly some exotic trim (gator or shark) . NPD speak up if I got it wrong and you can use a regular style belt sheath.
Surthriver
Member
View attachment 42517
View attachment 42518[/QUOTE]
Is that how you normally round the corners on your handles? Most knives that I've done have been hard to get the symmetry right and hard to get a nice, round edge. I don't have a grinder that I can slack belt with.
View attachment 42518[/QUOTE]
Is that how you normally round the corners on your handles? Most knives that I've done have been hard to get the symmetry right and hard to get a nice, round edge. I don't have a grinder that I can slack belt with.
rhinoknives
Well-Known Member
George,
I was just going to suggest Tung oil. I give 24 hours for each coat, about 3-4 coats and rub it in good with a old tee shirt after I pass the heat gun over it.
I just did a small culinary with stabilized hawaiian Koa and the Tung oil really made that Koa pop right out! The first person that saw it in the case bought it!
TacticallySharp
KNIFE MAKER
Surthriver,
I didn't have a belt grinder when I started either. I used files and sand paper. I had a couple of wood blocks and dowels I wrapped sandpaper around to help with the sanding. I now have 3 different types of belt sanders and a 2x72 grinder and I still like to hand finish my handles. After you do a few of them your eyes will see where you need to work on the handle more to get what you want. Sand till all the scratches are gone before moving to the next grit, and if once you think its right, you fine that it is not. Go back a grit level and start over. Draw top, bottom, and each side out on paper then use the cut out of the drawing as a template to get the shape you are looking for.
On this one I am trying for a look that is in keeping with an antiqued looking knife. This knife is not period correct but a representation of an old knife a cook would have as his go to utility knife on the chuck wagon while on the trail. Not his butcher knife.
Starting out I would say you need a vise, files, and sandpaper. If your going to buy one google knife vise. You can get one for $50 or so. You can also get a regular vise and put a piece of leather on each side of the blade to protect it. When you progress into it this is a great knife vise to get.
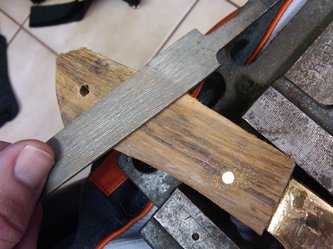
One of my first handles. Drill press vise, one combo rasp, one file, and lots of sandpaper!
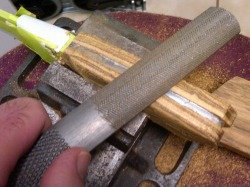
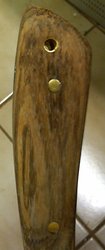
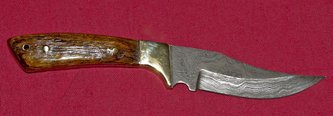
I started putting handles on other folks knife blanks. Info on how I did that on this page. I borrowed the Harbor Freight 1x30 sander for the photo on the page. If I can help with info just PM me.
I didn't have a belt grinder when I started either. I used files and sand paper. I had a couple of wood blocks and dowels I wrapped sandpaper around to help with the sanding. I now have 3 different types of belt sanders and a 2x72 grinder and I still like to hand finish my handles. After you do a few of them your eyes will see where you need to work on the handle more to get what you want. Sand till all the scratches are gone before moving to the next grit, and if once you think its right, you fine that it is not. Go back a grit level and start over. Draw top, bottom, and each side out on paper then use the cut out of the drawing as a template to get the shape you are looking for.
On this one I am trying for a look that is in keeping with an antiqued looking knife. This knife is not period correct but a representation of an old knife a cook would have as his go to utility knife on the chuck wagon while on the trail. Not his butcher knife.
Starting out I would say you need a vise, files, and sandpaper. If your going to buy one google knife vise. You can get one for $50 or so. You can also get a regular vise and put a piece of leather on each side of the blade to protect it. When you progress into it this is a great knife vise to get.
One of my first handles. Drill press vise, one combo rasp, one file, and lots of sandpaper!


I started putting handles on other folks knife blanks. Info on how I did that on this page. I borrowed the Harbor Freight 1x30 sander for the photo on the page. If I can help with info just PM me.
TacticallySharp
KNIFE MAKER
Laurence,
I normally use Tung oil, given I was trying to achieve an old time look I used the boiled linseed I use on my tiger maple handles. I think part of my problem may have been all the rain we are having in South Florida lately. I am currently using a over the counter Tung oil blend from Ace Hardware. The stuff I really like is no longer being carried locally. I have found a source for it on the internet. The Real Thing!
When I need it to dry fast I mix 2 parts Tung oil, 1 part glossy varnish, 1 part mineral spirits, and few drops of Japan Dryer. I hand rub it on and let it soak in about 10 minutes between coats. I steel wool between the first 2 coats, then just buff with piece of old T-shirt after each of the next 2 coats. I agree it really POPS all types of wood. Great stuff.
TacticallySharp
KNIFE MAKER
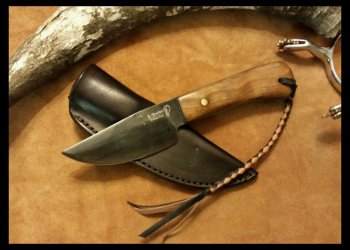
Well I finally got the handle to look like I wanted. Laurence Tung oil with a couple of drops of Japan Dryer did the trick. On Monday knife to engraver for blade mark and sometime next week over to my friend Bola to use his sewing machine on the sheath. Sheath 7 oz Herman Oak, dyed chocolate, and coated with Aussie for weather protection.
Some photo are needed to show progress.
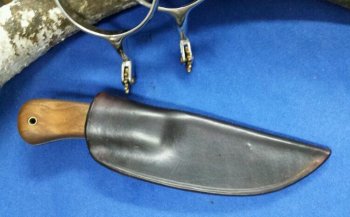
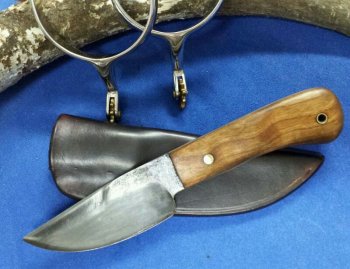
Harder to make look old & used than to make one pretty and shiny.
Some photo are needed to show progress.


Harder to make look old & used than to make one pretty and shiny.
Last edited:
Kampman Knives
Well-Known Member
Nice little knife!
Didn't know there are export criteria to send knives to the EU?
I send knives and get knives from everywhere without having heard of that or having problems with it? (I live in the Netherlands)
I know shipping is ridiculously expensive and than when something arrives you have to pay another ridiculously expensive tax on it, they should make it cheaper and easier
gr Igor
TacticallySharp
KNIFE MAKER
NPD,
It yours. I will ship it as soon as I get it back from my engraver. He is a firearms manufacturer that does my engraving around his production work.
Glad you like it.
Igor,
I did not know about the restrictions till I got ready to ship the original KITH knife with a 7.5 inch blade that had a nearly 9 inch edge. This is going to Denmark. They have a 4.7" edge requirement which was confirmed by both Denmark's folks here and the people in our customs here. I am glade you mentioned the tax on it. I think that this knife only has a value that includes materials and outside services. As a replica it can's be much more than $75.00 US including the sheath. I agree that anything like the import tax you are mentioning should not be. I guess they do that to keep people from going outside for goods.
TacticallySharp
KNIFE MAKER
Being packaged for shipping. Goes out on Mondays post office run. Finally got it back from blade mark engraver. I will try to post a photo later when I get in from doctor's appointment.
Last edited:
rhinoknives
Well-Known Member
George,
If we had real import duties on junk from china people would buy more domestic made stuff.
The knife looks great!
If we had real import duties on junk from china people would buy more domestic made stuff.
The knife looks great!


