Help toubleshooting hamon attempt

I haven't been keeping up with this the last few days so I've missed alot. Thank you for the wealth of information gentlemen.

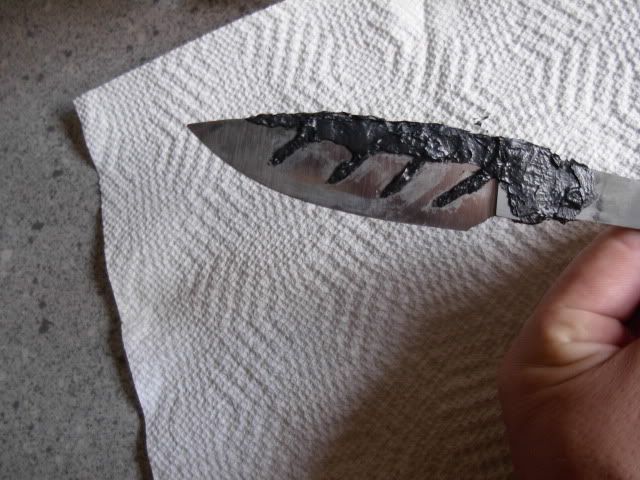
Another thing I've started doing on my blades is to taper the thickness of my ashi lines when I apply them. When using the Rutland cement, I apply it straight from the tube to the spine and spread it to my desired thickness for the blade. When I prepare to apply the ashi lines, I mix it on a pallet like a painter would with paint. I apply drops of water until I get my desired thickness and then apply from the spine down so that the lines taper in both width and thickness.
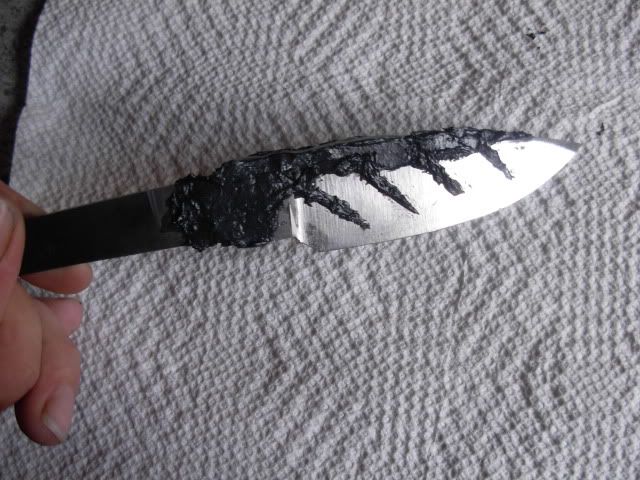
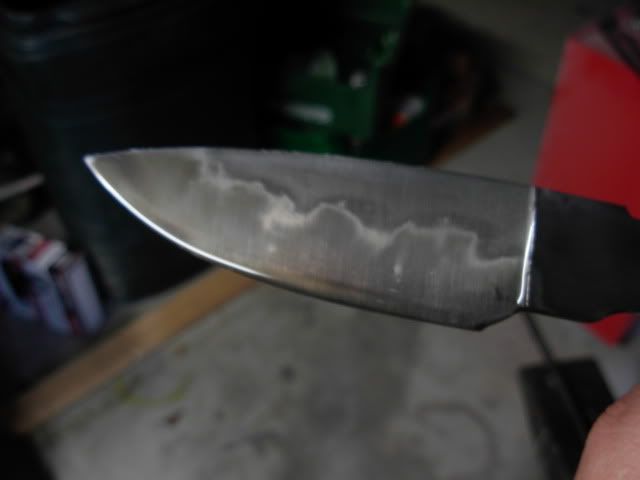
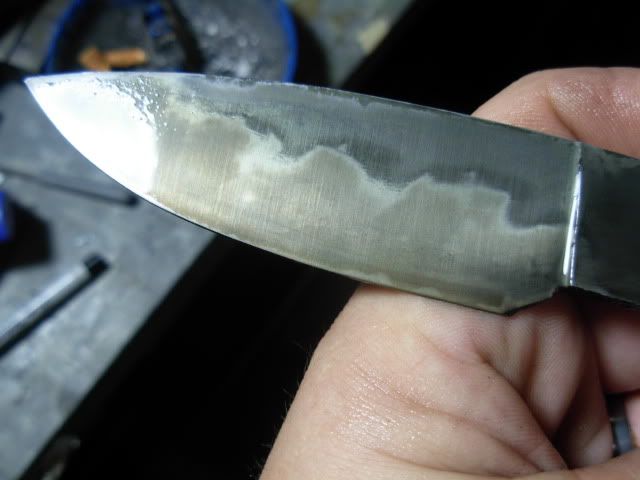
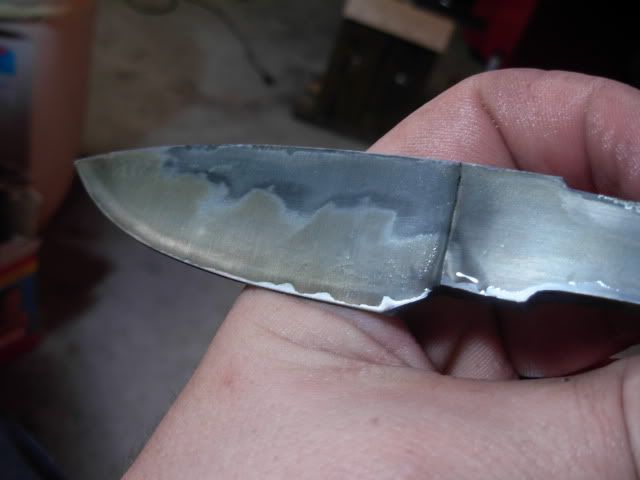
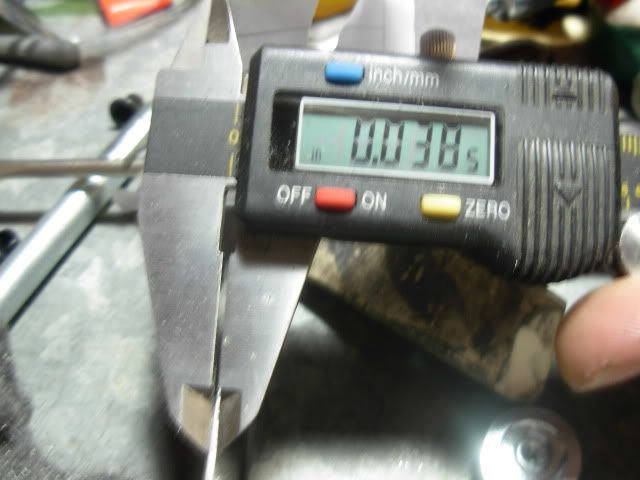
 
Hey josh, I recommend forgoing the wash coat. I tried it that way and quickly realized it wasn't worth the trouble, especially when using oil instead of brine.
 
Just wanted to say thanks everyone for all the help !

I've got my next blade in the oven for a sub-critical anneal overnight so I'll be having another go at it hopefully tomorrow.

I'll keep you guys posted on my progress.... or lack thereof LOL

Josh
 
Thought I'd give you guys a small update.

After hunting all over town today I finally scored on the hunt for a local source for the Rutland Black Cement. $14.95 for a caulking tube, YOWSER !!! LOL. But of course I shelled out for a tube :) Anyway I'm attempting my best to incorperate all the great advice I got here in attemp #2. Rutland cement 1/16" at most as even as I could get it from side to side and ashi lines tapering in thickness towards the edge. It's curing now but I'll be hardening it later on tonight.

Rutlandcement001.jpg

Rutlandcement002.jpg

Rutlandcement003.jpg


Wish me luck, Josh
 
$14.95?!?!? Wow, I wanting to say I paid less than $10 at Lowes. Your clay up looks good from here. I'll keep my fingers crossed for ya.
 
Thanks Murph ! I was guesstimating maybe $7 plus tax. They got ya comming and going when they're the only game in town but I figured Order... Pay shipping... hurry up and wait... Ahh heck with it I'm ready to go today.

Josh
 
I gotta tell everyone I'm pretty STOKED about what I got with this second blade :biggrin: and a BIG thank you all for helping me out. I feel now that I'm in a very good starting position with my HT and cement recipe for creating hamon.

I do believe that advancing from here will be mostly a matter of trial and error in cement application and learning from experience.

It seems a few people may be watching this thread so I'll run through the HT on this blade in it's current form
-Forging to shape at 2000 degrees
-Fine tuning and straightening at 1800
-Normalize in forge at 1600
-Normalize in Oven once each at 1600, 1550, 1500, 1450, and 3 times at 1425
-Rough grind to approx. .040 on the edge
-Sub-critical anneal 1300 for 1 hour then drop 50 per hour to 900 then cool down in oven.
-Clean scale off with a pass or 2 on an 80 grit J-Flex then clean with acetone then dishsoap and water
-apply Rutland Black furnace cement and let cure (4 hours in this case)
-Put in oven at 1475 and soak 20 minutes
-Quench in Parks 50 pre-heated to 100 degrees for approx. 20 seconds
-Pull and scrape off cement (came off pretty easily)
-Snap temper in kitchen oven at 275 degrees
-Temper in Evenheat tomorrow at 350 2 hours 2 times.

Here we are right out of the quench after knocking off the clay
hamon2001.jpg


Cleaned up with J-Flex 80, 220, 400, and 600 cork
hamon2002.jpg


Here's a few after a quick dip in the Ferric
hamon2003.jpg

hamon2006.jpg

hamon2007.jpg


This is probably also an important piece of the puzzle. Thickness at HT
hamon2009.jpg


Let me know what you guys think !

Josh
 
Last edited:
Now that's what I'm talkin about:thumbup: This is a good thread, it poses a problem, it has discussion to troubleshoot the problem and shows a successful solution and it is all well documented for others to benefit from.

You now got the hamon in a very nice placement on the blade, now all you have to do is adjust the ashi size and thickness and you will be able to shape it almost anyway you like. I would also shop around for cheaper sources of the cement, places like TSC and Menards carries it a bit cheaper.
 
Kevin,

LOL, I certainly hope that some other budding bladesmith may find this thread useful to their own endeavors. Threads like this are the only reason I had any idea where to begin this quest of figuring out hamon and although I really didn't intend for this to be any kind of WIP it's kinda morphed into that all on it's own.

As for being well documented the things that tend to keep me guessing even with other fantastically detailed WIP threads are things like- Normalize 3 times then proceed with XYZ. I think most of us have a fairly standard idea of what normalizing is and does yet everyone has their own recipe for doing it in accordance with their knowledge, experience, and available tools. So in the interest of full disclosure I tried to the best of my ability to include every detail to help others help me. If another benifits from that all the more better :)

I was shooting for the most basic of patterns with the cement thinking to keep it simple as possible at least until I could end up with a workable result like this. My gears are really turning now focused on how to modify the ashi lines to affect the outcome.

What I've come up with thus far is-

Making the ashi lines the same tapering thickness but making them wider may very well hold the heat a smidge more where the ashi meet the "spine coat" allowing a slighly more active hardening line where the pearlite in the spine dips down just a little into the top of the ashi line.

I'm also speculating that there are two ways to utilize the cement to form pearlite.
1. Thin with a wide area of coverage like the spine coat
2. Thick but in a very small area. Like one tiny dot of cement that stands tall to create a spec of pearlite in an area that is otherwise martinsite.

Some signs I take as VERY postive toward "pattern development" and the possibility of getting a predictable outcome are the fact that the hardening line followed the spine coat with great detail in between the ashi lines and also the fact that the front bottom corner of the ricasso hardened just as planned.

These two facts are leading me to believe this recipe is giving me a combination of quench thats fast enough to "freeze" the detail and cement that will hold heat long enough to reliably form pearlite without holding it so long as to "wash out" the activity.

This is where my head is at right now but of course subject to change with each blade in the future, LOL

Thanks once again to all for shifting my learning curve into high gear !

Josh
 
Hows is it going Josh , havent spoke with you for some time . One thing I always try to remember , the work that goes into making a japanese differentially hardened blade , The knife is like a canvas and you are the artist. No matter how many times you do it they never turn out the same . Sometimes the ones you put a lot of work in dont always turn out like we want , then when you are just fooling around with a blade you get this unbelievable result . If you want something that really sticks to the blade try mixing 1 part of activated charcoal to 3 parts of your refractory cement whatever you use . James Bieler
 
Bubba-san

All's well on my homefront. Thanks for asking !

I do understand what you mean about things not always comming out like you had pictured it in your minds eye. I think the beauty of this type of HT is founded in the organic nature of the end results. Even if possible to elevate to the point of getting the blade to become EXACTLY what I "picture" in advance I do believe something would be lost in the process so I do welcome the course of natural occurance that makes it all possible.

I think raising a child may be a good anology. A parent does their best to shape/mold/raise their children to become XYZ. However, the influences of the world along with the childs own make-up will also have a GREAT impact in determining who they ultimately become. This process of nurture and nature is what makes it possible for children to surpass the parents wildest dreams, be a dismal disappointment, and anything between the two.

Being new to creating hamon I'm most concerned about being on solid enough footing to get a functional blade with each HT and not too worried about TOTAL control or getting a WOW result with each blade.

At least on this first try with the Rutland Black cement it stuck like glue just as Kevin said it would do. My application was a bit rough when first put on but I did find that it begins to set within a few minutes developing a "skin" as it started curing that easily allowed me to mold it to a smoother coat and mold the taper right onto the ashi lines.

Again like Kevin said, after the quench I used the scraper on my wire brush to remove the cement and when scraped up the tang that whole side of the blade popped right off.

I worked on this blade for awhile last night and got ground to 220 with the edge at .010 I'm looking forward to doing some cutting with this little guy :) I think I'm even gonna throw some kinda handle on it so I'll get a better idea of it's real world cutting ability.

Take care, Josh
 
Have you looked at walter Sorrels video on Hamons? It is a very good WIP on creating a half dozen or so hamons . I think walter does some beautiful work . If you havent seen it I would buy it straight from Him. Walter is great sensei ,he speaks with a slow monotone voice that allows you to understand exactly what he is saying and trying to project. You have come a long way since I first met you on Ebay . Keep up the good work . Bubba-san
 
things look like they came out good the only thing i can add is i draw out a pattern on paper cut it out and trace on both sides of blade it keeps both sides even and no more warps
 
This has been very helpful to me, as I have an order for a knife with a hamon, my second and I want it better than my first one was, now I know what to focus on. Thanks Dogs.
Dale
 
Back
Top