
You are using an out of date browser. It may not display this or other websites correctly.
You should upgrade or use an alternative browser.
You should upgrade or use an alternative browser.
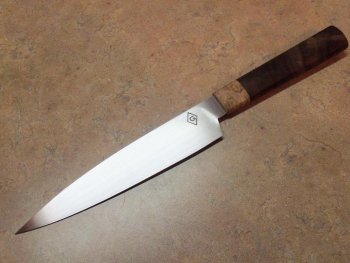
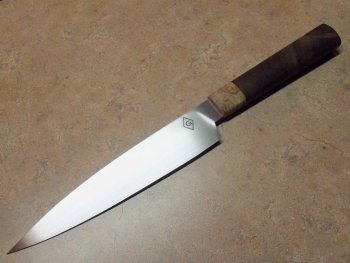
Couple of New Ones Done This Weekend
- Thread starter Diamond G Knives
- Start date


rhinoknives
Well-Known Member
scott.livesey
Dealer - Purveyor
very nice
scott
scott
Dream Burls
Well-Known Member
Very nice Mike. Love the profile on the petty.
Diamond G Knives
Well-Known Member
Thanks Guys, sorry to take so long to respond, been on the road a while!
God Bless
Mike
God Bless
Mike
HHH Knives
Super Moderator
Great looking cutters! How ya like the AEB-L?
Blessings
Randy
Blessings
Randy
Diamond G Knives
Well-Known Member
Randy,
So far I like it. I'm not crazy about grinding it after HT, but with the thickness of the material I'm afraid to do it any other way. Performance wise I LOVE it!
I think I need to get trained on how to use stones to get the full potential out of the edge though! I cant wait to start forging though, you and Jr are quite an inspiration! Got lots of ideas wanting out of my head!
God Bless
Mike
gearhartironwerks
Well-Known Member
Just a quick suggestion on photographing the blade: crumble up a piece of masking tape and place it under the blade (out of sight) and rotate the blade back a little. I assume the light source is behind the blade and coming from above. You may also need to move the camera a little. This will hopefully illuminate the blade tip giving an even light.
john
john
Diamond G Knives
Well-Known Member
I greatly appreciate the tip John.
Im in dire need of a decent camera!
As well as camera skills! Ive been told a light booth will help. Any ideas on that?
God Bless
Mike
Im in dire need of a decent camera!
As well as camera skills! Ive been told a light booth will help. Any ideas on that?
God Bless
Mike
gearhartironwerks
Well-Known Member
Mike,
You don't need a light booth per se. A large soft (diffused for shiny blades) light source from above and slightly behind the blade will work. Also, several white fill cards to reflect light back into the blade placed in front of and off to the sides will help. You'll need to play with that. Best advice is to always mount the camera on a tripod, then move the camera and fill cards. Photoshop or any other enhancement program is a must for digital since we can't post the highest resolution image the camera is capable of making because of size limitations. I have an older 8mp Canon that my daughter says is a dinosaur. So am I...
John
Diamond G Knives
Well-Known Member
Thanks John