
You are using an out of date browser. It may not display this or other websites correctly.
You should upgrade or use an alternative browser.
You should upgrade or use an alternative browser.
Shop Tip of the Day - Add yours here
- Thread starter BossDog
- Start date
Using epoxy on wood.
I get a mailer from the folks at West Systems every now and then that has a lot of research, techniques and bonding information.
This is a tip from them:
Surface prep is one of the most important steps in using epoxy. (A sandblasted metal surface that is being bonded is best for joining metal to anything. I know this from my own adhesive tests done in the "glue wars" several years ago.)
Heat wood up a bit before applying epoxy. Then, while it is cooling apply the epoxy and form the joint. The wood will draw in the epoxy into the pores as it cools and the air in the pores contracts.
Avoid "Blush" by using enough hardener. Blush is the inert waxy residue that is sometimes a byproduct of curing process. It can be removed with plain water and light scrubbing with a Scotch-Brite type pad.
When clear coating (potting) something in epoxy, avoid layers thicker than a 1/4" to avoid excess heat generated from exothermic (hah!) reaction. Pour in layers and wait for one layer to get to a tacky cure and then repeat.
A propane torch is used by boat builders flamed quickly over a surface with epoxy to reduce viscosity and get air bubbles out. I don't even want to imagine how many ways this can go bad.
Spraying a fine mist of denatured alcohol over the surface of epoxy will also help reduce air bubbles on a large surface of epoxy. I don't see this as a problem with putting scales on a knife handle but I threw this in anyway.
Excellent tip Tracy and on that theme from me..
I buy my epoxy in volume so rather then fight two larger bottles I put some of each into separate baby food jars and then use syringes from the pharmacy (free at mine if i ask) to suck each part of epoxy out. They come with a small straw that slip on the end and allow me to suck up however much part of epoxy needed and squirt into my mixing container at exacting amounts.
Keeping each epoxy part with its own syringe keeps everything much cleaner and hassle free clean up afterwards by drawing in a little acetone into the syringes.
rhinoknives
Well-Known Member
When I get my new 2" x 72" Grinding belts in from my suppliers.
I cut 2 1/2" slices of a Cardboard Carpet tube or empty masking tape roll rounds and put them over a L iron I have screwed into the shop wall.
My belts are separated by Grits and I can see what I have in stock. This also helps keep the belts from getting kinks and stretched areas. I have a whole wall covered with my belt inventory in this manner.
Laurence
www.rhinoknives.com/
I cut 2 1/2" slices of a Cardboard Carpet tube or empty masking tape roll rounds and put them over a L iron I have screwed into the shop wall.
My belts are separated by Grits and I can see what I have in stock. This also
helps keep the belts from getting kinks and stretched areas. I have a whole wall covered with my belt inventory in this manner.Laurence
www.rhinoknives.com/
Brad Lilly
Moderator and Awards Boss
I stole this from Ed Caffrey. I made a round pot rack that spins to hang belts on (A bicycle wheel would work well).
Matt Bufford
Well-Known Member
Put some dish soap in your dunk bucket. When you dip between passes on the grinder, the small particles won't stay in a layer on top of the water. This lets me keep the same bucket of water in use for much longer than before
rhinoknives
Well-Known Member
I put Prestone Anti -freeze 50/50 with water in my Dunk bucket and that will break the surface tension like soap so the particles sink to the bottom and keeps your blades from getting any rusty water spots on them too!
Laurence
www.rhinoknives.com
Laurence
www.rhinoknives.com
Brad Lilly
Moderator and Awards Boss
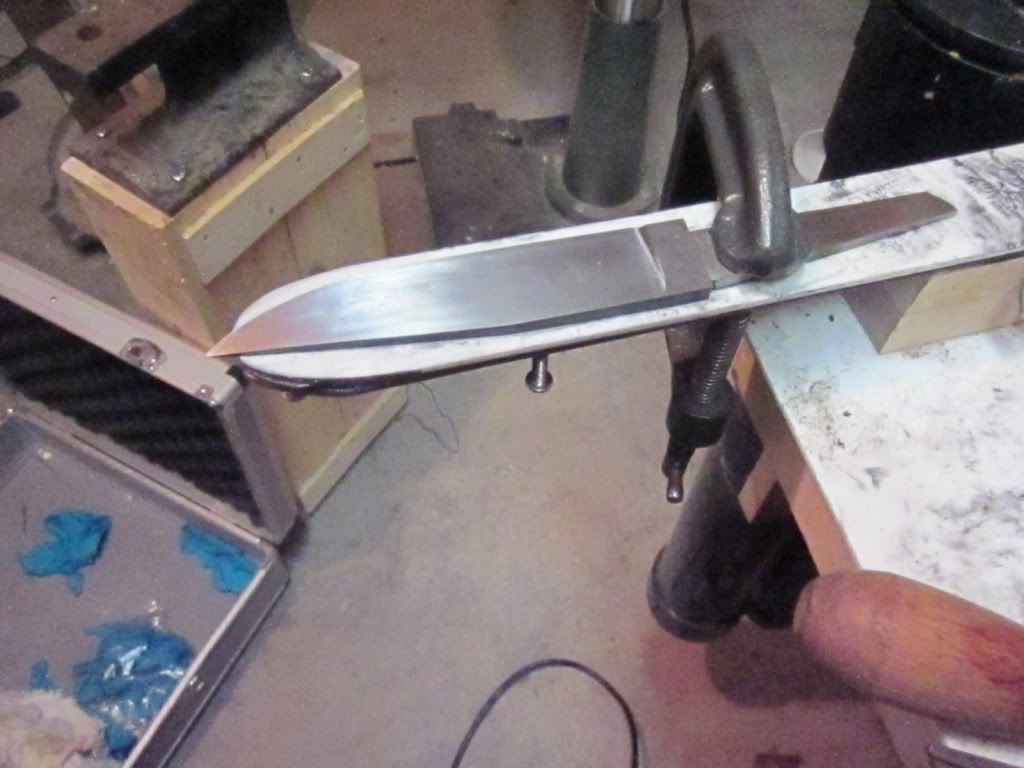
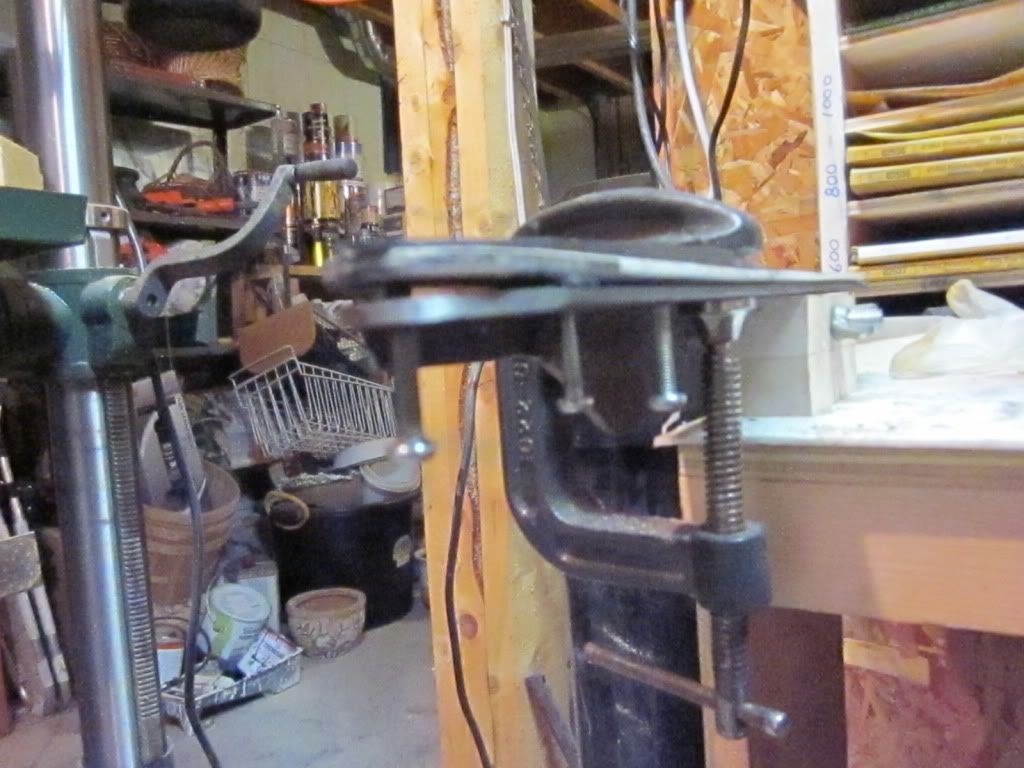
Nick Wheeler posted this somewhere (I can’t remember).This is a simple sanding fixture that takes the flex out of sanding tapered blades. Take a piece of angle and radius the tip then drill and tap three small bolt holes (I used 8-32). Then put a piece of flexible metal and a piece of puck board on top of the angle iron (the pictures will help). When you tighten the bolts the metal strip and puck board conform to the blade taper.
rhinoknives
Well-Known Member
Wayne & Moe,
Thanks and there is another Shop Tip,
I keep all pets out of the Grinding Room due to the fact that they don't wear a respirator and are low to the ground breathing all the deadly Cr@p we grind on.
I keep Scruffy's food & water up front in the Office away from all of this stuff.
Laurence
www.rhinoknives.com
mike miller
KNIFE MAKER
I'll add an addition to the soap in the dunk bucket-that is add a tablespoon of baking soda. Helps keep the flash rust down.
Sampson knifeworks
Well-Known Member
I do a lot of hand sanding with different sanding sticks. Using strips of wet & dry paper I attach to my sticks with two sided carpet tape. Put the carpet tape onto your sanding block and peel off the protective film, then you can train the adhesive with your hand to make it less sticky. This works for a long time for repeated changes. You can use your favorite lube, but keep it off the tape, WD-40 tends to melt adhesive!
Clint
Clint
Frank Niro
KNIFE MAKER
If you are drilling brass, a great drilling aid is water. Frank
Mike Martinez
Well-Known Member
White distilled vinegar works great to remove scale from steel if left overnight. If you want faster results, FeCl straight from the bottle will do it in minutes. Either way, it saves your belts from being mauled by forge or mill scale.
I use a toaster oven to heat up my knife assembly and speed up the curing process. I place it in the oven that has been pre-set to 120 deg F then "bake" it for 30minutes. Then I remove it from the oven but leave it clamped. While it is still warm the epoxy is still soft and can be gently scraped away from the ricasso area, etc. if necessary. After it has cooled the epoxy will be nearly set. A few minutes later it will be hard and you can continue with drilling, grinding, etc. The heat thins the epoxy and lets it penetrate into the wood and tight corners better. According to Devcon, it increases the strength of their 2 ton epoxy by 20 percent. Most of all, it really speeds up the knife making process. I use Acraglass and it works like a charm. I often cure 2 knives at once and really get to "cookin".
Church & Son
Well-Known Member
From Blister Fingered Randy..." Black Steel can still be very HOT!!!!
And for epoxy cleanup, a straw cut about 60 degrees gets down in the little nooks and crannys......
And for epoxy cleanup, a straw cut about 60 degrees gets down in the little nooks and crannys......
Travis Fry
Well-Known Member
A $35 electric leaf blower from Sears or wherever cleans the shop floor much more quickly and thoroughly than a broom can. It can also be used to remove leaves from the driveway...
scott.livesey
Dealer - Purveyor
good morning,
two items I have come up with to make it easier. View attachment 32704
top piece is PVC angle with evenly spaced holes for making holes in the tang. the hole is 3/32". bottom piece is steel angle welded to a piece of 3/4" steel pipe. the holes are the same spacing as the PVC and threaded for 4-40 machine screws. I screw my blank to the angle, place in a vise or other holder, and set any angle I need.
scott
the old sailor