Basic Basket Weave Pattern

Bruce Bump

Forum Owner-Moderator
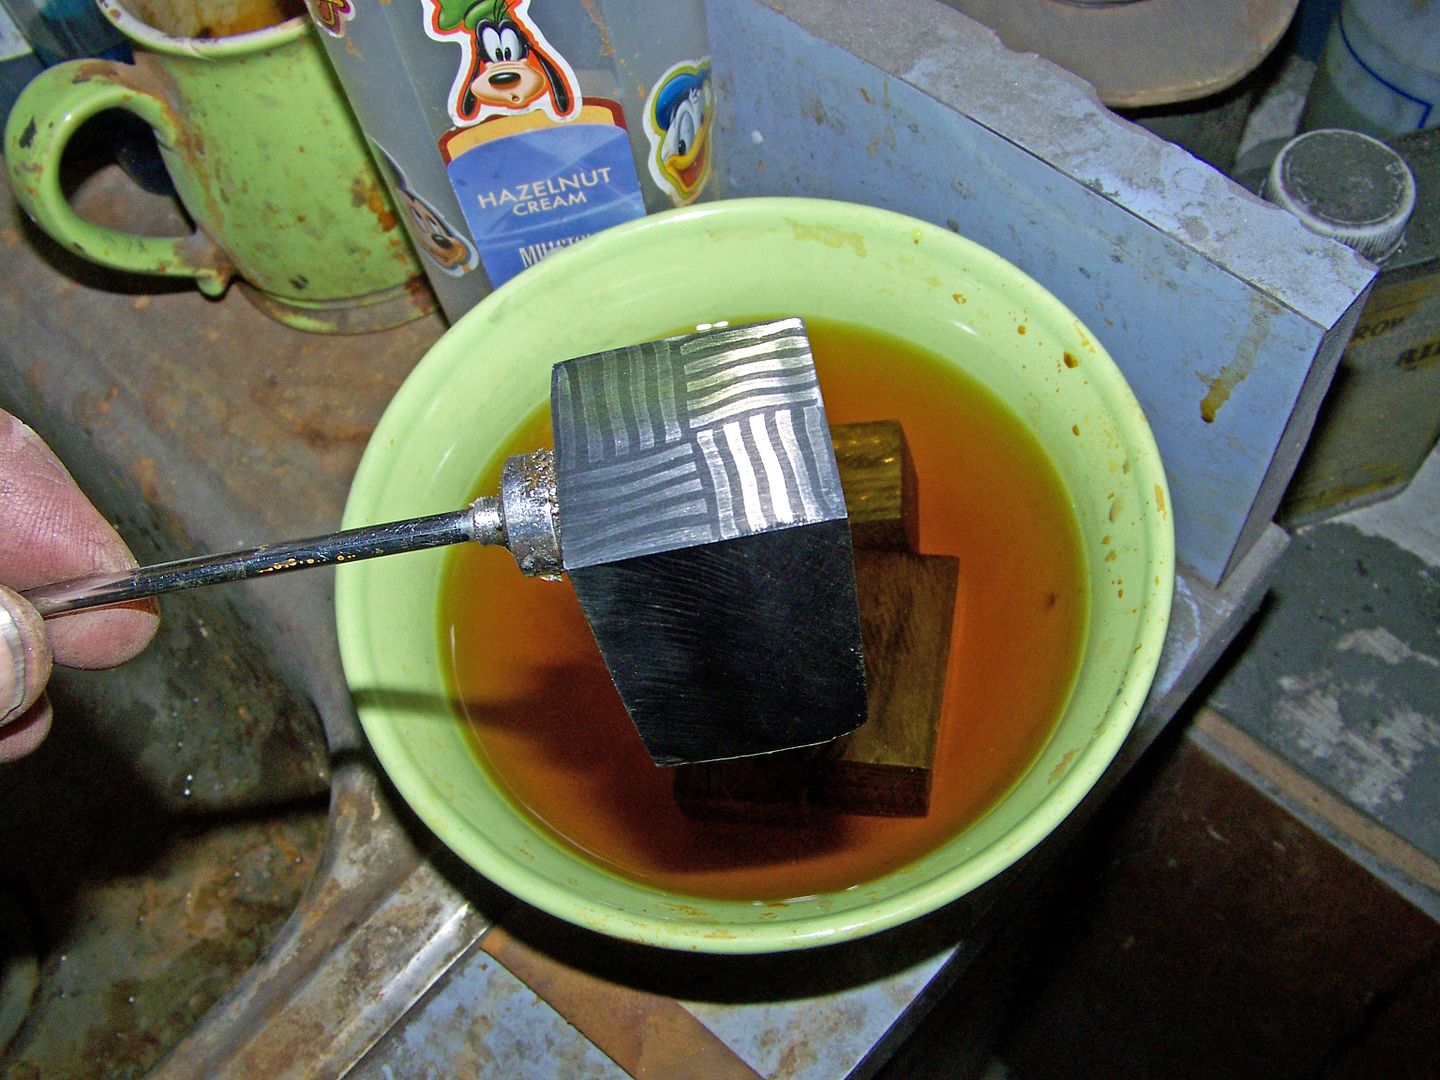
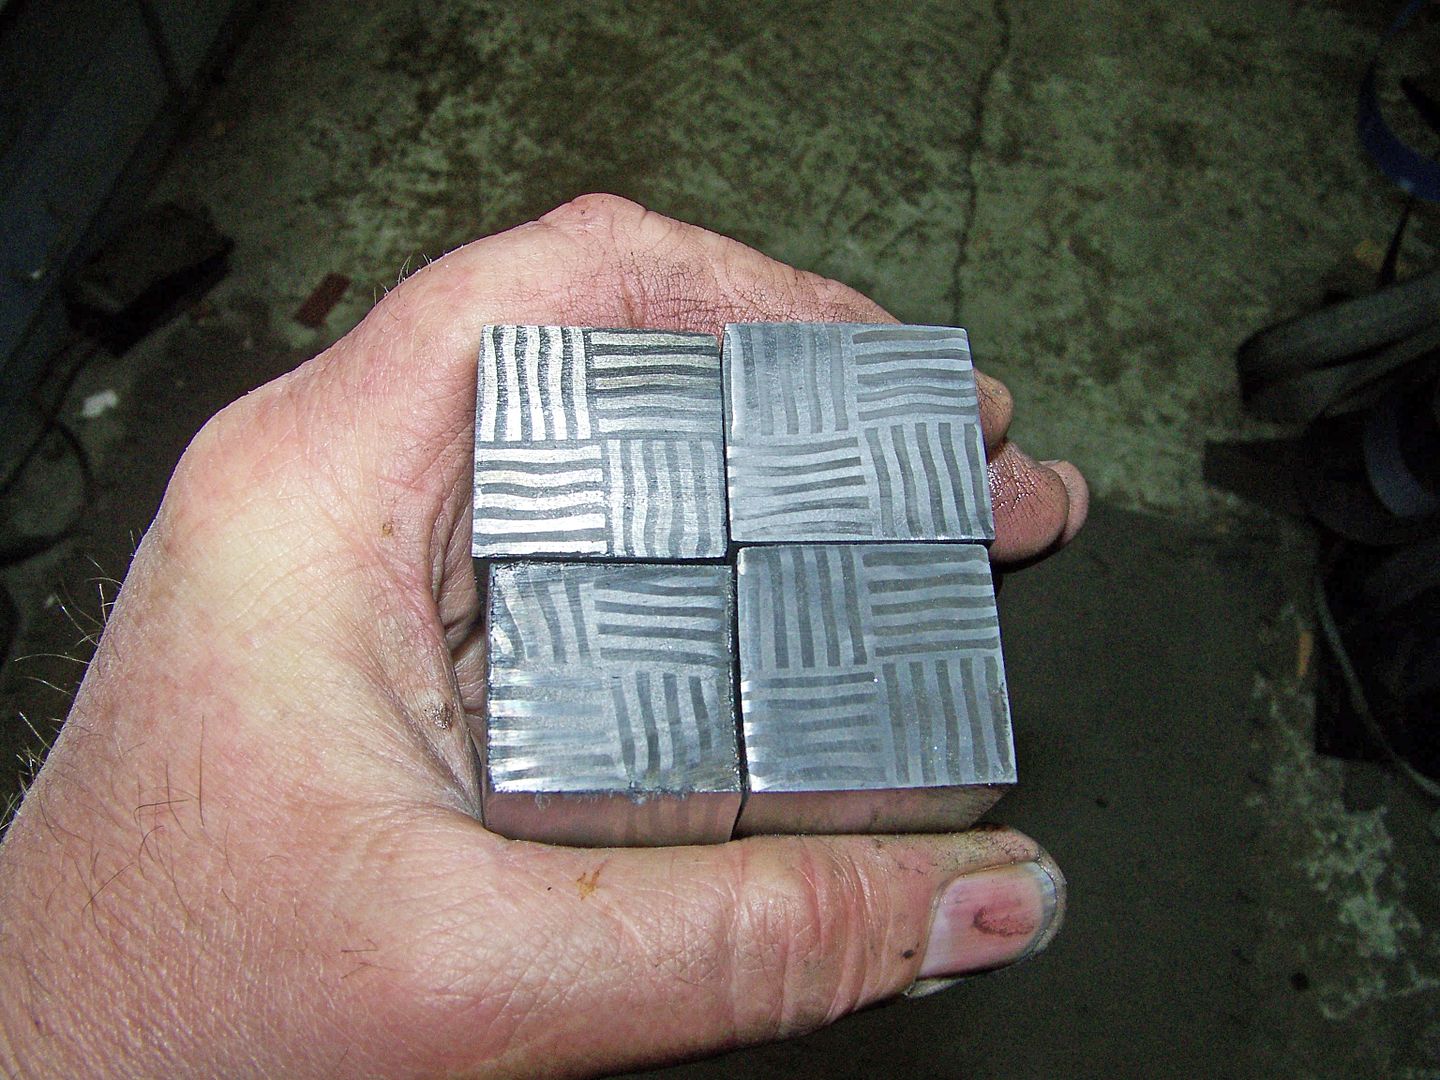
I have an order for a hunter knife in "Basket Weave" damascus and thought it might be an interesting one to photo. Its probally one of the first real Mosaic pattern I learned. Its an interesting pattern and looks good as is or as part of a more complex mosaic for the more advanced pattern development.

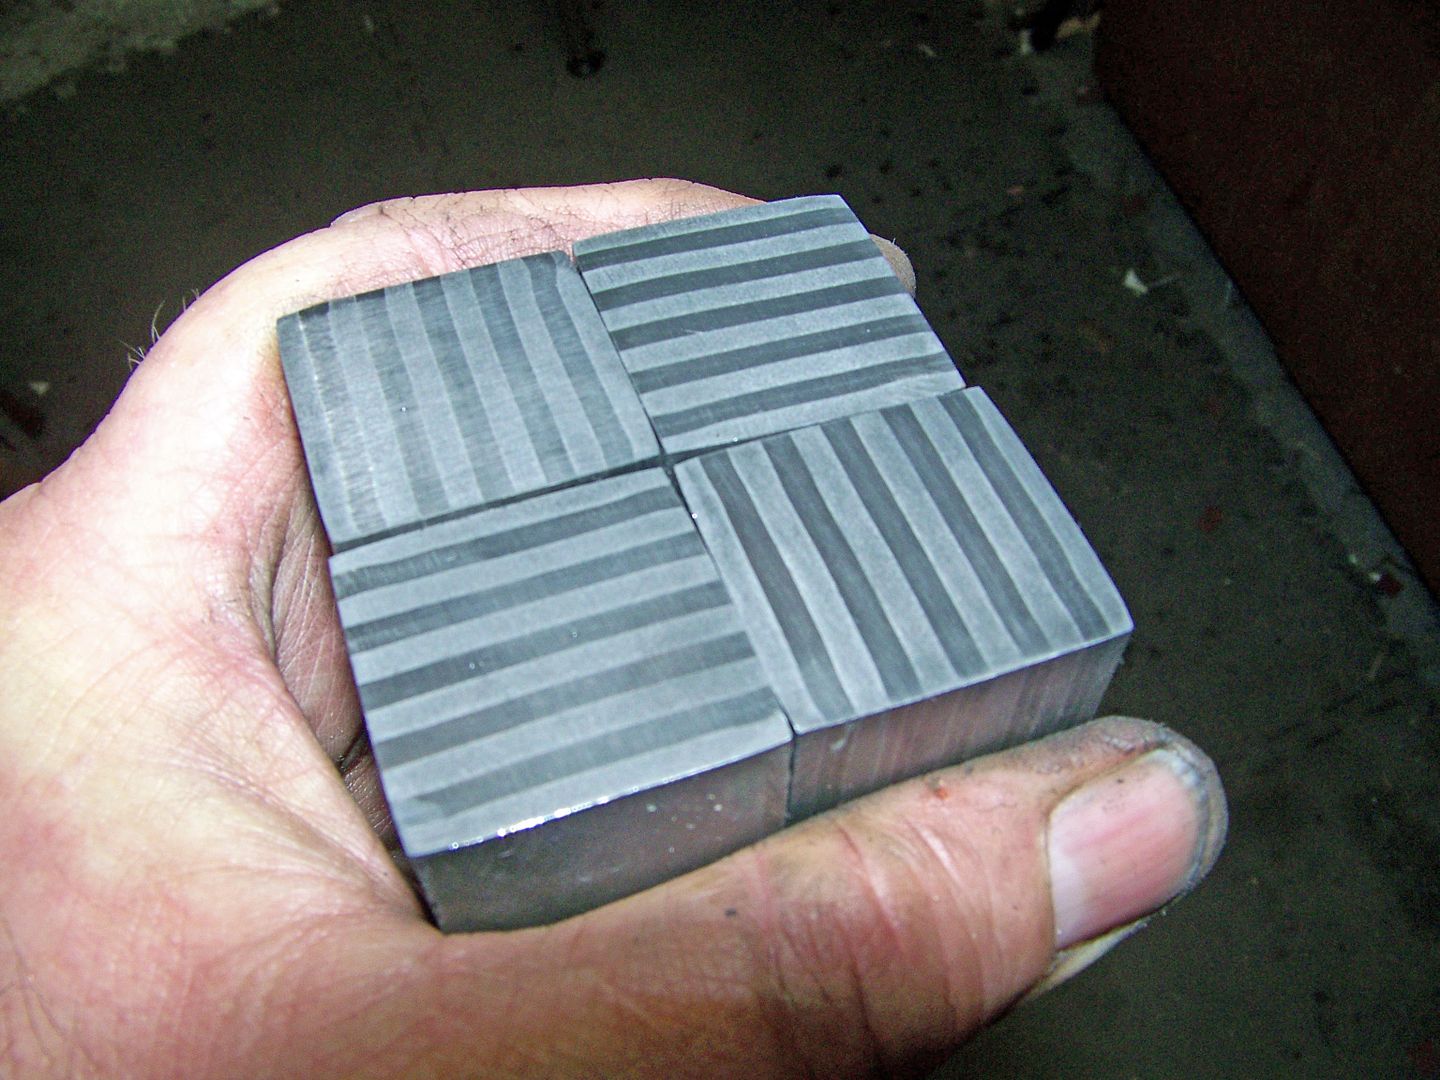
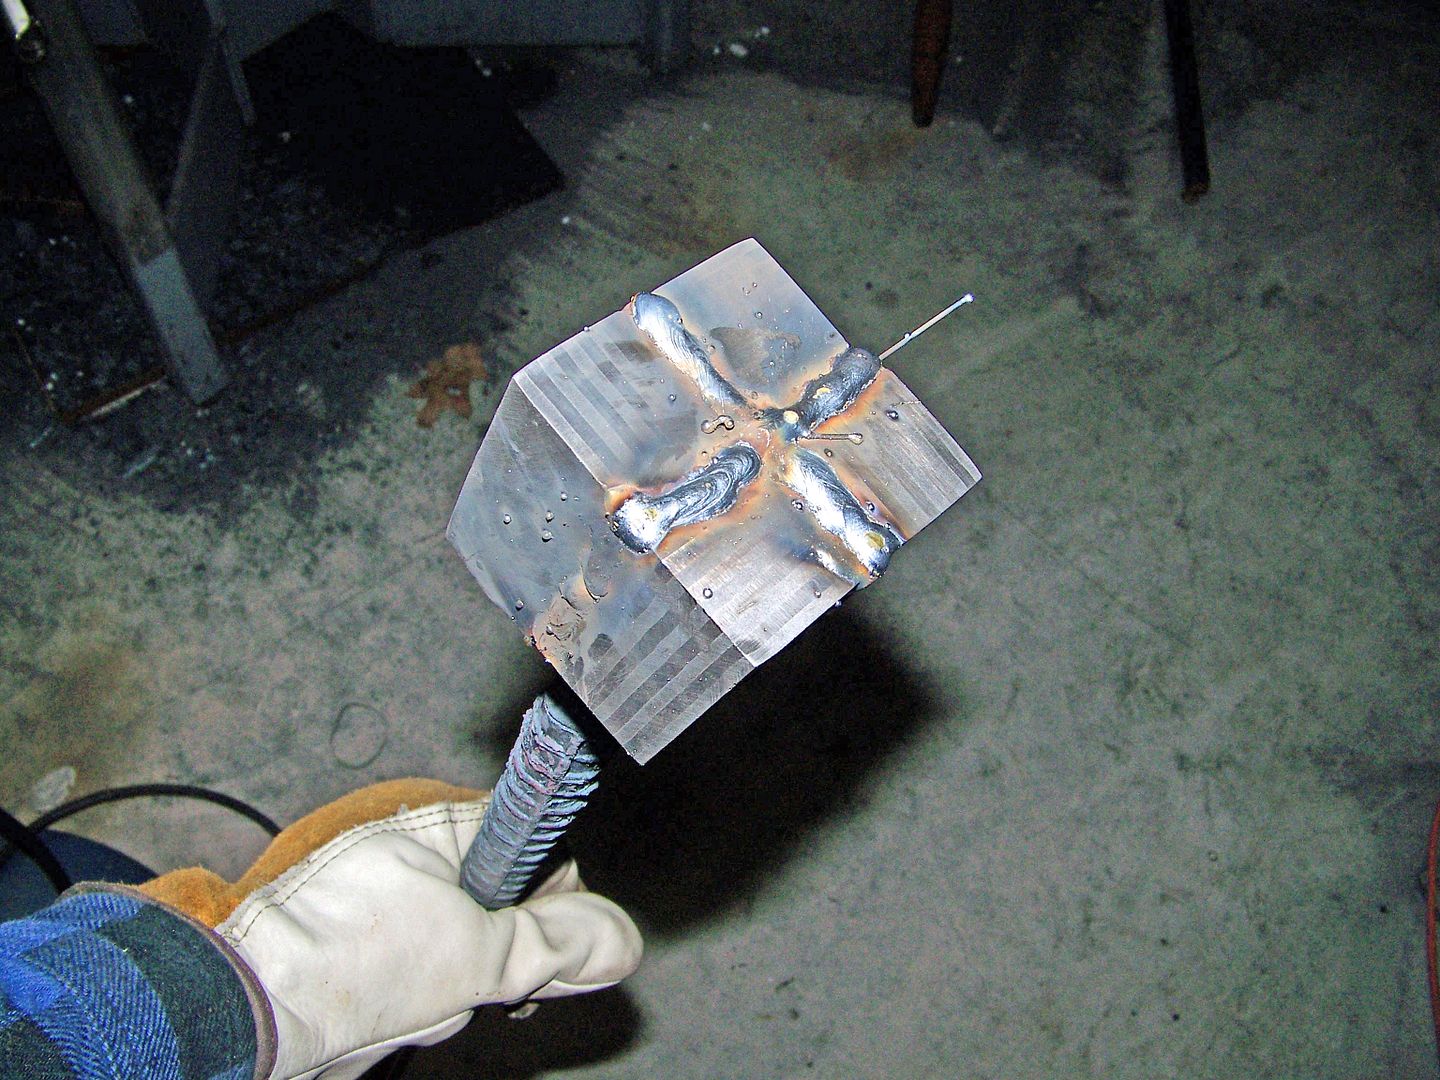
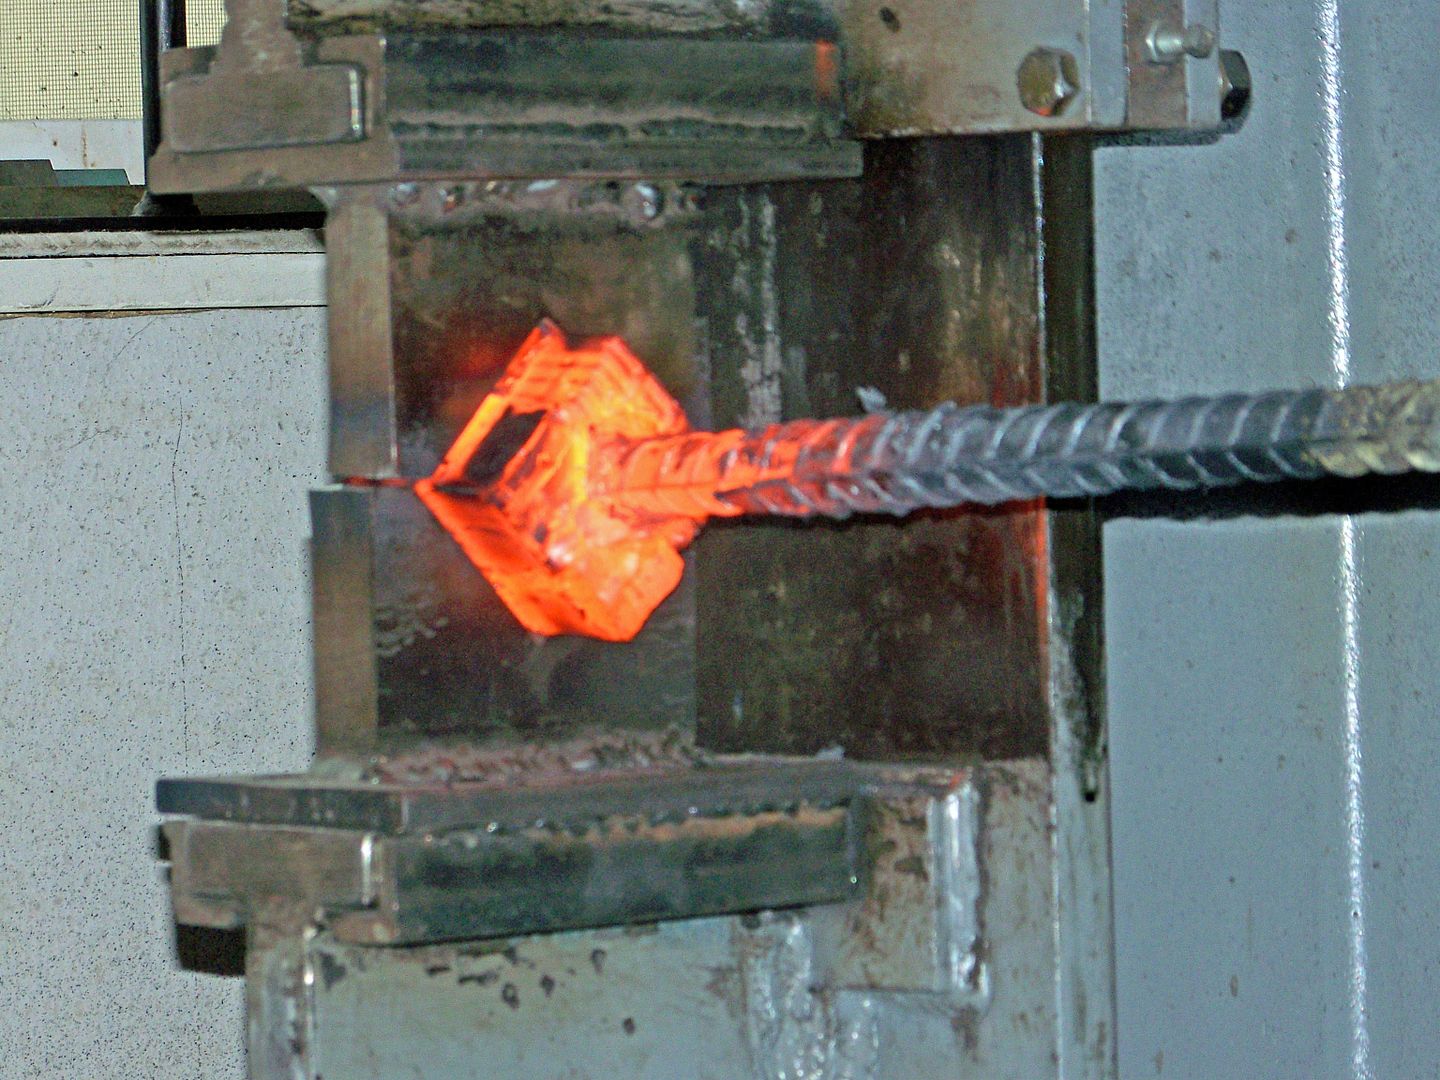
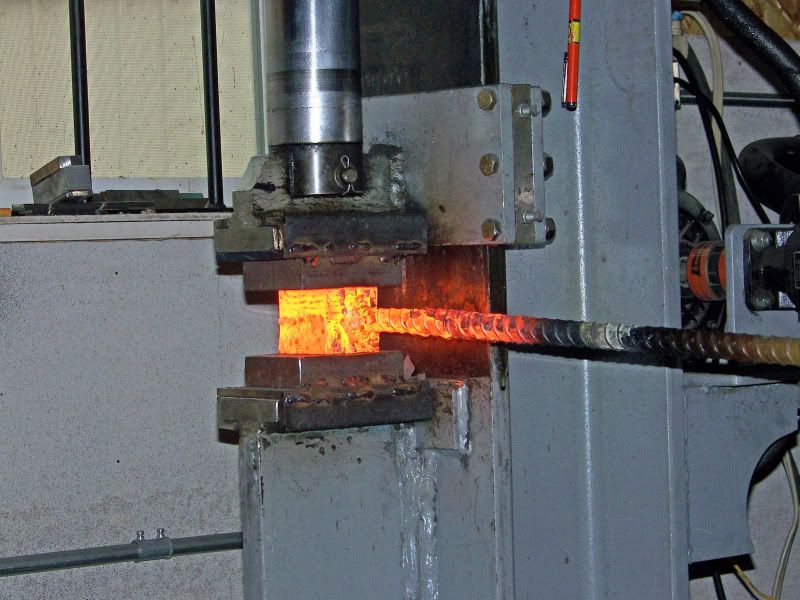
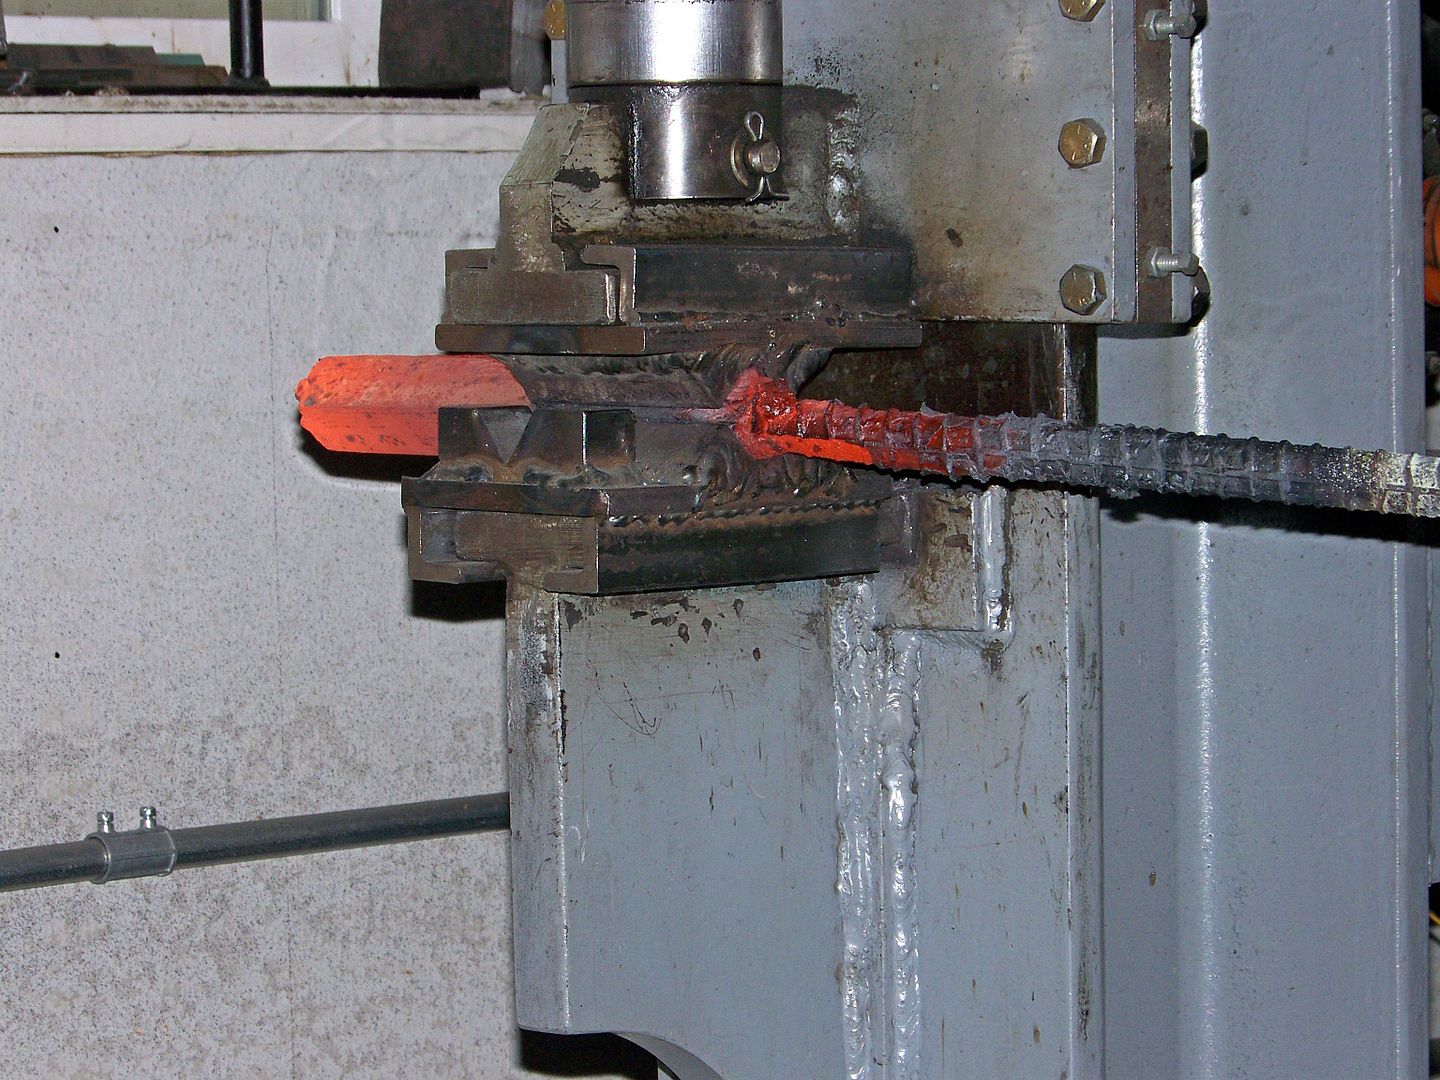
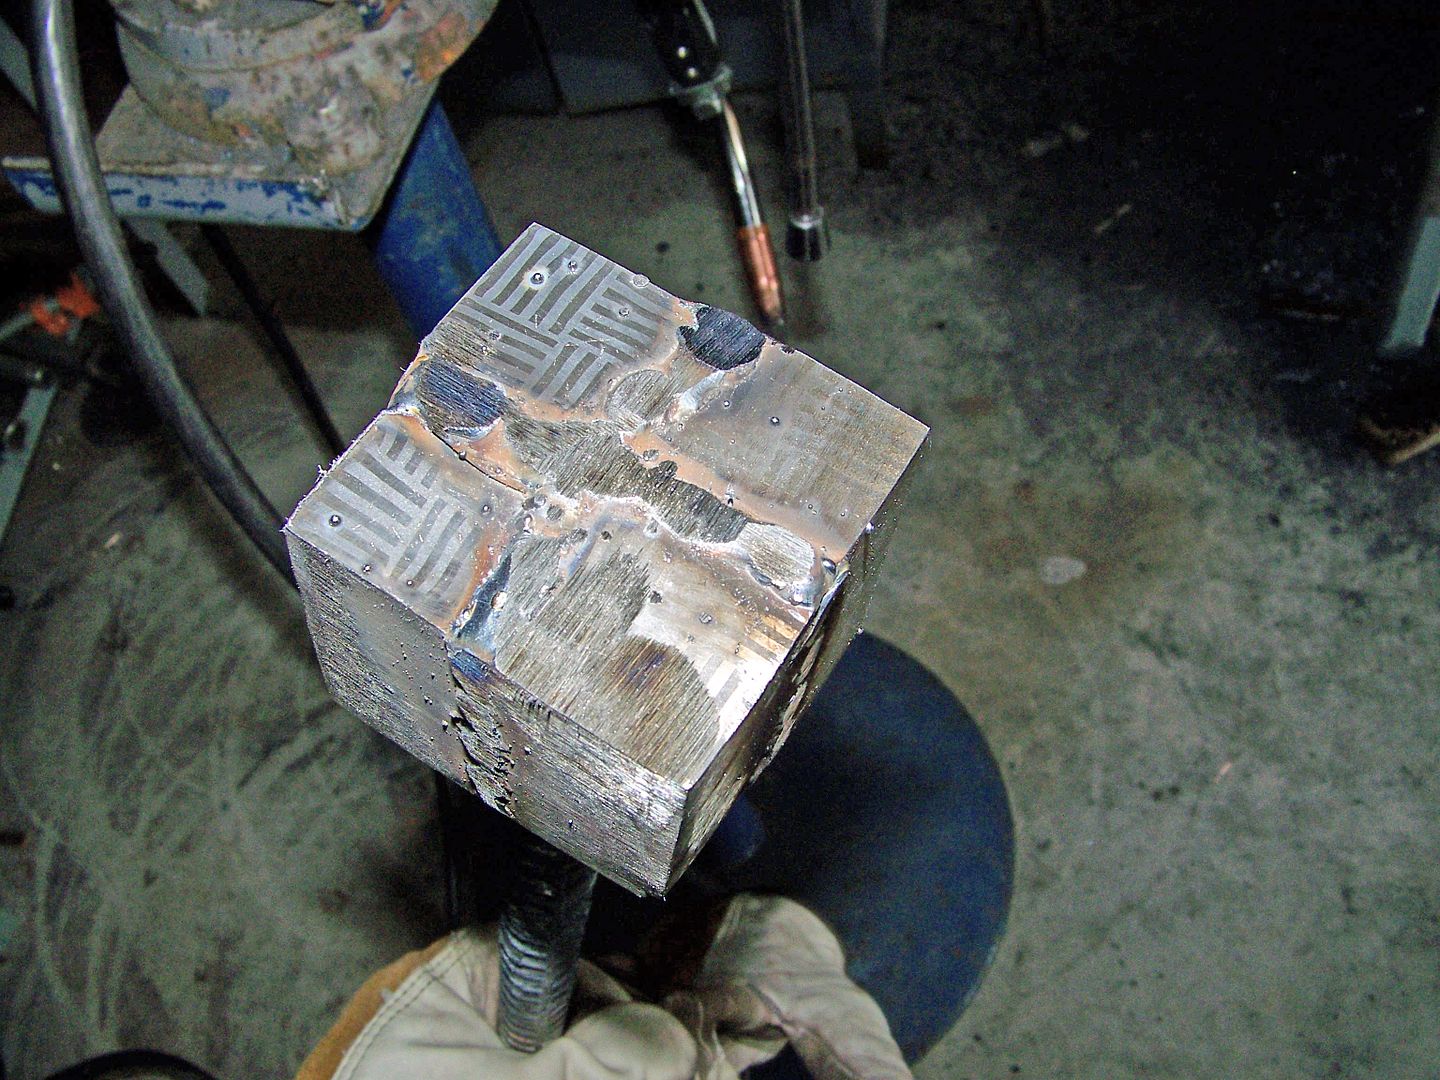
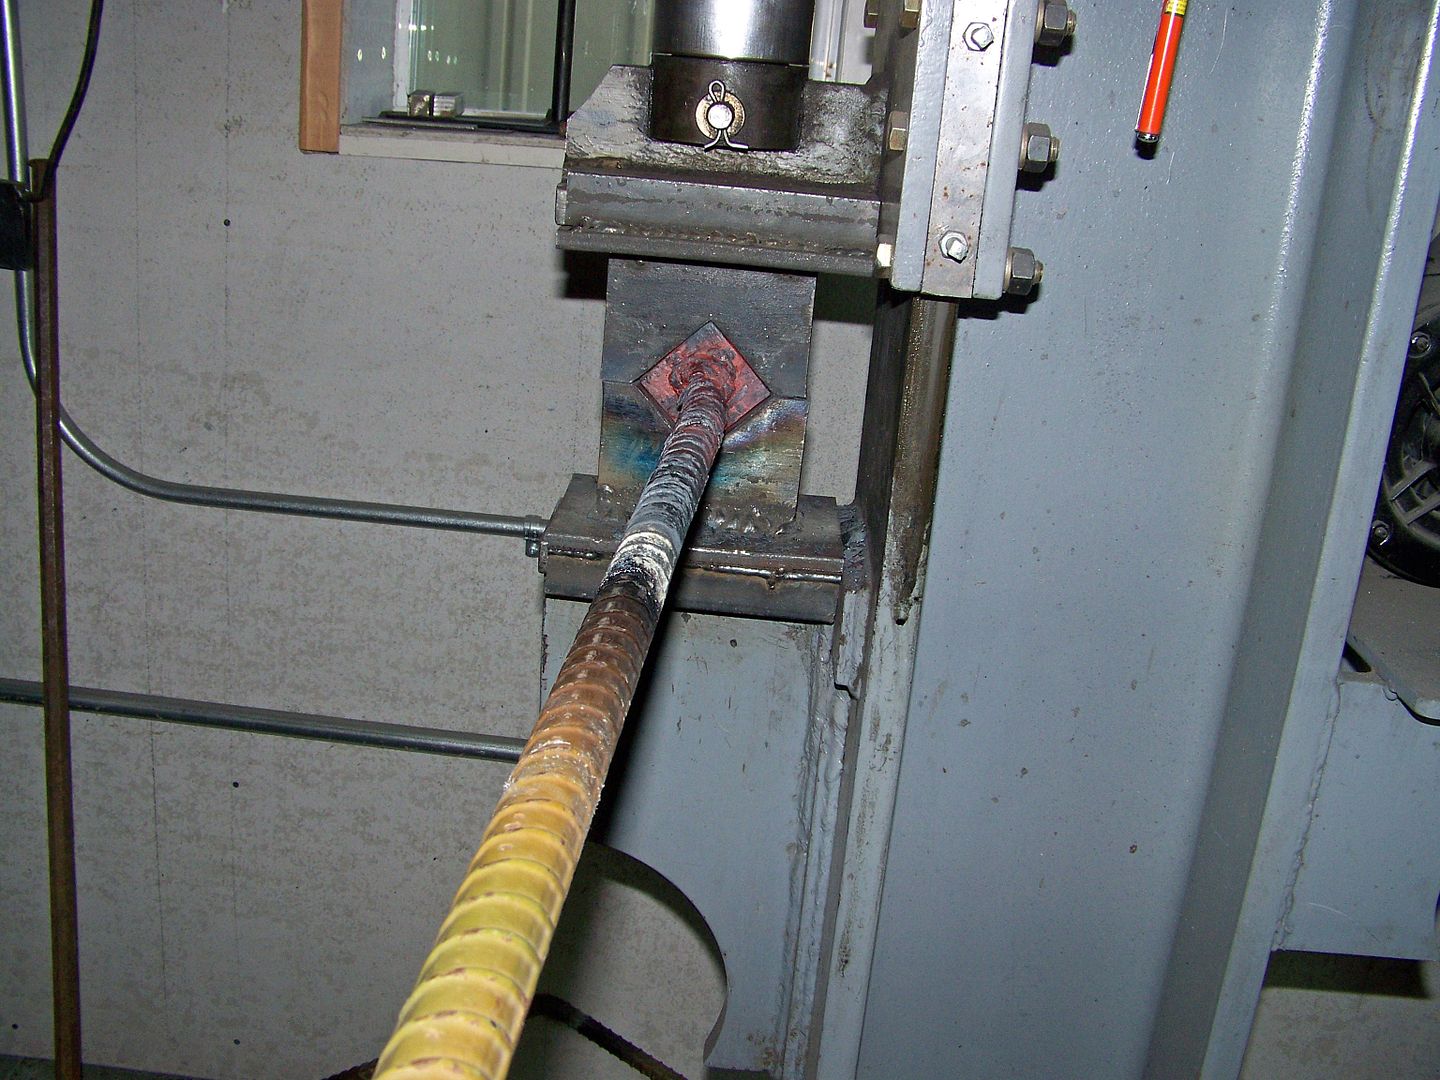
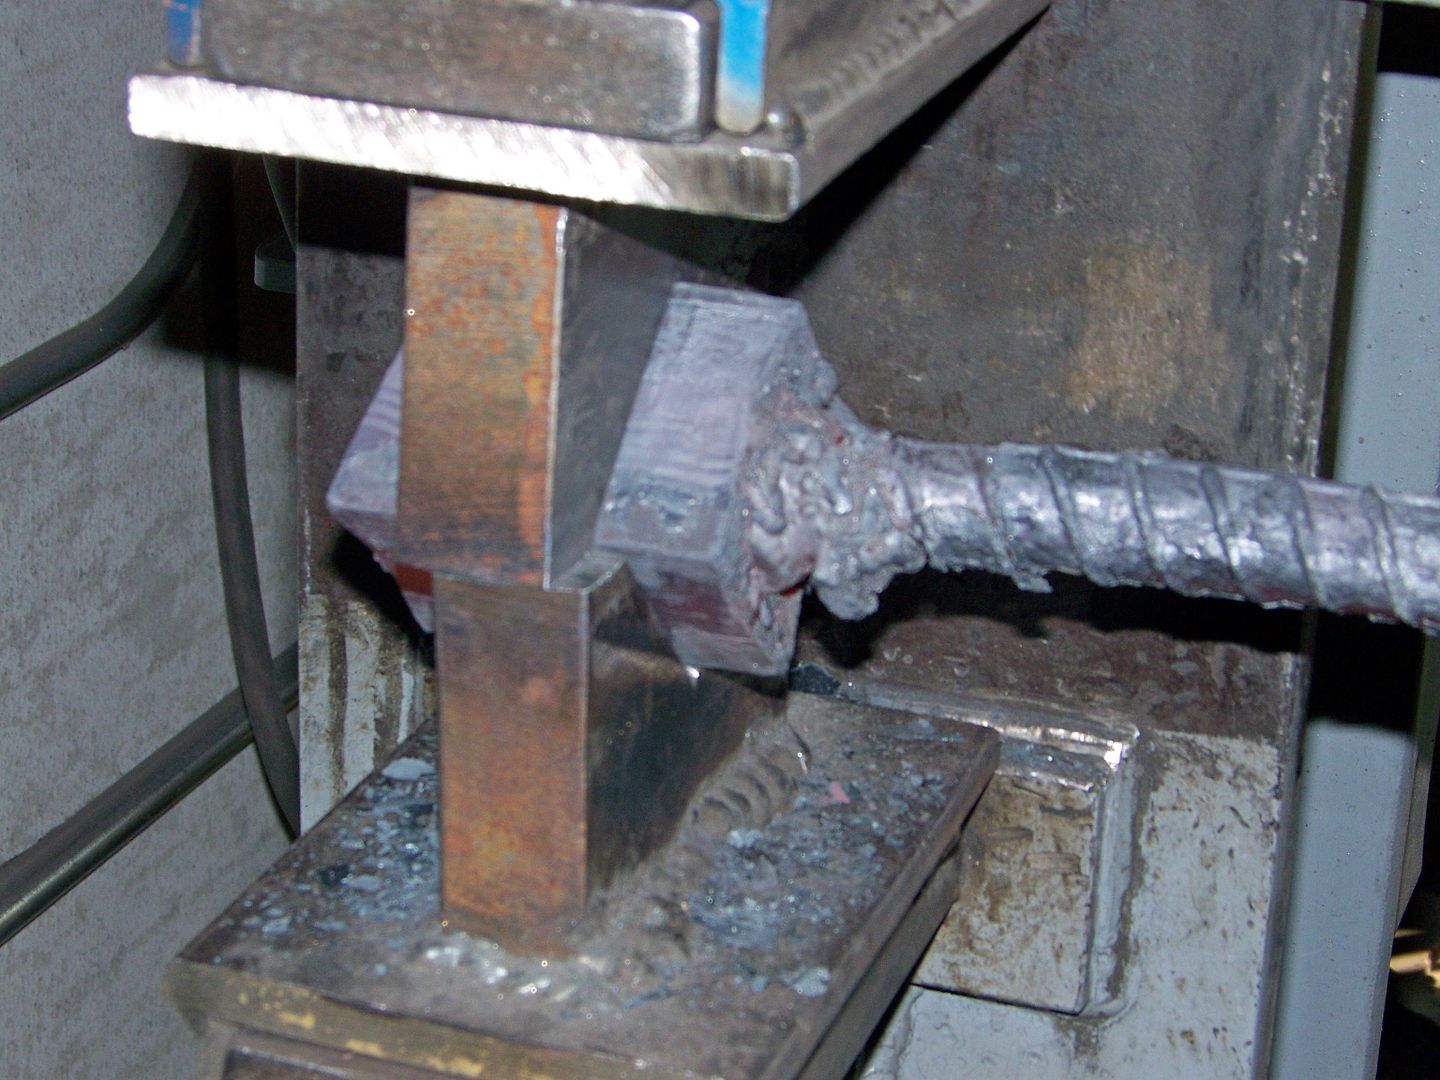
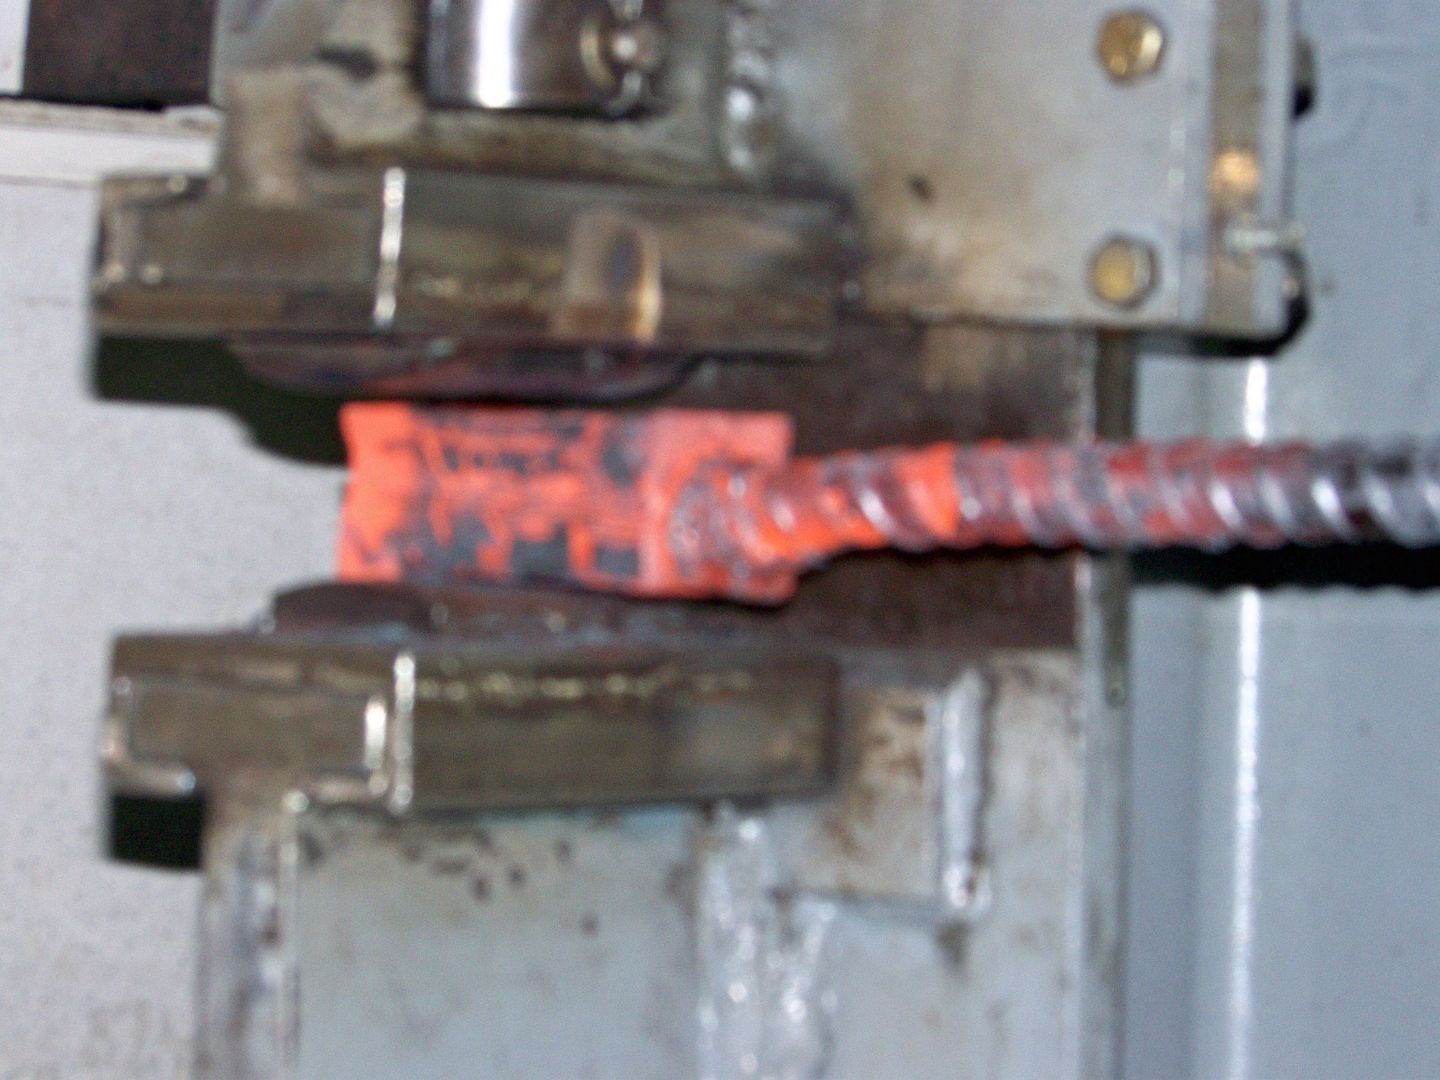
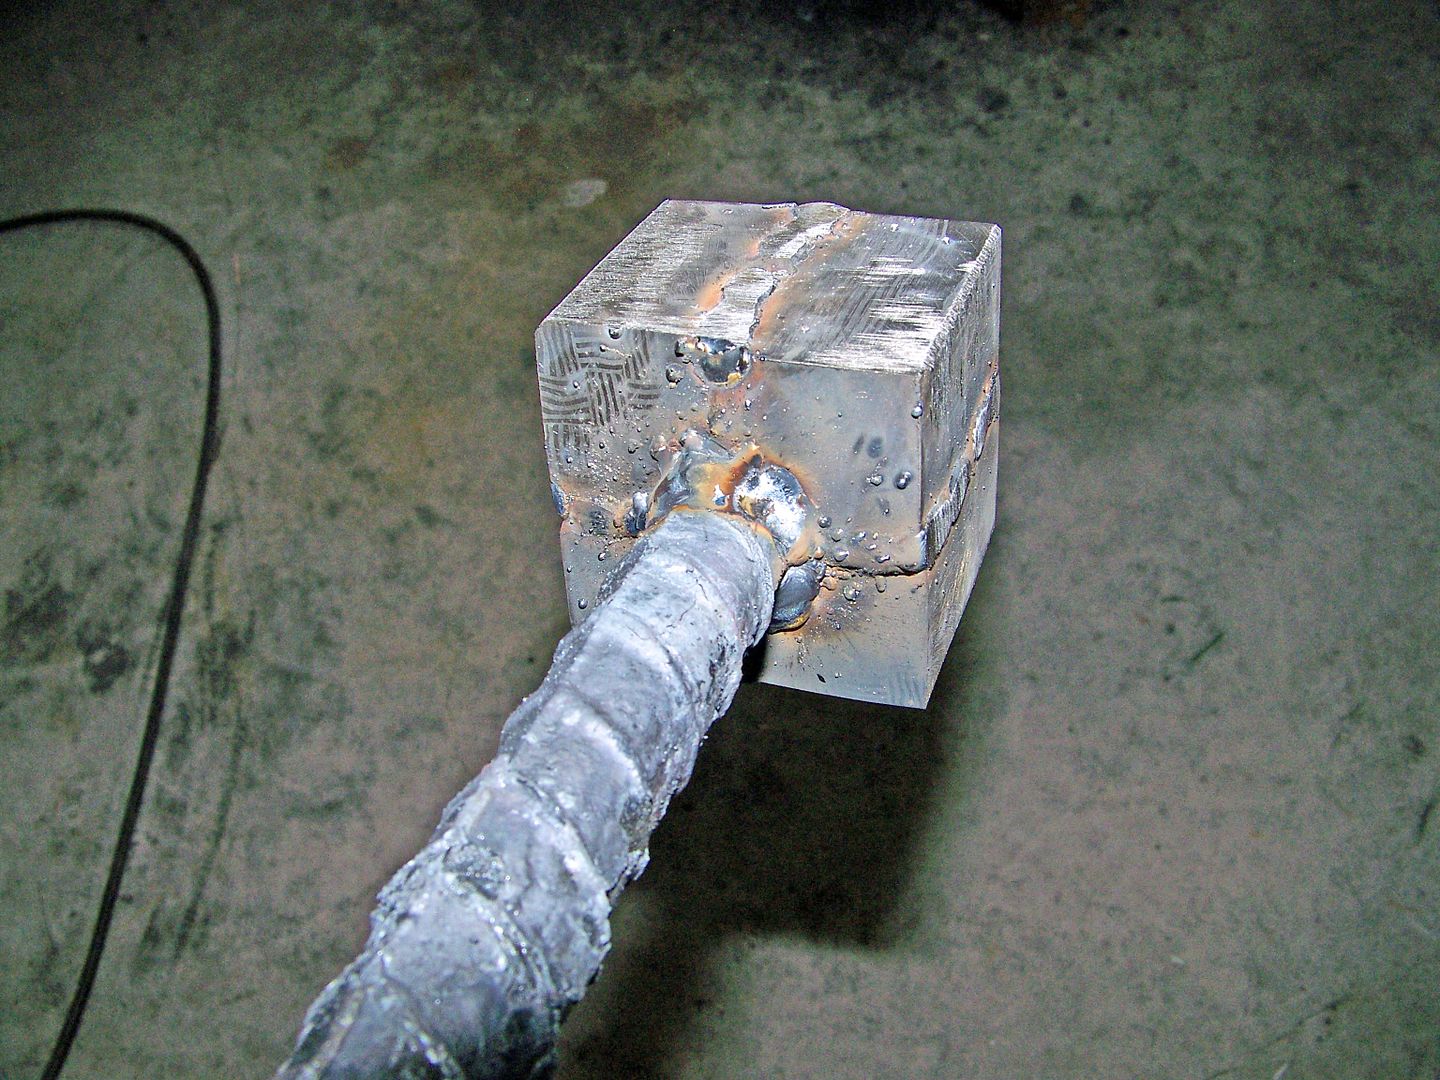
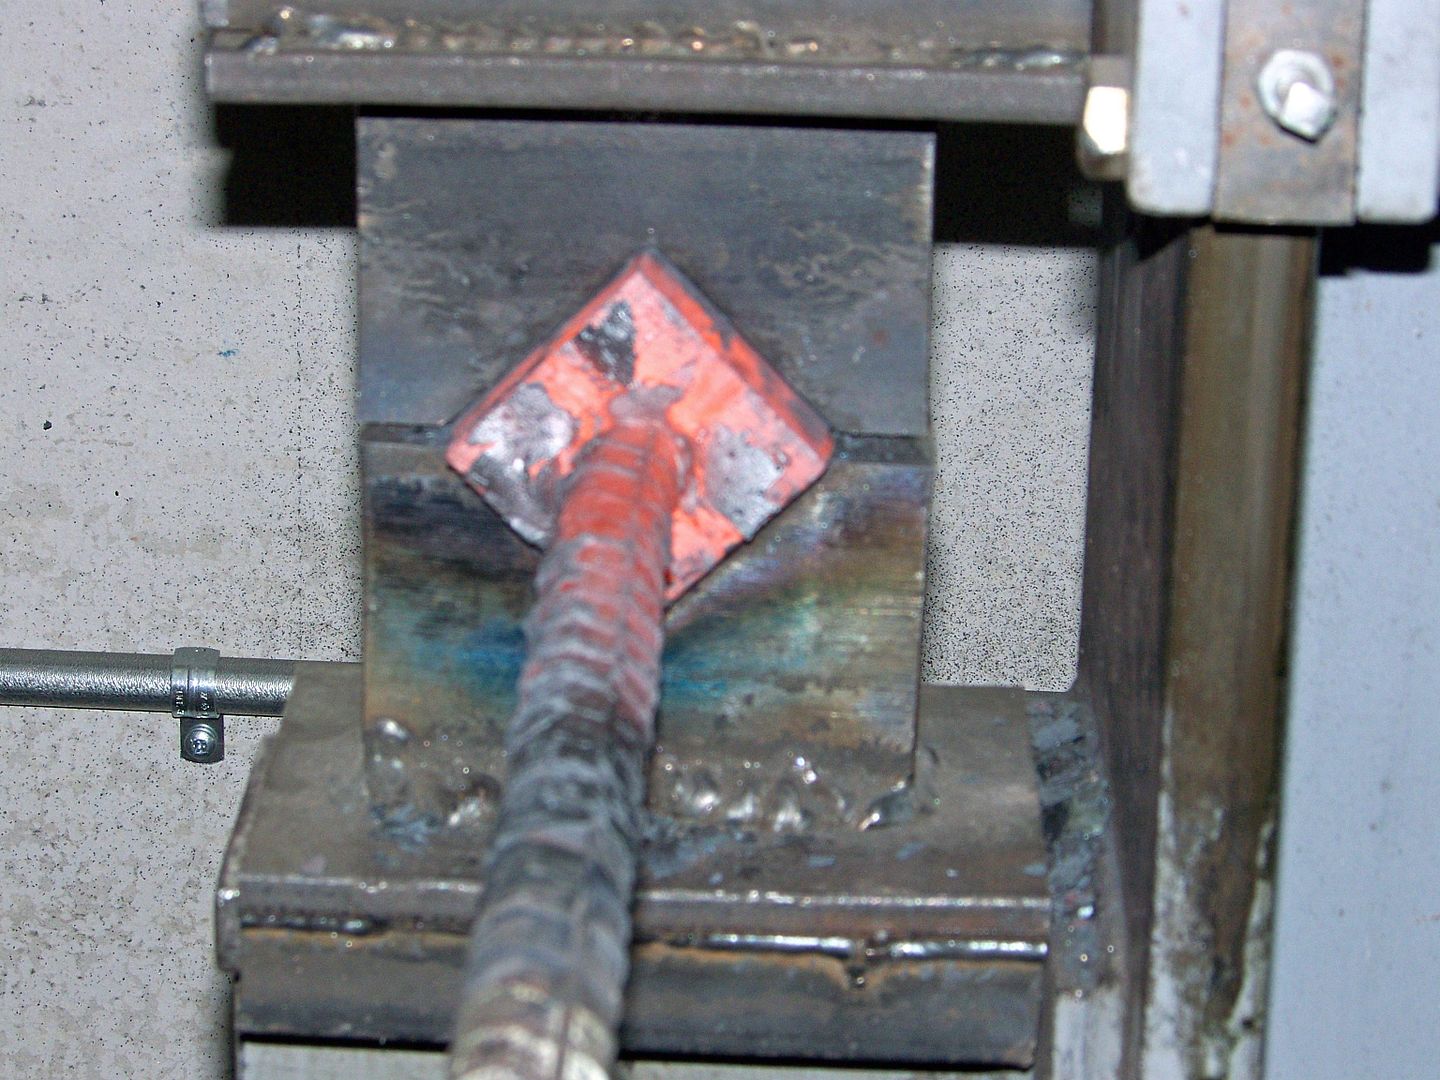
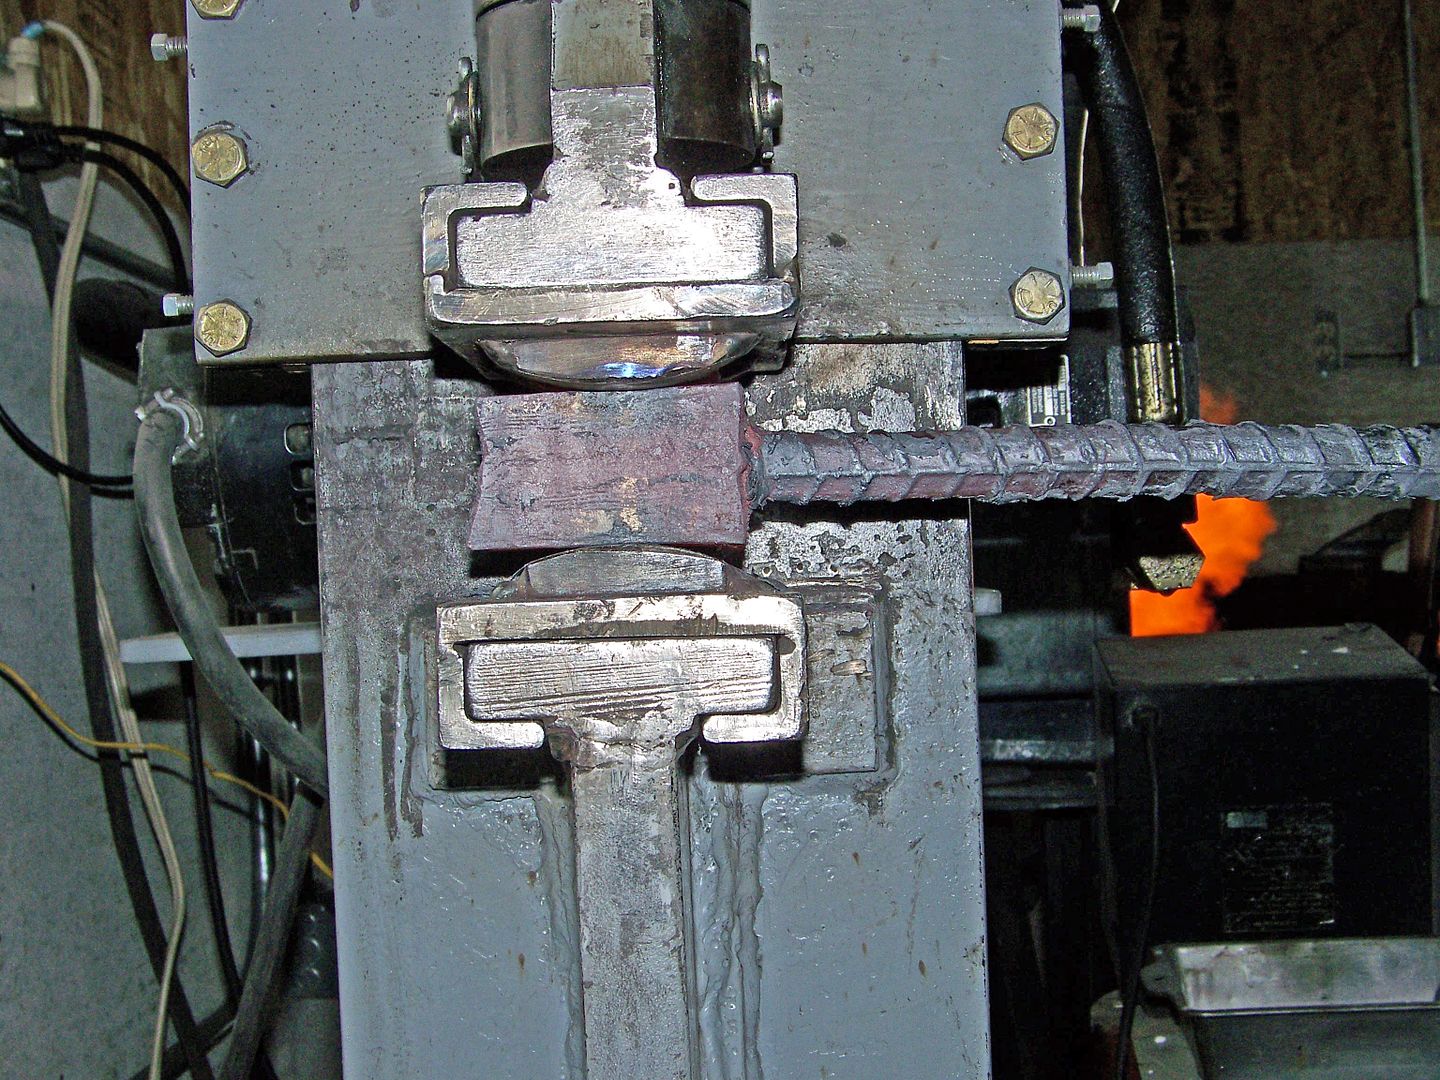
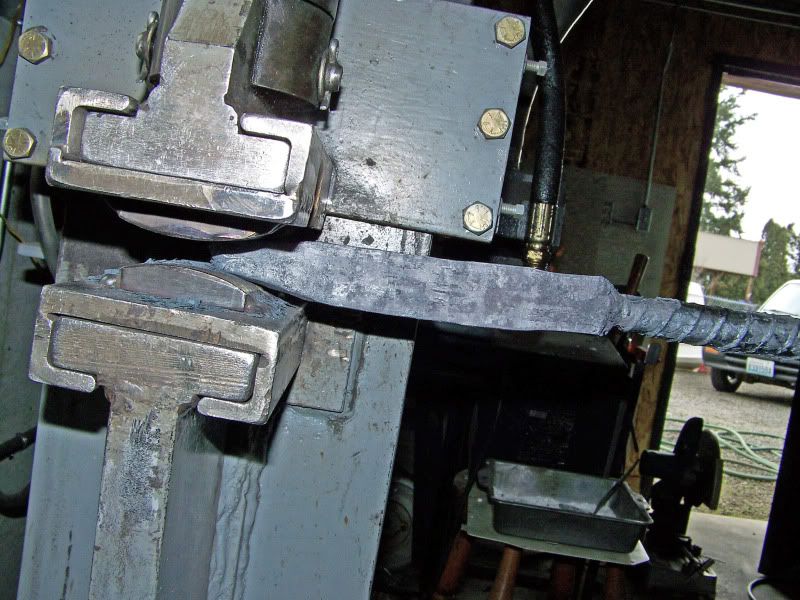
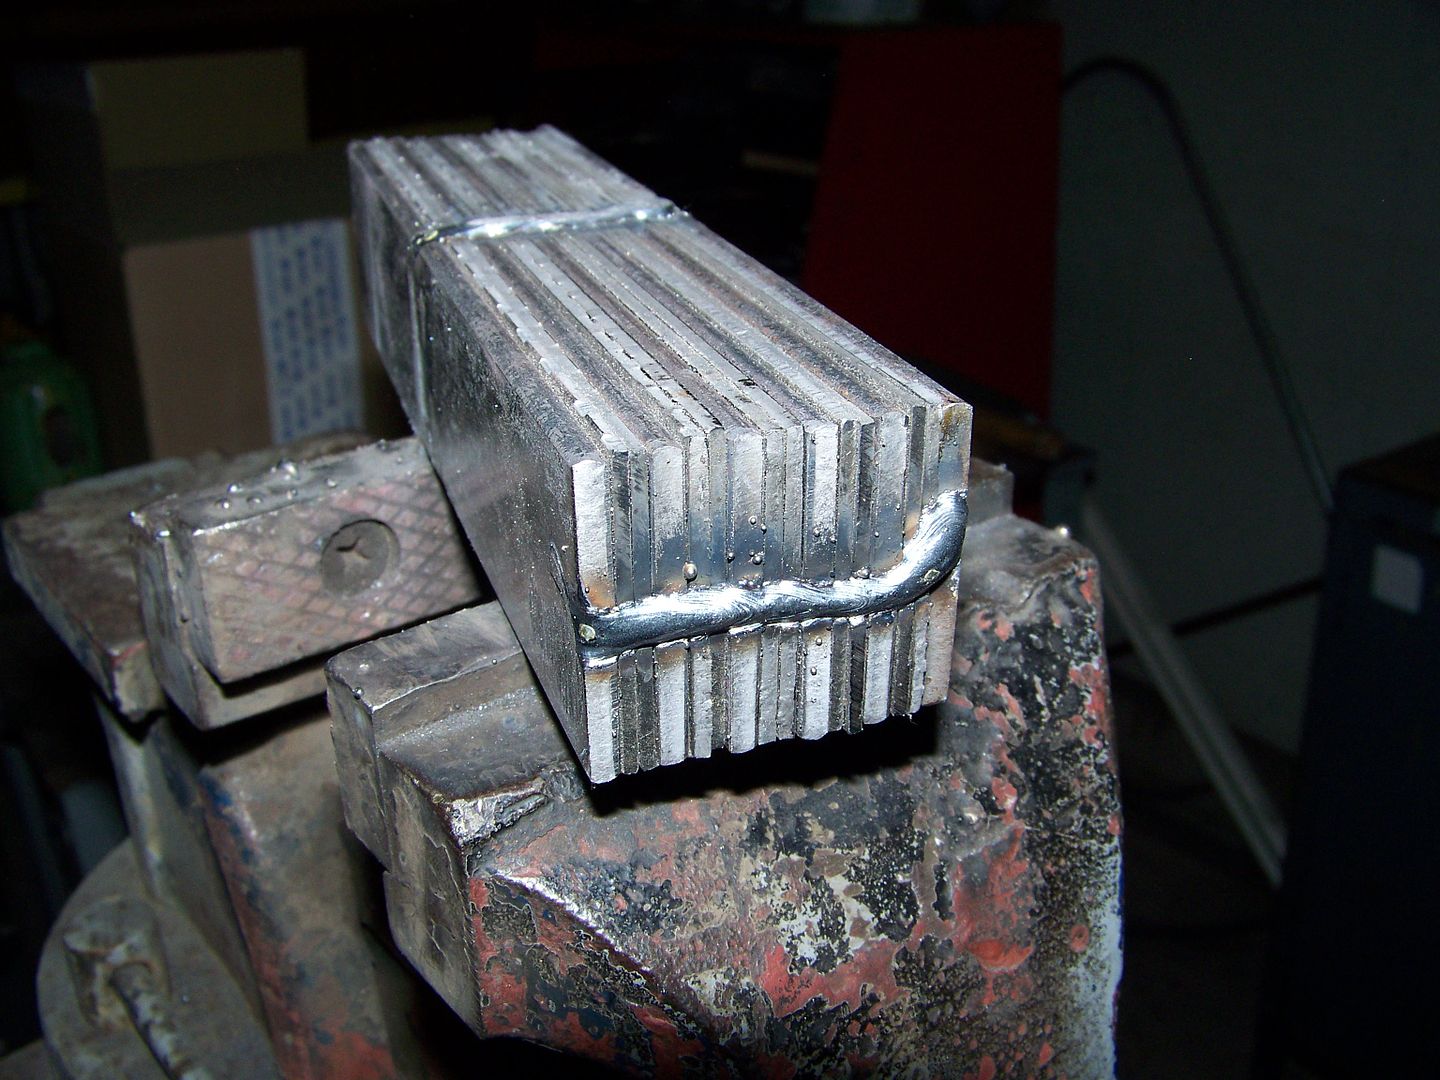
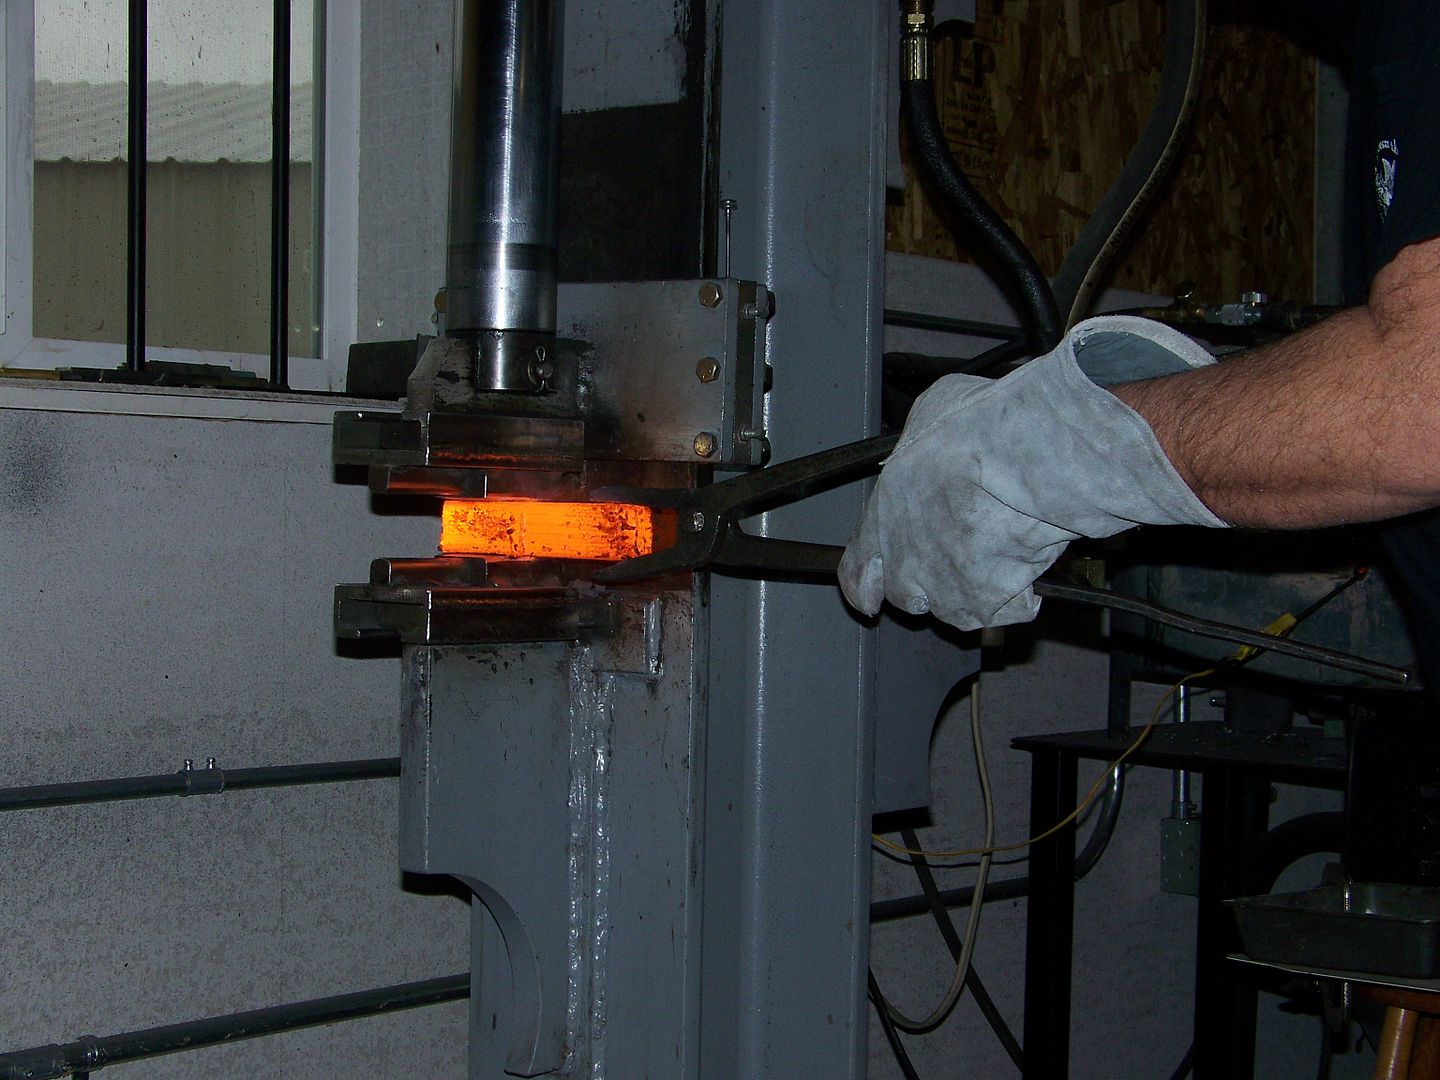
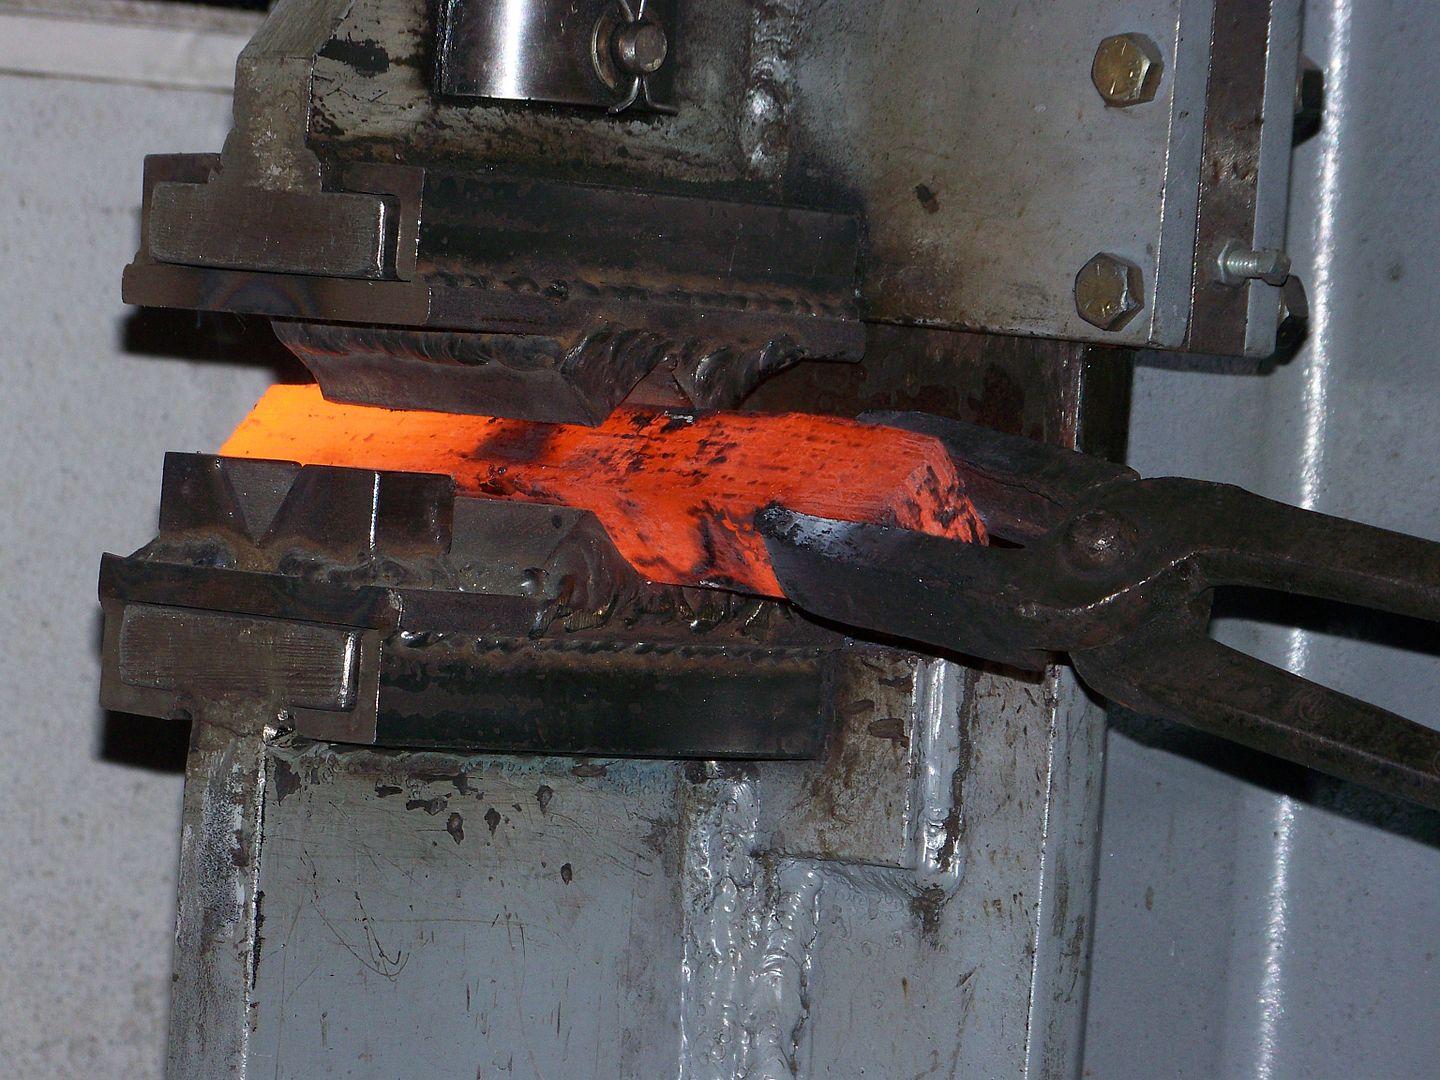
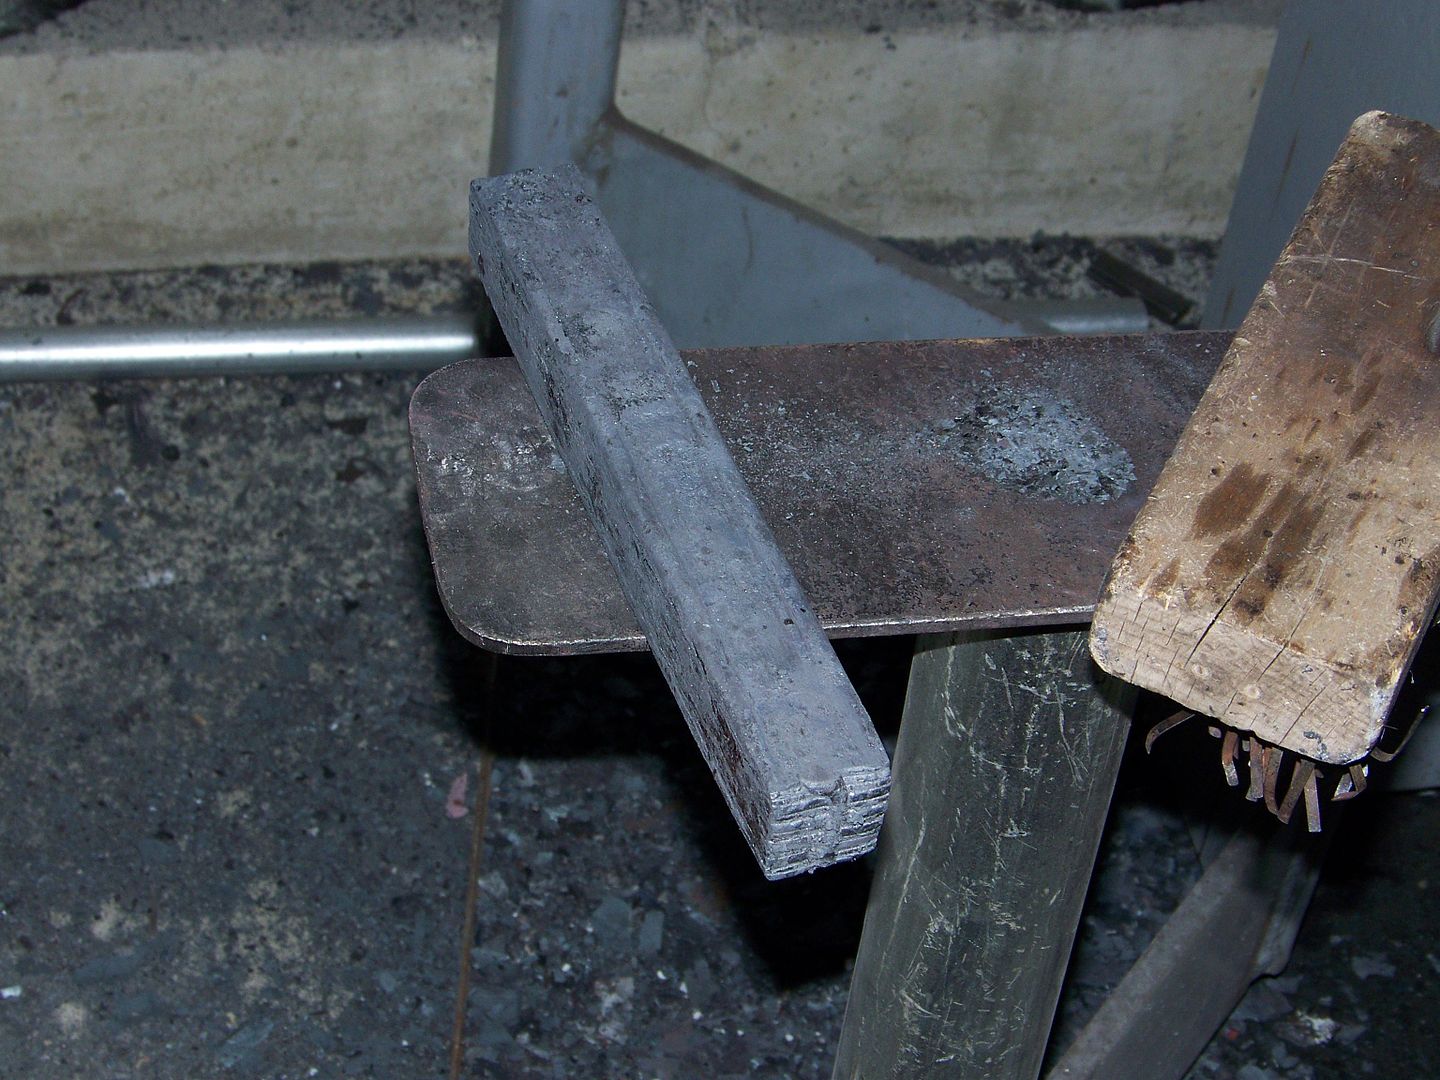
Heres the first stack and weld. Alternating 1084/15n20. Its not too important how many layers you start with as long as when you are done drawing it out ya end up square. I didnt even count these. Really low layer looks cool too. I like to draw it out 3 or 4 times its original length and cut in into 4 equal lengths and re-stack. More on that later.


101_5598.jpg


101_5599.jpg


101_5602.jpg


101_5607.jpg


101_5608.jpg
 
Bruce between you and Mr Richard, you guys are gonna make a wanna-be smith out of me yet. This is going to be great! I know it's been the weekend and all, but - I'm impatient! :D

Thanks for everything you teach Bruce. Getting to watch over your shoulder is an amazing wonderful thing. Particularly since your time is truly valuable and you use it in a way that's helping so many people. Stopping to take pictures, and then processing them and getting them online, and writing it up here must use a third of your day. That blows me away. Thanks!

The embarrassing part, I'm not sure I know what basket weave looks like. Maybe I'll recognize it when we get closer.
 
Much Thanks guys! As I've said before if anybody is interested I enjoy showing some of what makes me happy. What you've been watching is what I do most everyday with a few pictures. The bad part is you see mistakes as well as the successes. This business is rewarding but also frustrating. It seems to have so many levels and plateaus to accomplish. After 21 years making knives I find the mistakes are fewer but the learning curve has never stopped. Tools make my job better and easier but its not easy to pay bills and buy tools. I am ordering a Rockwell tester soon so you can see how that works if you are interested.
Anyway, thanks for following my threads.
 
Today I ground off all 4 sides of the welded billet and cut it into 4 semi-equal lengths. A quick dip in ferric cloride shows the simple laminate. I orient the pieces so it looks like basket weave and will mig weld all the seams up and forge weld it with squaring dies.

There is a couple advantages of mig welding the seams closed instead of fluxing. The flux could easily get trapped in between the layers and cause real problems later as a void. Another advantage is the parts dont have to match perfectly. The compression from the press will align them.

As long as oxygen is sealed out there is no need for flux.

101_5638_edited.jpg


101_5644_edited.jpg
 
Today I welded the seams closed and welded the handle back on. It went into the forge and when it reached 2300 deg I took it out and squeezed it with the big squaring dies to weld it. I drew it out and resquared it with the small squaring dies. Right now its at 1" square and cooling off. I will grind away the scale from all 4 sides and cut it up into 4 more equal lenghts and do it all again tomorrow.

101_5661_edited.jpg


101_5662_edited.jpg


101_5665_edited.jpg


101_5666_edited.jpg


101_5670_edited.jpg
 
Here is where we are at now. I like it. You can see how the numbers grow each time. I need to decide where to stop. BTW using mosaic lingo this is called "4 way" because its cut into 4 and reconfigured and welded.

101_5677_edited.jpg


101_5678_edited.jpg
 
101_5662_edited.jpg


Are those new squaring dies?

I thought I recalled all your other dies being fabricated out of angle iron
why the switch ?
 
101_5662_edited.jpg


Are those new squaring dies?

I thought I recalled all your other dies being fabricated out of angle iron
why the switch ?

I've had these for awhile and use them for welding. The advantage is they are narrow and will force the 4 pieces toward the center and close up any gaps with much more pounds per square inch force. This is the only size I have of this type but plan to make more narrow ones in smaller sizes. They draw well too as the angle iron dies wont draw at all but true the billet and keep it square.
Good question and very observant. cool 1
 
Back at it today. I mig welded all the seams closed again and welded the handle back on. In the fire it goes until it reached the magic number 2300 deg. and right into the squaring dies.
After drawing it out I straightened it and resquared it with the 1" angle iron dies and cut the handle and the other end off with the chop saw. If ya do that while its still hot it cuts like butter but WOW those sparks are hot. I went from the chop saw to the angle grinder and ground away all the scale. Again if ya do it all while its still hot from the forge it comes off really fast.

BTW here is a shot of my angle grinder and steel bench in a special corner with fire-proof wall board (actually hardi-back for flooring but "fire proof" sounds better). I shoot the grinding sparks in this corner now because I almost had a fire all the way across the shop from sparks landing under a cardboard box and smoldering for a couple hours before smoking up the place. Luckily I smelled smoke and found it before it burst into flames.

101_5680_edited.jpg


101_5681_edited.jpg


101_5682_edited.jpg


101_5683_edited.jpg


101_5685_edited.jpg


101_5687_edited.jpg


101_5688_edited.jpg
 
Cut in 4 again, cleaned up and etched to re-orient the pattern and mig weld/forge weld again. This may be the last time, we'll see.

101_5696_edited.jpg
 
They are forge welded together again and drawn out into a billet. I think the squares are small enough now to look right on a hunting blade. I tapered one end so the squares will get smaller toward the blades tip and not look "cookie cutter" but forged.

I should mention that to avoid trapping the mig weld in the billet I have been grinding it away right after the first forge weld and any remaining mig weld material before each 4 way. It really shows up after the etch because it is low carbon and gray in color.

101_5704_edited.jpg


101_5706_edited.jpg


101_5707_edited.jpg


101_5709_edited.jpg


101_5710_edited.jpg


This picture looks like I'm drawing out the taper with the billet too cold. I couldnt find the camera so it cooled off. Do not squeeze steel this cold. Most all my drawing temps are from 2300f down to about 1800. Too cold and the welds can open up. If they do it can get oxygen and build scale in a heartbeat. If that happens it needs to fluxed and soaked at welding temp again and forge welded back together. I have had that happen and sometimes it wont forge weld back together too. There are some ruined billets laying around the shop with days of work in them.

101_5714_edited.jpg
 
Last edited:
Excellent photos and info.

I am a big fan of basketweave. I like to have material (1075, 15N20, and nickel) slit into 1/2" wide rolls and then make up 49 squares inside a 4 x 4 x 6 can. It takes a little longer to set up, but saves you the first few forgings.
 
Excellent photos and info.

I am a big fan of basketweave. I like to have material (1075, 15N20, and nickel) slit into 1/2" wide rolls and then make up 49 squares inside a 4 x 4 x 6 can. It takes a little longer to set up, but saves you the first few forgings.

That would be a more uniform way to keep the pattern straighter and not as much grinding and restacking. I want to show some basic canister welding here soon.
 
Back
Top