Another San Mai thread

KenH

Well-Known Member
OK folks, over the weekend I mentioned I was working on a new San Mai billet using .094" thickness 15N20 for core with .110" thickness 416SS for outer layers making a weld stack around .30" thick - almost 1/3 inch. The finished billet looked good and was around .280"-.290" depending on where I measured it. While forging I drew the billet out trying to thin it down some, and finally got it to around .2" thick with some hammer marks. I was able to smooth this billet more as I used a flattening bar - that flattening bar works! Thank you Chris. Put on surface grinder and did some grinding, billet cleaned up pretty good around .150", that's .025" removed from each side. Doesn't seem too bad. I profiled a knife blank and looks like there are no visible delams.

I ground bevels in leaving edge pretty thick for me. Did the HT in Canola oil. This is the final blade after it's HT'd, beveled, and sanded to 1200 grit. Both sides where etched in a 3:1 mix of FeCl for about 5 minutes. Here is the side that was just cleaned being careful not to remove the black oxide from 15N20 core.
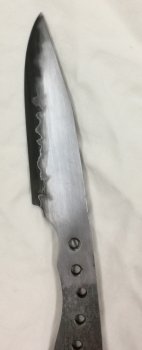
M's_SanMai_SS-L.jpg

Here is other side where I sanded total blade with 1200 grit removing all the black oxide. I suspect for a kitchen knife it would be hard to keep the black oxide layer after much use and this is how it would look. Any guidance on how to keep the black oxide looking dark? That rough edge isn't a delam, just showing the carbon migration that happens with low carbon SS for outer layers, and perhaps etching make it a bit rough also.
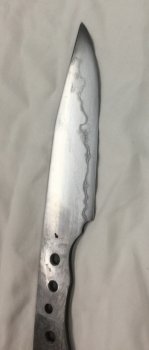
M's_SanMai_SS-R.jpg
 
Last edited:
I am glad the flatter worked out for you. It is funny but I was about to ask you how you kept the HC so dark but then you asked the same question. Good to know I am not the only one in that boat. Your steel looks great by the way.
 
Yea Chris - fresh out of FeCl it's really dark and stays dark until it gets wiped with something. Sitting overnight the black is pretty solid, but still won't hold up to use. Since the cladding is SS there was a suggestion to cut lemons 'n onions and allow the patina to develop on the 15N20 core to contrast with the SS cladding. That might work.

I have thought about trying an AEB-L core with mild steel cladding. This would allow a nice dark patina on the cladding while the cutting edge would stay nice 'n shiny. Just thinking out loud there.
 
I actually thought about letting it dry a day or two then hitting it with Gun Kote to protect the oxides but that will not work because the Gun Kote would only stick as well as the oxides so it would fail too. My next experiment will be with very slow etching, then cleaning then etching then cleaning then etching to see if it will help. I watched Ed's Damascus etching video and got a couple of tips there mainly that the slower the better where etching is concerned so I am going to try that.
 
Yes, slow etching is next on my trials - I did this last etch with FeCl diluted 3:1 with distilled water, but am thinking perhaps 5:1 might be better. The 3:1 etched in just a couple of minutes. I think Ed was talking about slow etch taking several minutes, maybe 30? Don't remember time for sure.
 
That looks great!

One thing that seemed to help me lock in the black oxide was to boil it in water for a few minutes shortly after etching. Can't hurt to try and see if it helps in this instance. It's either that or let it sit for a couple days.

That said, it's been a while since I used FeCl. Been using some nastier acids lately for a little different look.
 
That's a good idea - I'll give boiling in water to see how it works. Thanks for the idea.
 
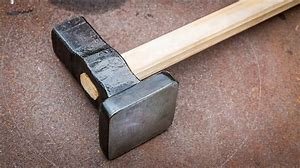
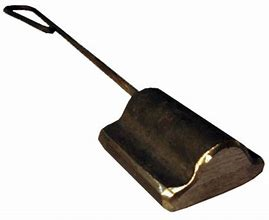
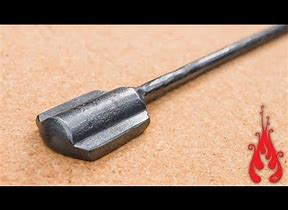
I think I told him that in the absence of a proper flatter you can weld a handle to a piece of leaf spring and get the job done. My first "flatter" was a piece of leaf spring welded to an engineer's hammer. It worked...sort of.
 
OK I get it now instead of a flatter hammer, you are using a bar, and beating on the bar!! th9RHHRWUM.jpgWorks for me!!!
 
Yeah, it hurts your hand a little if you are not careful but it does help remove hammer marks until you can forge a flatter.
 
I love using my flatter. Quick and easy way to clean up flats. Mine was originally a wooden handled flatter but the handle broke. I removed it and I've found it a lot easier to use since then. I just use it as a hand-held flatter now.
 
I know you guys already know this but in the interest of education I am going to put this out there anyway in case someone reads this thread who does not know. A flatter is not intended to be swung like a hammer you place the flatter on top of your work piece and then you strike the flatter with a hammer. This ensures perfect contact with your work piece every time instead of landing errant hammer blows on a near finished piece. I see this mistake a lot so I hope this helps someone.
 
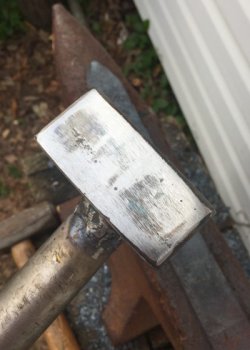
OK folks, here's what I used as a flattener. This first is what I used on the San Mai billet, just as mentioned, a bar held in my hands and hit with hammer. I couldn't show holding the bar in my hand since it was holding the camera.
IMG-3009.jpg

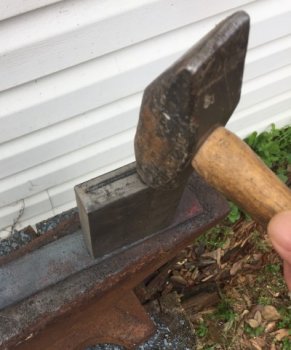
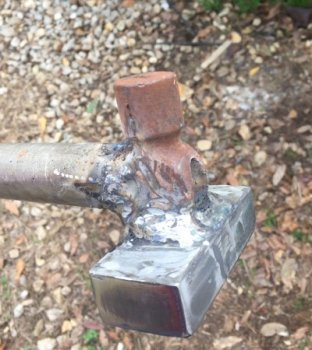
This is what I made today - sawed off a 1-1/2" X 3" piece of the 1" thick bar and welded to the peen side of a small ball peen hammer. I cut the peen ball off to leave a flat spot to weld to. Smoothed up the bottom a bit. I did anneal the hammer head so it shouldn't chip when hitting with hammer. Don't look at crappy welds. 45 yrs ago I was a welder, but don't do it enough anymore.
IMG-3011.jpg IMG-3012.jpg
 
Back
Top