Nick Schreiber
Well-Known Member
Heikki, that is beautiful! If you want to make something like that for your KITH then feel free!
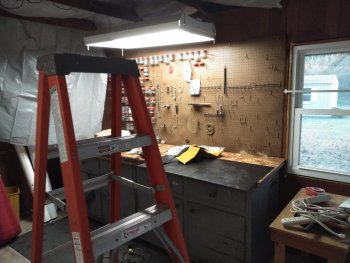
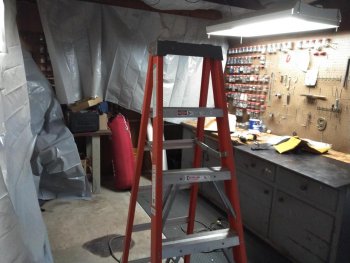
What's going on in my shop? It's a new shop! I am taking over part of the garage! First step is hanging plastic to try to keep the dust contained, and then getting tarps to cover the other stuff in the garage, which we are using for storage currently (just moved into the house in mid August and had our wedding there last weekend, so there is a lot to go through!). Just gotta make a few modifications to the plastic sheeting and I can start moving my toaster oven, kydex press, Jet drill press, Band saw and 2*36 handle sander over. Then it will be time to set up the Ameribrade FastBack and get a 220V outlet into the garage!
Belt sanders will go right on the table in front of the window. To the left will be my assembly area, followed by the kydex press and oven. Behind those will be the drill press and belt sander and another assembly table. The work table is big enough to hold my handle materials, kydex materials, blanks, tools, etc in the drawers without having everything all over the work table cluttering the area up. Looking forward to using the new shop!
") and had to redo them.
and had to redo them.

Looks good Bruce!A friend of ours runs an online auction and asked me to make and donate a knife. I , too , was stunned!!!
Here's what I have going so far. Comments. Critique. Laughs?View attachment 75166View attachment 75167

do you need a mill to do the fuller? Or can you do it by hand ?There are varying opinions on "glue squeeze out" that results in a glue starved joint. Some say yes, some say you can't squeeze out enough. Figure out what works for yourself. One of the methods for mitigating that glue squeeze out, however, is grinding a fuller on each side of the tang to form a glue pocket. Whether that fuller helps with glue I can't really say, but those fullers are gangbusters for getting the mating surface at the edges of the tang flattened out and making a crack free joint. After I grind my fullers, I put a hard backer behind my sandpaper and do it just like I'd sand a blade. View attachment 75171
do you need a mill to do the fuller? Or can you do it by hand ?
I use a Foredom tool and have a ton of accessories including sanding drums and abrasive wheels. The question then becomes: is it worth it for the outcome?
There are varying opinions on "glue squeeze out" that results in a glue starved joint. Some say yes, some say you can't squeeze out enough. Figure out what works for yourself. One of the methods for mitigating that glue squeeze out, however, is grinding a fuller on each side of the tang to form a glue pocket. Whether that fuller helps with glue I can't really say, but those fullers are gangbusters for getting the mating surface at the edges of the tang flattened out and making a crack free joint. After I grind my fullers, I put a hard backer behind my sandpaper and do it just like I'd sand a blade.
Oh, and I am more than a flattered that my free handed fuller provoked a milling question.do you need a mill to do the fuller? Or can you do it by hand ?

There's a lot of questions and opinions out there. Here's a link to a fairly good discussion by a guy I know who seems to know his stuff through his engineering history...I can see where that would give much better shear strength vs. holes alone.
Generally speaking, there is some good information in that thread about bonding two parts together with epoxy, from the engineering perspective from which it is presented.There's a lot of questions and opinions out there. Here's a link to a fairly good discussion by a guy I know who seems to know his stuff through his engineering history...
Adhesion: Making Handle Scales Stick, and Stay Stuck, on Blade Tangs
My previous posts on another thread led to the conclusion that I should consolidate this discussion into a single thread. I have had time to type out more on this subject - and so am posting this. I am also re-posting the earlier material so that it is all in one place eventually. Apologies...bladeforums.com