Mike Jones
Google Master
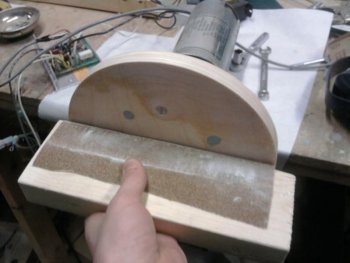
I have been wanting a disc grinder for some time now. As much as I wish I could have a Beaumont Metal Works variable speed grinder, the price was way out of my budget. I had seen others use a treamill motor/controller from surplus center and a Beaumont Metal Works disc, but surplus center no longer sells those motors, and I don't really have $75 to spend on a disc. Next option: Check Craigslist for a used treadmill (old style with knob/slide speed control is best). I came across one for $25, that I worked into my schedule where I won't use any excess gas to pick up. So now the question is: Where do I find a disc? I had thought about this for a while, then finally decided that a baltic birch (Russian Birch) plywood wheel would be cheap and easy to make.
So here is my progress of this disc grinder.
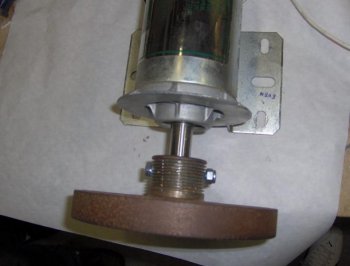
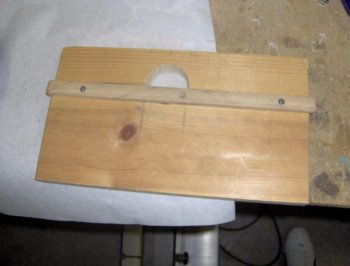
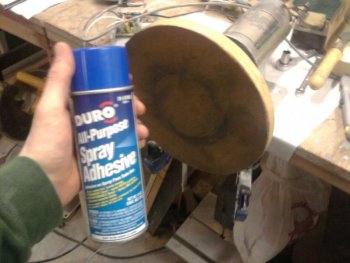
I started out with 1/4" baltic birch plywood (already had it) and glued 3 10.5x10.5 pieces together to make 3/4" plywood.
To get the treadmill motor, carefully mark all wires on the control board before unplugging them. Remove the dial speed control, control board, motor, and there may be a voltage stabilizer thingy that is not on the board. If you do not know what the wires are, do not attempt this on your own! I had an electrical engineer help me! If your motor only has two wires going to it, you can switch the two inputs to reverse the rotation.

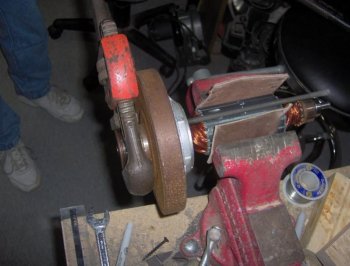
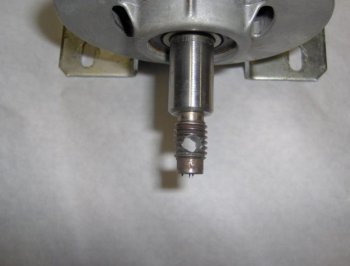
To remove the flywheel, I took some penetrating oil, let it set in for a few minutes, then removed the coiled part of the motor (with the shaft) and stuck it in the vise with some leather protection. Then I used a breaker wrench to get enough force to get the rusted threads loose.

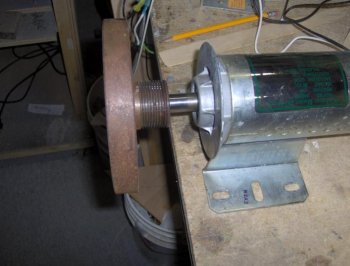
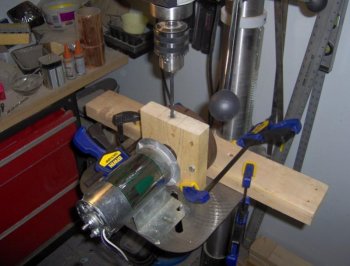
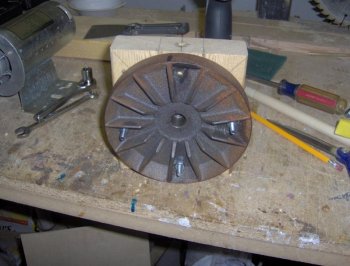
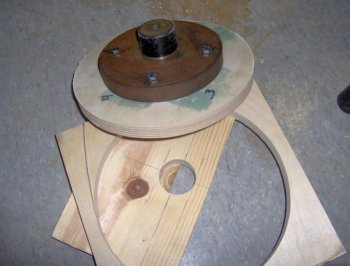
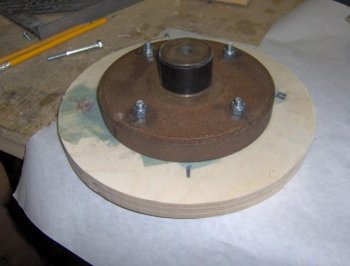
I decided to use the treadmill flywheel on the shaft backwards (for a flat surface and better clearance) to hold the plywood onto the motor shaft. I drilled 4 holes about 90 degrees apart.


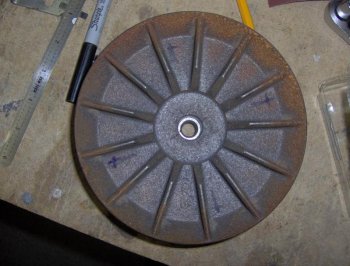
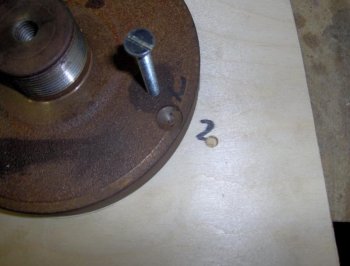
I found the center of my plywood and marked it. Then I put the flywheel on the center and drilled the 4 holes into the plywood, dropping a bolt into the hole to keep it alligned. I also marked the plywood with a small hole, at the hole where the flywheel already had one (to always keep it aligned. Both holes together)

So here is my progress of this disc grinder.
I started out with 1/4" baltic birch plywood (already had it) and glued 3 10.5x10.5 pieces together to make 3/4" plywood.
To get the treadmill motor, carefully mark all wires on the control board before unplugging them. Remove the dial speed control, control board, motor, and there may be a voltage stabilizer thingy that is not on the board. If you do not know what the wires are, do not attempt this on your own! I had an electrical engineer help me! If your motor only has two wires going to it, you can switch the two inputs to reverse the rotation.
To remove the flywheel, I took some penetrating oil, let it set in for a few minutes, then removed the coiled part of the motor (with the shaft) and stuck it in the vise with some leather protection. Then I used a breaker wrench to get enough force to get the rusted threads loose.
I decided to use the treadmill flywheel on the shaft backwards (for a flat surface and better clearance) to hold the plywood onto the motor shaft. I drilled 4 holes about 90 degrees apart.
I found the center of my plywood and marked it. Then I put the flywheel on the center and drilled the 4 holes into the plywood, dropping a bolt into the hole to keep it alligned. I also marked the plywood with a small hole, at the hole where the flywheel already had one (to always keep it aligned. Both holes together)
Attachments

Last edited:


")