Scalloped Bolster Inlays

Steven Janik

SUPERMOD & AWARDS BOSS
Scalloped Bolster Inlays part 1

This may be old hat for some but it is a great way to use a contrasting bolster that is thinner than your scale stock without just using a pile of spacers.

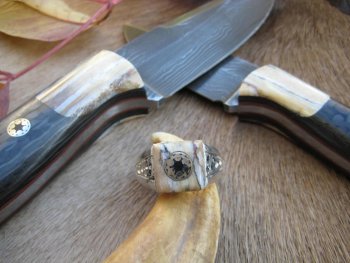
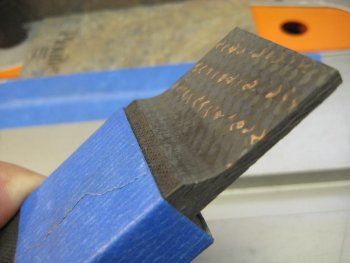
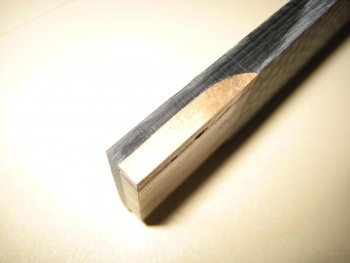
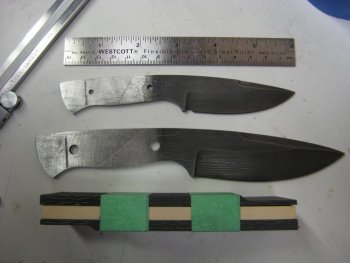
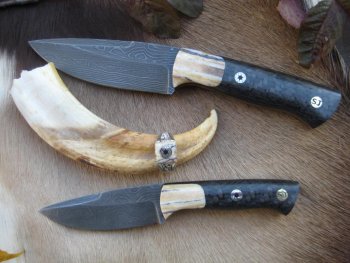
pic #1 shows the finished product.

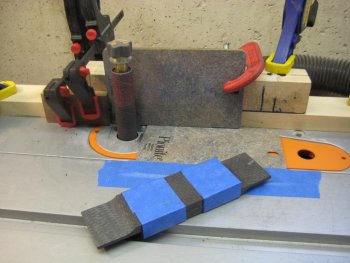
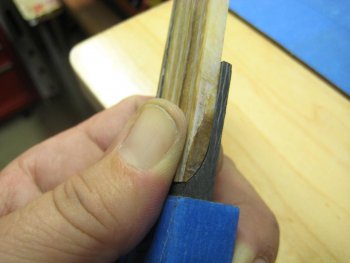
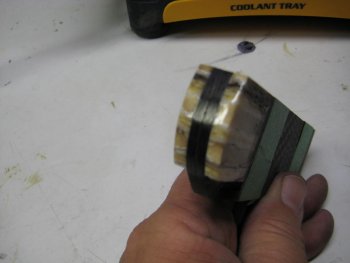
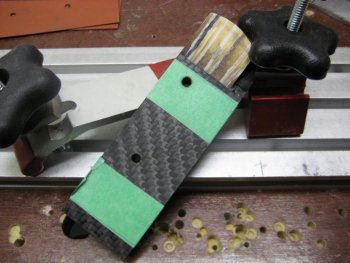
pic #2 shows the two scales taped together. I put a 1/4" block between them on this set because the carbon is thin and it's just easier to hold on to.

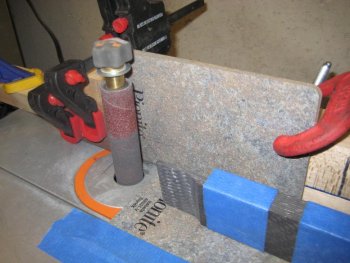
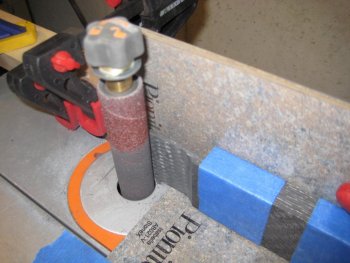
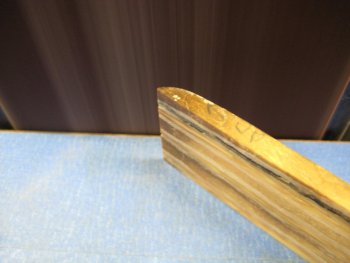
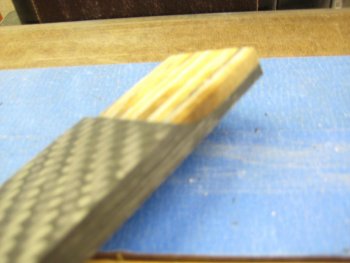
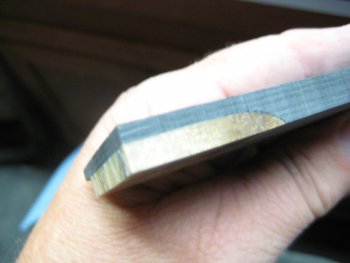
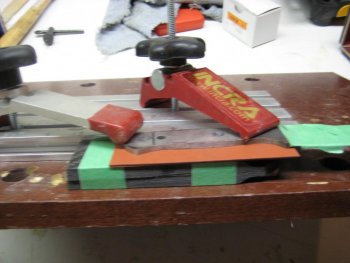
pic #3 shows the stock being plunged into the oscillating spindle sander. This can also be done with a drum sander in your drill press or on the 1" wheel of your grinder. I just like this little oscillator for this kind of task. You flip the piece over and do alternating ends and I add the laminate counter top sample as .040 spacers but you can also move your fence as you progress. You must be slow and careful because by pushing stock between a rotary tool and a fence you could create a jamb and a flying projectile.
 
Last edited:
Scalloped Bolster Inlays part 2

pic #1 and #2 show the scales ground to a thickness to accept the bolster inlay.

pic #3 and #4 show the sanding and hand fitting of the inlay.

pic #5 is the glued and sanded inlay.
 
Last edited:
Scalloped Bolster Inlays part 3

pic #1 shows all parts, including spacers and blade set up in my drilling fixture.

pic #2 is on the drill press.

pic #3 shows the freshly drilled holes with no "breakouts".

pic #4 is the front end of scales which must be shaped and polished before it all goes together,

pic #5 is more finished goods.

Sorry the pics are not larger but I followed the instructions and it works on the first one and then I lose my post when I try the second one.

Regards,
Steve
 
Last edited:
Tracy,
I'm not sure I was very clear, but I set up the fence to just touch the scale at the start then add the laminate spacers (pic #3 part 1) to move the scale off the fence and make a .040 cut (which is the thickness of the laminate sample). I subtract the thickness of the inlay from the thickness of the scale and I know how much to take out to get close. I usually leave the bolster stick out a little and sand it flat after its glued. You can also just move your fence after every pass on both pieces.

thanks, Steve
 
Looks awesome.
Im not ready to tackle this yet but its great to see how its done.
The knife looks killer.2thumbs
 
Hi Steve, if you find them, it might be worth starting to use a photobucket account. I have hundreds of photos in mine and still not full!
 
Scalloped Bolsters

I dug up the pix. This set was called Stoneage meets Spaceage and I used mammoth tooth and carbon fiber and red brick spacers.
 

Attachments

  • bolster 030.jpg
    bolster 030.jpg
    88.4 KB · Views: 242
  • bolster 001.jpg
    bolster 001.jpg
    92.4 KB · Views: 199
  • bolster 002.jpg
    bolster 002.jpg
    93.7 KB · Views: 202
  • bolster 003.jpg
    bolster 003.jpg
    89.9 KB · Views: 206
  • bolster 005.jpg
    bolster 005.jpg
    82.9 KB · Views: 208
more scalloped bolster pix.
 

Attachments

  • bolster 008.jpg
    bolster 008.jpg
    85.9 KB · Views: 92
  • bolster 009.jpg
    bolster 009.jpg
    82.5 KB · Views: 94
  • bolster 010.jpg
    bolster 010.jpg
    79.9 KB · Views: 98
  • bolster 014.jpg
    bolster 014.jpg
    79.7 KB · Views: 101
  • bolster 017.jpg
    bolster 017.jpg
    86.6 KB · Views: 97
last 5 scalloped bolster pix.
 

Attachments

  • bolster 022.jpg
    bolster 022.jpg
    90.2 KB · Views: 99
  • bolster 024.jpg
    bolster 024.jpg
    78.6 KB · Views: 110
  • bolster 025.jpg
    bolster 025.jpg
    84.9 KB · Views: 108
  • bolster 026.jpg
    bolster 026.jpg
    89.7 KB · Views: 108
  • Book 036.jpg
    Book 036.jpg
    96.5 KB · Views: 296
Back
Top