Swayback Wharncliffe How To

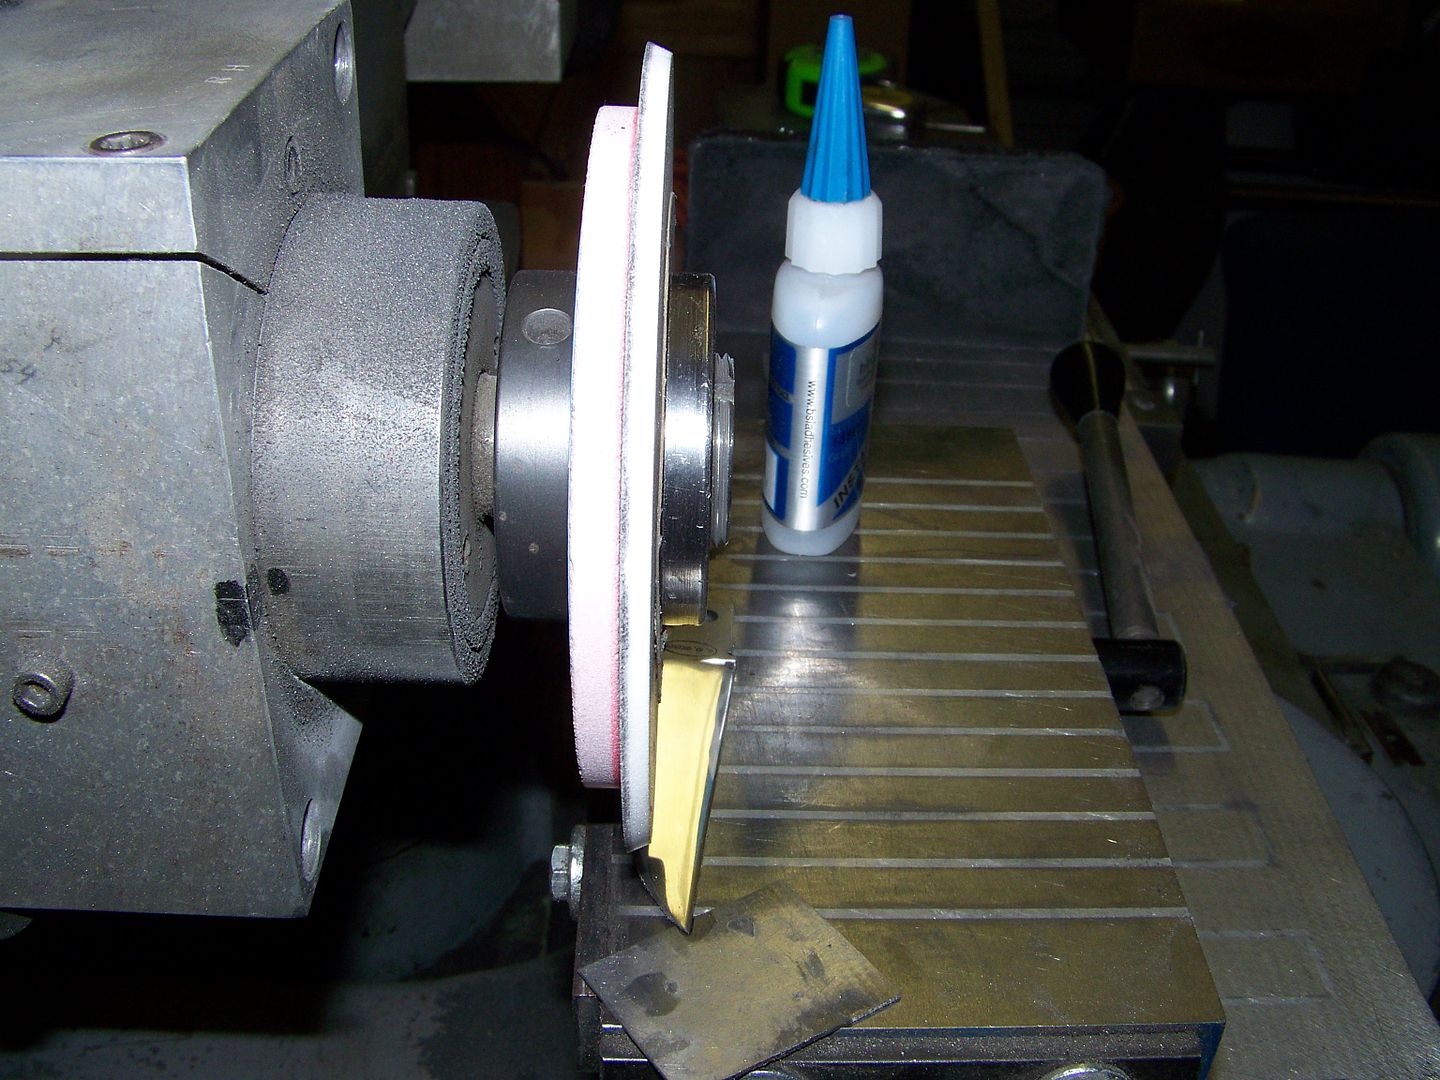
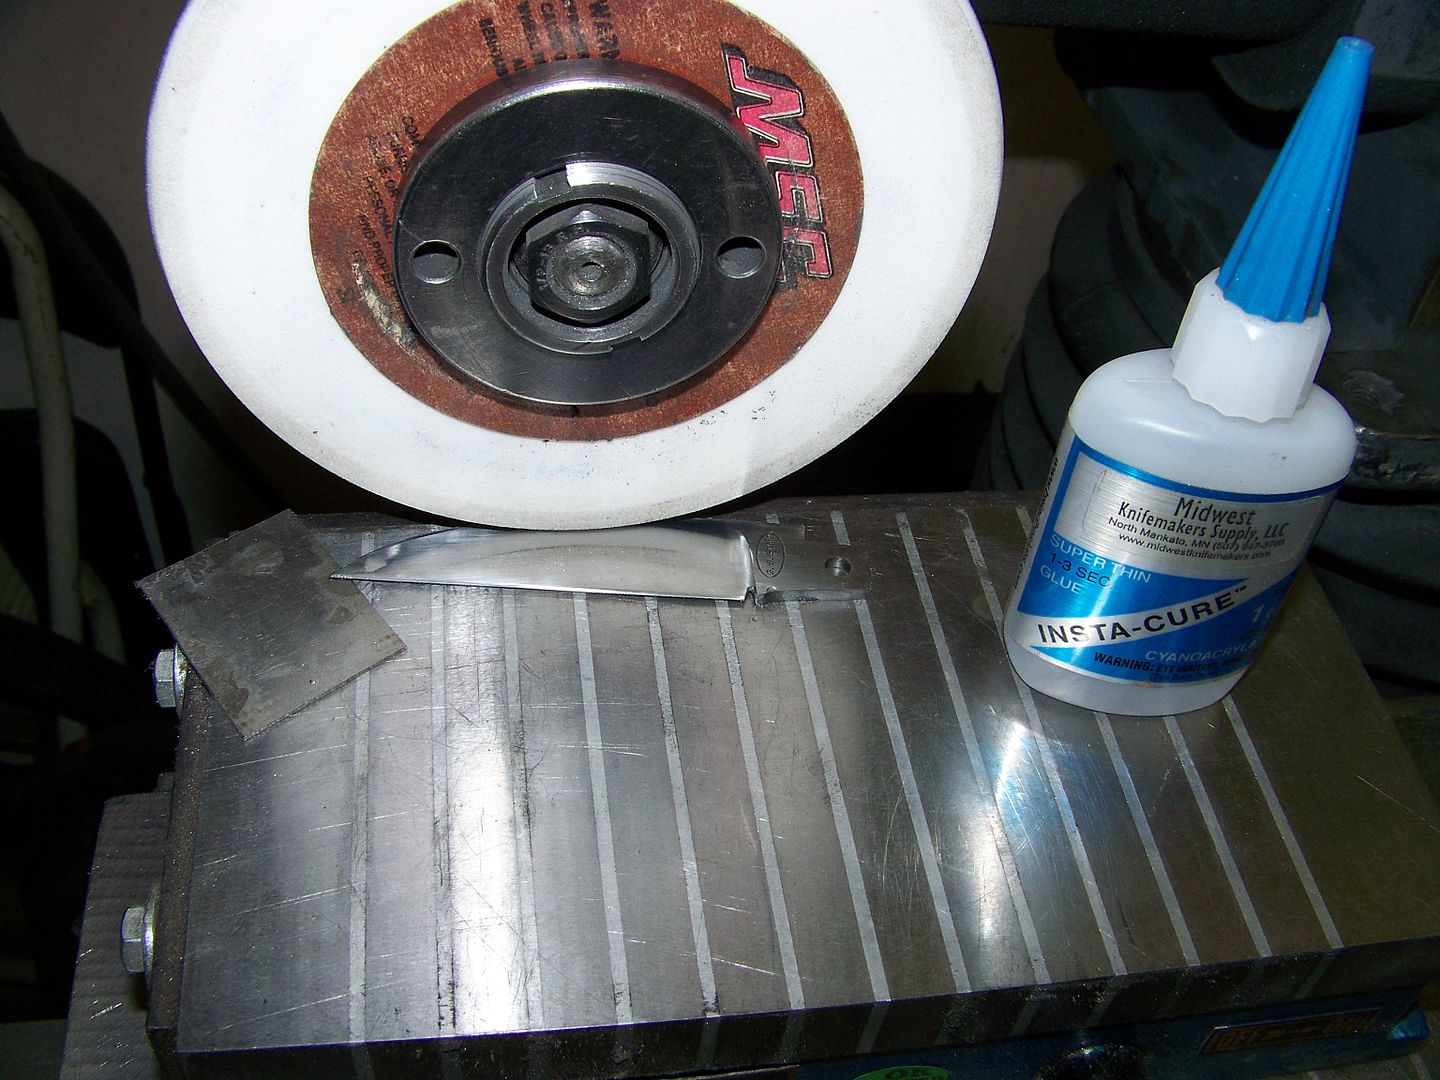
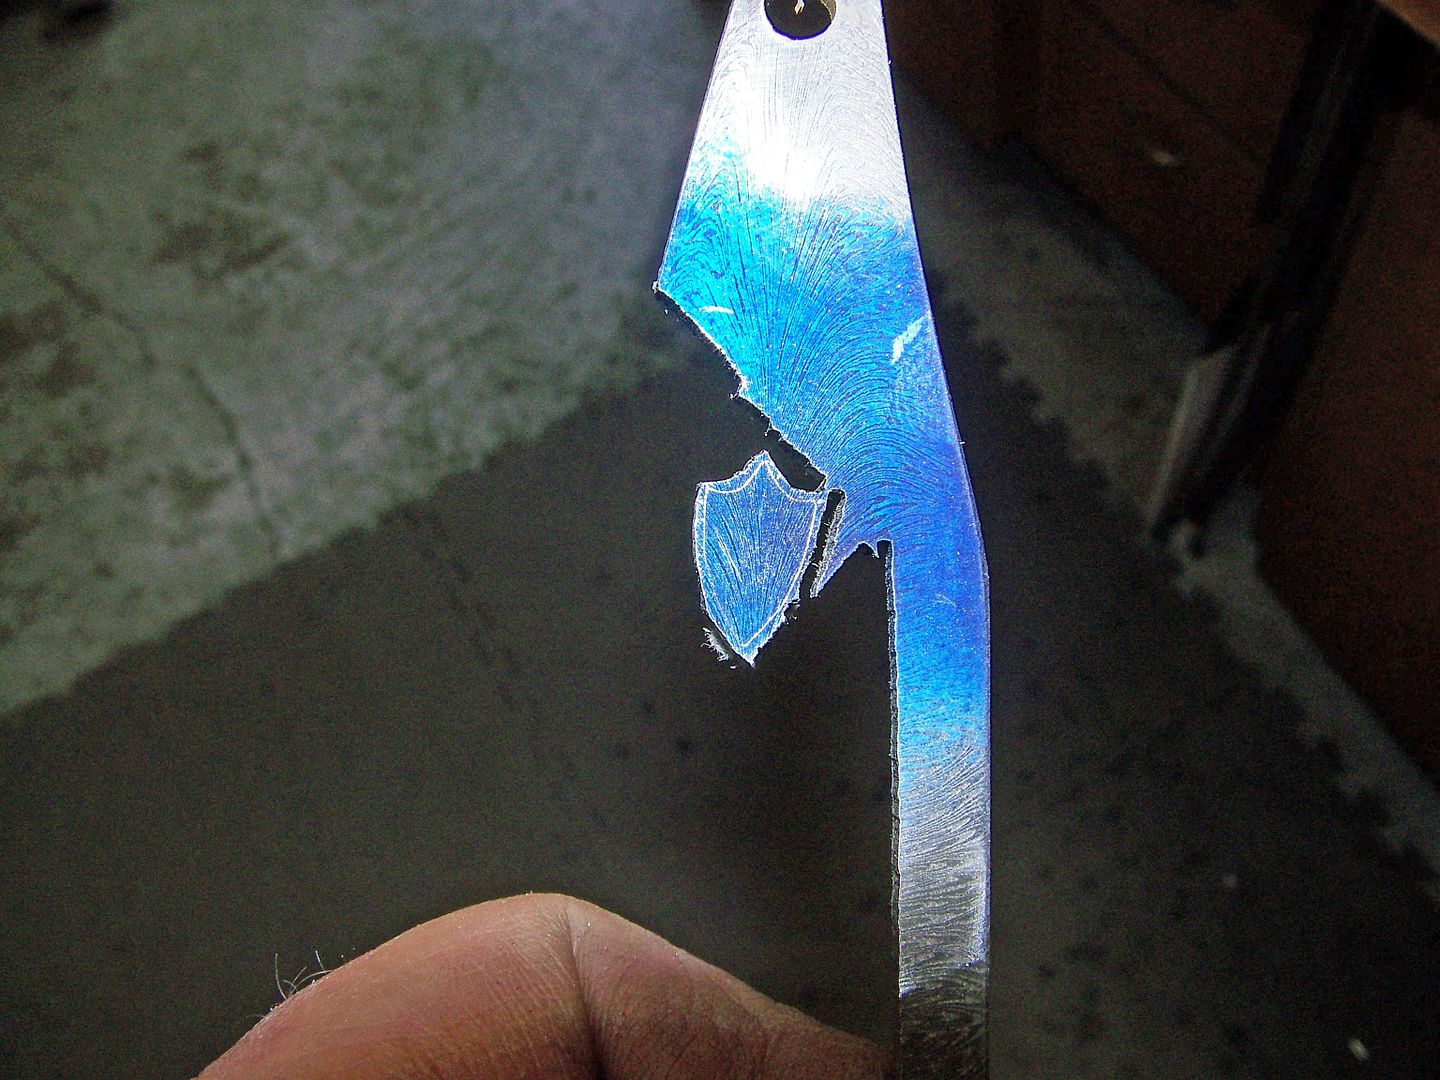
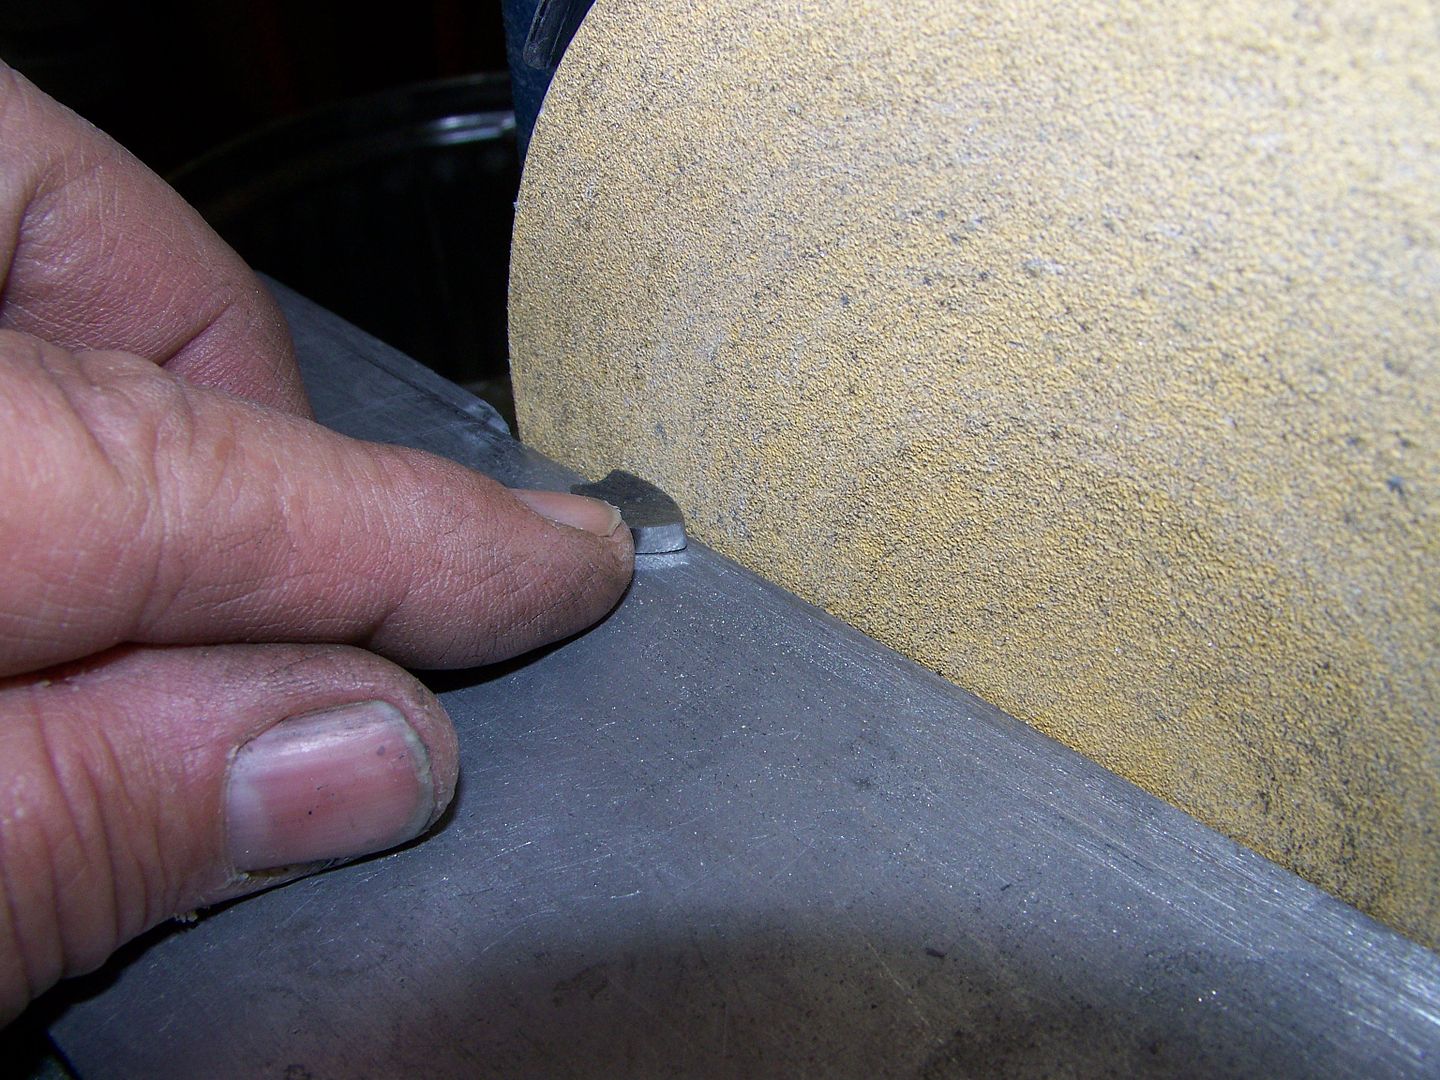
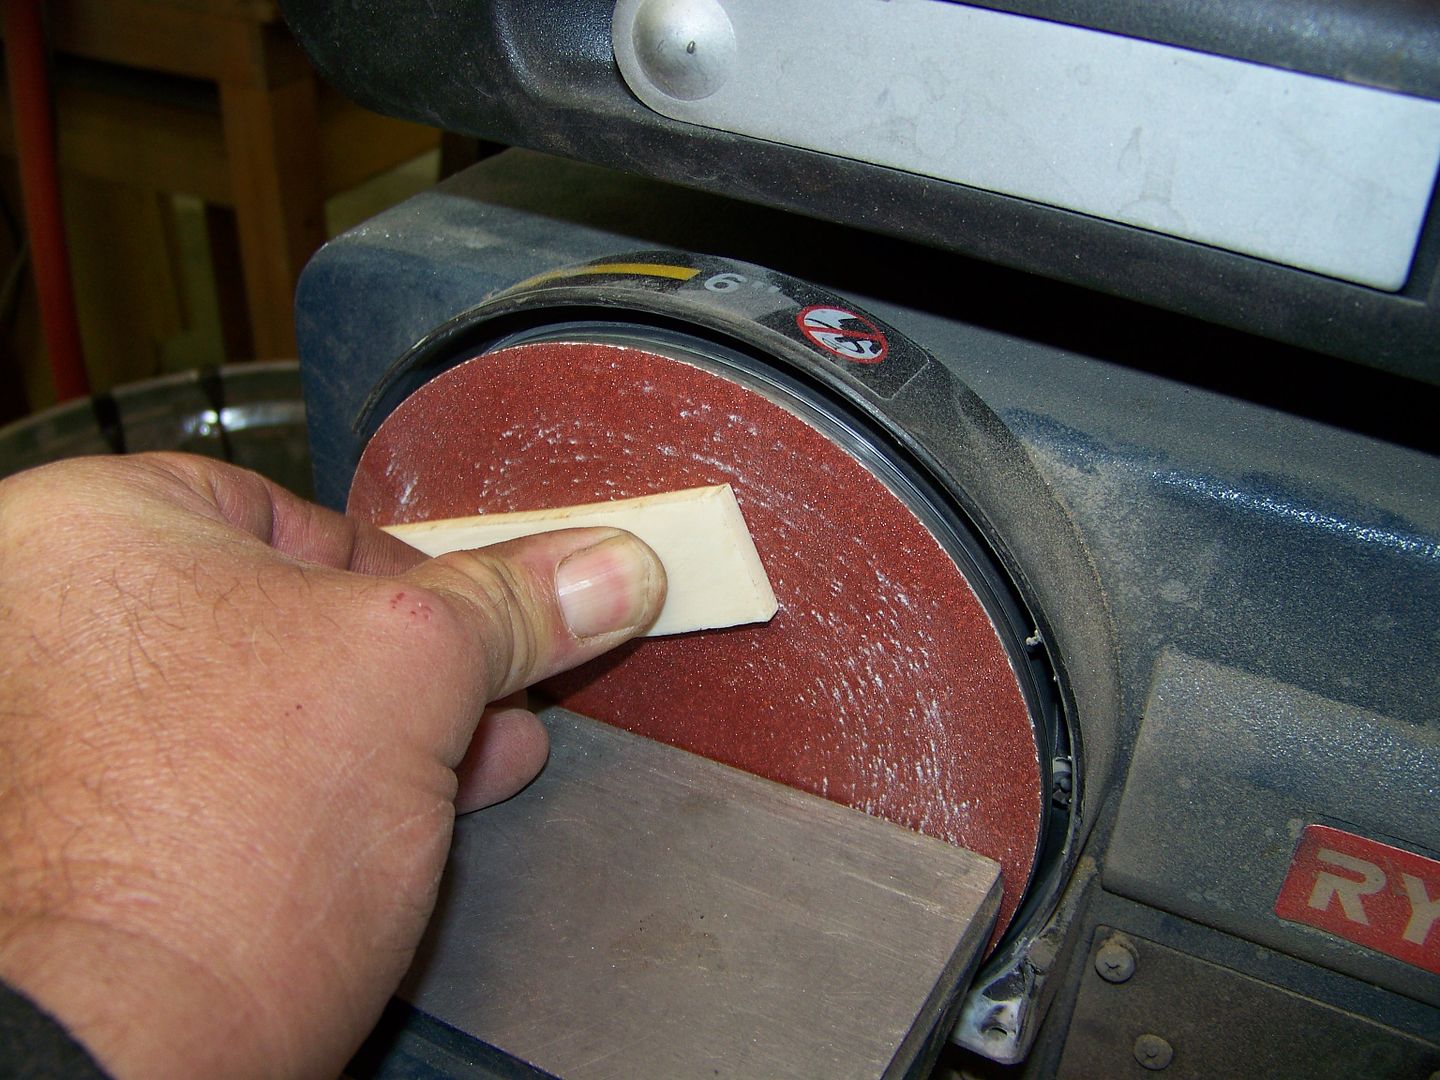
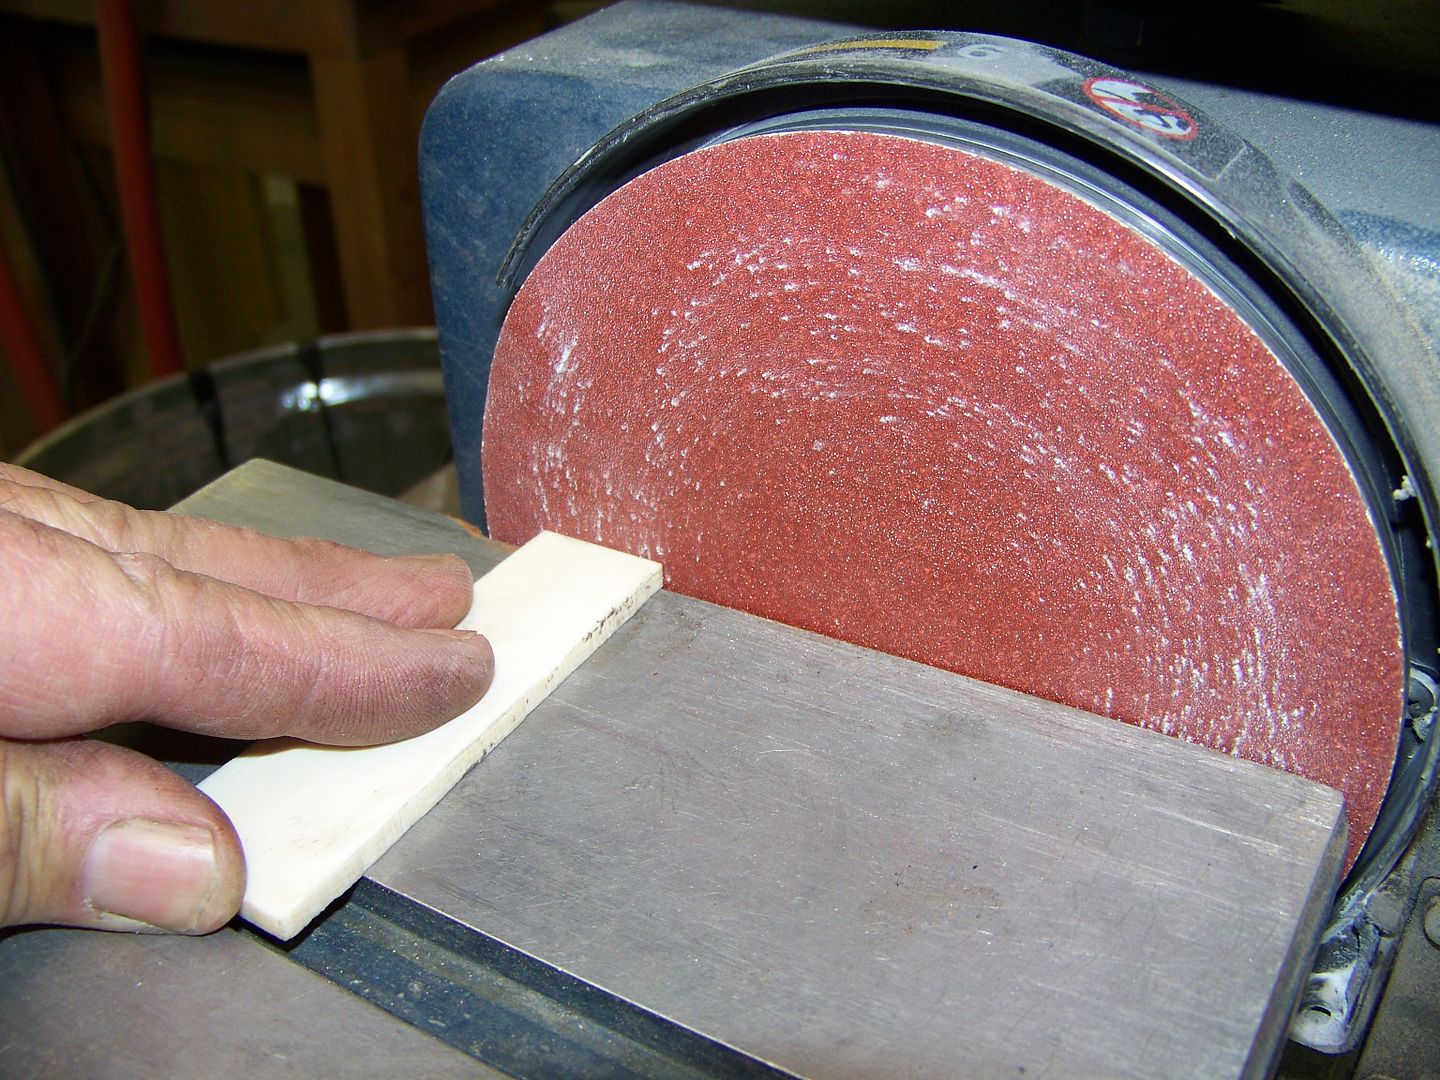
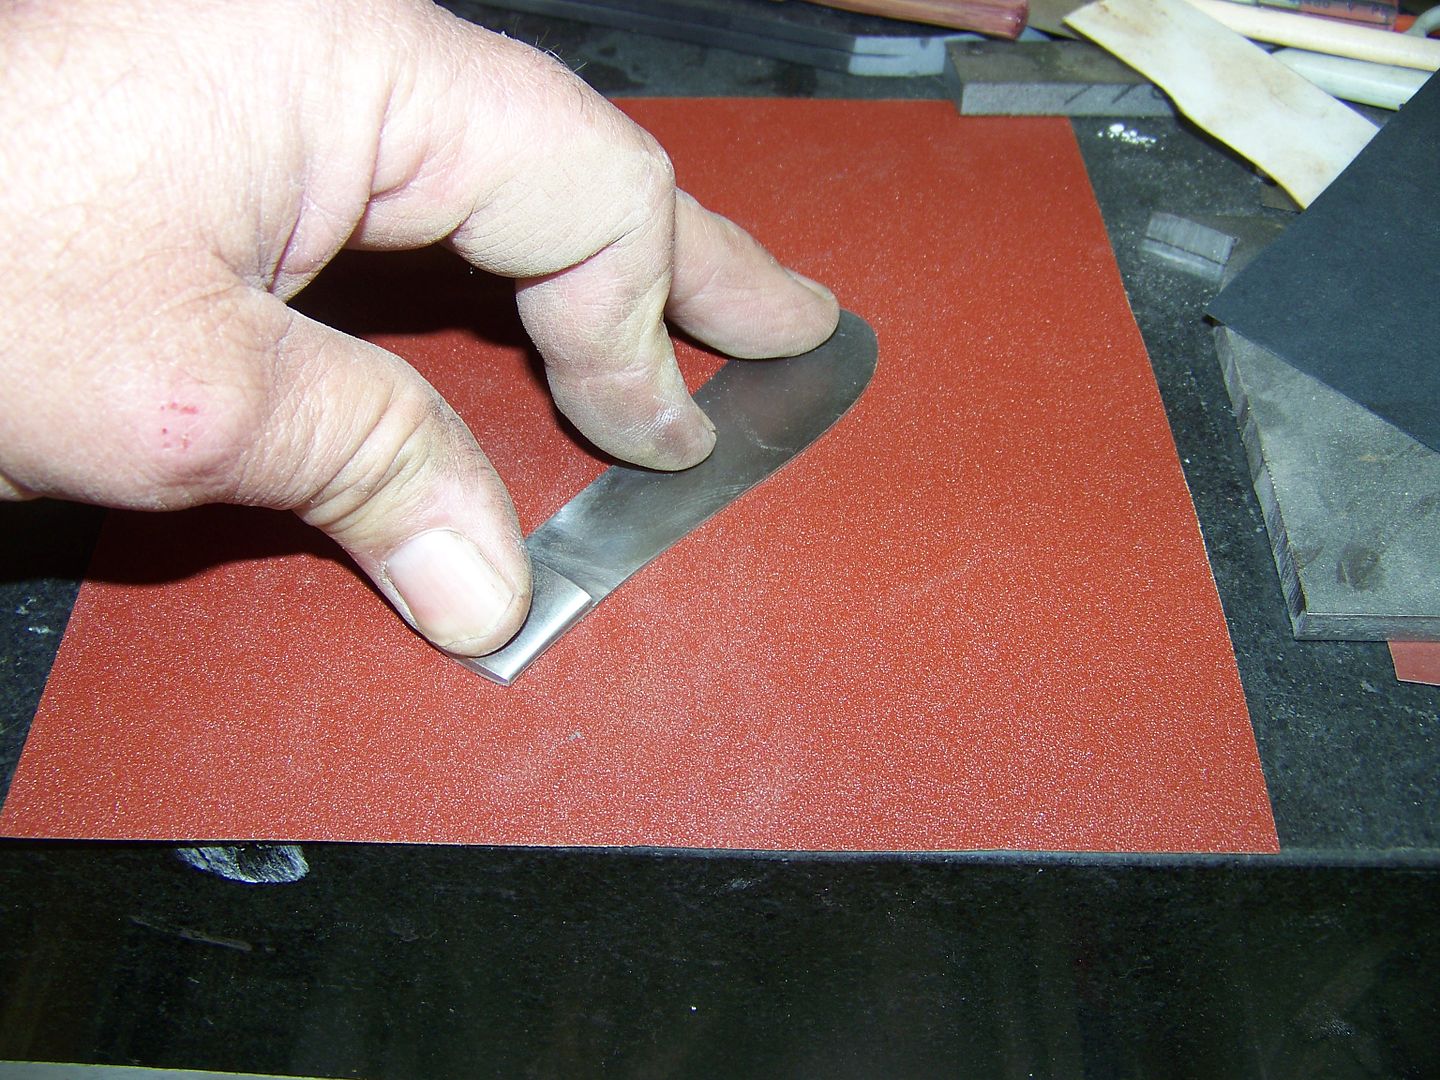
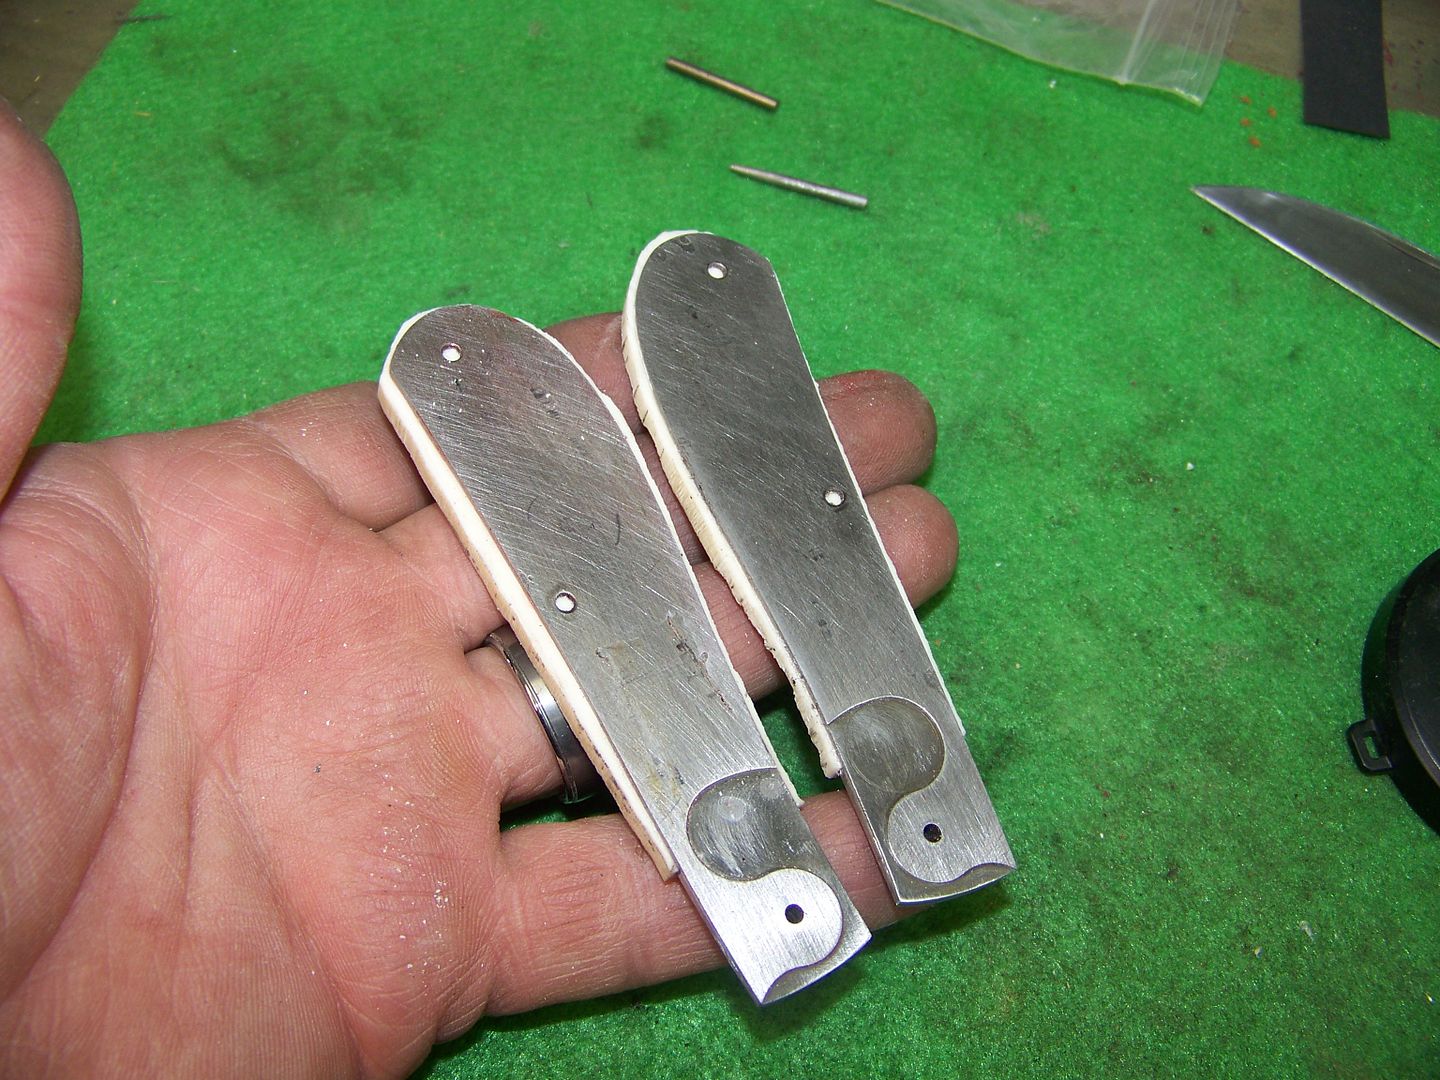
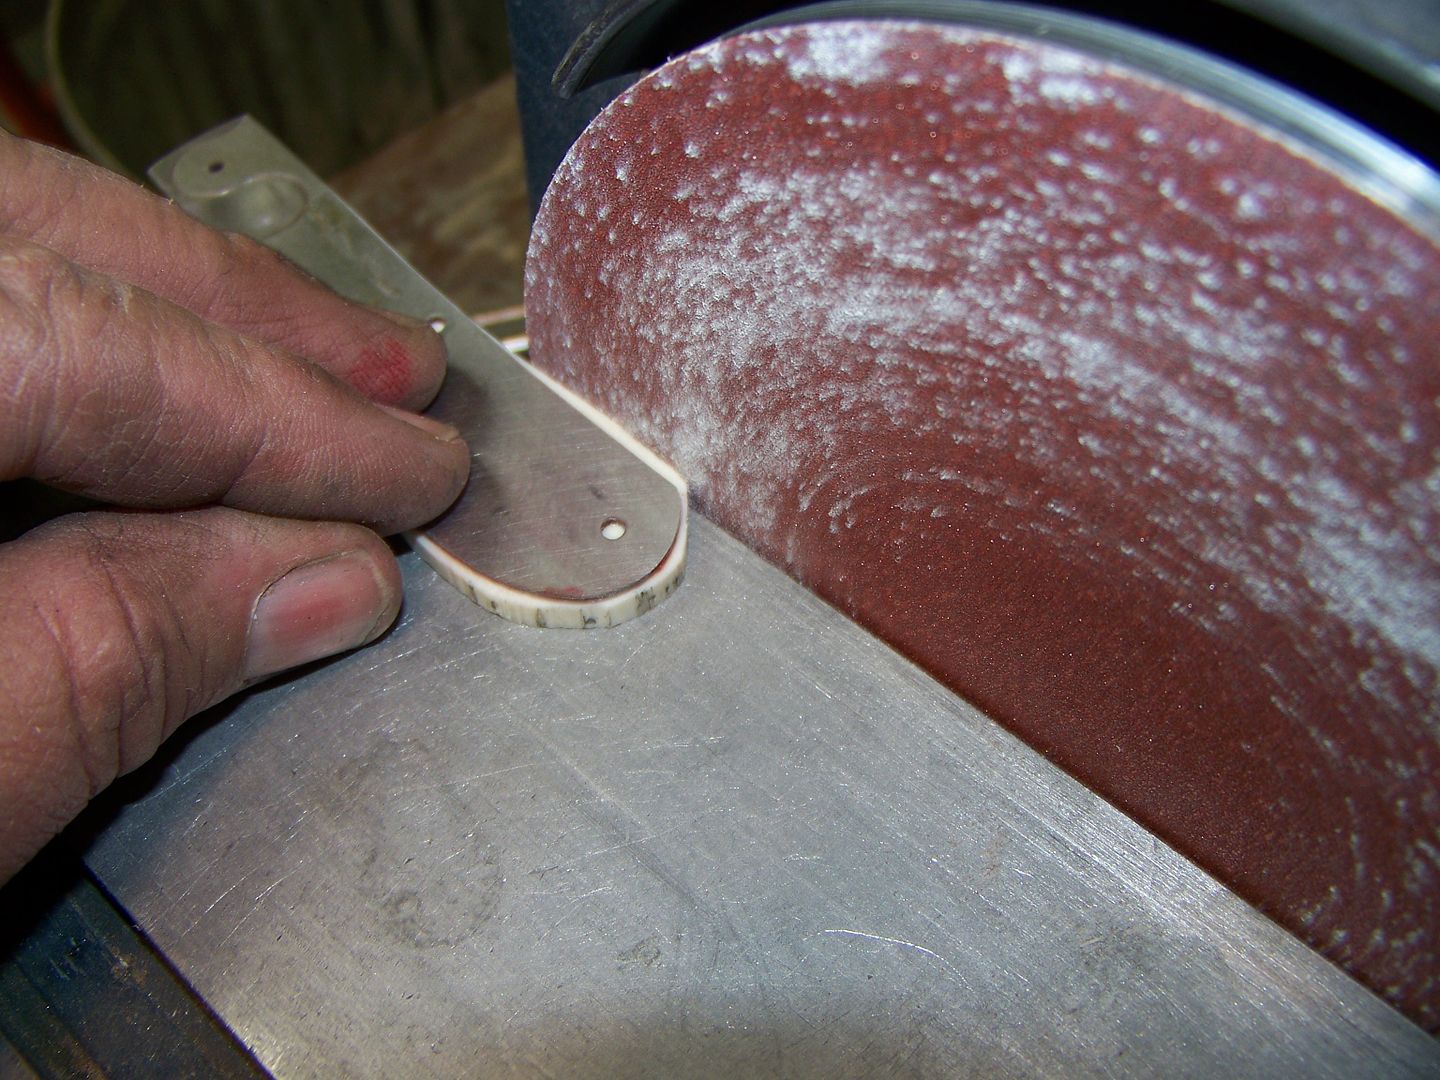
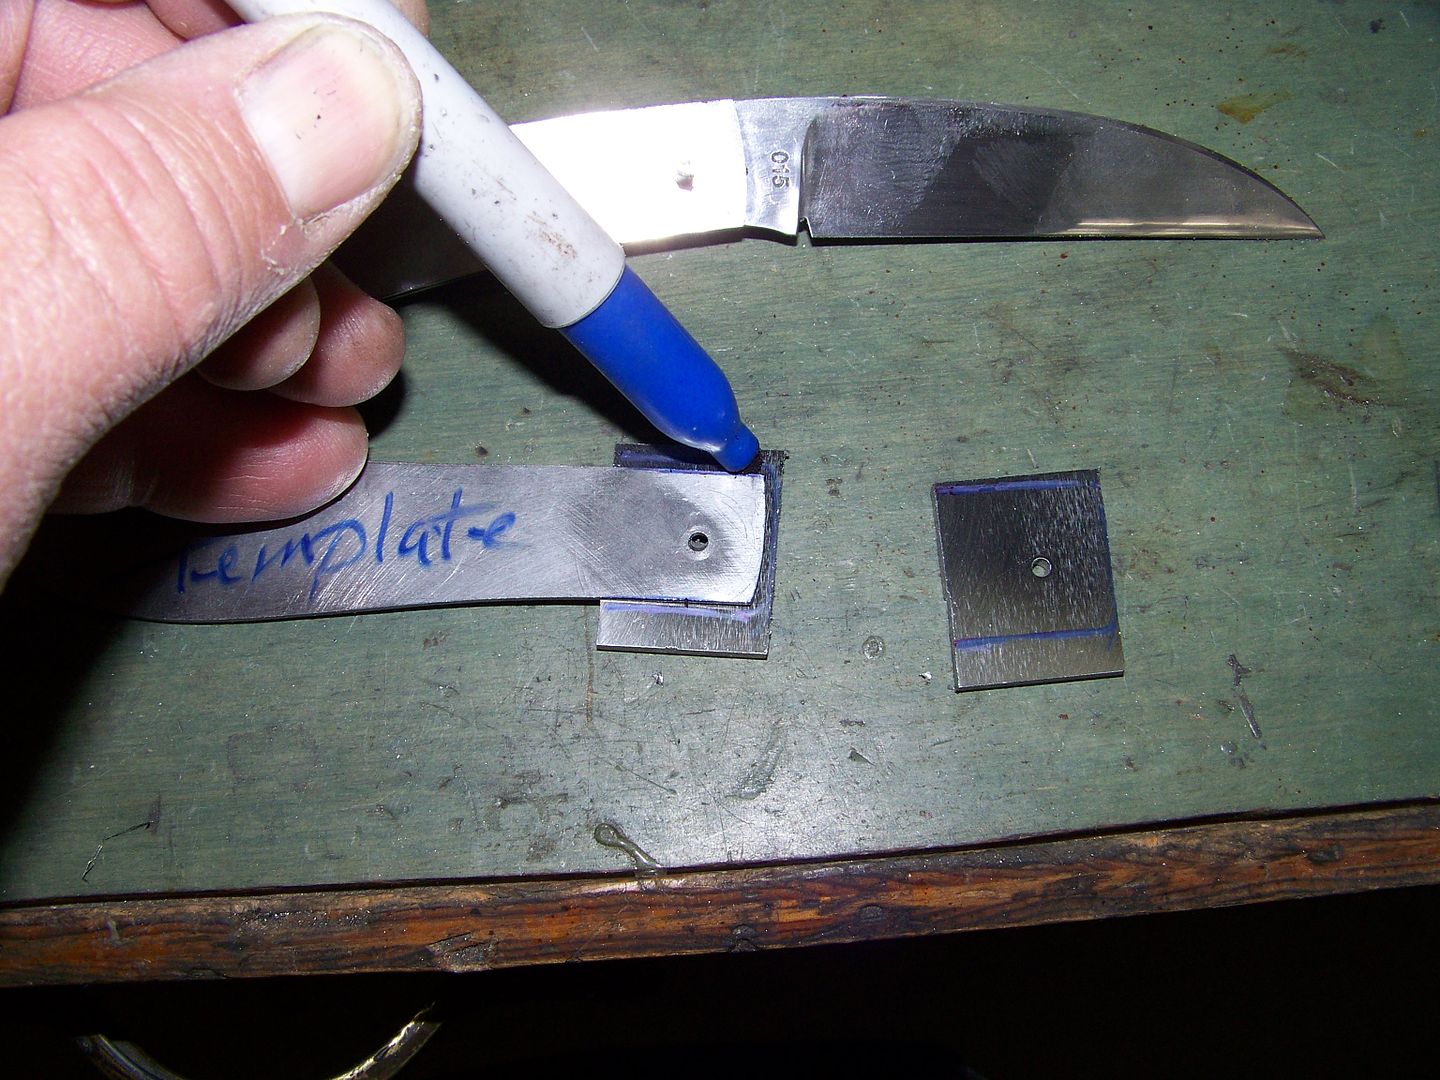
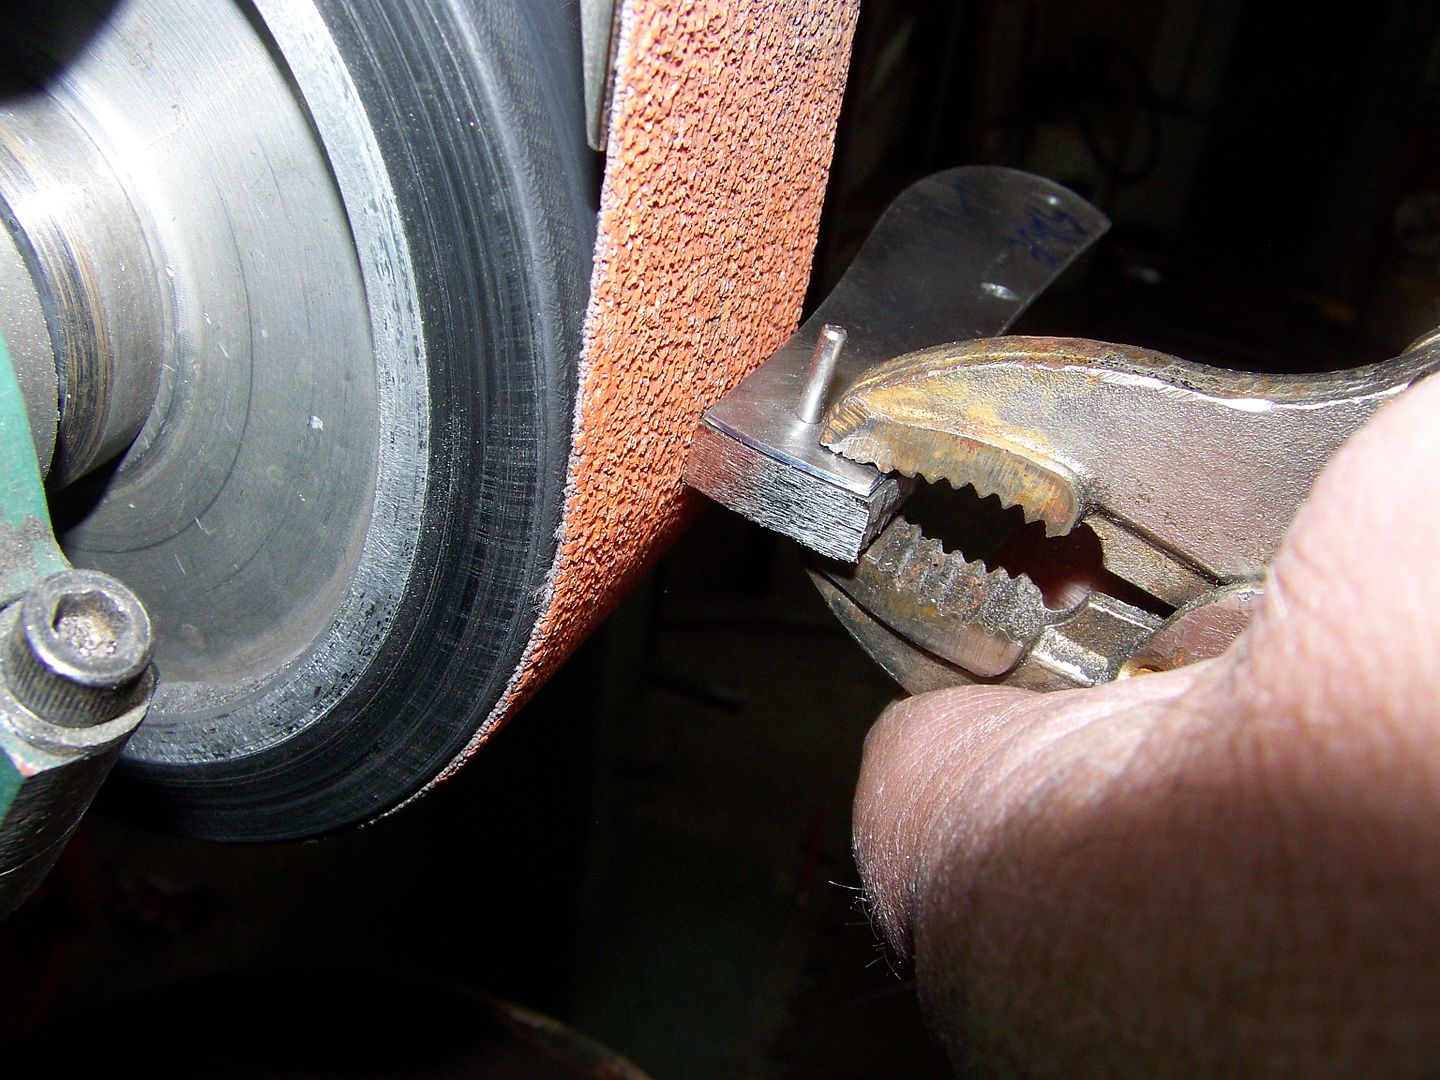
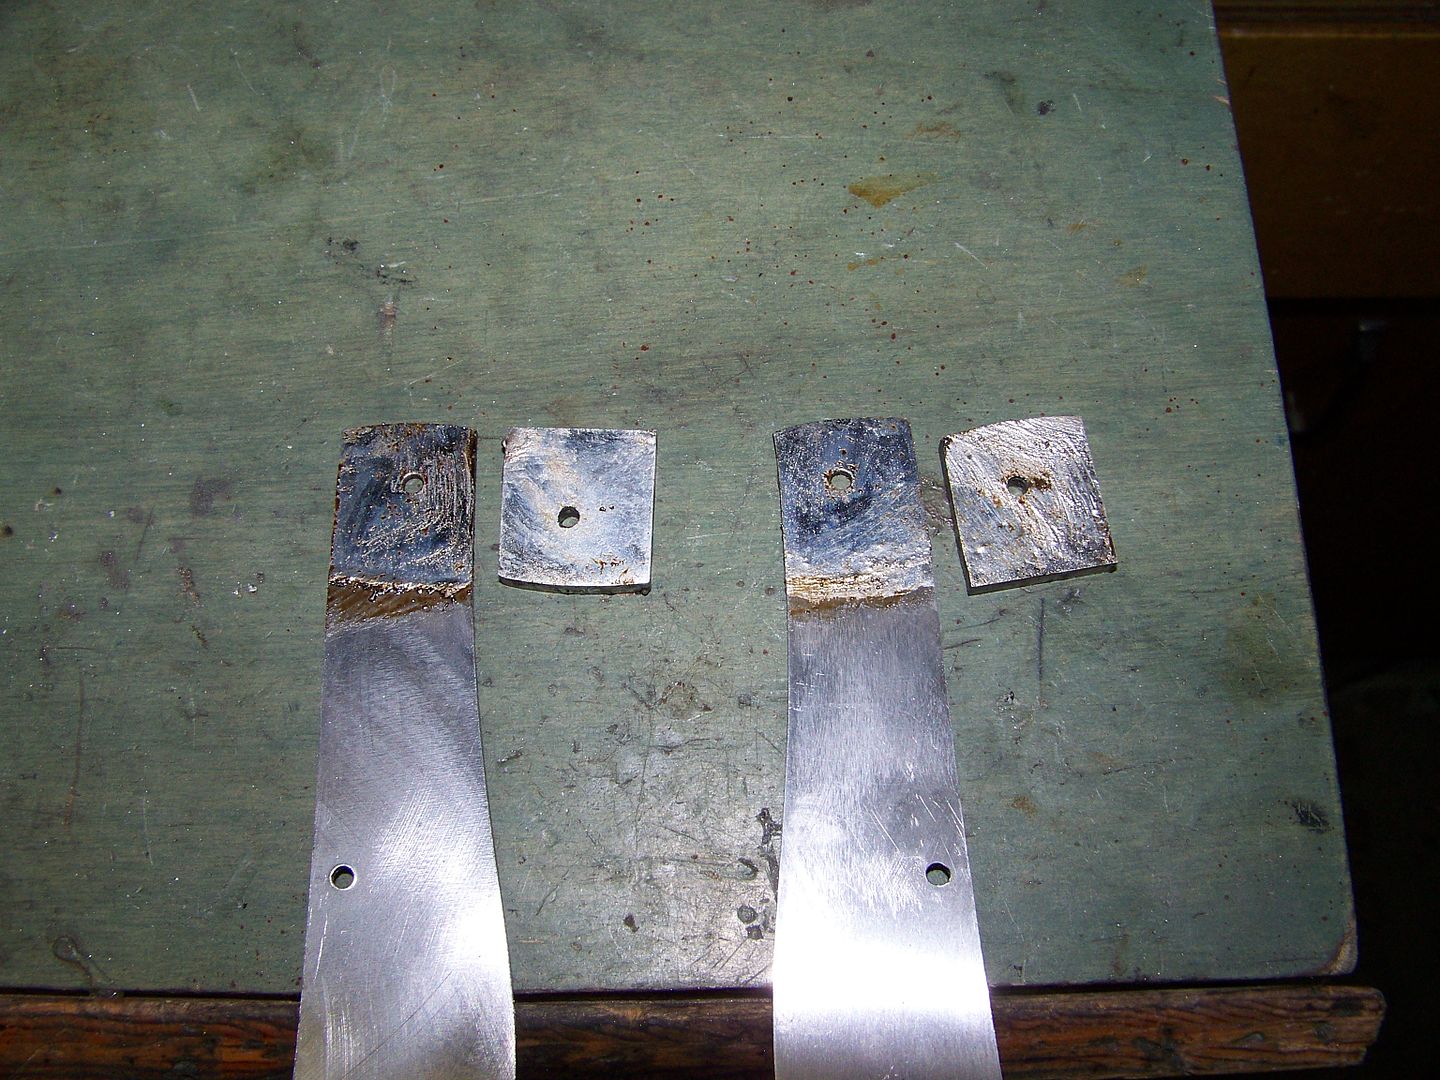
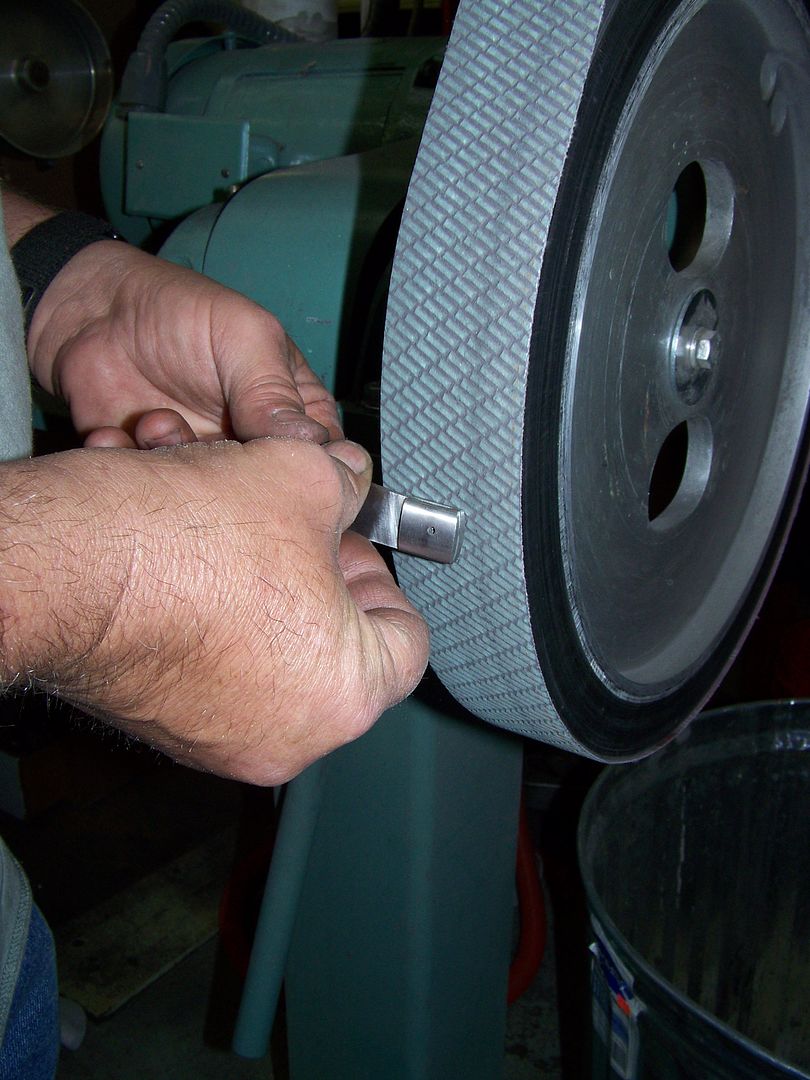
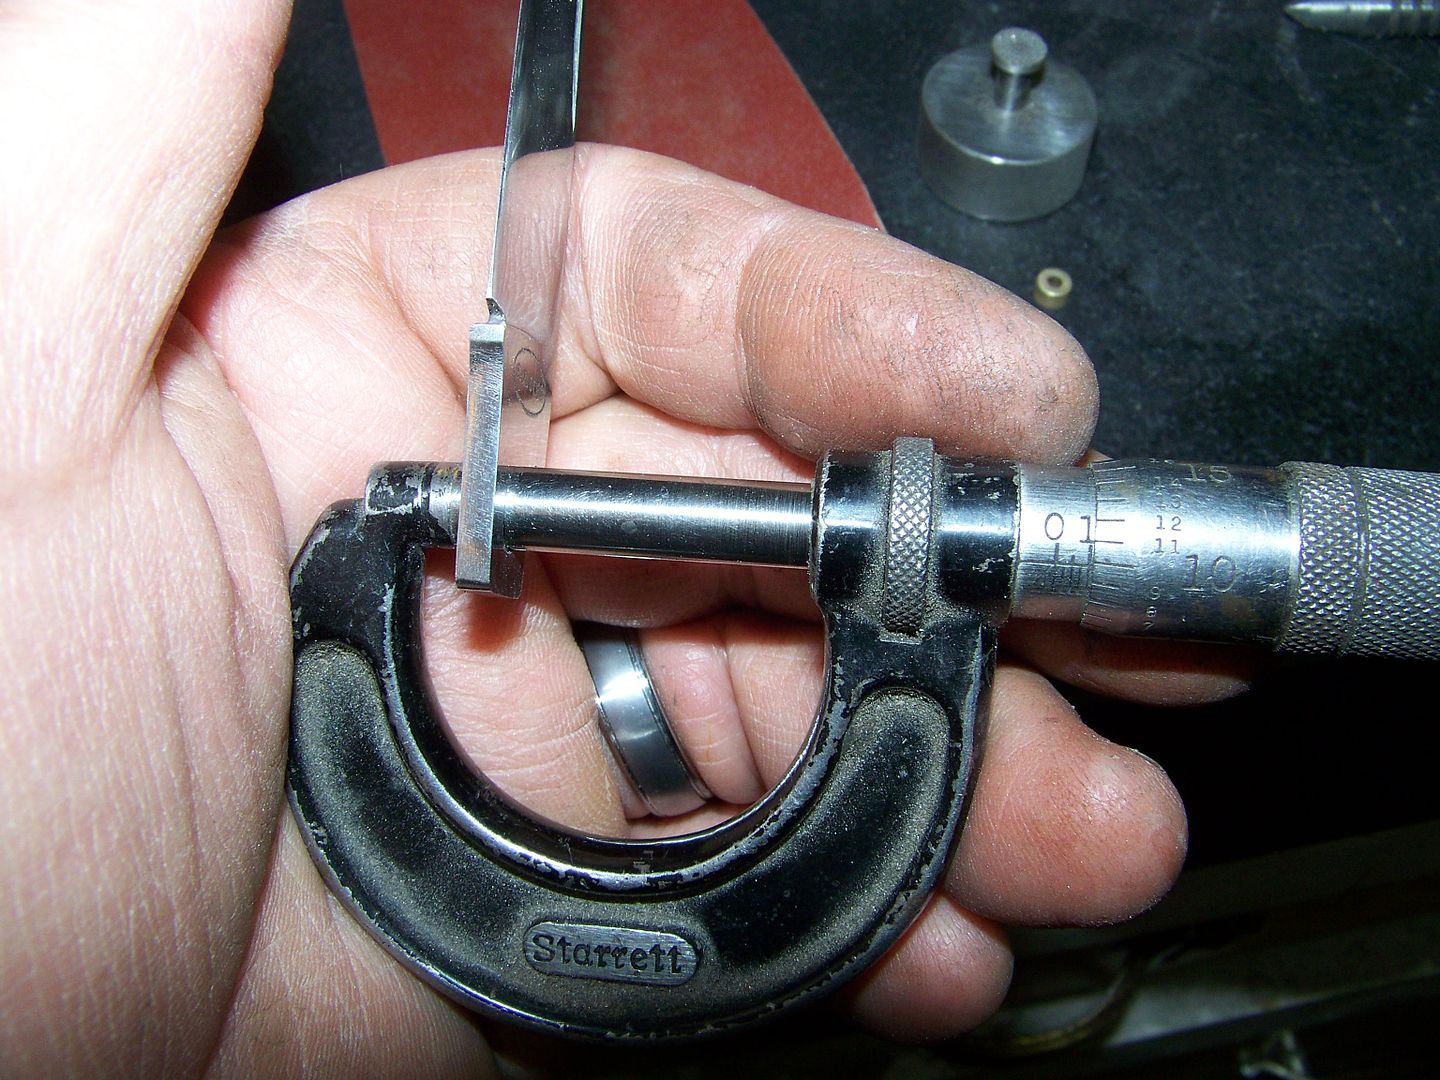
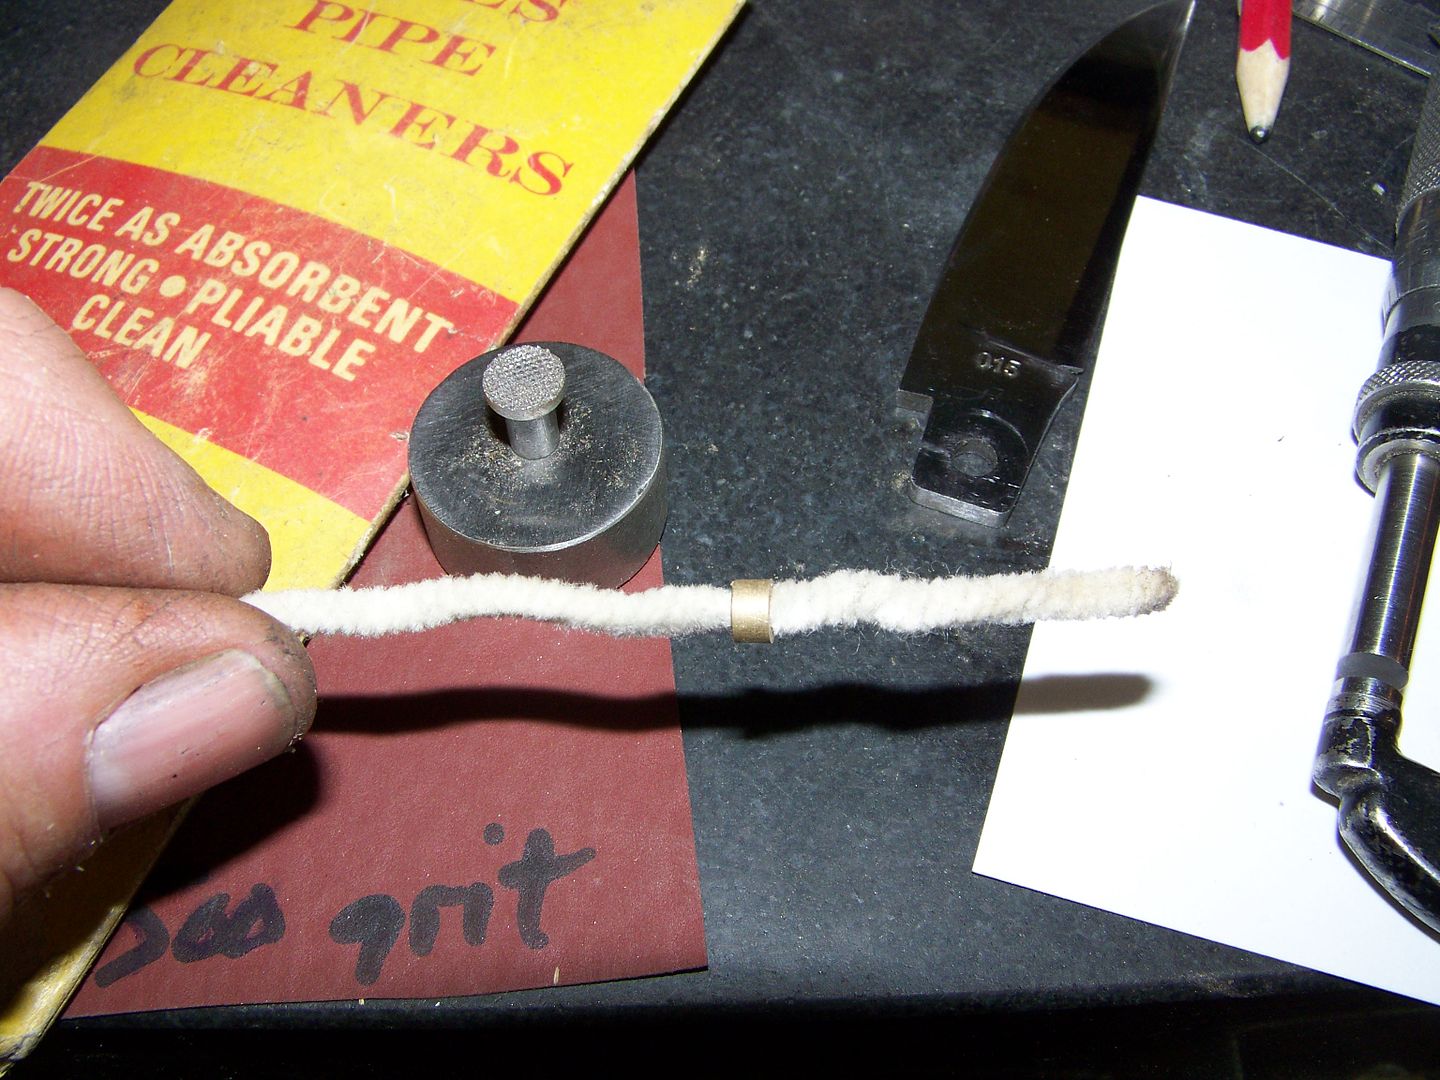
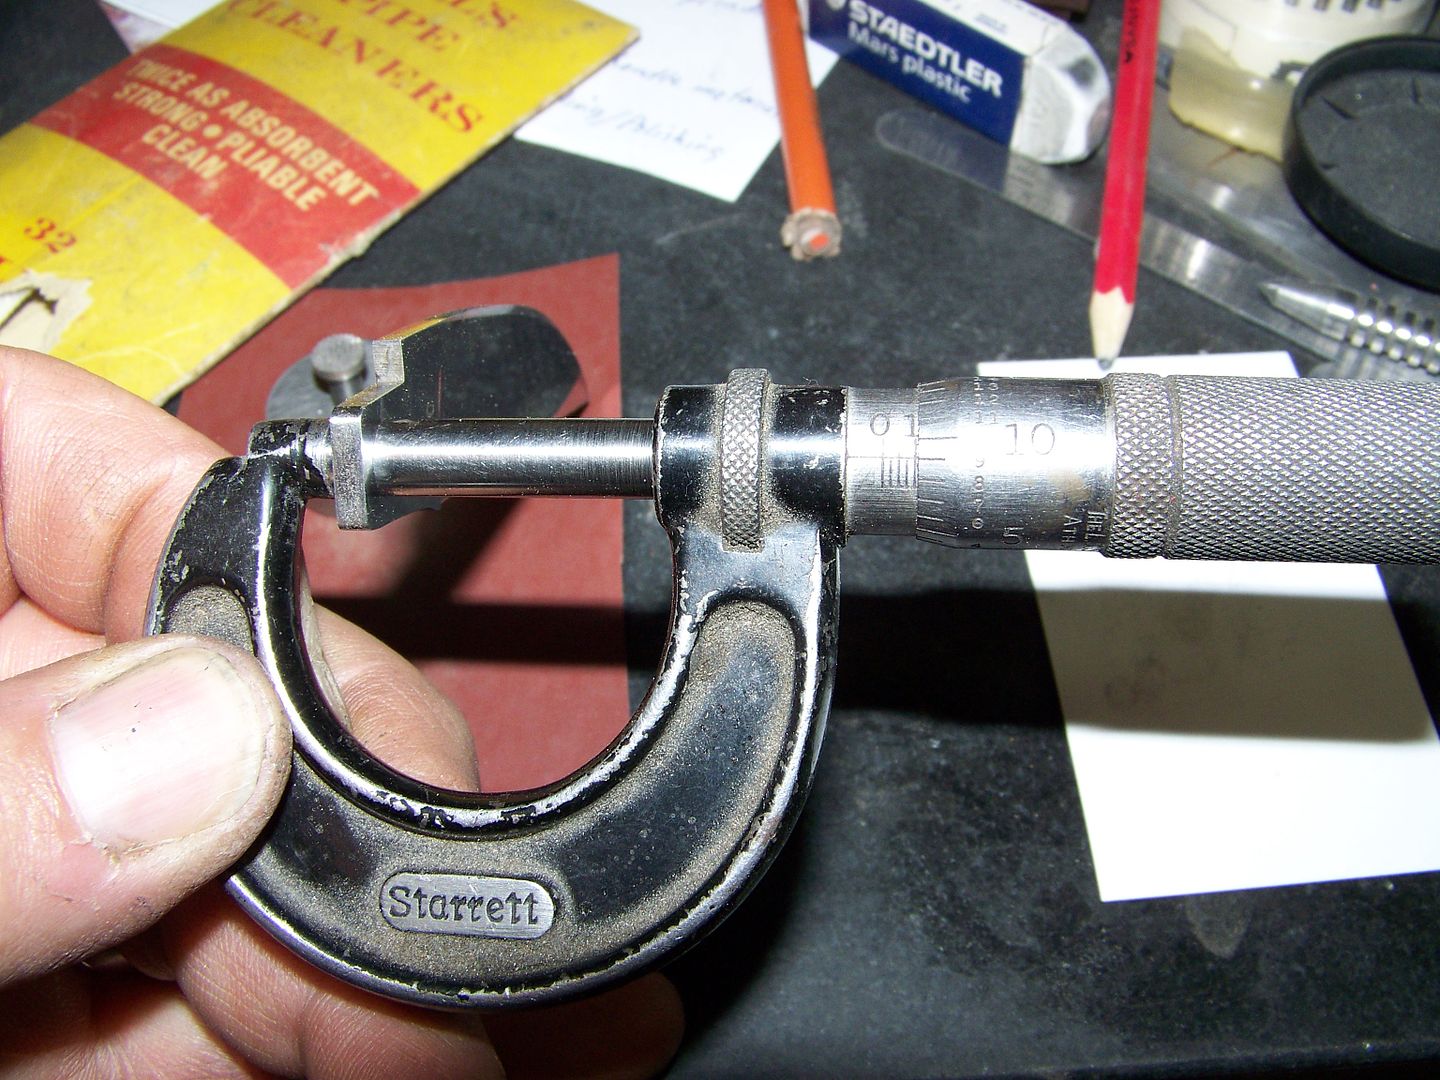
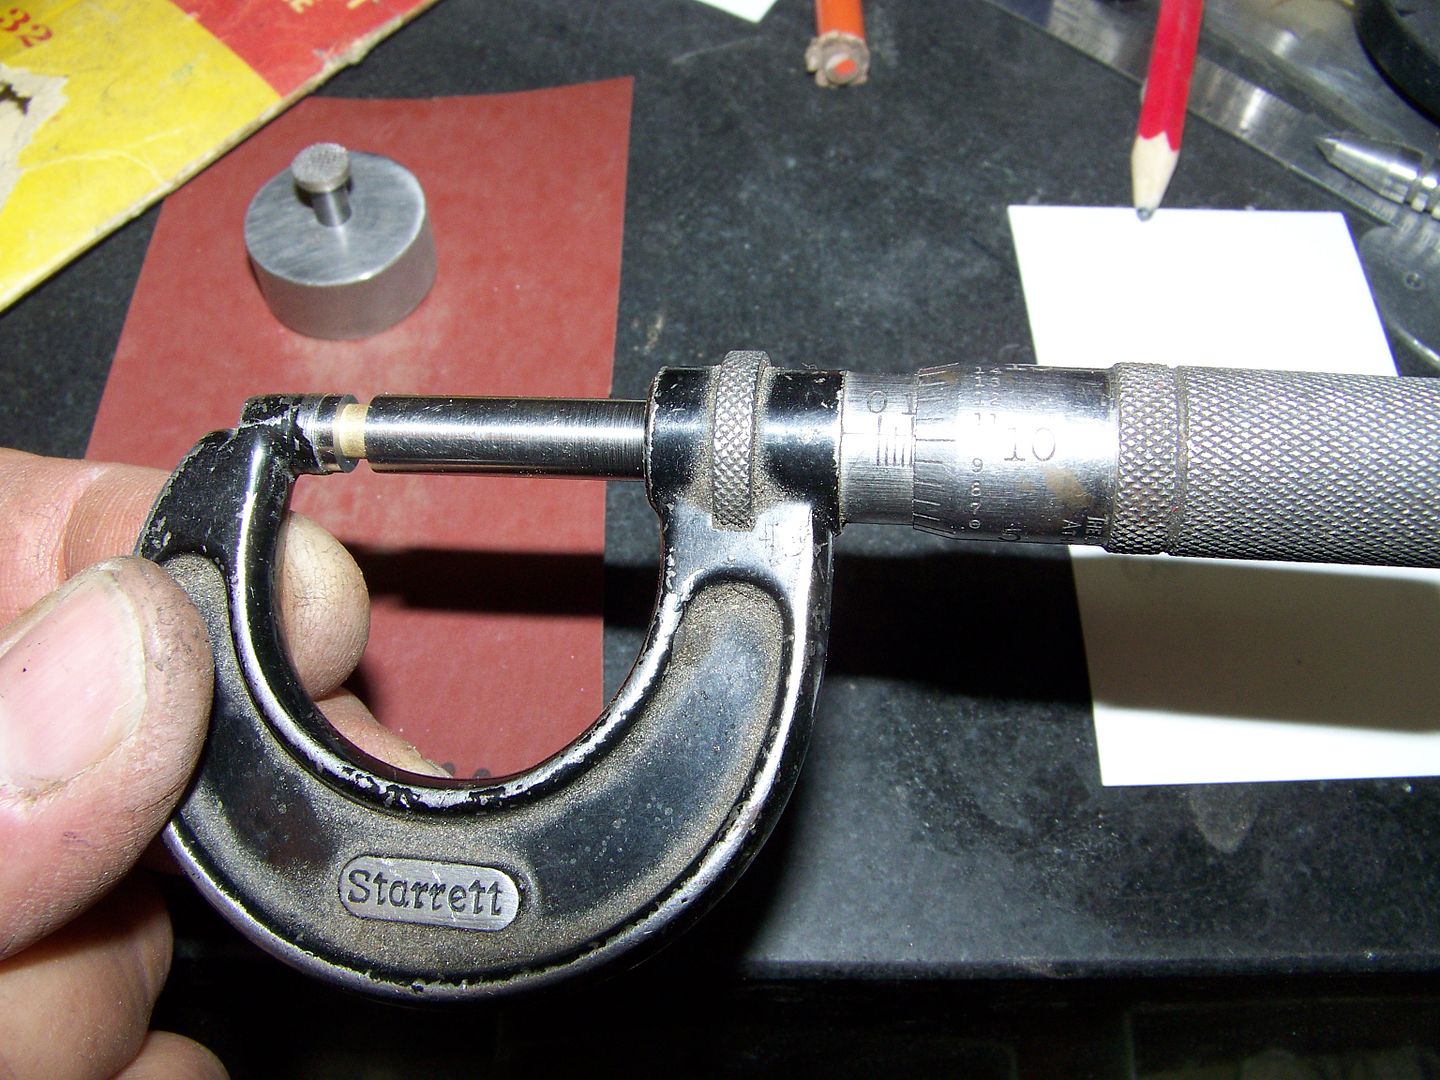
I cut a set of oversized bolsters from 1/8" 410 stainless on the bandsaw, drilled a 3/32" hole through each, pinned them to the liner template and rough ground the profile very close to actual size. I pinned the two together and matched them on the scale side on the disc. They need to be exactly the same. Be sure to clean up the back side for a clean solder joint.

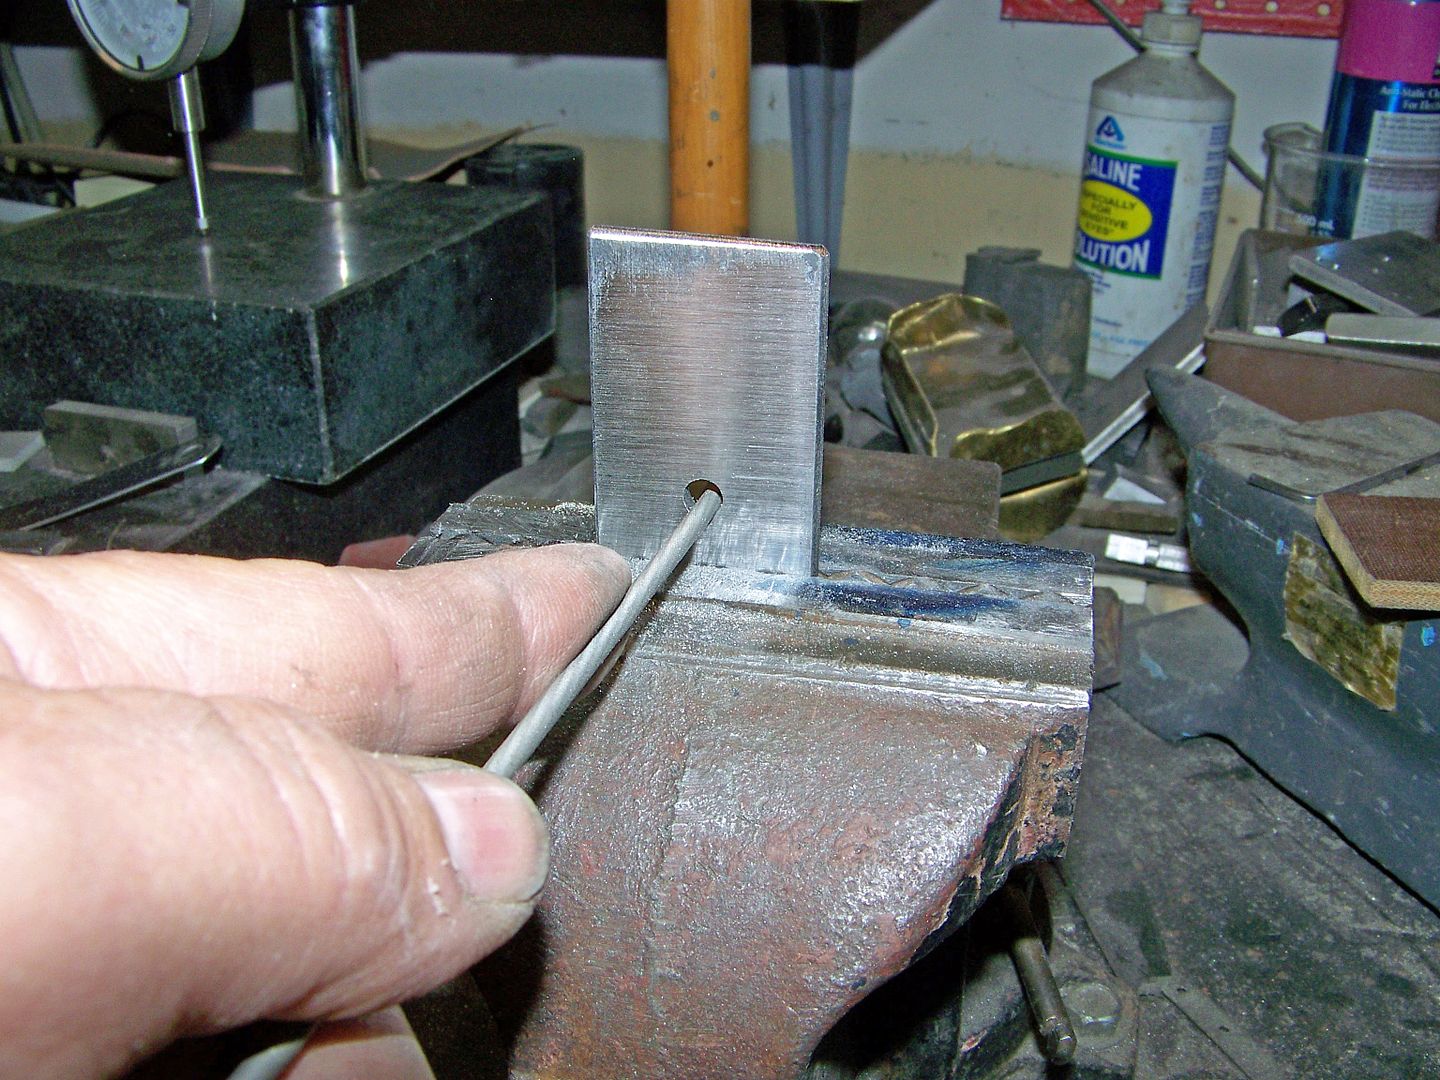
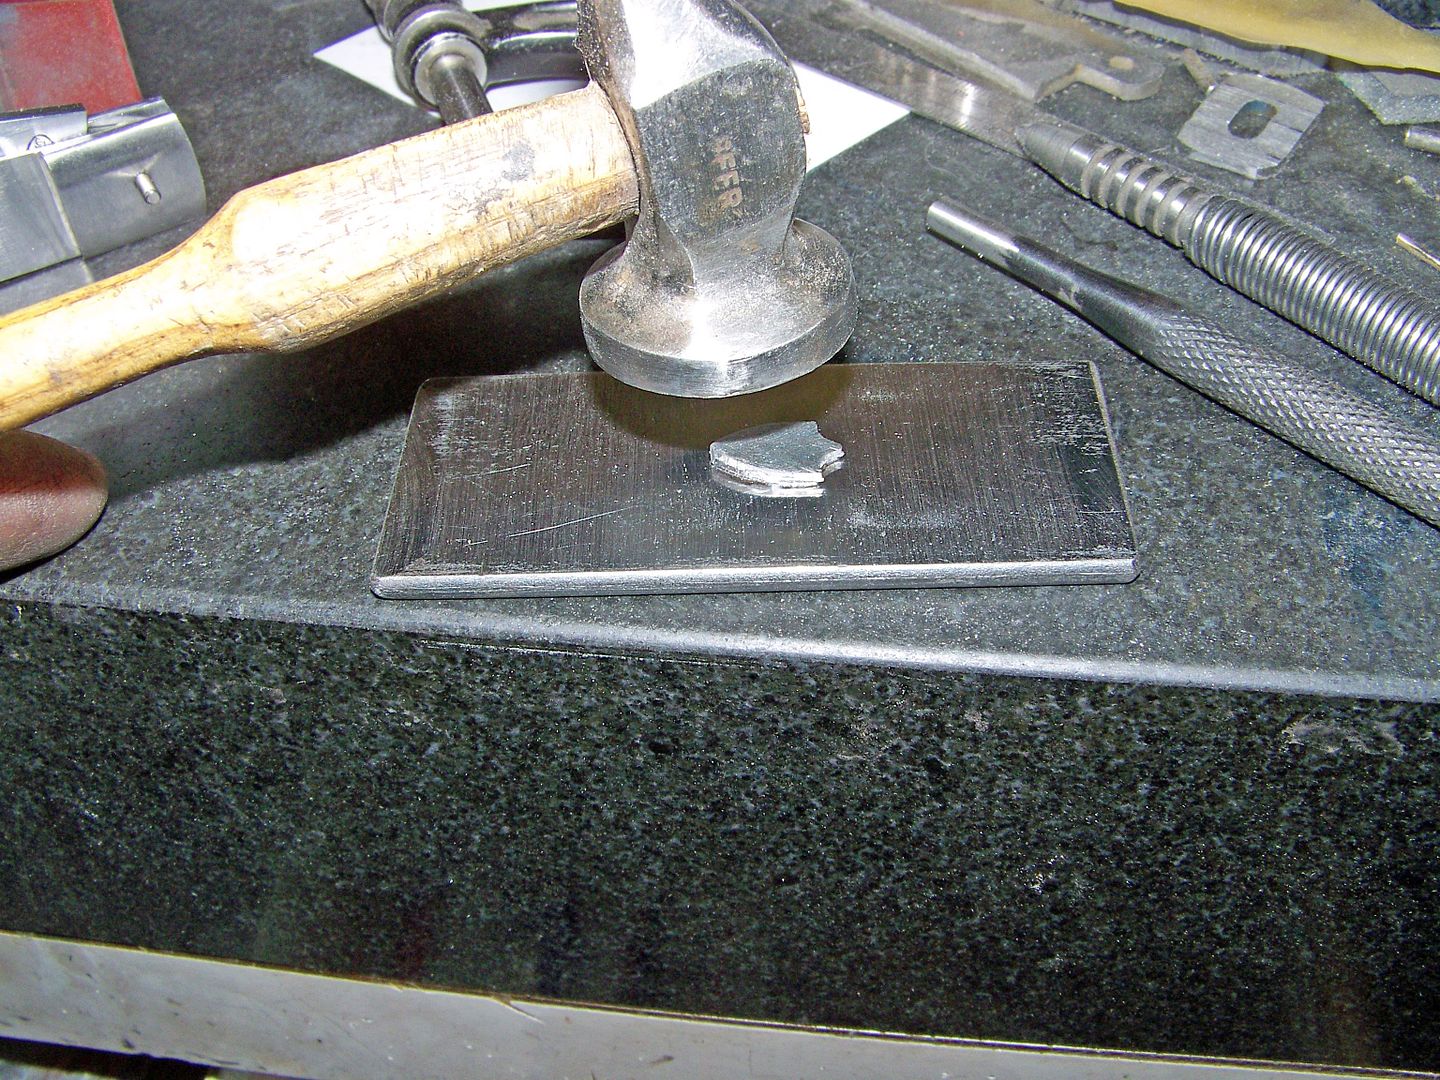
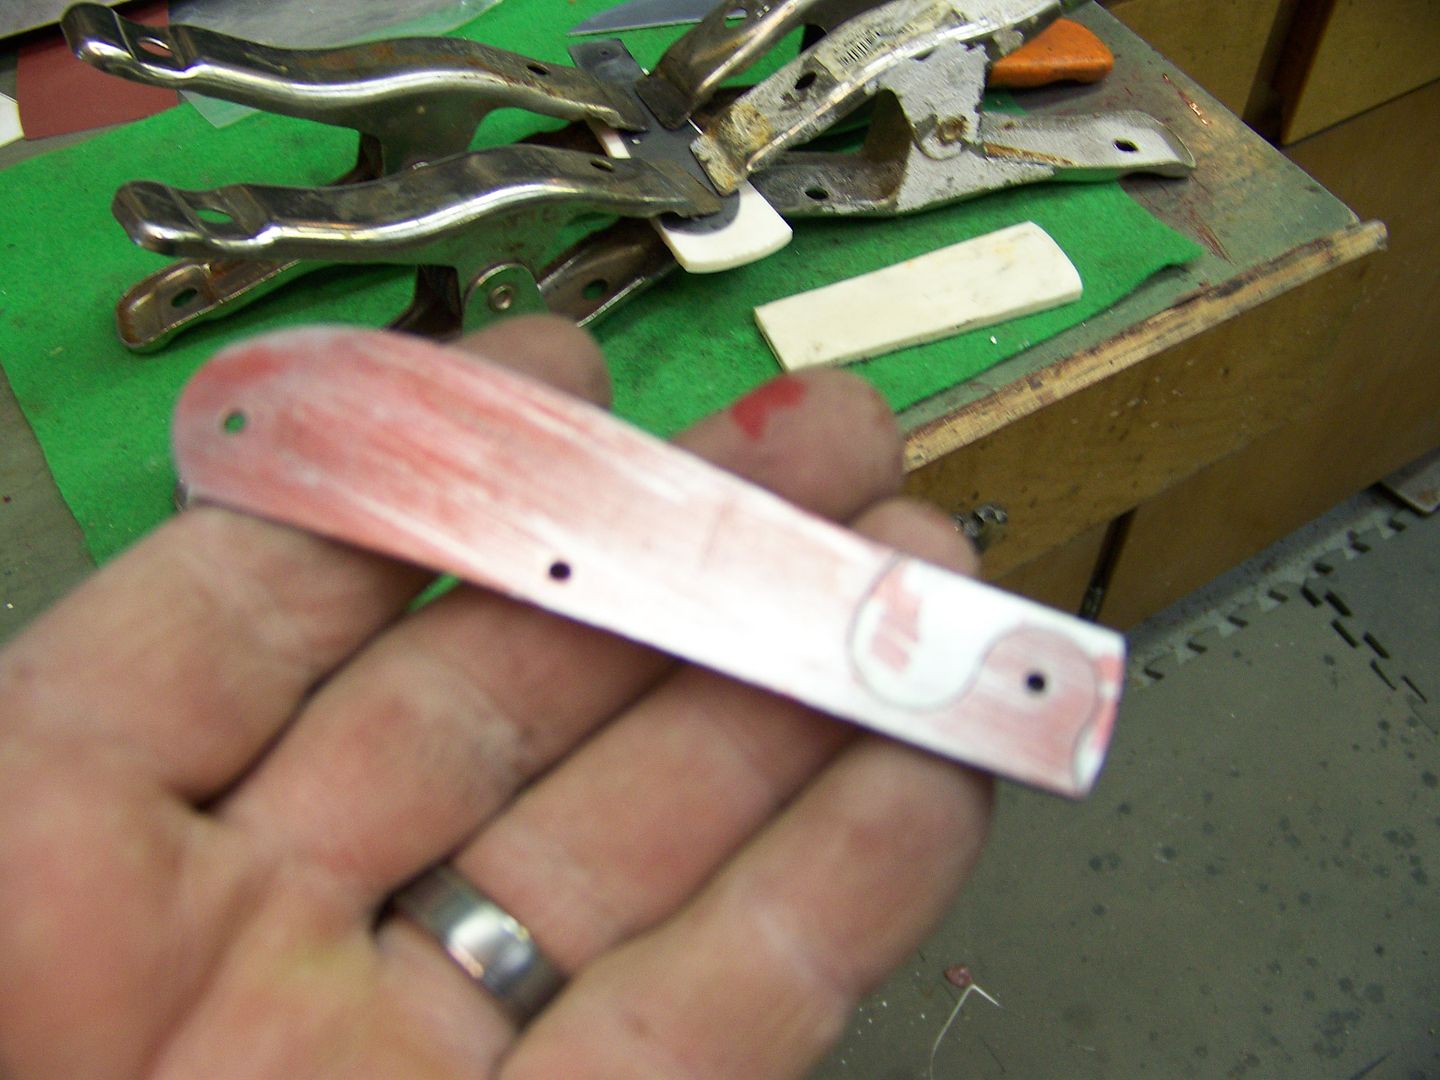
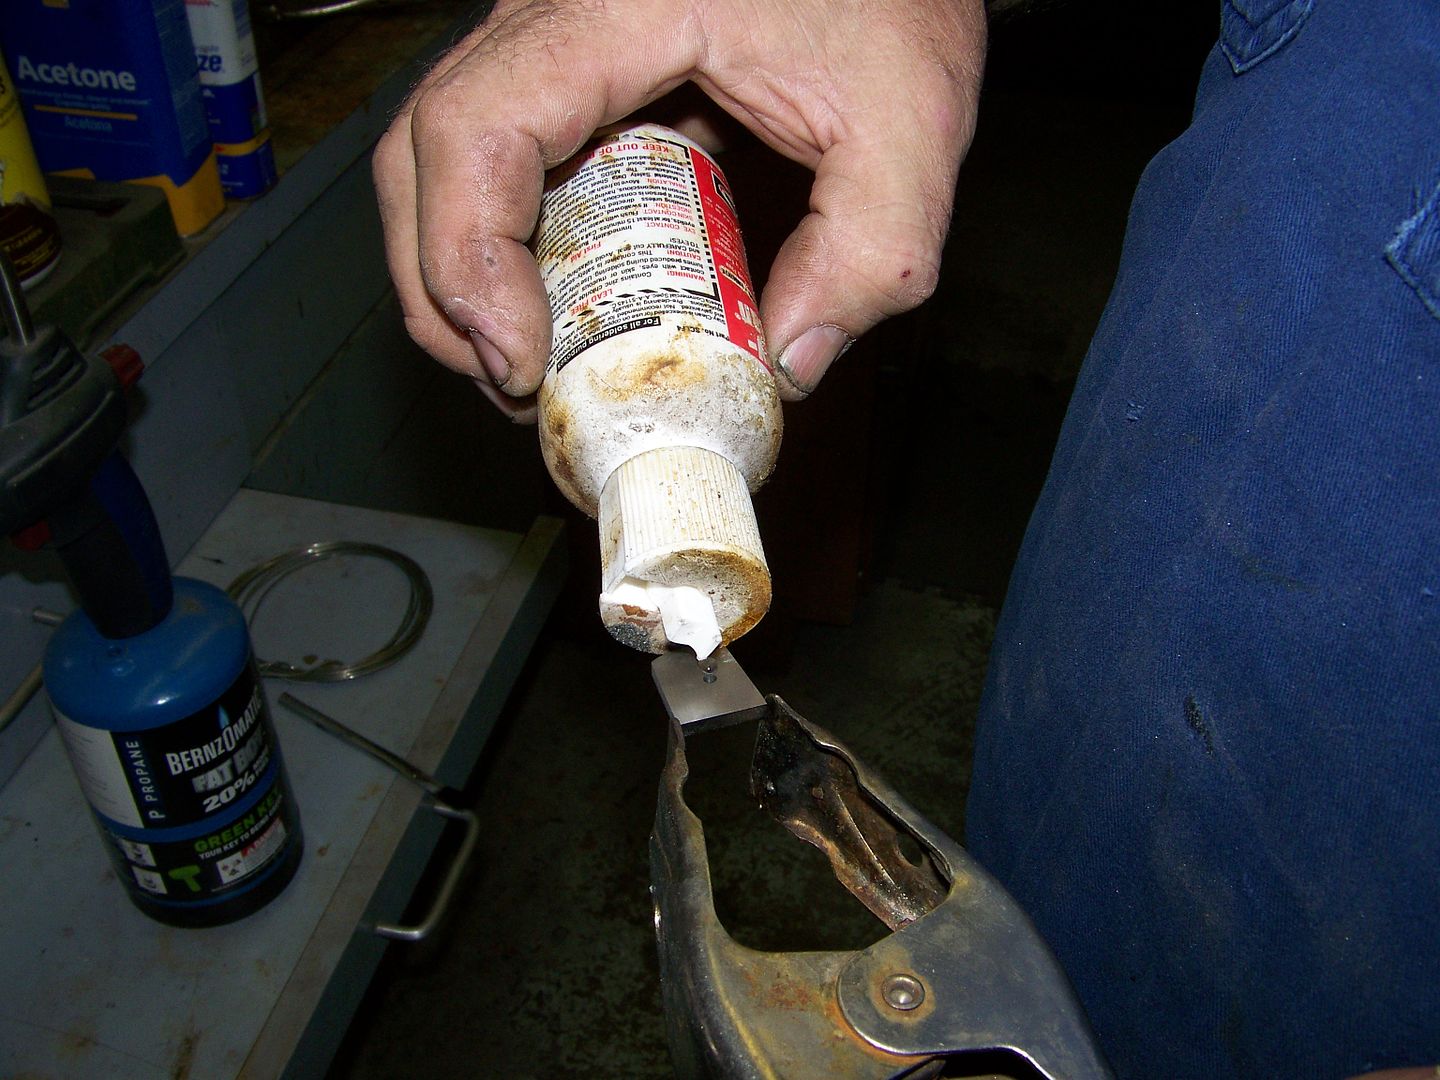
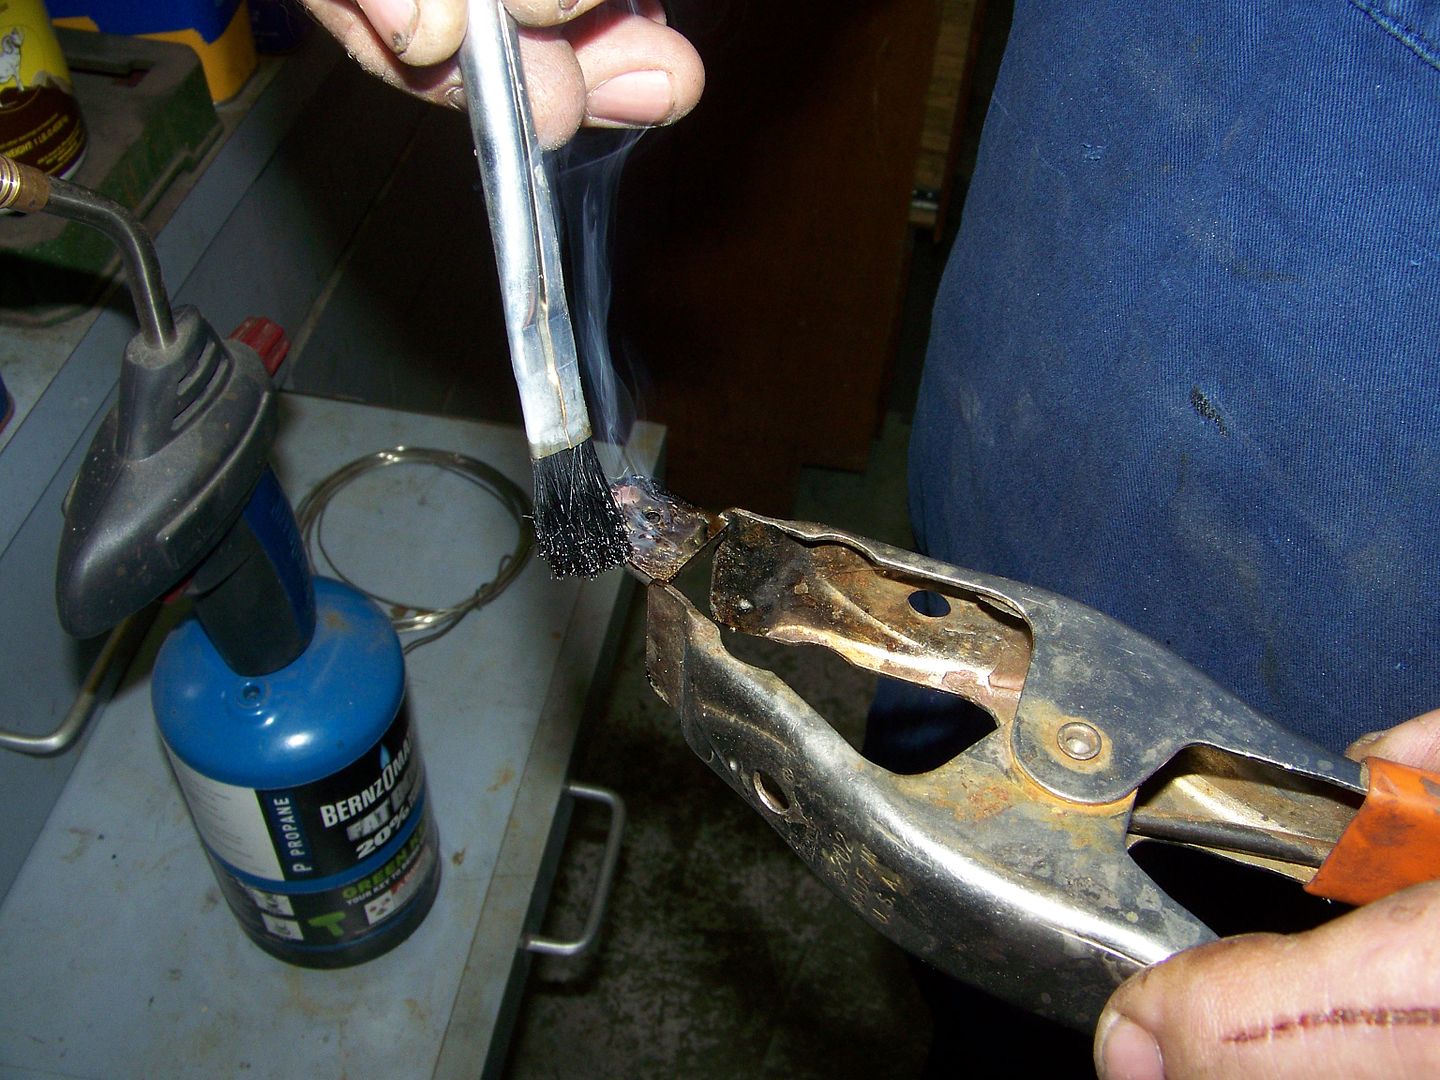
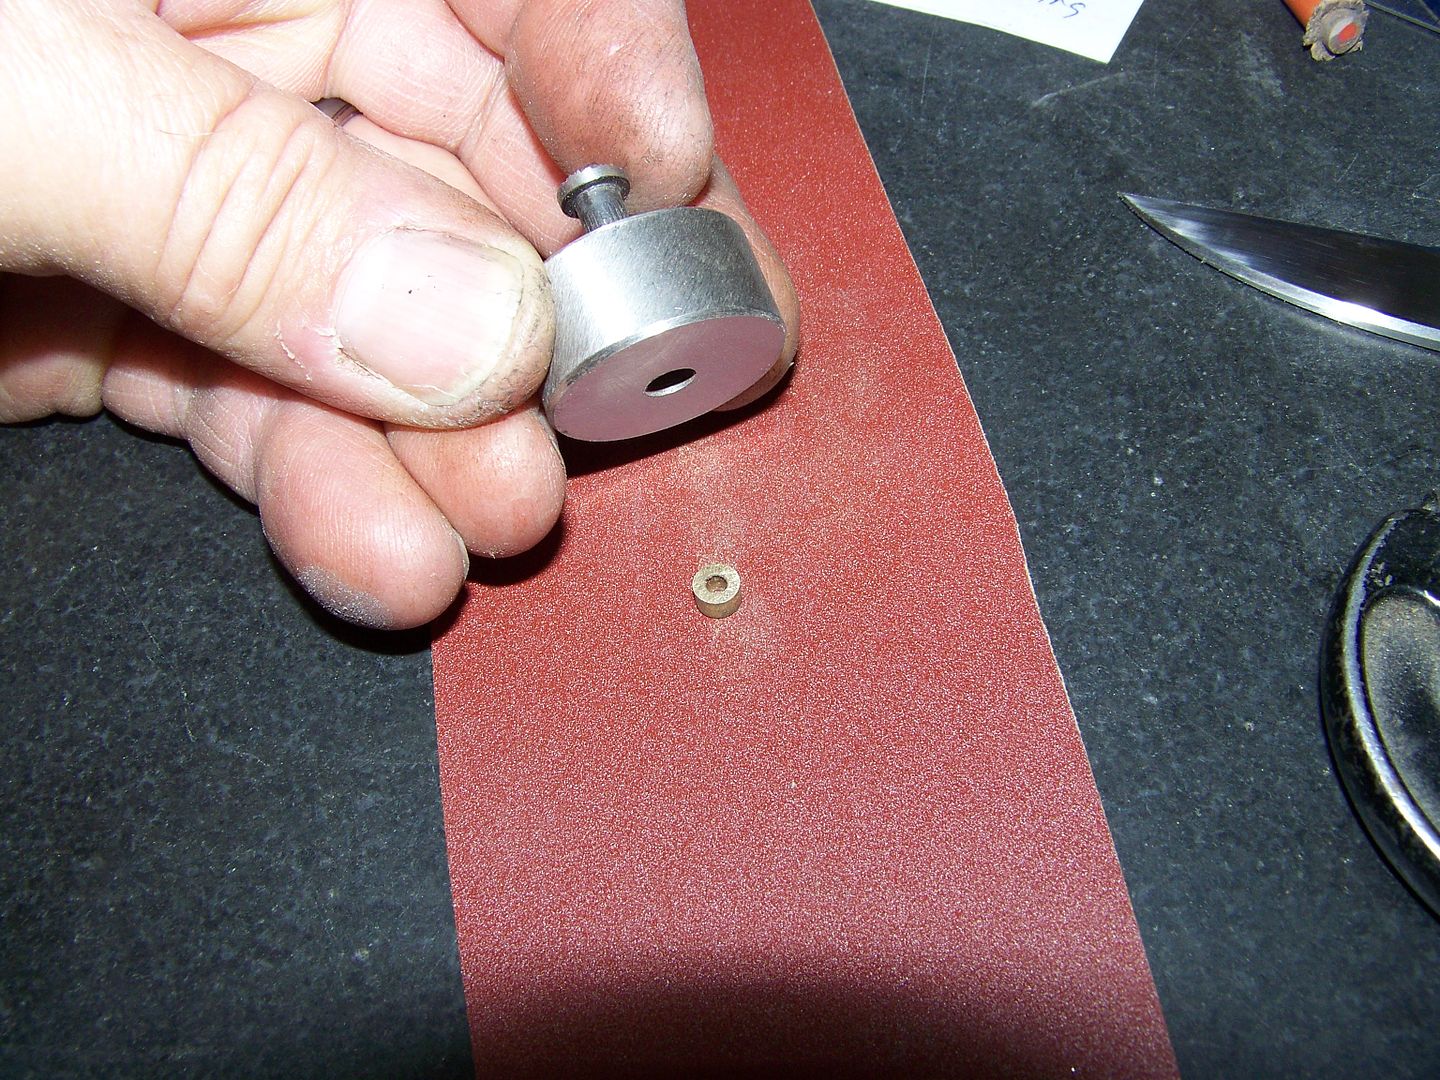
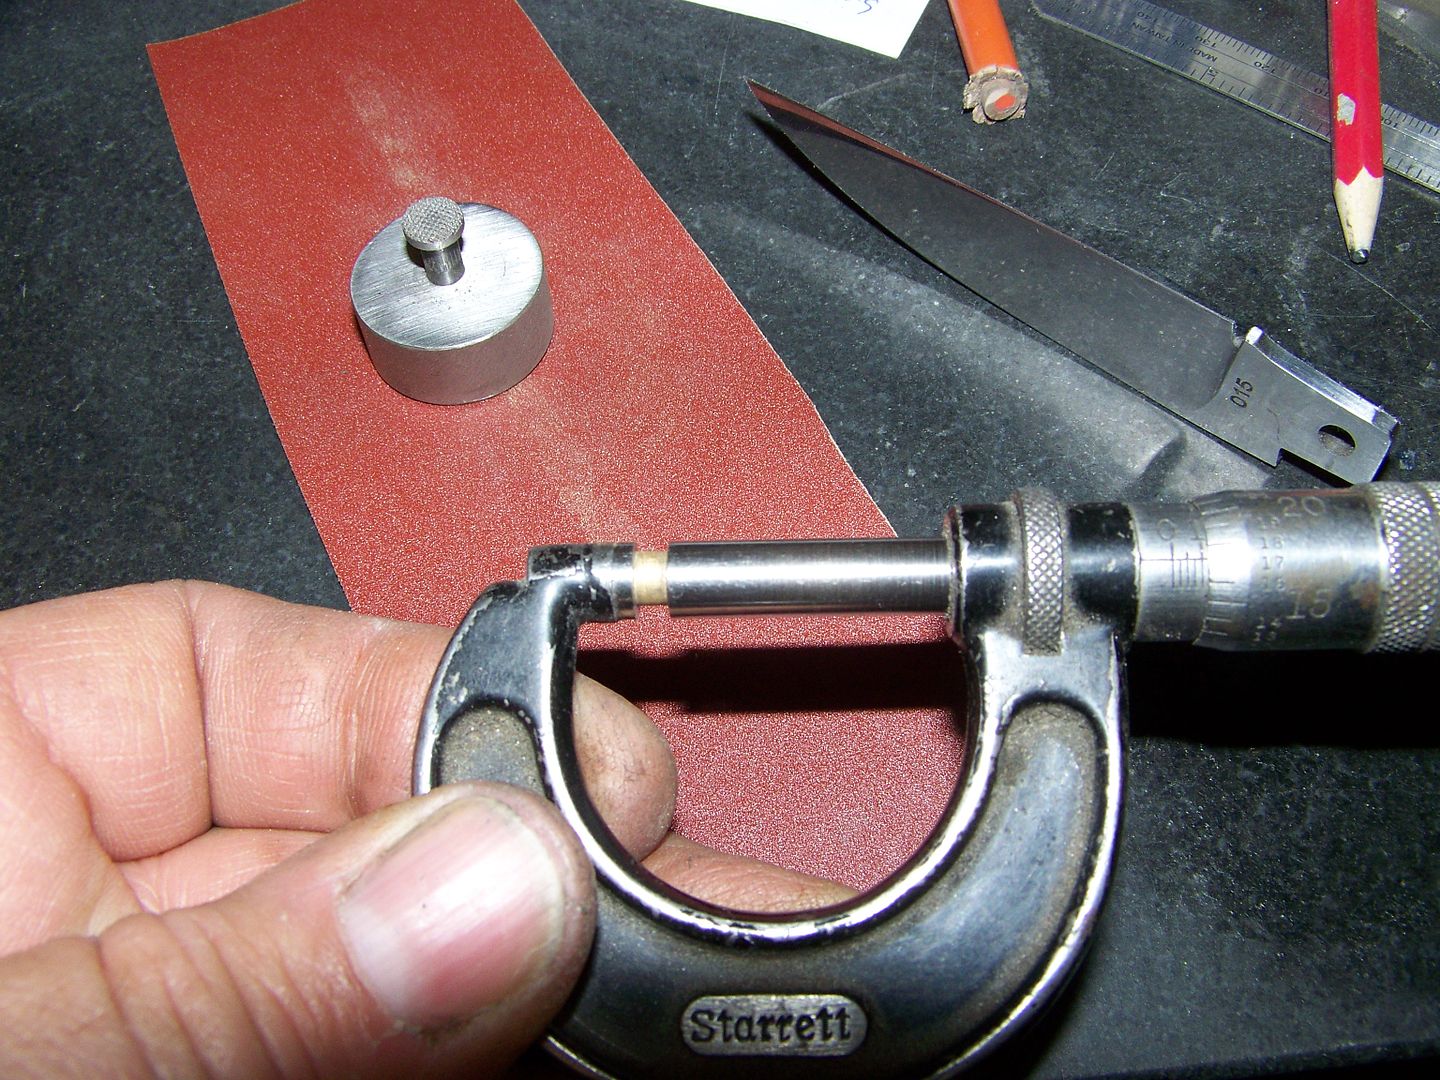
Next I "tinned" the back side of each bolster and the ends of each liner. "Tinning" simply means to flux and put a drop of solder with heat to be sure there is no contamination or voids in the joint. Simply flux and heat, use a solder brush to spread the flux and add some solder, spread the solder around and work it back and forth until the entire surface is tinned.

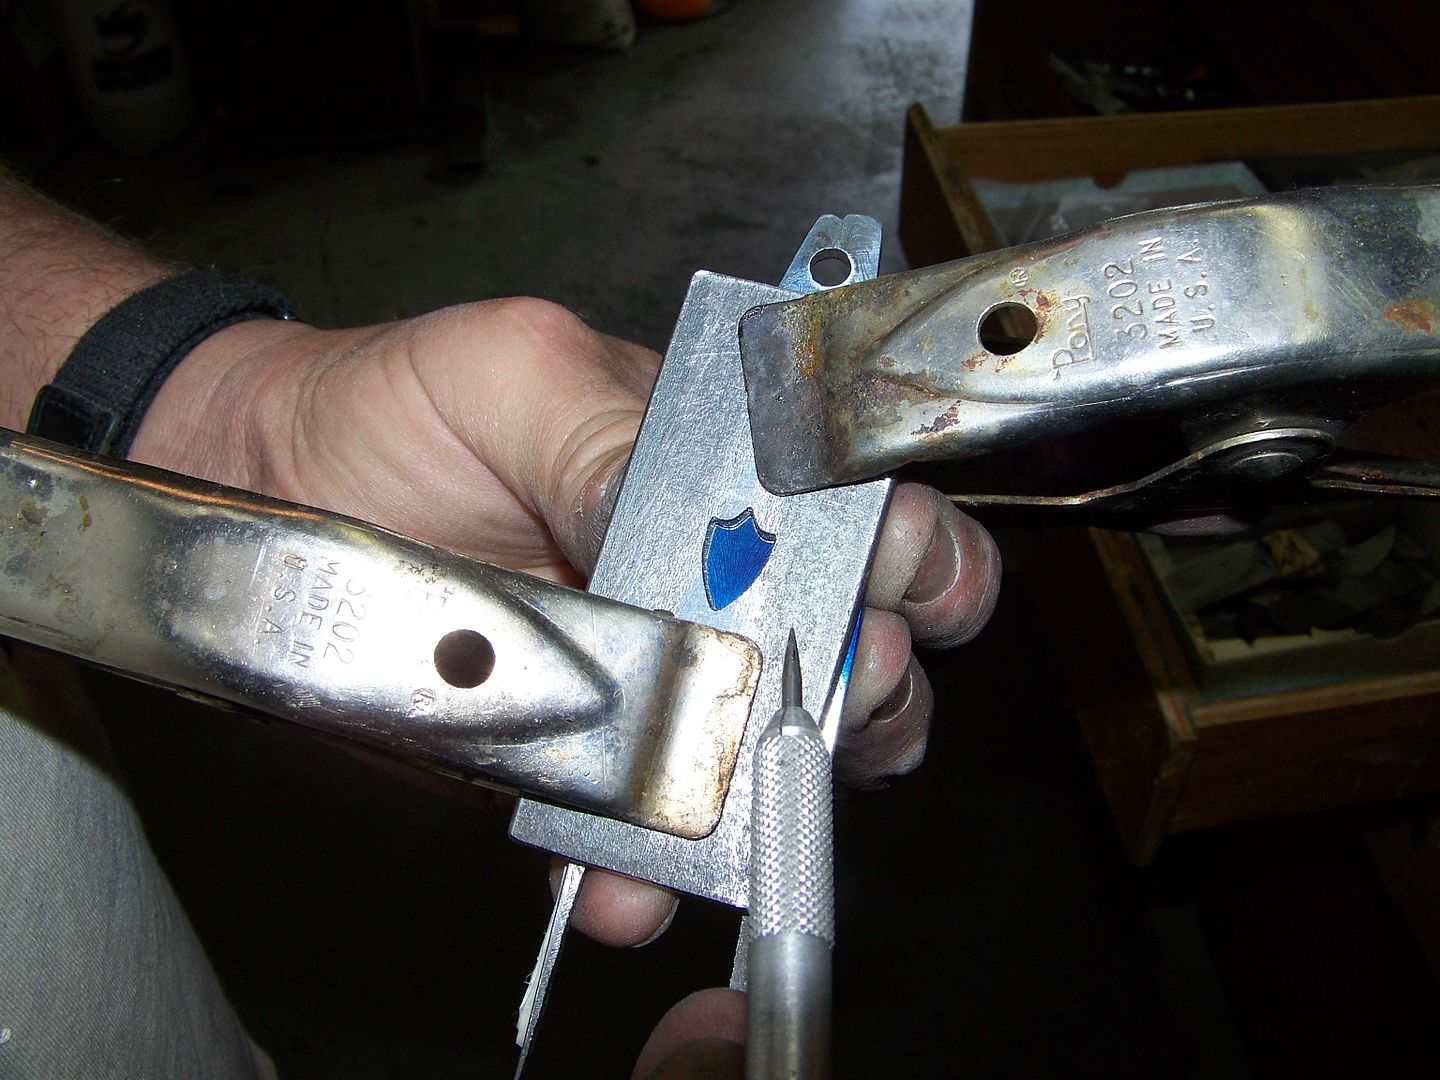
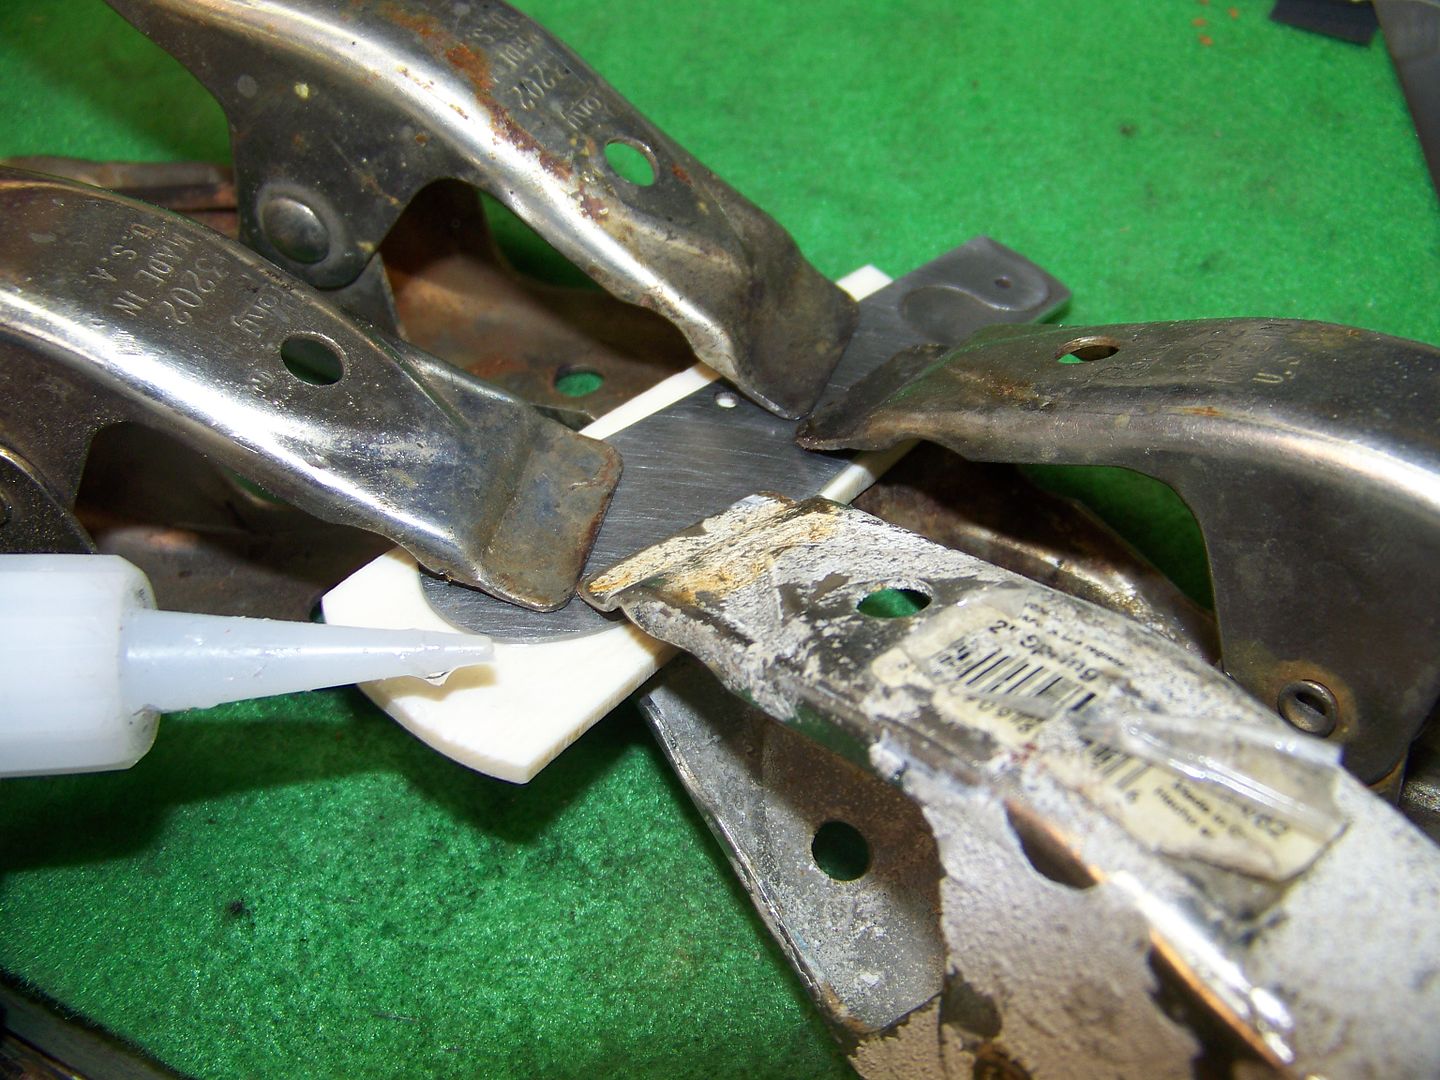
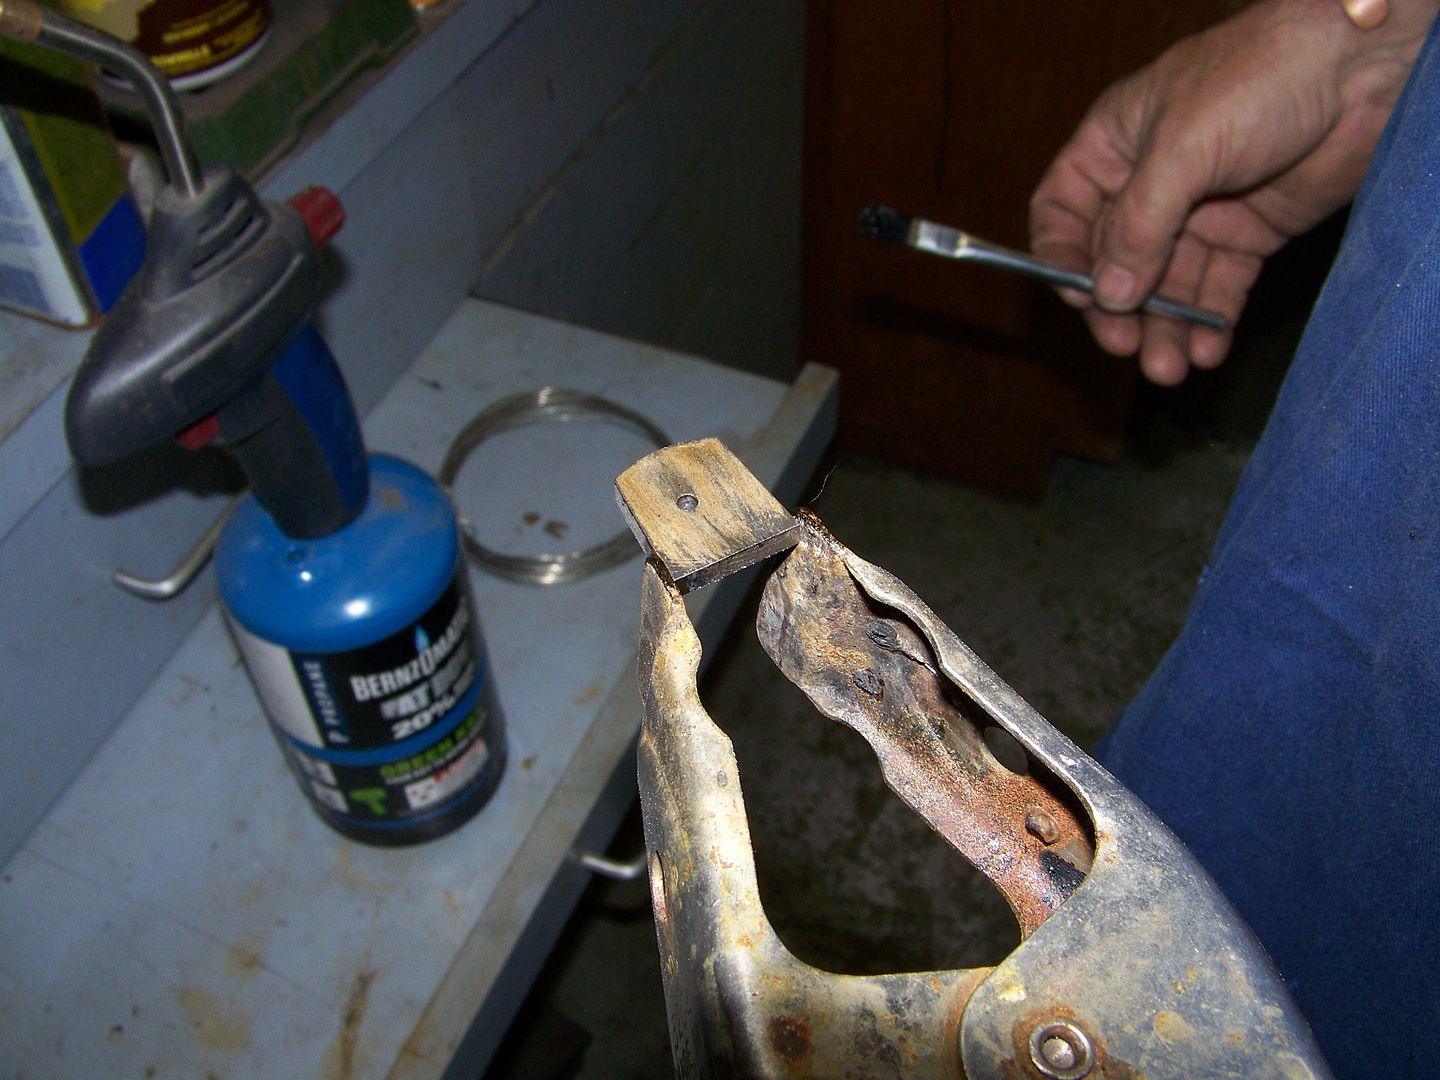
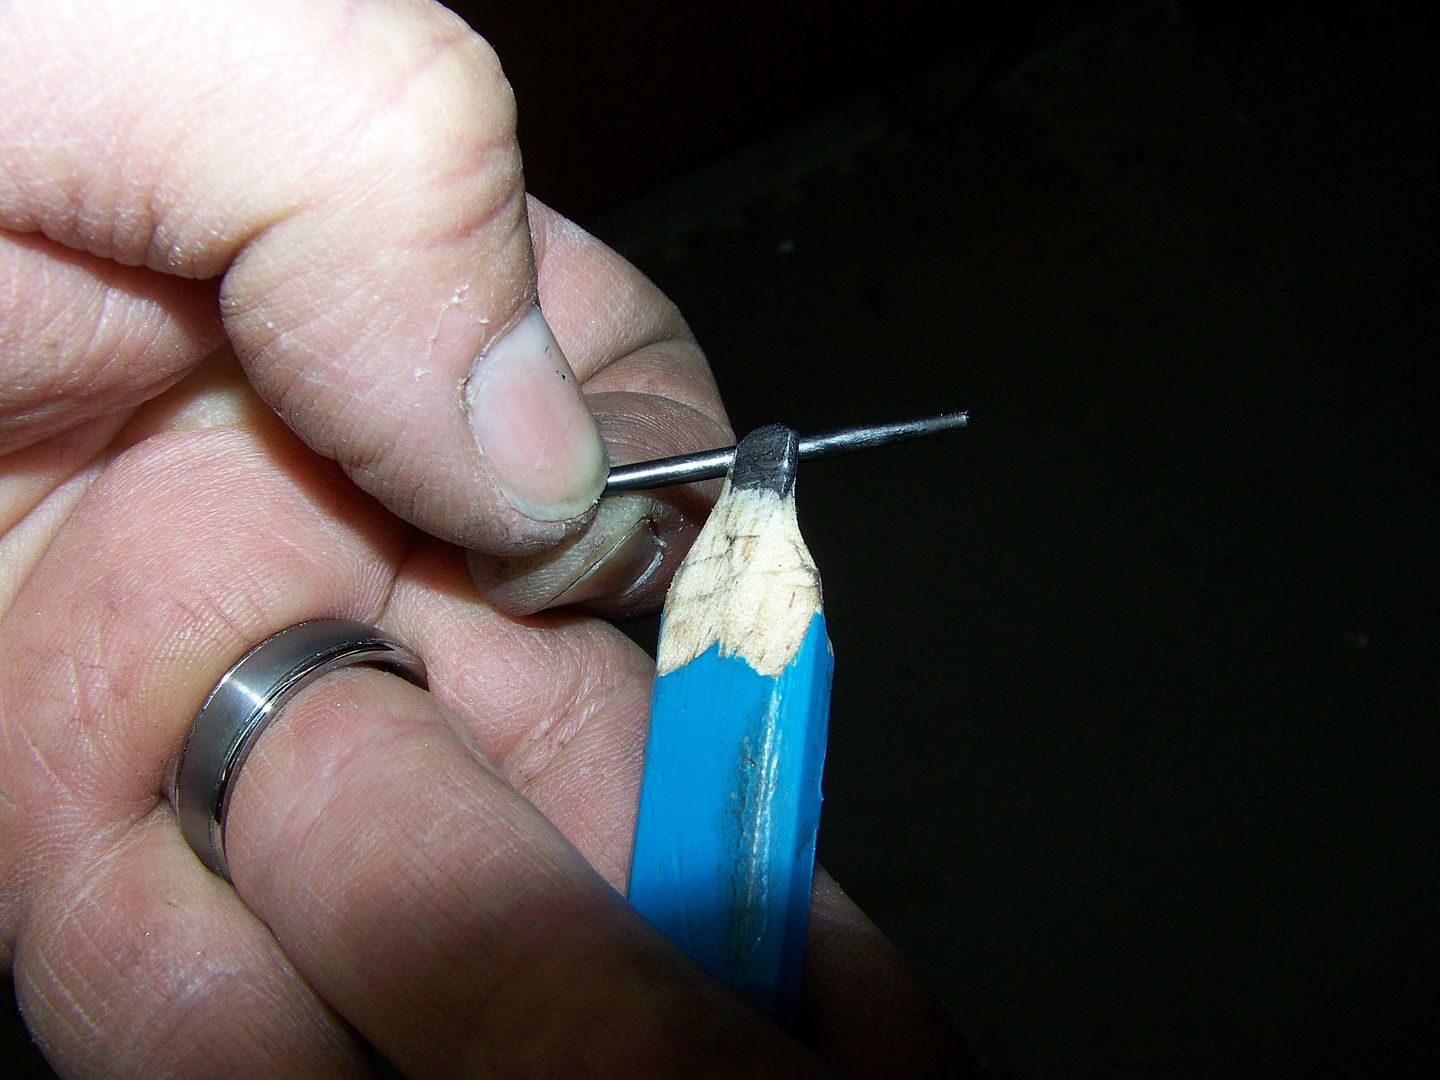
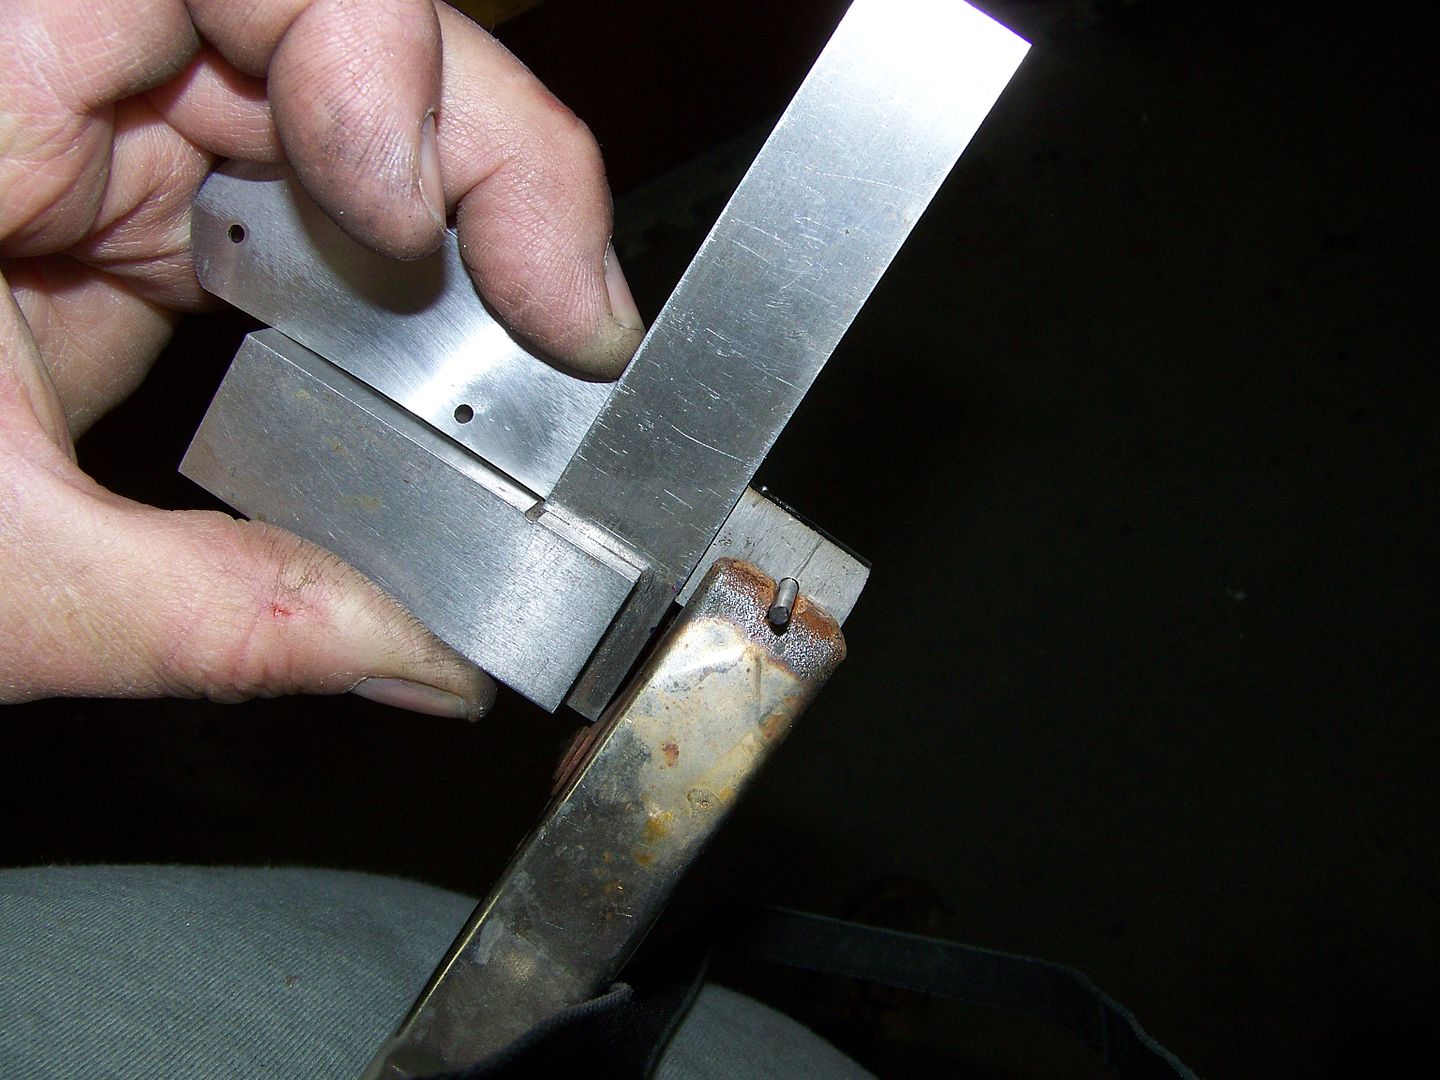
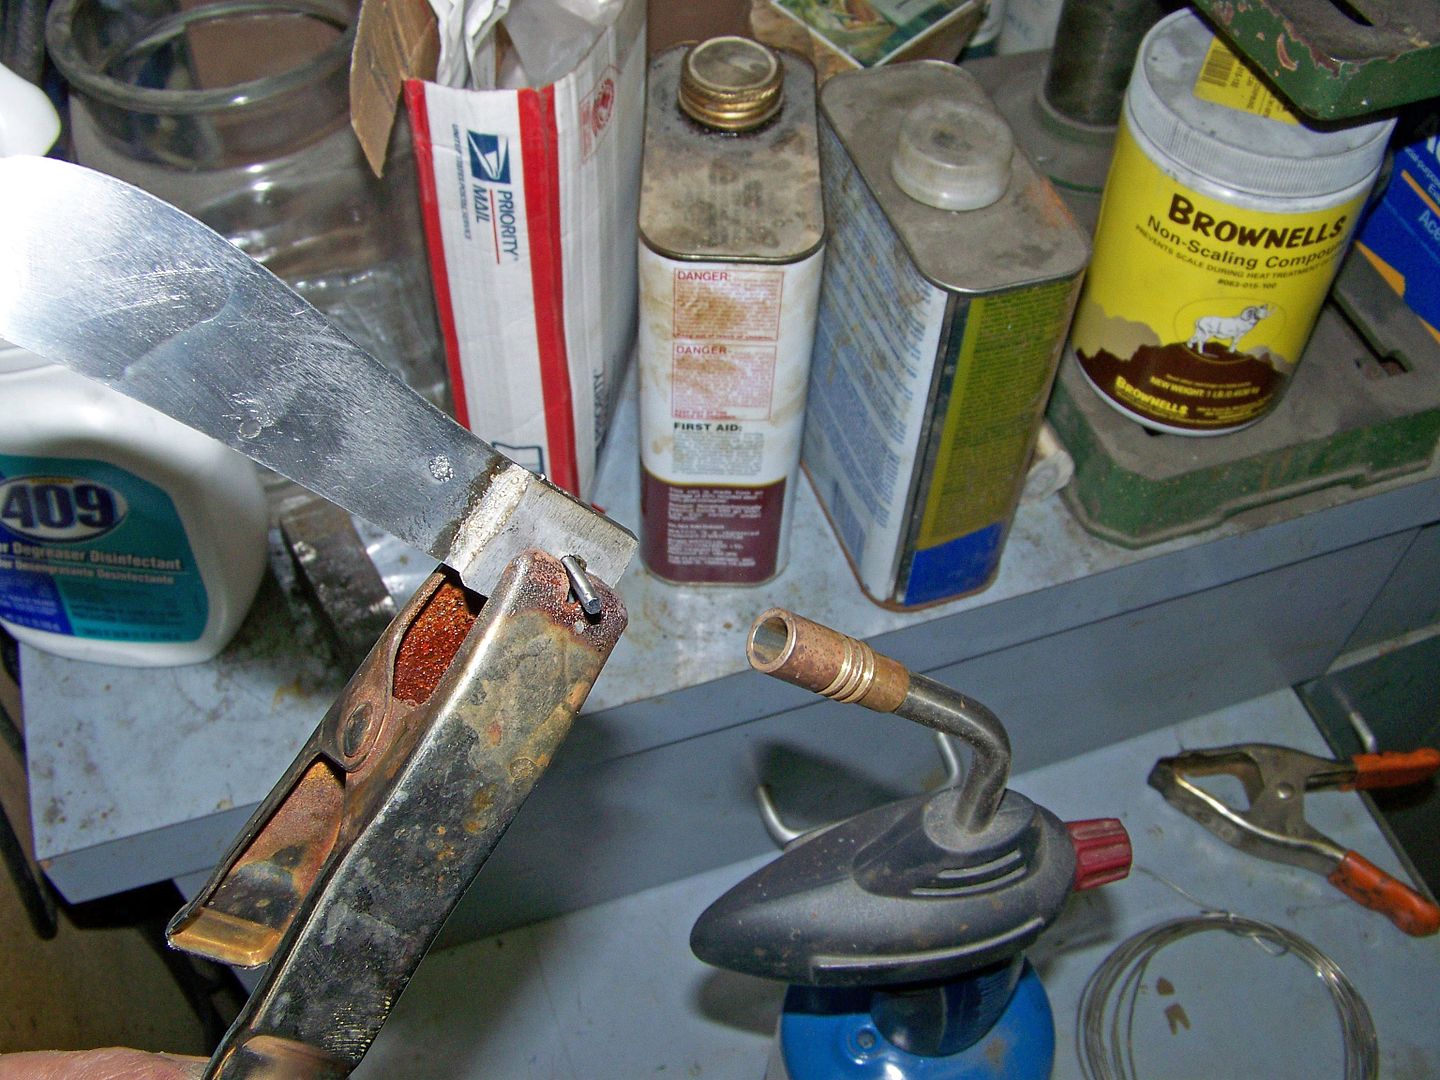
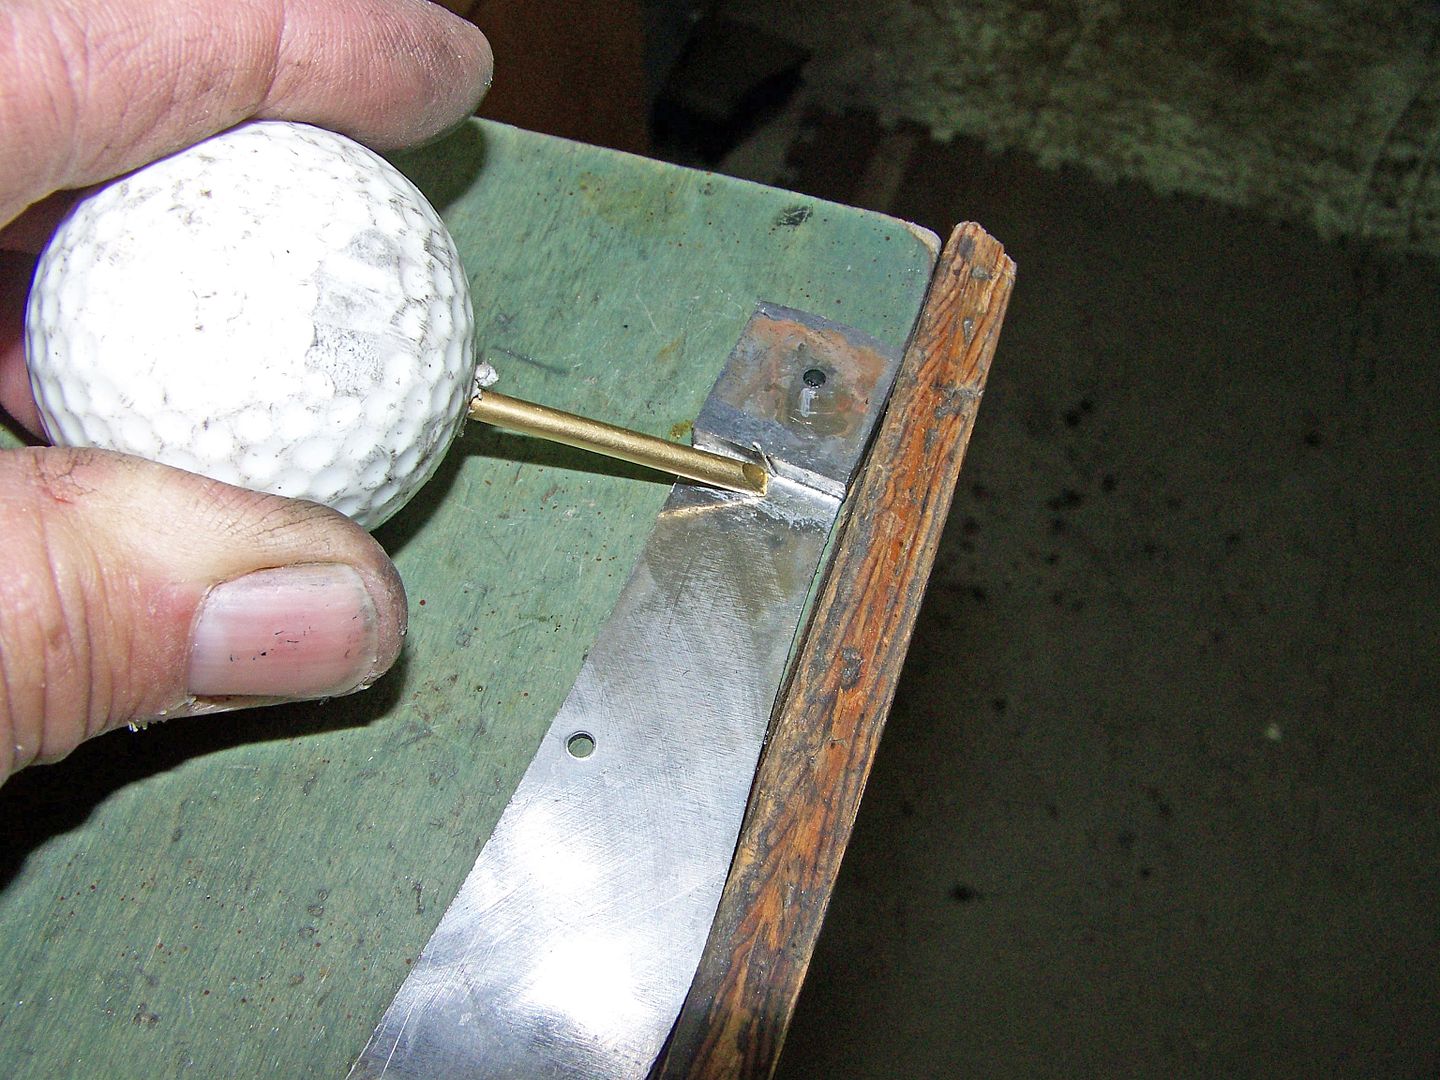
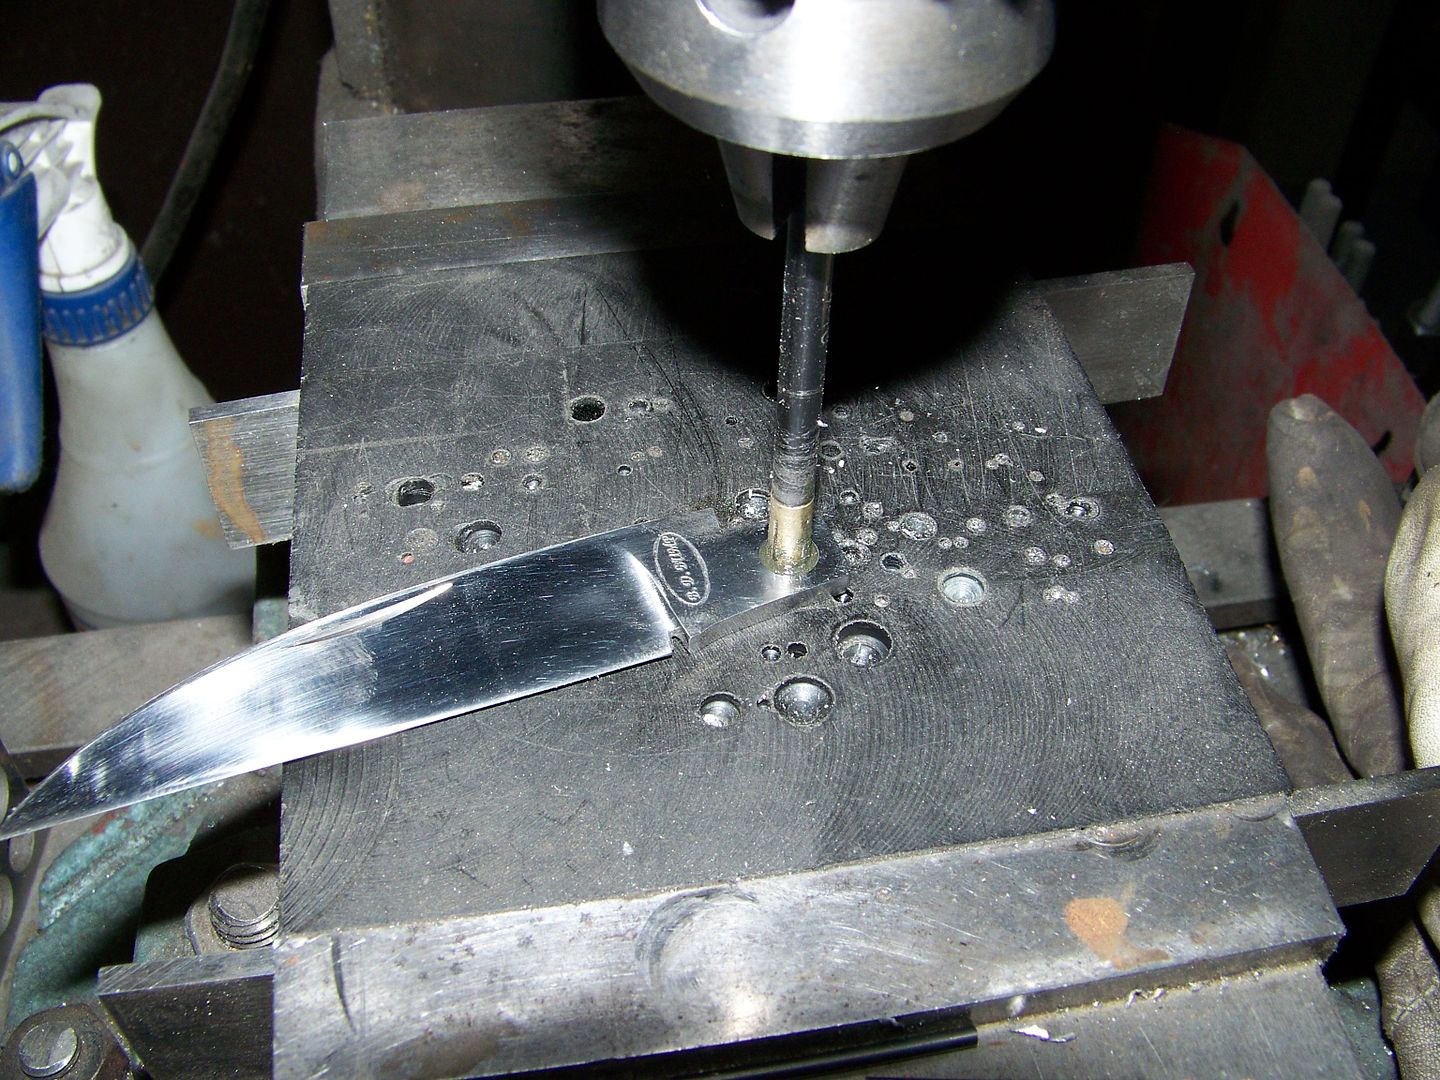
Run the same drill bit through the liner and bolster holes just to clean out any solder inside the holes. Using a sharpened high speed steel drill bit, rub a pencil on it to coat it with lead. Solder wont stick to lead, dont ask me why. Now simply pin the bolster to the liner with the leaded pin and clamp them being sure they are square with the liners. Add one drop of flux so it can seep inside the joint and heat slowly with a propane torch. No need for a big flame as this is only 400 degree silver solder. Rotate the assembly so its get even heat on all sides and watch for the solder to begin to melt. As the solder melts the clamp will automatically squeeze the two together and give a seamless joint. Use the solder brush to wisk away excess solder as it seeps out of the joint. Dont overheat, just take your time so its nice and even. No mental stress at all and perfect seam joint every time. When you are satisfied the excess solder is squeezed out of the joint quickly cool it under cold running water. The brass rod poked inside the golf ball is one of my most sophisticated tools and easily cleans off the remainder of the solder. Wash everything with soap and water to clean any flux that could be remaining on the parts. You dont need flux on anything as it can leave rusty finger prints everywhere you touch especially on the hand rubbed 2000 grit feather damascus blade.

100_7303.jpg


100_7305.jpg


100_7306.jpg


100_7307.jpg


100_7309.jpg


100_7310.jpg


100_7311.jpg


100_7313.jpg


100_7314_edited.jpg


100_7318_edited.jpg


note, if you paid enough attention you noticed that a couple of the photos are of Bruce Barnettes slippie bolsters he is making here. He is here for a week on his way back to Australia from the Blade Show.
 
Last edited:
I should have studied this thread and had a list of questions before I called and talked to you guys tonight. Another great WIP Bruce. Thanks for doing these.. they are really helpful to every one..
 
I should have studied this thread and had a list of questions before I called and talked to you guys tonight. Another great WIP Bruce. Thanks for doing these.. they are really helpful to every one..

As long as my Kodak keeps working I'll just keep on taking pictures. 2thumbs
 
With the bolsters soldered on the liners its now time to shape the bolsters and thin them down for the scales. I put them back to back so I can see both bolsters at once and try my best to make them shaped exactly alike.

100_7343.jpg


The blade .187" (3/16")pivot hole should be lapped with a .187" barrel lap. I use fine valve lapping compound on the barrel lap. It cleans and aligns the pivot hole. Be sure to clean out all the valve lapping grit afterwards.

100_7337.jpg


This folder uses a 3/16" bronze bushing from K&G. I measure the thickness of the blade and the thickness of the bushing. On my metal lathe I turned this small bushing lapping fixture. The bushing sits inside of it and is pushed gently down as I make a figure 8 motion on sandpaper. A granite plate is handy for this. The bushing needs to be only .001" (one thousands) wider that the blade is thick at the tang. Its easy to lap off too much bushing so when it gets close to proper size simply change to very fine sandpaper. This is important because it can determine whether the blade is going to wobble or be too tight after the pivot pin is peened down.

100_7328.jpg


100_7329.jpg


100_7327.jpg


The bushing needs to be cleaned several times because of the lapping so pipe cleaners work pretty well. The micrometer is much more accurate than a vernier caliper and the faces on it needs to be clean also. A business card will clean them.

100_7333.jpg


100_7336.jpg


100_7335.jpg


Its not easy but if you can read the mic on these last two shots you will see the bushing is exactly .001" thicker than the blade.

More fun tomorrow. Please come back
 
Last edited:
note, if you paid enough attention you noticed that a couple of the photos are of Bruce Barnettes slippie bolsters he is making here. He is here for a week on his way back to Australia from the Blade Show.

Say G'day to Bruce for me :)

Alistair
 
I forgot to mention earlier but I ground in the nail nick on my surface grinder. This thin white wheel is dressed down at about a 45 degree angle. The surface grinder table is locked into position and the wheel is lowered down onto the blade. Notice the blade is sitting on a smaller fine pole magnetic chuck and is shimmed and superglued down.

100_7326.jpg


100_7325.jpg
 
Last edited:
Bruce & Bruce, sure enjoyed the visit today and holding some of these projects in my hand. Hope I didn't interupt progress much with all the questions. The colt didn't try to buck me off when I got home so all and all "a great day":D
Thanks again, Robin
 
Hey Bruce,

What kind of tolerance have you seen on the bushings from K&G? I checked their site, but it doesn't specify any tolerance. Do you have an assortment of reamers in the 0.1865 to 0.1875 range or are they always relatively precise enough that you get can by with only a 0.1870 reamer?

Thanks,
Josh
 
Bruce & Bruce, sure enjoyed the visit today and holding some of these projects in my hand. Hope I didn't interupt progress much with all the questions. The colt didn't try to buck me off when I got home so all and all "a great day":D
Thanks again, Robin

Hi Robin,
Likewise it was interesting and educational to visit your leather getaway shed. Something noteworthy in every square inch in there. Thanks for the tips, tricks and tools also the lightning struck black walnut. 2thumbs
 
Hey Bruce,

What kind of tolerance have you seen on the bushings from K&G? I checked their site, but it doesn't specify any tolerance. Do you have an assortment of reamers in the 0.1865 to 0.1875 range or are they always relatively precise enough that you get can by with only a 0.1870 reamer?

Thanks,
Josh

Josh, They have about 3 sizes for length but they are all .187" diameter. I just use a 3/16" ream and 3/16" barrel lap. It gives enough clearance for a smooth slack free fit. One thing I've learn though is drill bits dont always drill the right size hole so be sure to pre-test every drill bit to prevent oversized holes.
 
I want a custom shield on this one so I took a piece of annealed 1084 (for the parser plate) and drilled three holes through it that resembled Mickey Mouse and connected them with a round file. I used several other small files until I was happy with the results. I cut the shield from the same feather damascus the blade is from on the bandsaw and ground the sides to a slight angle. It wedged very tight and needed to be tapped into the hole and removed several times, each time hand filing off the scraped metal from the side of the shield. Its possible to make the shield fit the parser plate nearly perfect this way.

I plan to drill a pin hole in the back side as a hidden pin and harden the little shield. More on that when the time comes. Right now its pizza time for Fathers Day!
Happy Fathers Days all you fathers out there.

100_7355_edited.jpg


100_7360.jpg


100_7361_edited.jpg


100_7362.jpg


100_7366_edited.jpg
 
Well, i'm too busy to check in for a week or so, and i miss out on such a great thread.
Mr. B at his best again, what more can i say :) Thank you for posting this, it's very educational (the good kind of educational :) )

Ondrej
 
Well, i'm too busy to check in for a week or so, and i miss out on such a great thread.
Mr. B at his best again, what more can i say :) Thank you for posting this, it's very educational (the good kind of educational :) )

Ondrej

Thanks Ondrej,
I need to get back on this one as it so fun but have too many irons in the fire at the momment. Another week should show some progress hopefully.
 
Had time to get back on this folder today I chose pre-ban ivory for the handle material and flattened one side and squared the end that mates to the bolster. The liners were checked for flattness with a magic marker and rubbed on a flat plate to make sure they werent warped or bent. With the liners straight and the ivory flat there shouldnt be any gaps anywhere. Its like a foundation of a house, if its not flat and level nothing else will be either. I'm starting to sound like an old grandpa.

I like to clamp everything and then wick super glue in around the edges.

Next step is to drill the center hole and rear hole to 3/32" and begin to radious and shape the bolsters and scales. They need to be to almost exact finished thickness and shape.

100_7503.jpg


100_7504.jpg


100_7505.jpg


100_7510.jpg


100_7507.jpg


100_7512.jpg


100_7513.jpg


100_7514.jpg
 
Last edited:
Bruce,
Why the wicking of the super glue? Will it pull in enough to get a good bond. I guess I am asking because I would have loaded it up and clamped it hard enough to push excess out.
Thanks,
Jim
 
Bruce,
Why the wicking of the super glue? Will it pull in enough to get a good bond. I guess I am asking because I would have loaded it up and clamped it hard enough to push excess out.
Thanks,
Jim

Hi Jim,
Yes, even though there is no real visible gap the thin super glue wicks all the way to the center.
 
Back
Top