Bruce Bump
Forum Owner-Moderator
This is how I make a one of a kind slipjoint but I also made some 416 ss templates just in case I want to make another one some day I can use them for a pattern.
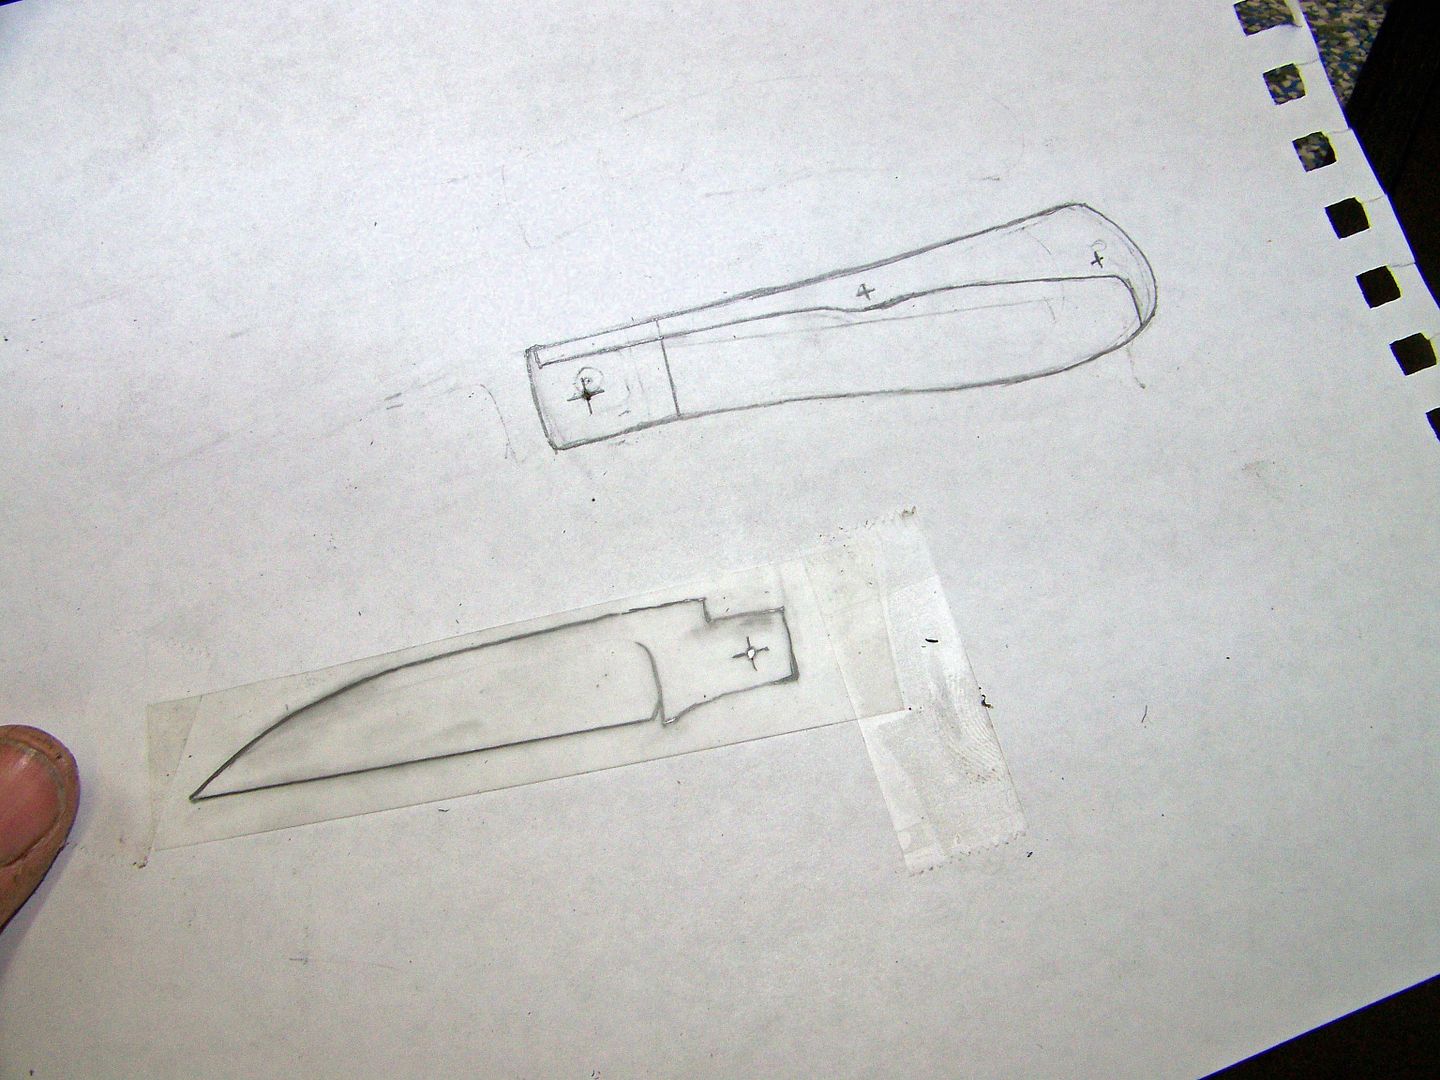
It starts with a drawing of the liners on plain paper. Next I cut a clear piece of mylar and pin it to a cork board where the pivot goes. Mylar is nice because it can be drawn on with a pencil and erased a hundred times until I like the blade. Be sure to draw the spring on the paper too. The handle is in pencil too so it can be changed here and there too if needed.
With the mylar blade drawn it can be pivoted open and closed. Pay close attention to the tang. Actually 99% of making a slipjoint is all about the tang. If the tang is wrong nothing works believe me. The stops are everything and make the differance if the top of the knife is flush in open, half stop and closed position. Its all in the tang. A half stop isnt even needed but I like them, some people dont.
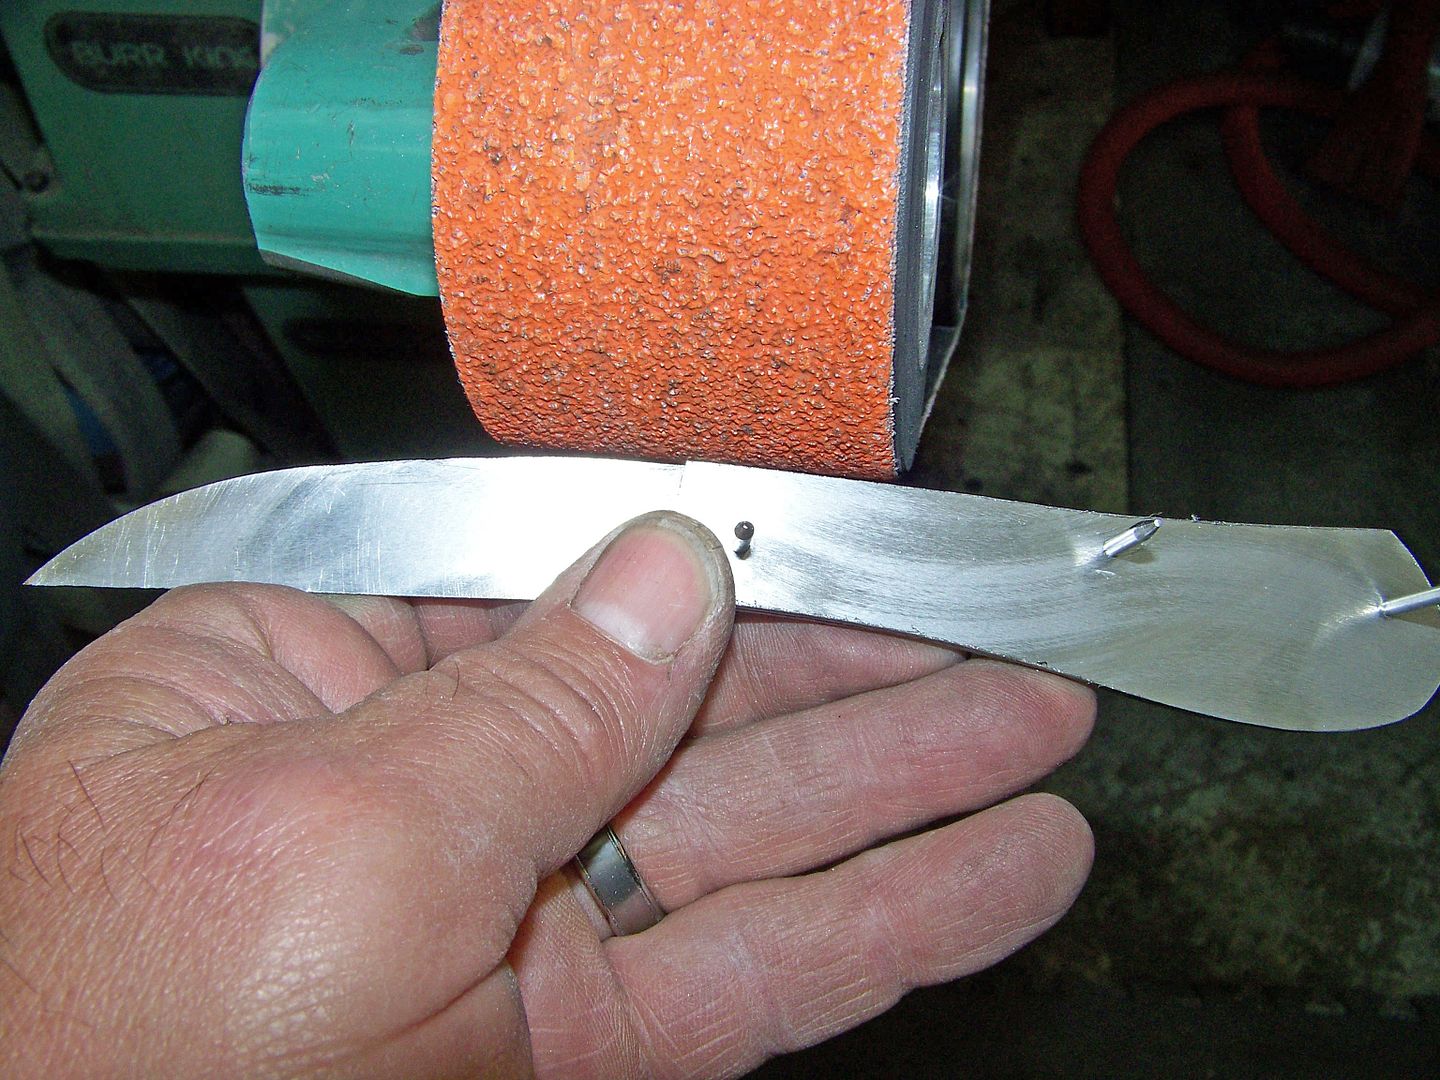
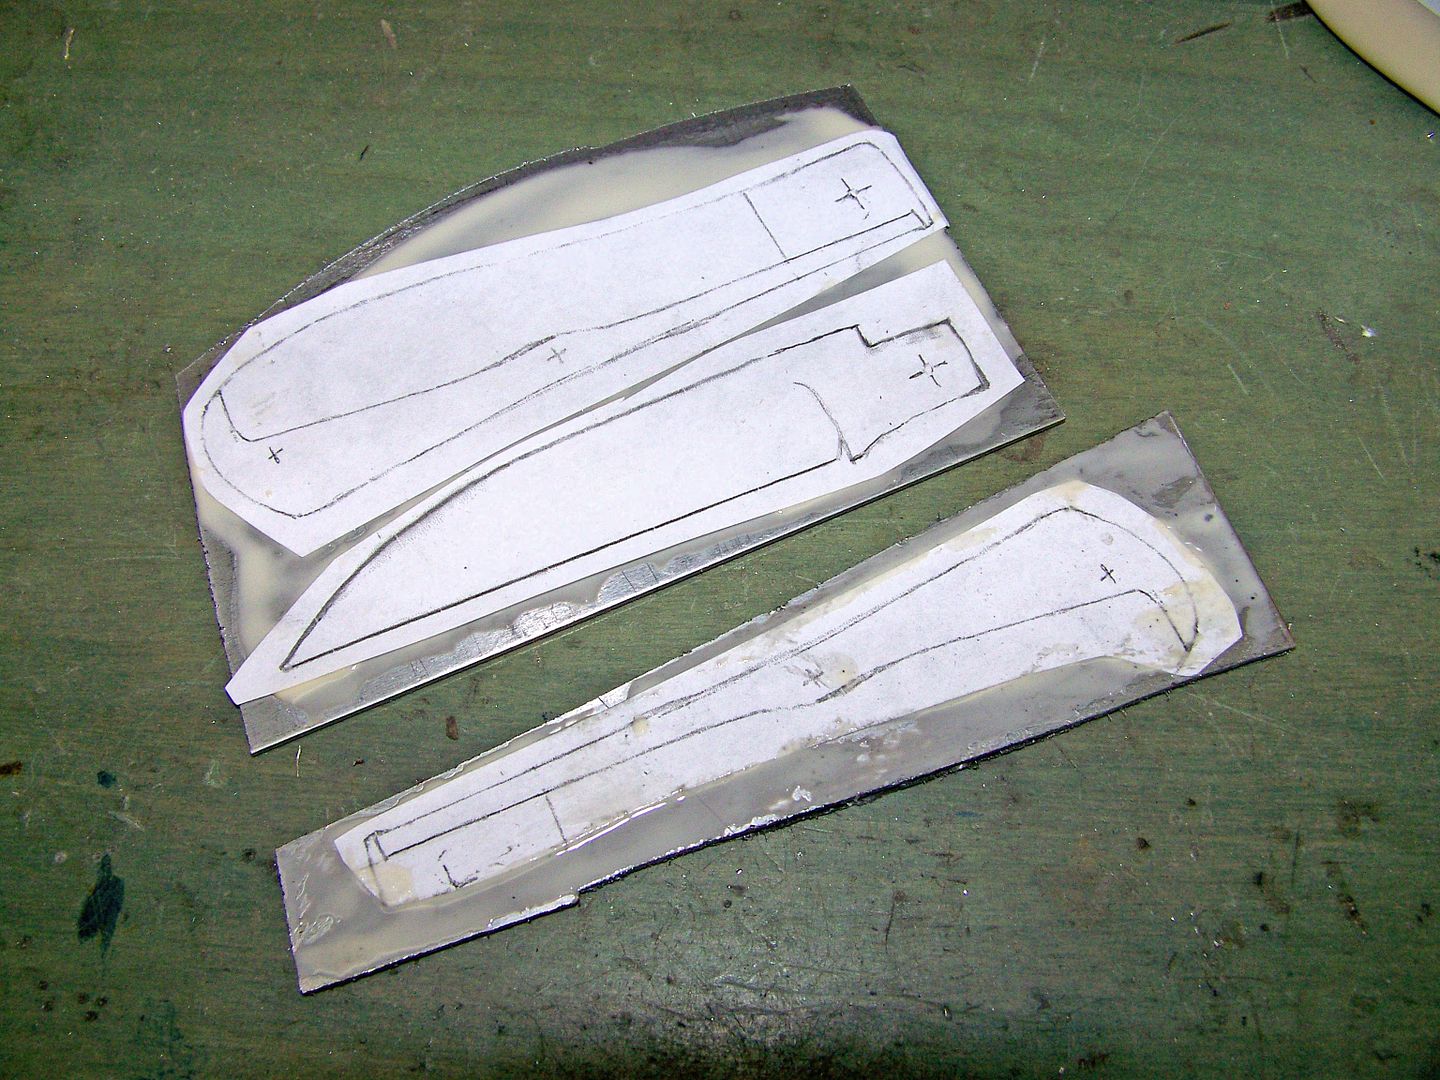
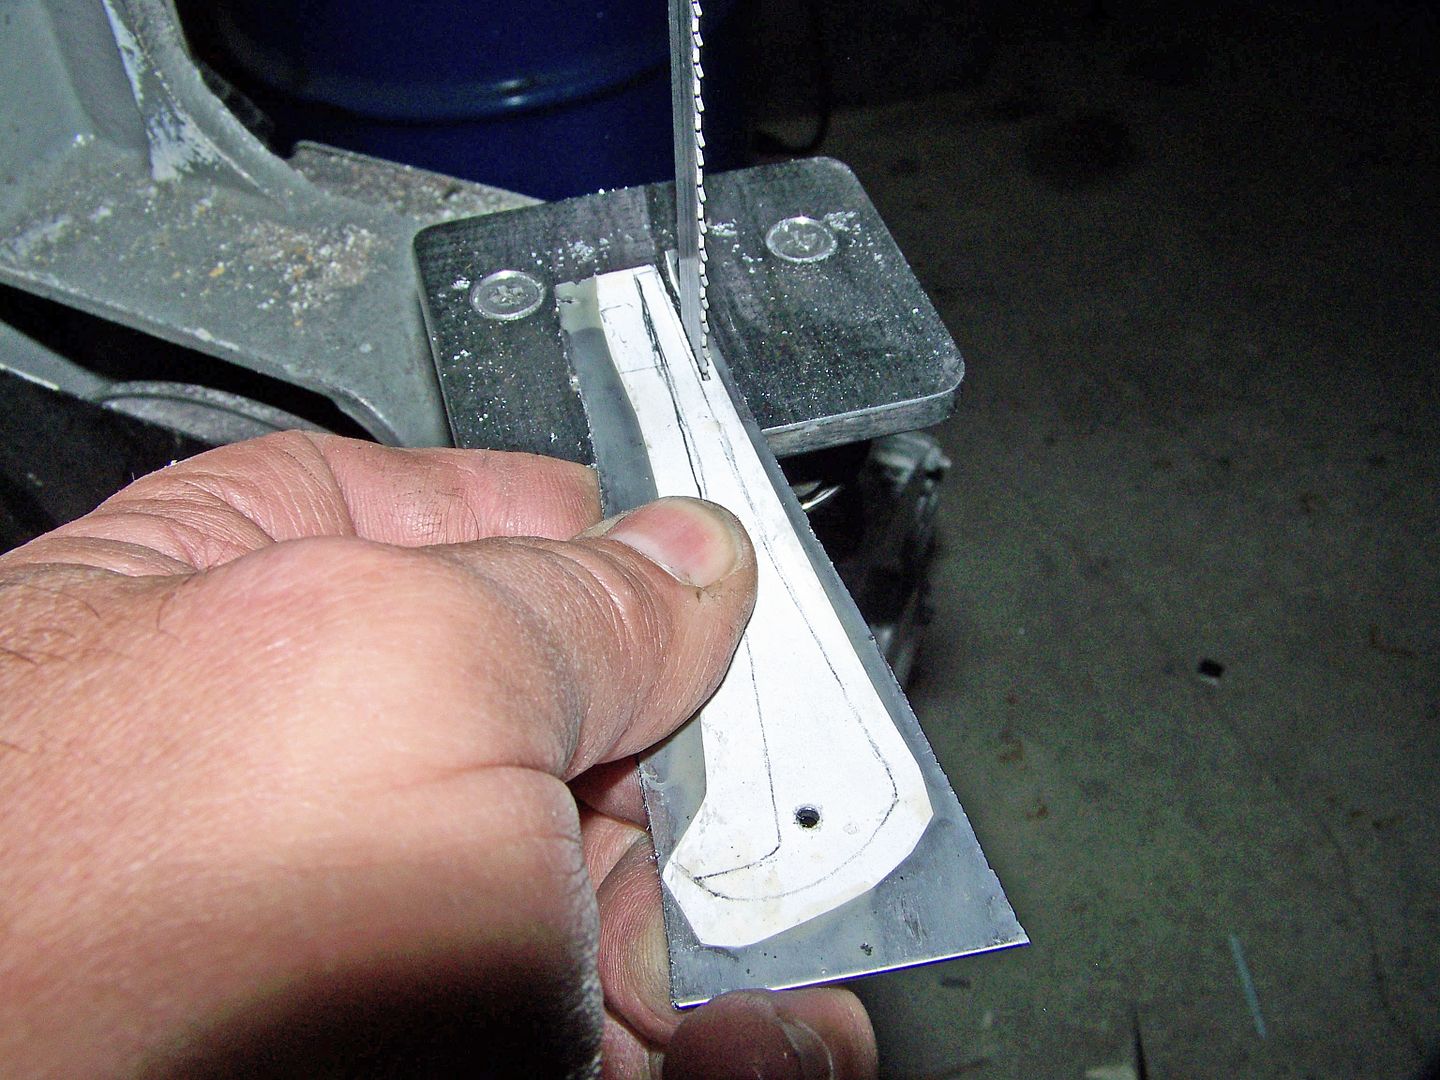
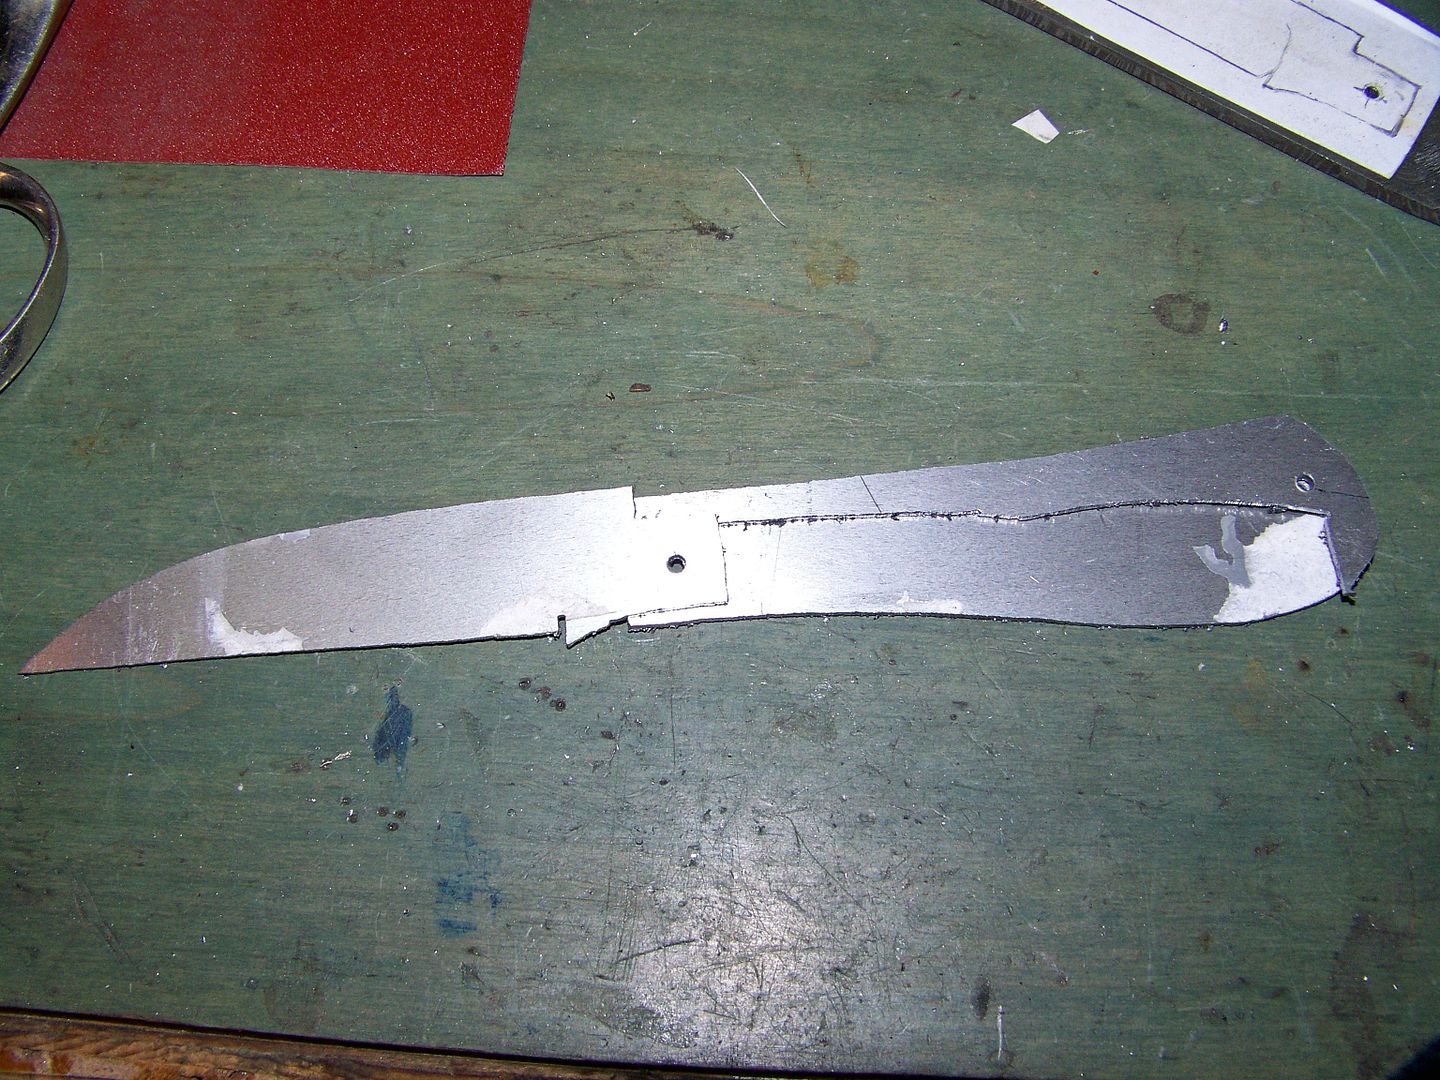
When it looks good on paper and mylar simply photocopy the parts, cut the blade, spring and liner out and glue them to the 416 stainless sheet. I use .040" for most all liners. bandsaw out the parts and grind to the lines. Leave them a little oversized and file them for a closer fit. I have the holes marked and drilled too.
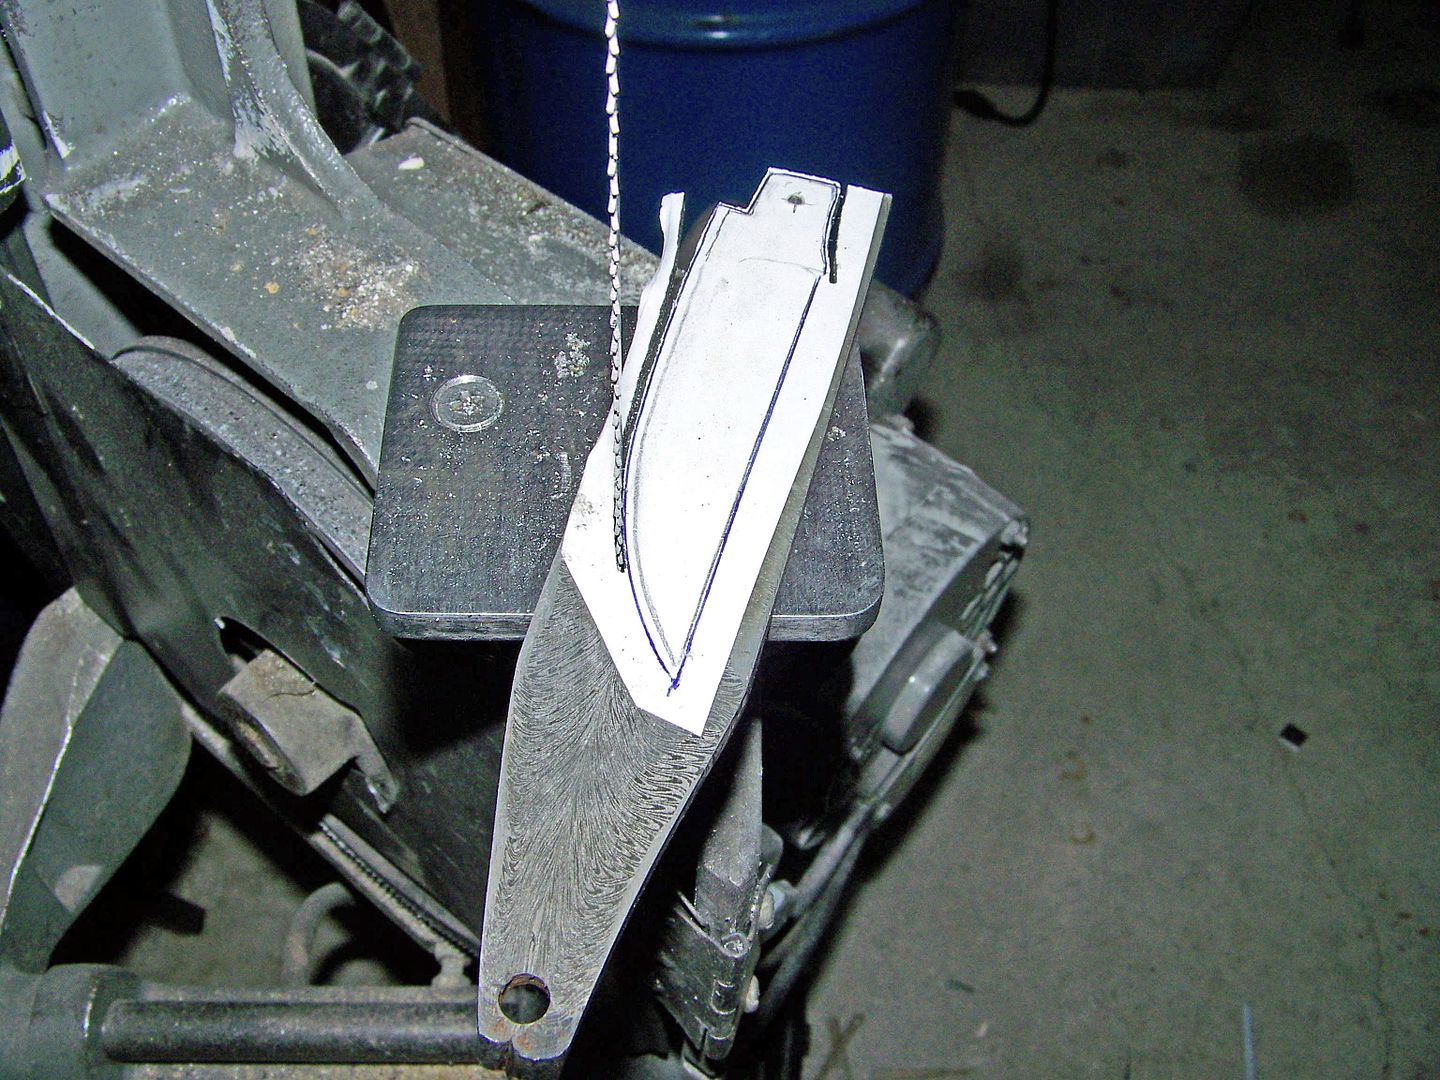
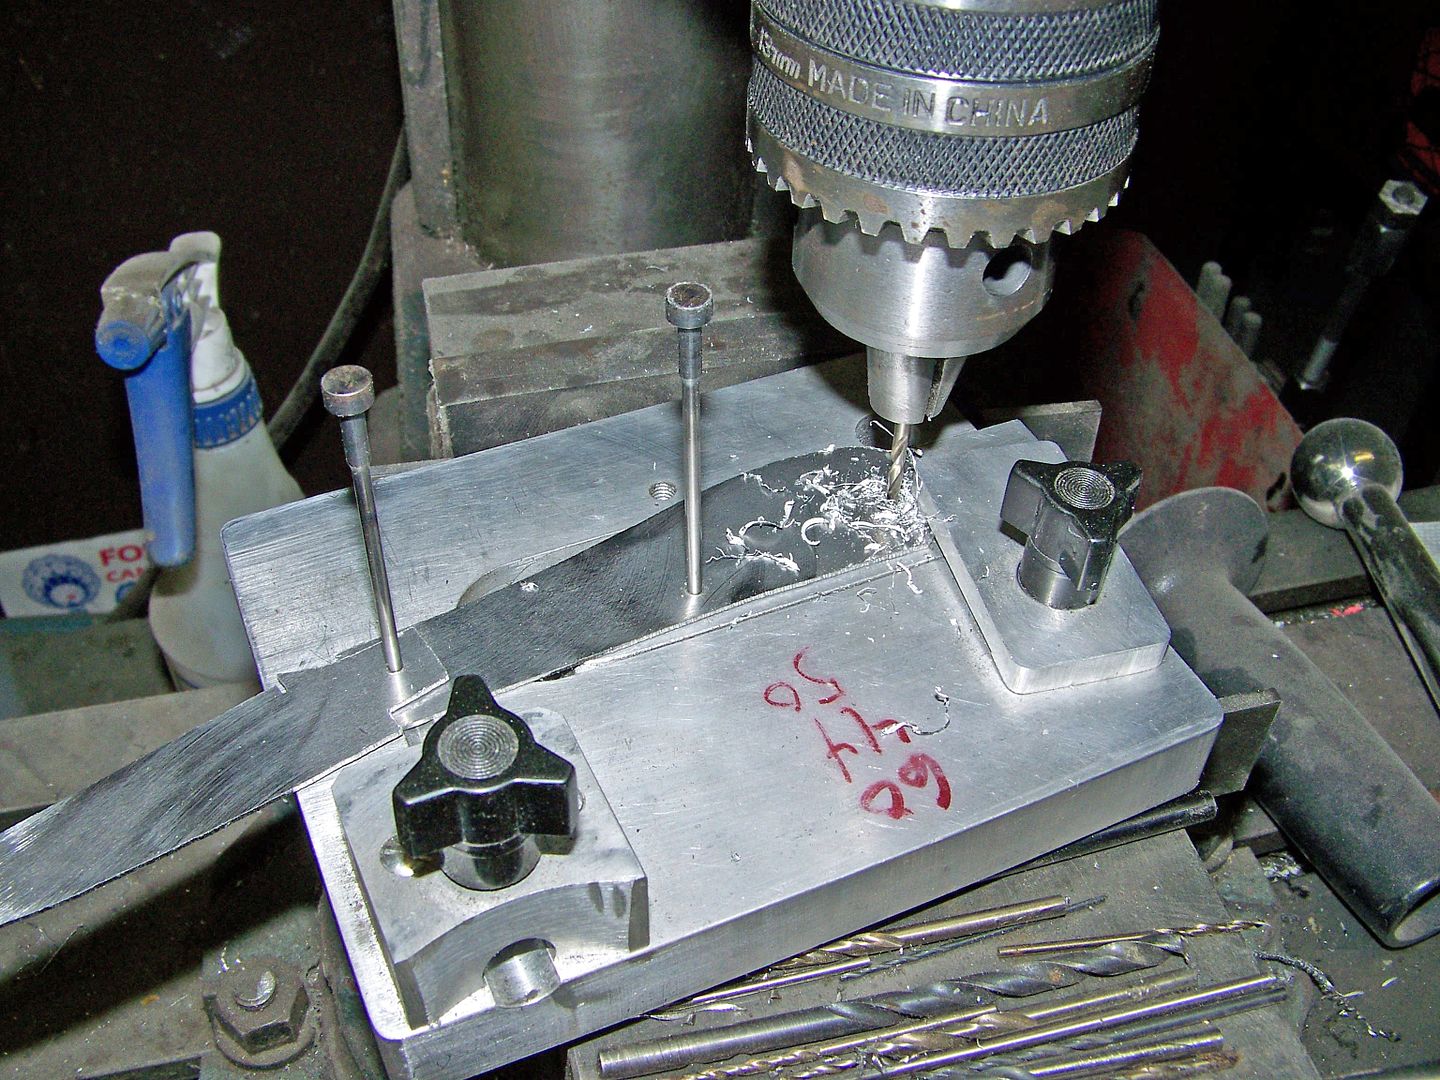
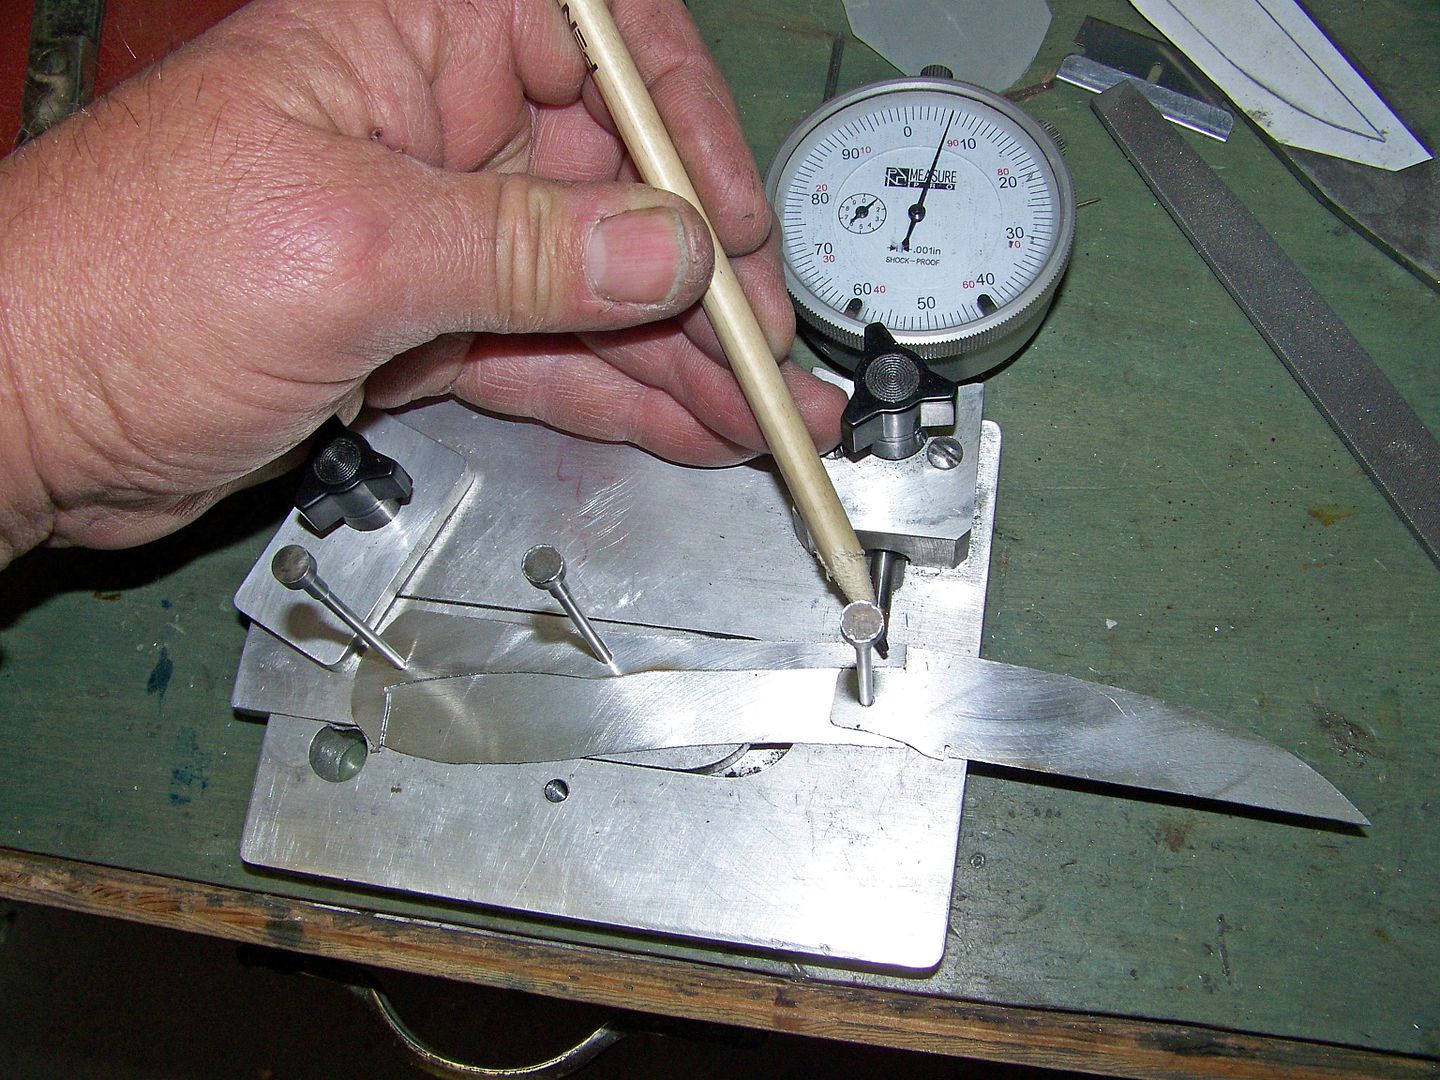
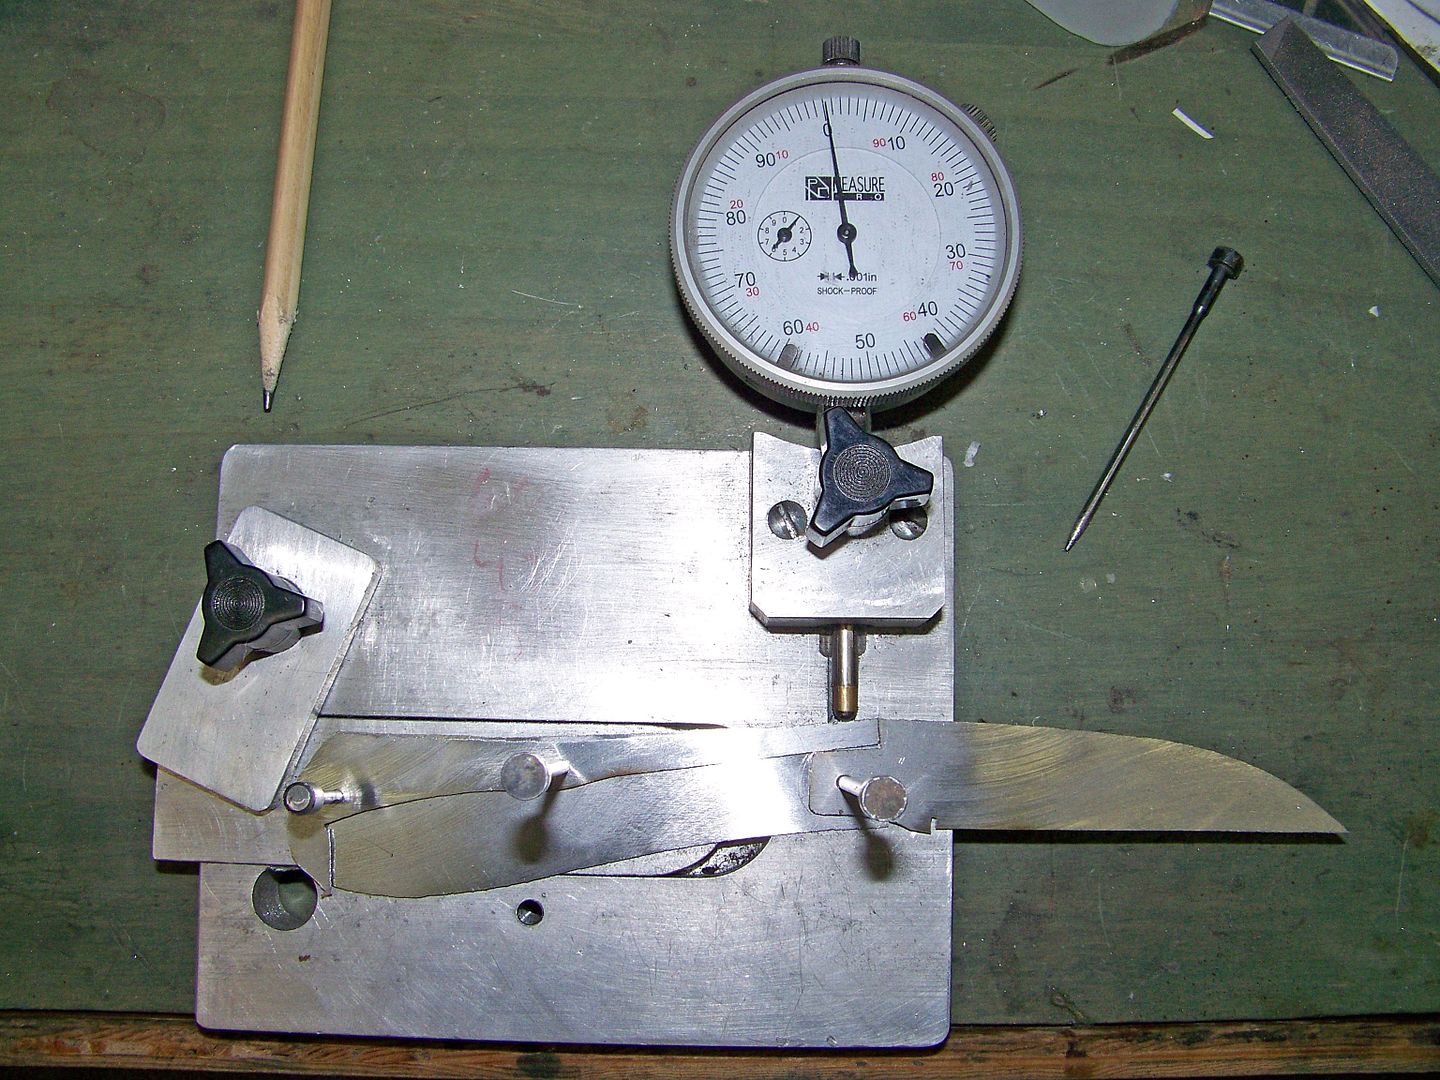
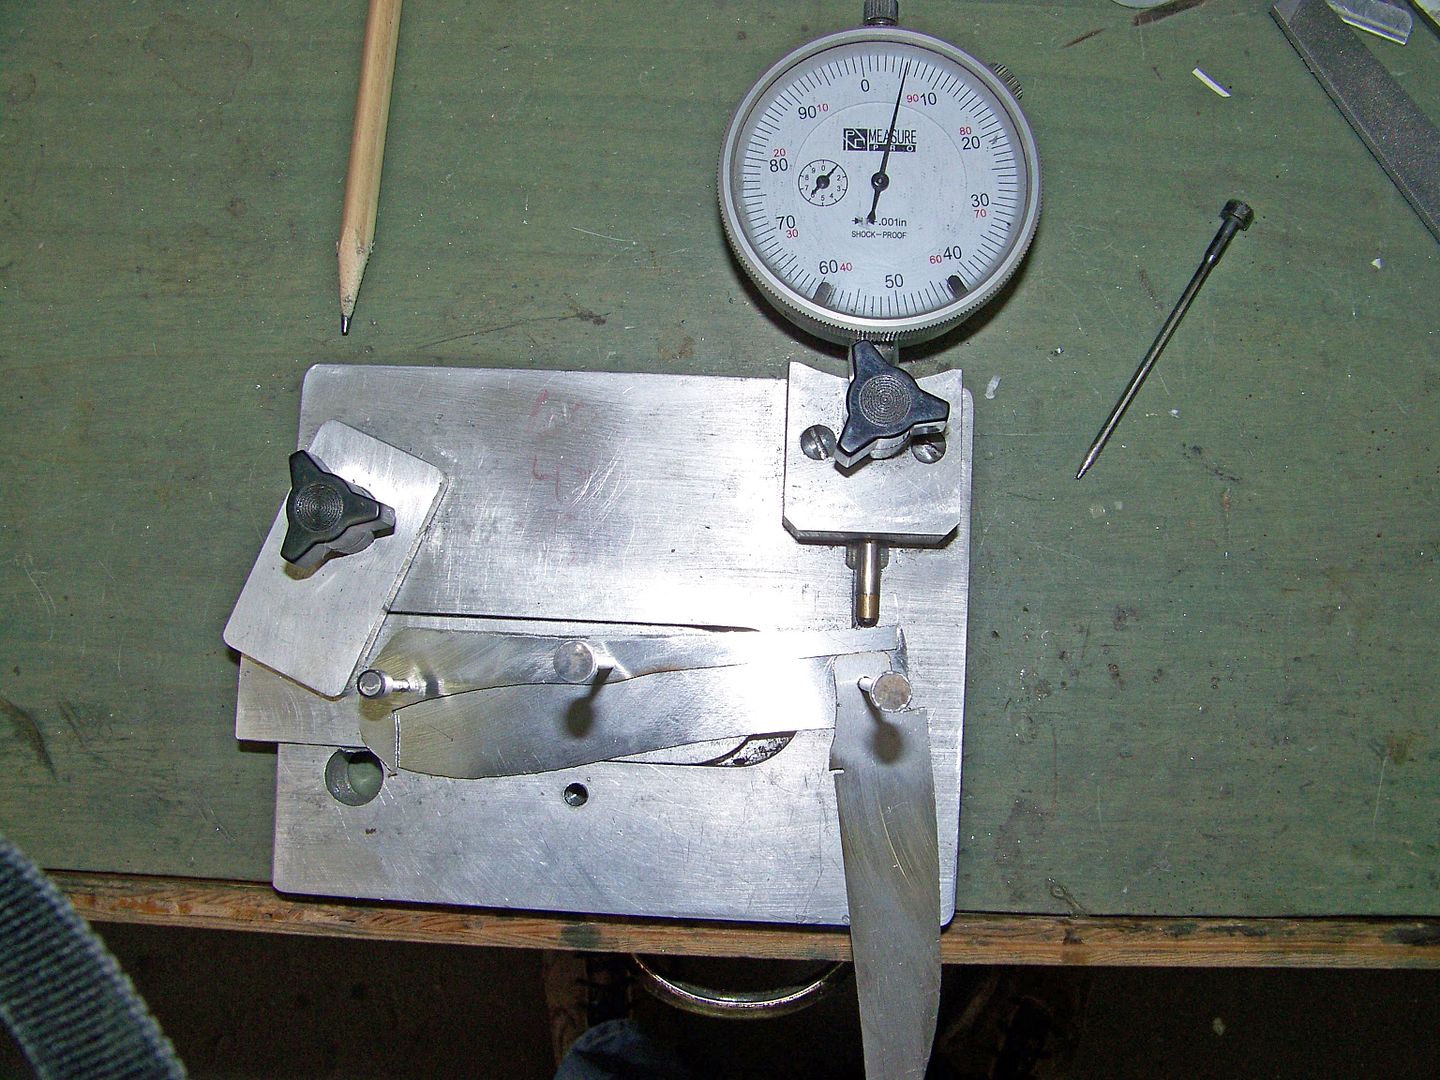
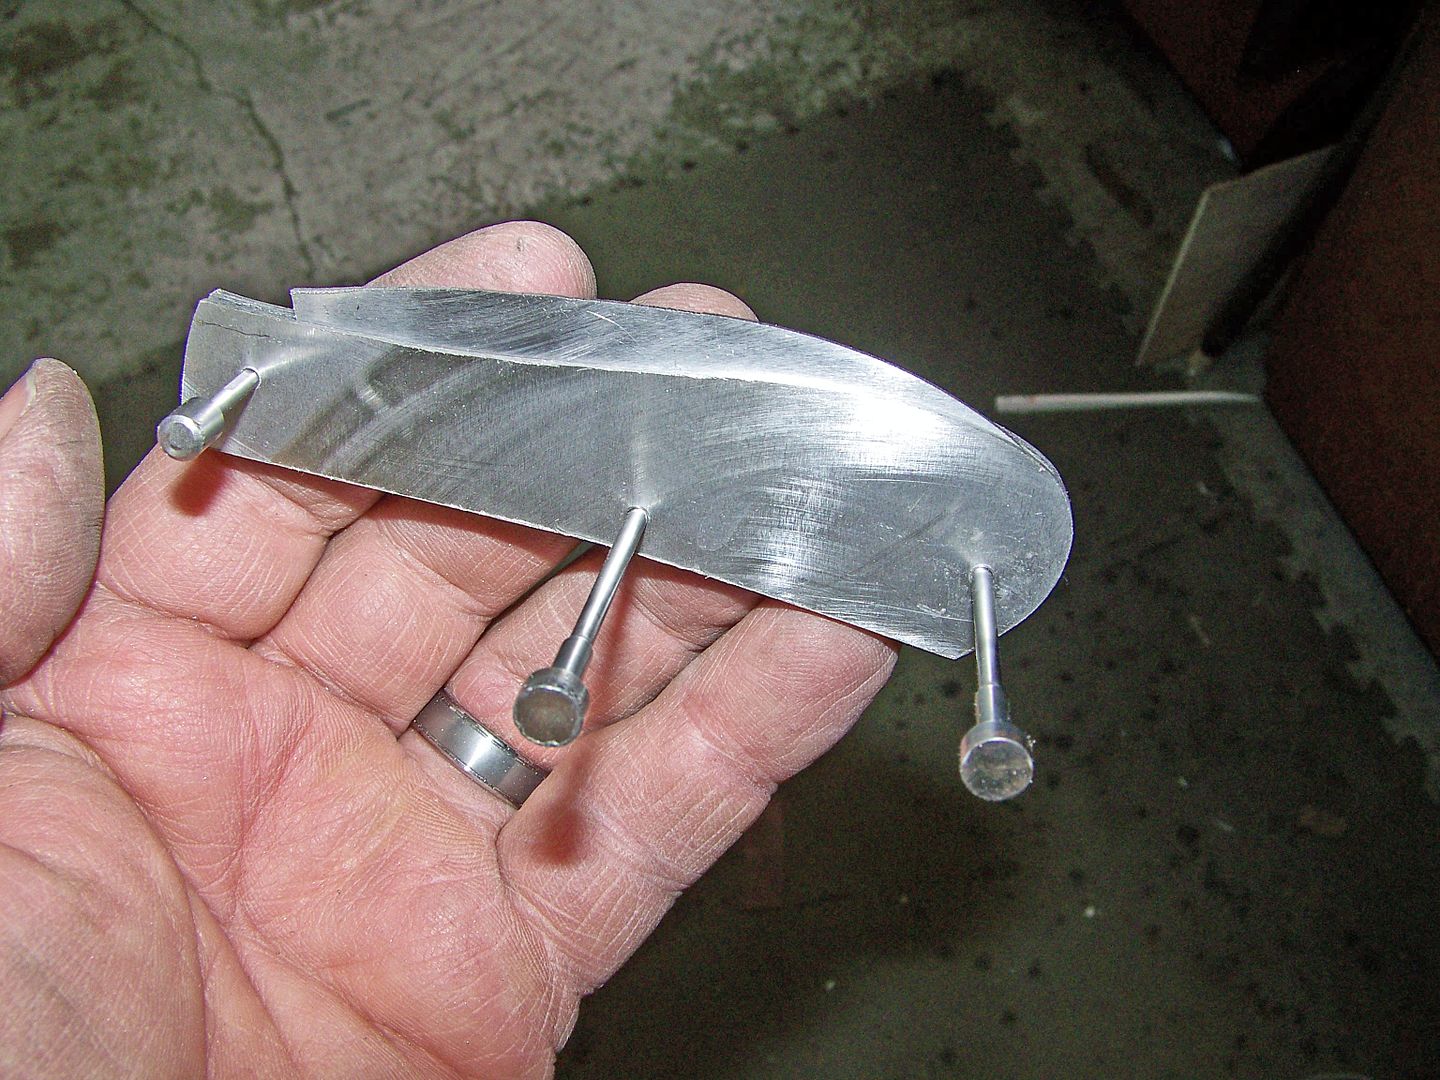
I made this dial indicator fixture and it is neccesary to adjust the tang for the flush fit on top. I use a 3/32" hole and hardened pins. Mount the liners and drill the aluminum fixture for the liners and pin them to the instument. The temperary sheet metal blade and spring too. Dont worry about the pre-bend in the spring yet, we will do that later.
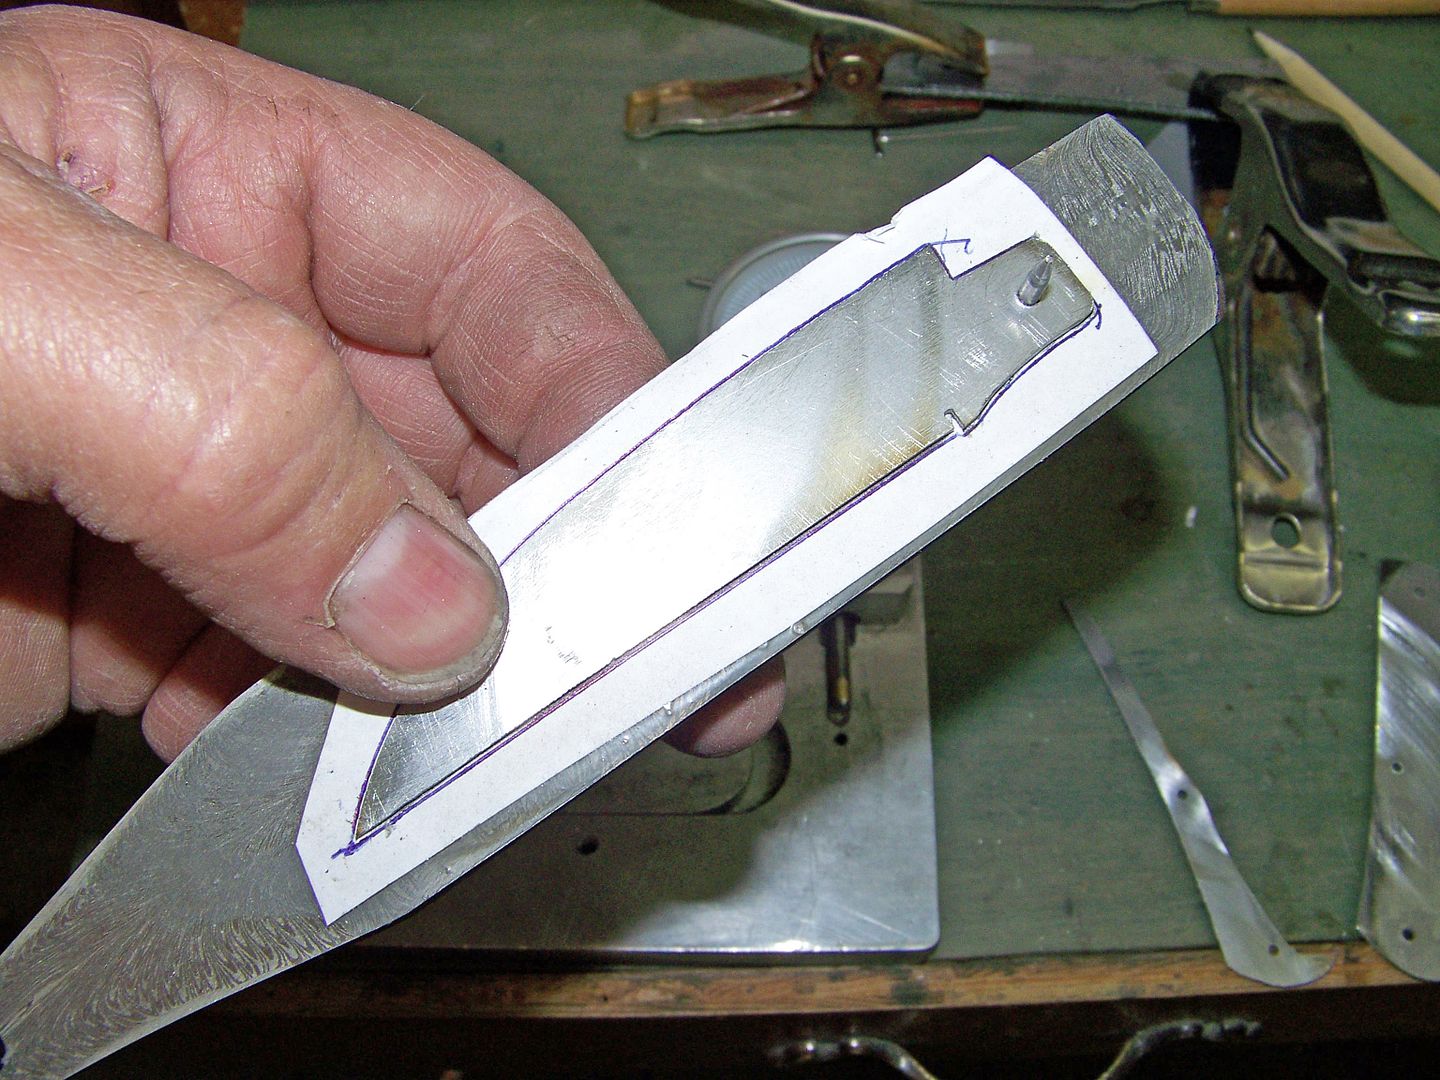
Rotate the template blade and file away material that isnt needed until the blade, spring and liner all work together. The tang needs to be very close to perfect in all three positions and the tip needs to be where it belongs. If you make a perfect template you can duplicate it with a perfect blade so it pays to work on the stainless template until it works. The dial indicator needs to be at "zero" in all three positions so start with the blade open first and zero the needle. Make sure the overall profile looks good and matches the original drawing otherwise the tip is too high or too low. trim the spring tip and the tang stop now.
Next rotate the blade to the half stop and shorten the tang until you get about .010" more than zero and finally close the blade. The dial indicator needs to also be higher than zero. Really hard for me to explain but when the time comes you will see why its so important for the half stop and the closed positions both to have a higher reading than zero.
I'm hoping these pictures clear up some questions.
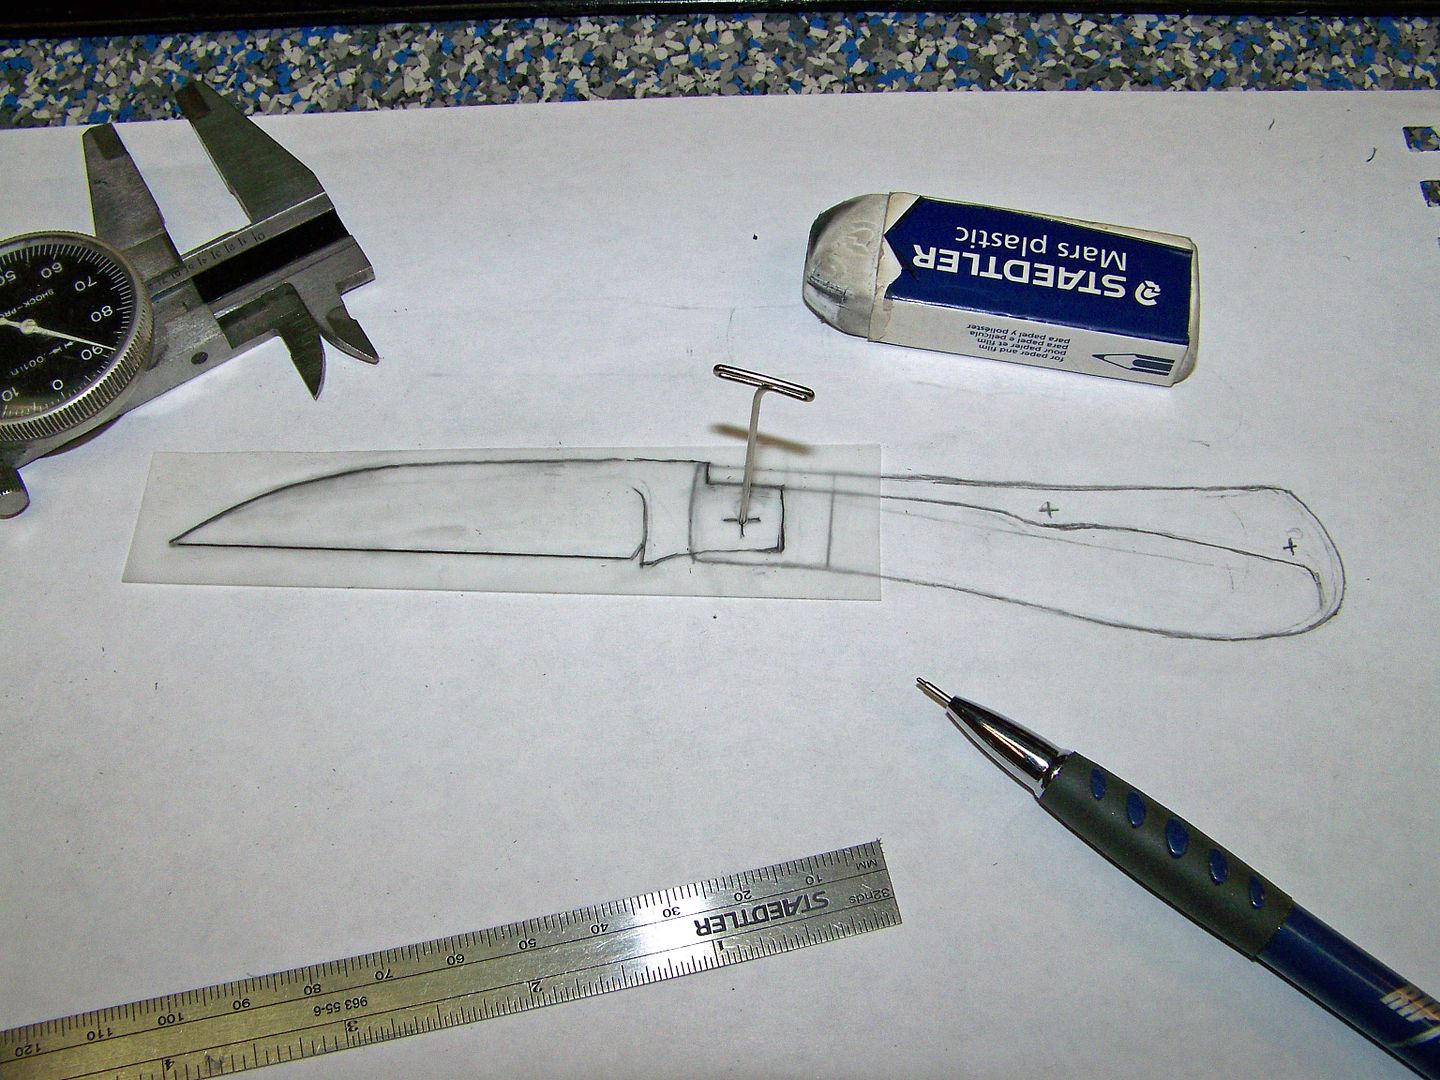

It starts with a drawing of the liners on plain paper. Next I cut a clear piece of mylar and pin it to a cork board where the pivot goes. Mylar is nice because it can be drawn on with a pencil and erased a hundred times until I like the blade. Be sure to draw the spring on the paper too. The handle is in pencil too so it can be changed here and there too if needed.
With the mylar blade drawn it can be pivoted open and closed. Pay close attention to the tang. Actually 99% of making a slipjoint is all about the tang. If the tang is wrong nothing works believe me. The stops are everything and make the differance if the top of the knife is flush in open, half stop and closed position. Its all in the tang. A half stop isnt even needed but I like them, some people dont.
When it looks good on paper and mylar simply photocopy the parts, cut the blade, spring and liner out and glue them to the 416 stainless sheet. I use .040" for most all liners. bandsaw out the parts and grind to the lines. Leave them a little oversized and file them for a closer fit. I have the holes marked and drilled too.
I made this dial indicator fixture and it is neccesary to adjust the tang for the flush fit on top. I use a 3/32" hole and hardened pins. Mount the liners and drill the aluminum fixture for the liners and pin them to the instument. The temperary sheet metal blade and spring too. Dont worry about the pre-bend in the spring yet, we will do that later.
Rotate the template blade and file away material that isnt needed until the blade, spring and liner all work together. The tang needs to be very close to perfect in all three positions and the tip needs to be where it belongs. If you make a perfect template you can duplicate it with a perfect blade so it pays to work on the stainless template until it works. The dial indicator needs to be at "zero" in all three positions so start with the blade open first and zero the needle. Make sure the overall profile looks good and matches the original drawing otherwise the tip is too high or too low. trim the spring tip and the tang stop now.
Next rotate the blade to the half stop and shorten the tang until you get about .010" more than zero and finally close the blade. The dial indicator needs to also be higher than zero. Really hard for me to explain but when the time comes you will see why its so important for the half stop and the closed positions both to have a higher reading than zero.
I'm hoping these pictures clear up some questions.
Last edited: