Tutorial on Kit Modification

Steven Janik

SUPERMOD & AWARDS BOSS
This is gonna fall into two categories so it may get switched to Custom Modification Forum.

I was recently given a "BULLSHARK" framelock folder kit by Jonathon of Custom Knife Kits so I thought I would see what could be done with it. There have been questions about kits before on this forum and by no means am I trying to push this over as a custom built knife, BUT if you are new to folders or just starting out and have limited equiptment and funds this is a great way to start . I used this one simply as a platform for this tutorial and will keep it in my pack or give it to charity or some kid. I'm open to suggestions but will not adopt any of you. (unless of course you have good gardening skills, a cnc mill, a great place to hunt or just a lot of disposable income and will buy shoes and purses for my wife.)

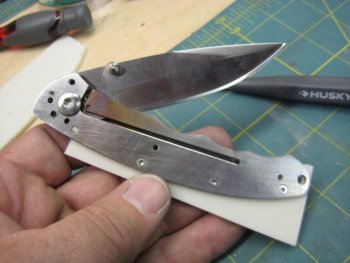
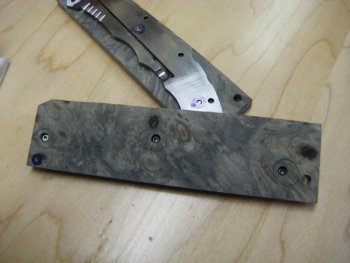
I was amazed at the quality of this kit for the money, under $30.00. I love liner locks and full scales so I did a full on conversion as follows.......

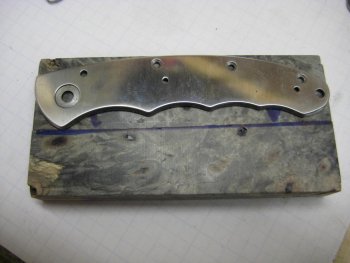
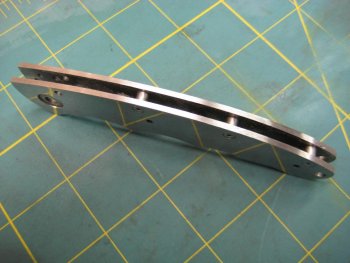
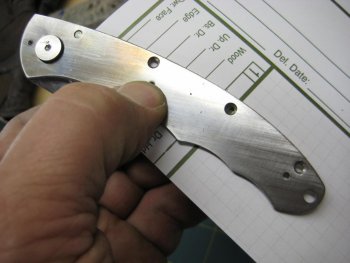
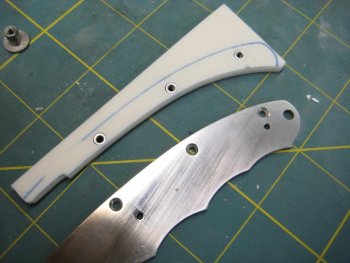
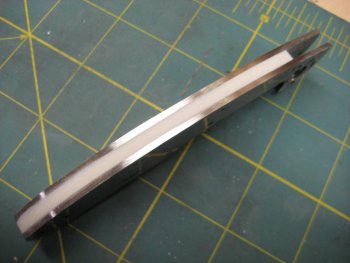
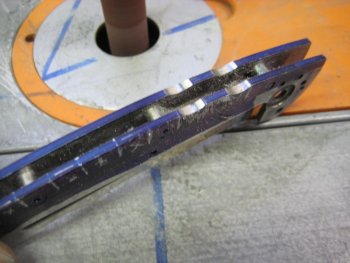
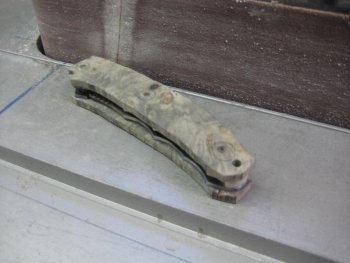
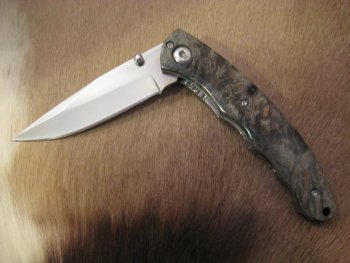
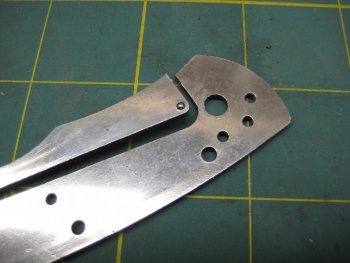
This is the kit as shipped with radiused edge frames and textured G10 half scales.
attachment.php

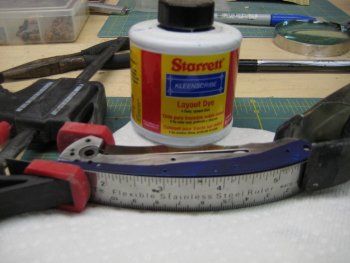
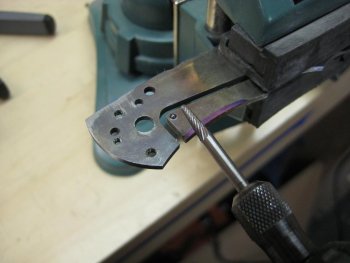
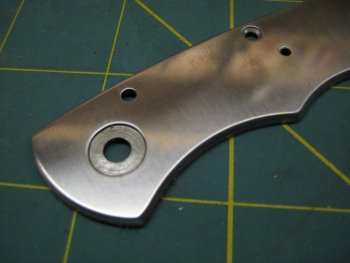
The detent ball is already in place when shipped.
attachment.php

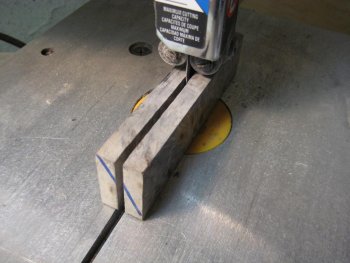
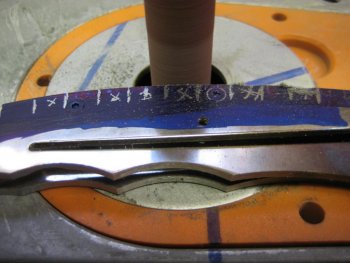
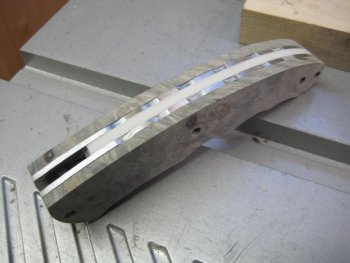
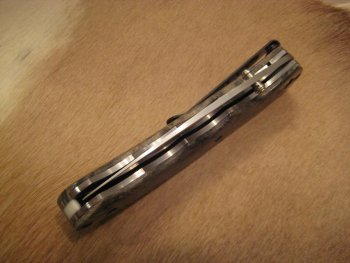
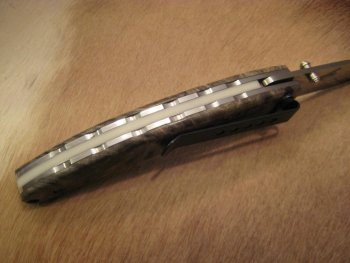
This shows the radiused frame edges which I remove later on to accept full scales.
attachment.php

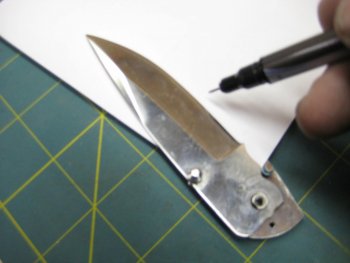
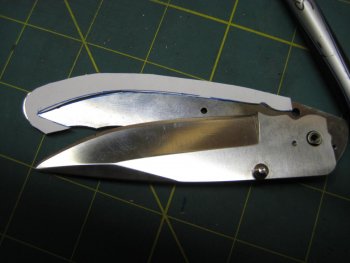
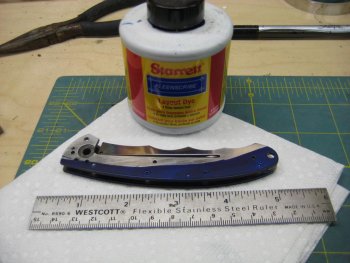
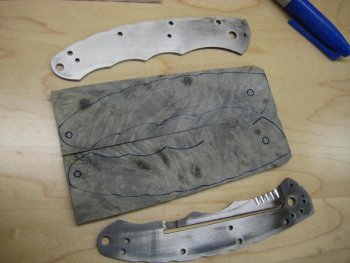
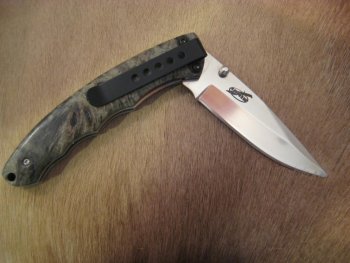
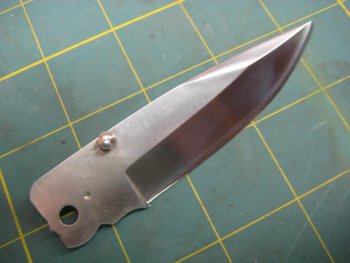
This is the blade as shipped with thumb stud attached and already pocket drilled for detent ball.
attachment.php

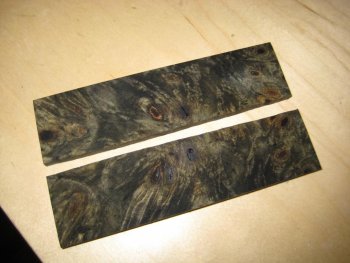
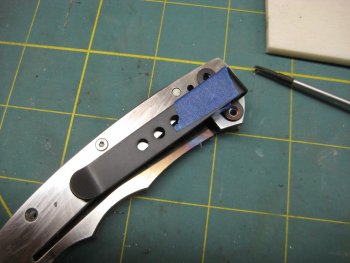
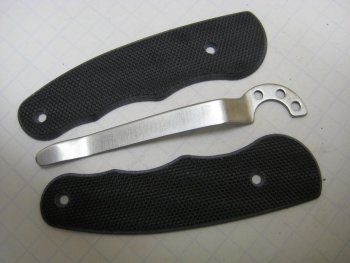
These are the half scales and clip as supplied. I did not use these.
attachment.php
 

Attachments

  • kit 001.jpg
    kit 001.jpg
    87.4 KB · Views: 308
  • kit 002.jpg
    kit 002.jpg
    90.6 KB · Views: 295
  • kit 003.jpg
    kit 003.jpg
    86.6 KB · Views: 292
  • kit 004.jpg
    kit 004.jpg
    81.6 KB · Views: 295
  • kit 005.jpg
    kit 005.jpg
    88.3 KB · Views: 293
Last edited:
Kit Modification part #2

Stabilized Buckeye Burl block for scales.
attachment.php

Splitting block on band saw.
attachment.php

Scales sanded and wet to show color.
attachment.php

Liners assembled with back spacers and radii sanded off.
attachment.php

Here I'm bending a ruler along the centers of the existing pivot hole and threaded holes for half scales. I will locate, drill and tap a new hole at the front of the liner to accept the full length scales.
attachment.php
 

Attachments

  • kit 009.jpg
    kit 009.jpg
    86.7 KB · Views: 286
  • kit 014.jpg
    kit 014.jpg
    94.2 KB · Views: 293
  • kit 019.jpg
    kit 019.jpg
    83.2 KB · Views: 281
  • kit 021.jpg
    kit 021.jpg
    87 KB · Views: 284
  • kit 011.jpg
    kit 011.jpg
    94.6 KB · Views: 289
Kit Modification #3

Drilling for the new hole at the front of the liner and for the clip. This is an extra drill bit that is not in my index so it is marked with tape to identify size and number. Pretty smart, huh. These liners are hardened so if you are going to drill and tap any new holes you can nock the hardness out with a regular propane torch. I just held it in vise grips and heated to a dull red glow just on the end to be drilled and let it cool slowly. It was still a little tuff but TiN bit cut through it. Tap very slowly and break your chips every quarter turn.
attachment.php

Locating the new pocket clip. I like to have it up high for a low profile carry.
attachment.php

Tapping a hole the old fashioned way.
attachment.php

Here I slide the pivot through and set the blade on the squeeze a piece of paper between the blade and liner and trace both sides.
attachment.php

I'm going to make a full back spine out of bone colored Corian and this will be my template.
attachment.php
 

Attachments

  • kit 022.jpg
    kit 022.jpg
    87 KB · Views: 281
  • kit 024.jpg
    kit 024.jpg
    88.7 KB · Views: 276
  • kit 026.jpg
    kit 026.jpg
    83.4 KB · Views: 276
  • kit 028.jpg
    kit 028.jpg
    80.6 KB · Views: 274
  • kit 029.jpg
    kit 029.jpg
    80.8 KB · Views: 278
Last edited:
Kit Modification Part #4

This is the back spine pattern I traced on both sides of paper.
attachment.php

I have transferred the pattern onto Corian which I thickness sanded down to the same height as the original back spacers.
attachment.php

Smoothing out the inside edge of the new back spine.
attachment.php

Clamping the spine to the liner and locating the back spacer holes.
attachment.php

I am using the original back spacers because they are threaded. Remember this was a framelock and has countersunk holes from each side through what are going to be the liners for this new liner lock.
attachment.php
 

Attachments

  • kit 031.jpg
    kit 031.jpg
    86.1 KB · Views: 275
  • kit 032.jpg
    kit 032.jpg
    89.2 KB · Views: 269
  • kit 033.jpg
    kit 033.jpg
    84.3 KB · Views: 274
  • kit 035.jpg
    kit 035.jpg
    85.1 KB · Views: 270
  • kit 038.jpg
    kit 038.jpg
    86.4 KB · Views: 274
Kit Modification Part #5

New solid spine attached to liner.
attachment.php

View of spine in place from the bottom.
attachment.php

The spine touches the stop pin and is tightened up before sanding.
attachment.php

I've bandsawed the Corian close to the liners and bring it down to size on side sander.
attachment.php

First look at sanded spine and liners. Now removing the radius at the frame/liners starts to make more sense.
attachment.php
 

Attachments

  • kit 042.jpg
    kit 042.jpg
    81.7 KB · Views: 261
  • kit 043.jpg
    kit 043.jpg
    85 KB · Views: 256
  • kit 045.jpg
    kit 045.jpg
    84.9 KB · Views: 254
  • kit 047.jpg
    kit 047.jpg
    83.9 KB · Views: 258
  • kit 048.jpg
    kit 048.jpg
    81.9 KB · Views: 263
Kit Modification Part #6

I'm gonna layout some basic "filework" on liners. As you will see this is not done with files this time but is a very basic way to get some texture on the back of the knife. I wouldn't sell this to anyone as "Hand Filed".
attachment.php

Next I bend a steel rule along the spine and layout a simple pattern.
attachment.php

I use a 1/2" diameter drum on my oscillating spindle sander to make the detents in the liners.
attachment.php

A quick look at the pattern. You have to make sure that your detents don't line up with back spacer screws or you will grind into them and see them forever.
attachment.php

Putting some non slip thumb grooves in lock bar with dremel and carbide cutter. I torch colored the lock bar with a small butane torch, a few seconds turns a nice wheat color.
attachment.php
 

Attachments

  • kit 050.jpg
    kit 050.jpg
    89.6 KB · Views: 259
  • kit 051.jpg
    kit 051.jpg
    84 KB · Views: 256
  • kit 052.jpg
    kit 052.jpg
    87.2 KB · Views: 262
  • kit 053.jpg
    kit 053.jpg
    83.3 KB · Views: 261
  • kit 055.jpg
    kit 055.jpg
    84.5 KB · Views: 255
Kit Modification Part #7

I lay the liners out on the scales and get ready to drill some holes.
attachment.php

The holes are laid out, drilled through and countered bored for the recessed button head screws.
attachment.php

The scales are attached and ready to be sanded down close to the liners. I always use my little 9" badsaw first to get everything close before sanding.
attachment.php

This shows the spine sanded and now you can see how the little bit of added texture on the sanded detents helps the overall look.
attachment.php

And then BLAMMO!!!! Just when you think your cooking along you notice a little high spot in the backside of one of the liners. Heck, that's easy, I'll just tough it on the side sander and it flies out of your hand at 9000mph and breaks in half. But have no fear, Super Glue is here. There was nothing missing so I glued it up and continued on.
attachment.php
 

Attachments

  • kit 060.jpg
    kit 060.jpg
    90.5 KB · Views: 244
  • kit 063.jpg
    kit 063.jpg
    92.8 KB · Views: 242
  • kit 066.jpg
    kit 066.jpg
    88.5 KB · Views: 243
  • kit 067.jpg
    kit 067.jpg
    84.7 KB · Views: 253
  • kit 072.jpg
    kit 072.jpg
    87.2 KB · Views: 245
Kit Modification Part #8

A little freehand sanding and it's starting to look like something.
attachment.php

Final sanding with an orbital palm sander and a quick buff with white compound.
attachment.php

Finished clip side.
attachment.php

View of alignment from the bottom.
attachment.php

Finished look along the spine. It all came together nicely.
attachment.php


All in all the total time was about 6 hours and that included the screaming and jumping up and down when I broke the scale.

For a way to get started into folders, this kit can't be beat. The quality is exceptional, the lockup is sweet and there is no wobble and I left it loose enough to flick open with little effort.

Please feel free to ask any questions.
Have fun and be safe.

Regards,
Steve
 

Attachments

  • kit 074.jpg
    kit 074.jpg
    90.6 KB · Views: 260
  • kit 076.jpg
    kit 076.jpg
    89.9 KB · Views: 269
  • kit 077.jpg
    kit 077.jpg
    94.2 KB · Views: 268
  • kit 081.jpg
    kit 081.jpg
    91.8 KB · Views: 258
  • kit 082.jpg
    kit 082.jpg
    88.9 KB · Views: 269
Beautiful work. One question if I may. You used a propane torch to knock some of the hardness out of it to allow for an easier re-tap. Did you have to re-heat treat or does it not matter that you reduced the hardenss a little?

I have an EDC knife that I love but I would rather it carry tip up on the left but there are no factory provisions to mount the clip that way. I have wanted to tap new holes to allow for this but was scared that the liner was heat treated so I did not want to screw anything up trying.
 
heat treat

jdkno,
I had no metallurgical info on these liners so I was kind of shooting blindly by torching the liners. But it also wasn't a critical spot so I wasn't too worried about softening up the ends. I did, however torch the lockbar and quench it in water to keep good tension and return at lock up.
The geometry of this liner, backspacer and pivot location combination seems to be self supporting. The only torque in the blade, which is almost non-existant, is due to the nylon washers which I will replace.

Is you are looking to drill and tap a clip into an existing liner, This will work but you have to be able and willing to clean up the finish due to discoloration. This may lead to refitting scales, etc. Which is a whole new can of worms.

Hope this helps.

Regards,
Steve
 
Last edited:
Hey Steve, great tutorial. You made it look easy. I am going to have to try a kit to get started on folders because I don't know squat about them. Denny
 
That was a great tutorial, Steve. After seeing this I think I will try a kit before I get into making folders just to see what I'm getting in to.
Thanks!!

Larry
 
Back
Top