pattern welded grosse messer wip

kevin - the professor

Well-Known Member
Greetings Everyone,
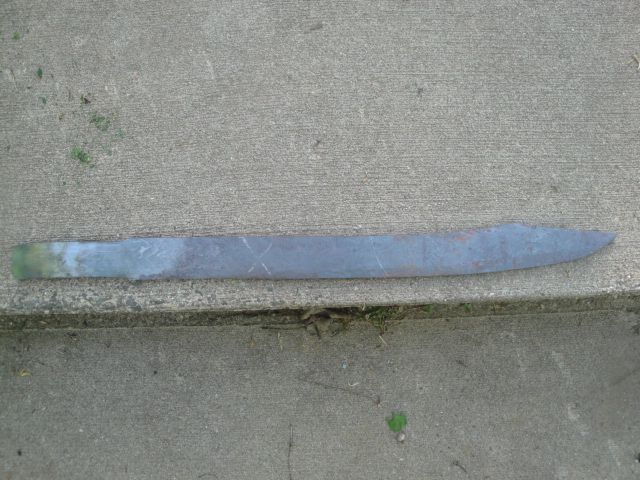
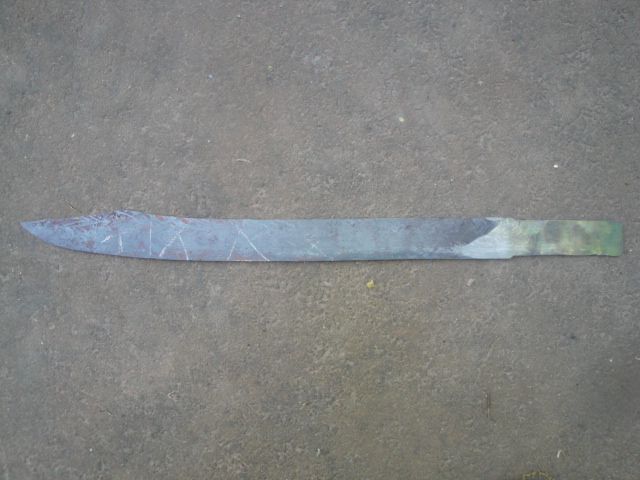
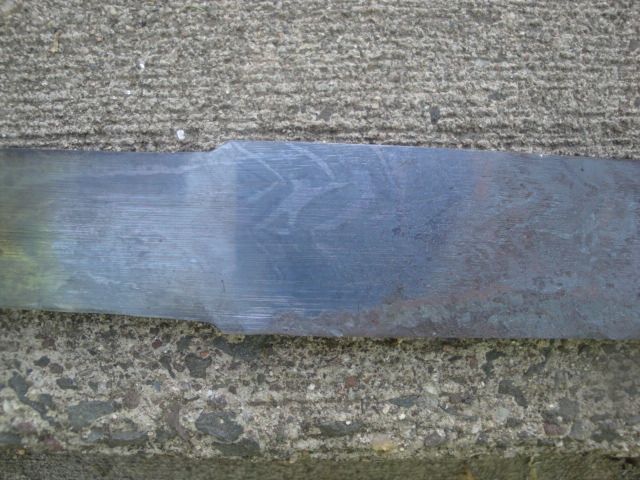
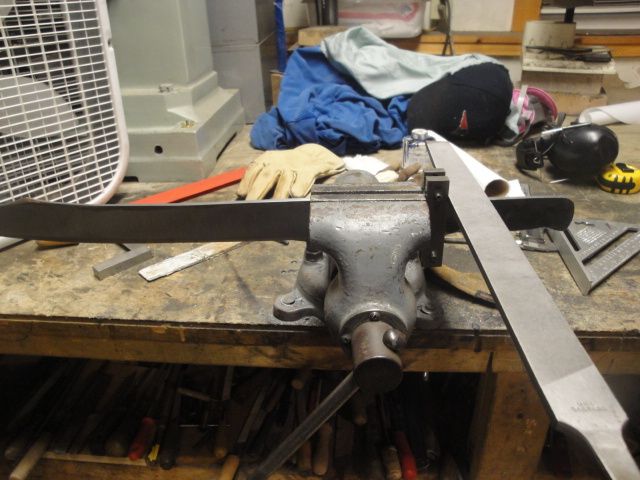
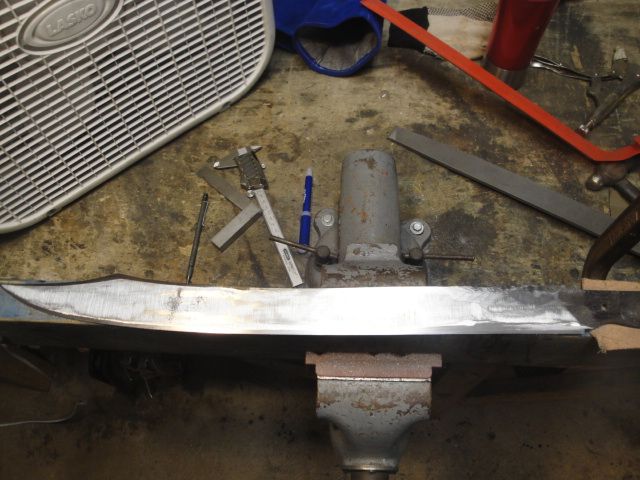
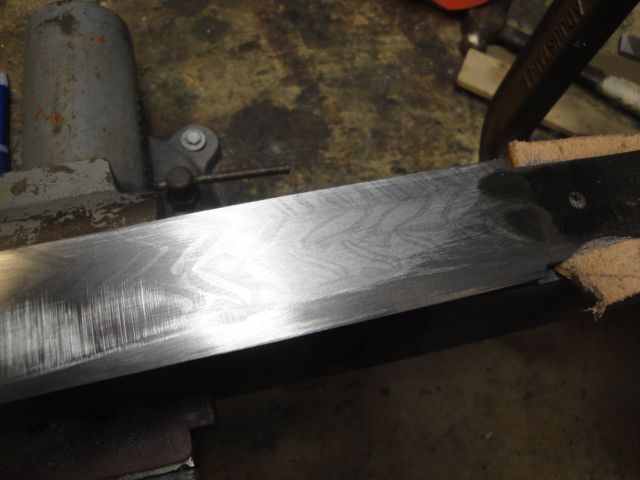
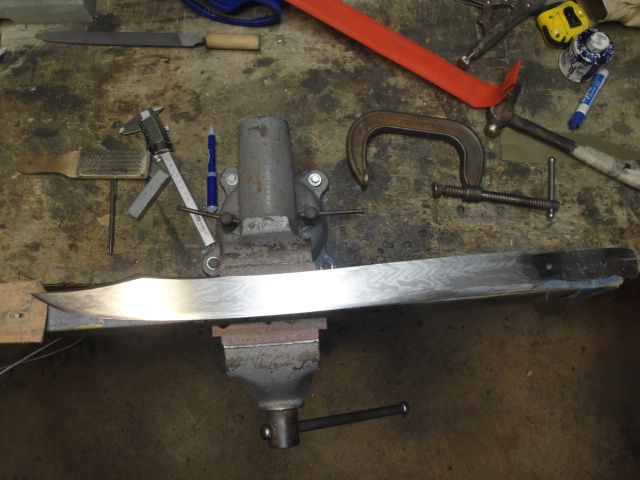
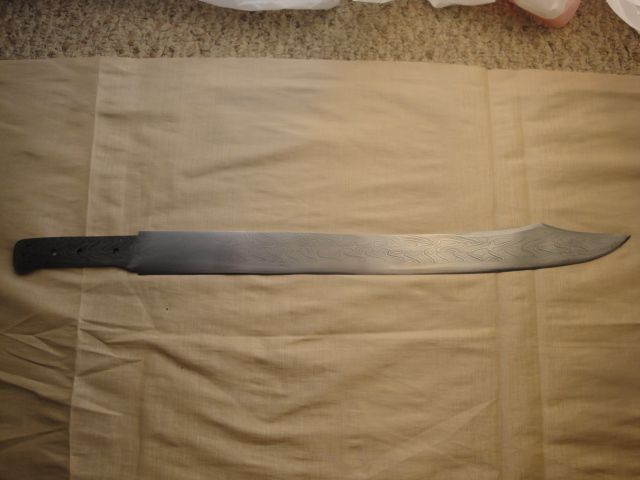
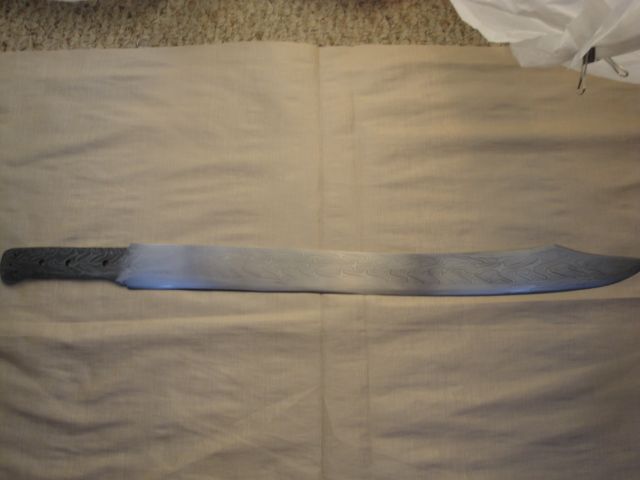
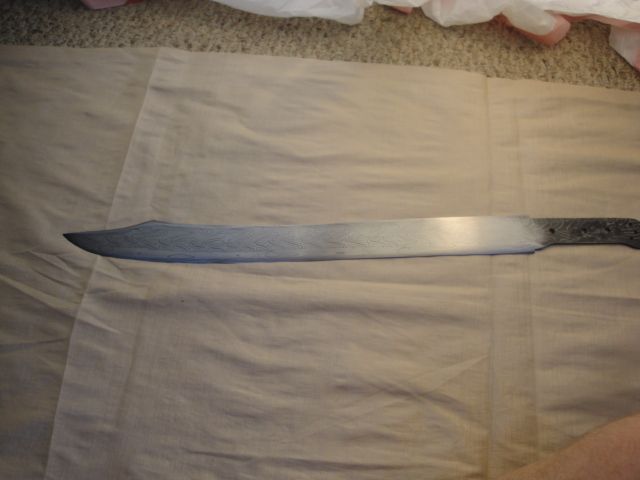
this is truly a work-in-progress. However, it has made it through heat treatment, so I think it is safe to show the progress thus far. I am really enjoying these steels. They weld together well, have good contrast, and have similar heat treating characteristics.

Plus, they are quite tough and hold a good edge. I don't have metallographic capacity, or even a Rockwell tester, so I admit my testing is limited. Still, they seem to work well together, though they require some special treatment due to a tendency to air harden a bit coming out of the forge. There are some additional heating and cycling requirements when forging compared to the simpler steels. But, I think they are worth it.

Here goes:
DSC04099.jpg


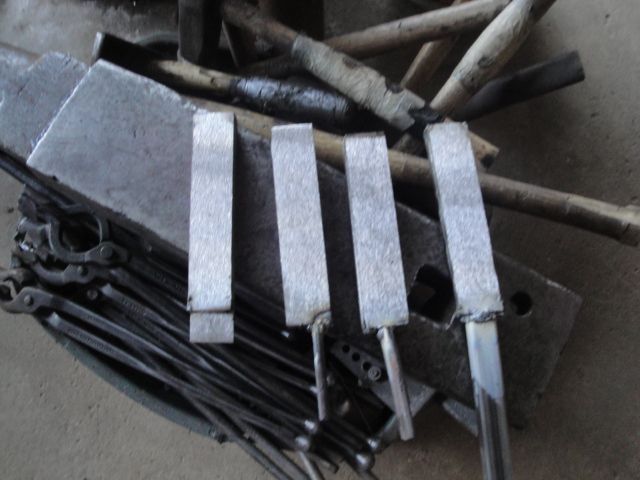
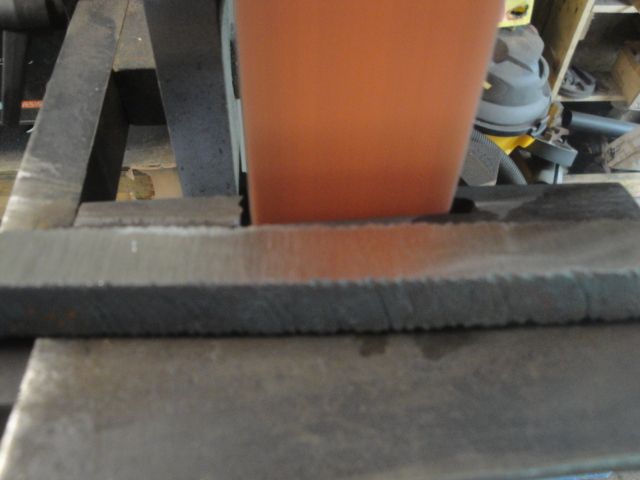
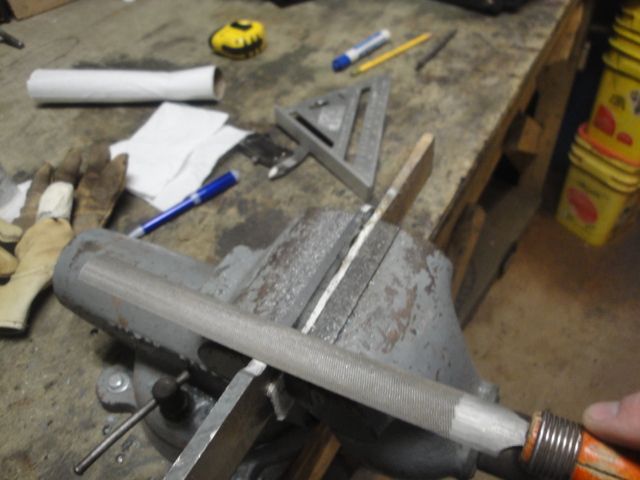
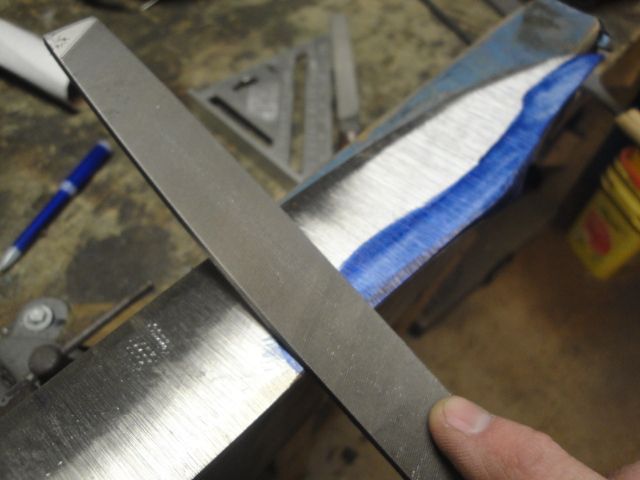
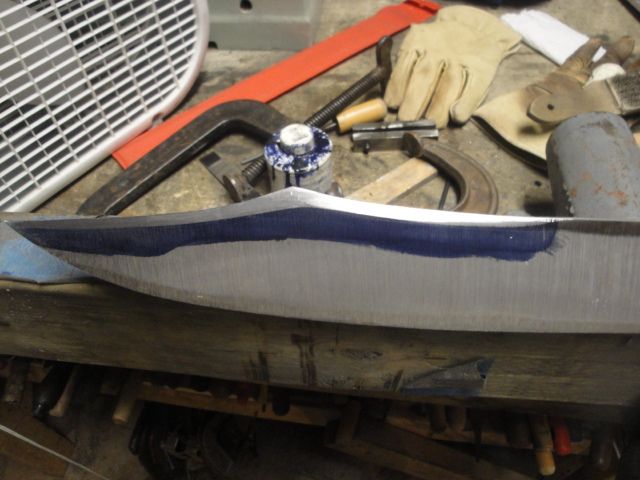
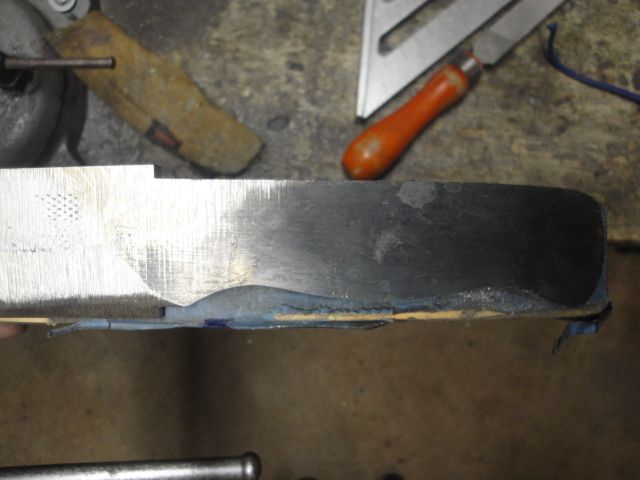
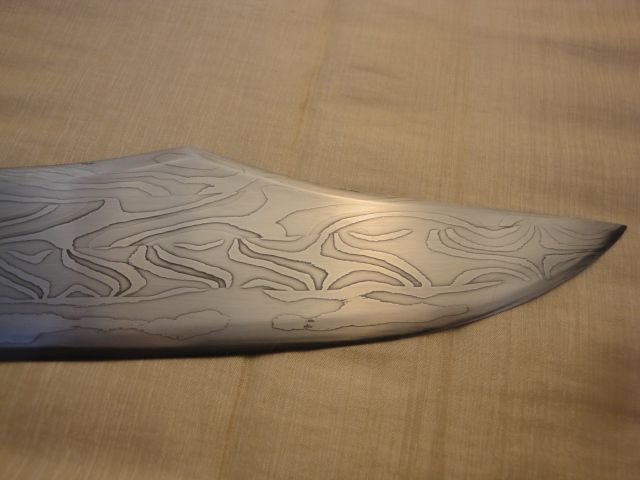
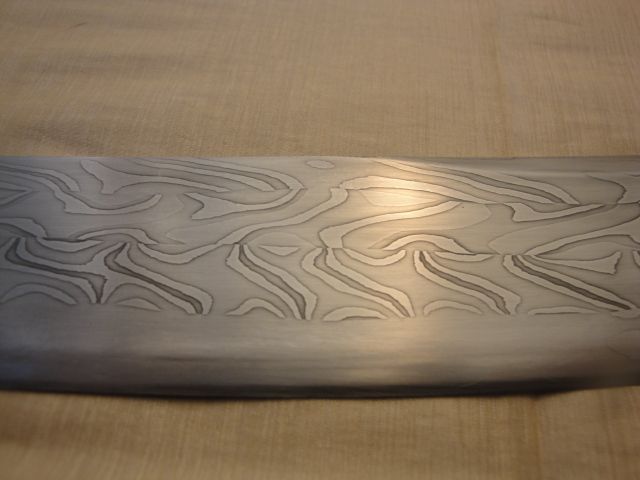
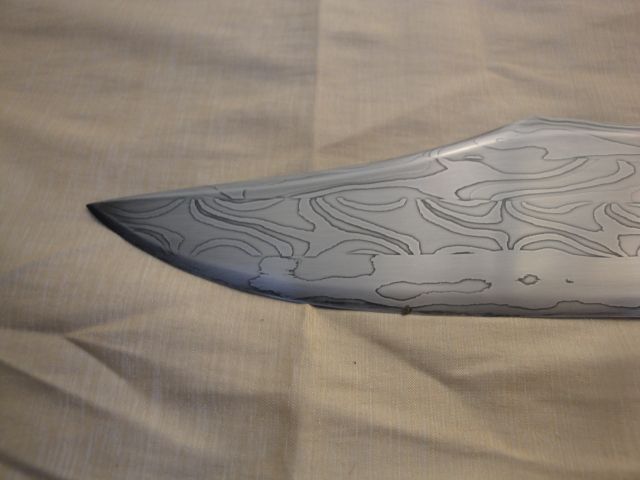
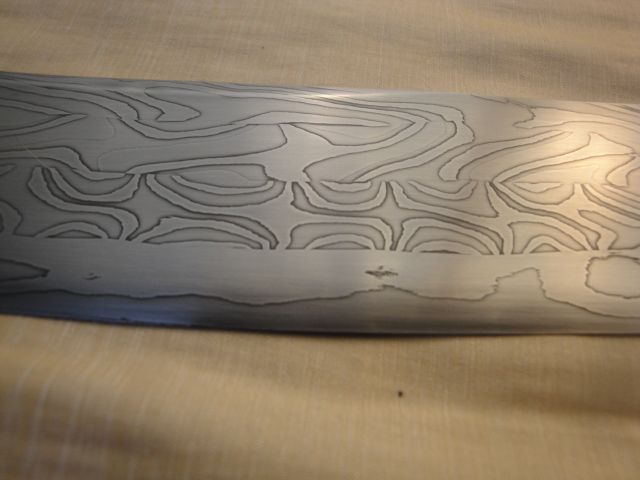
these are the bars stacked and ready to be forge welded. No flux was used to weld these. There are two that are thicker stacks than the other two. These will be longer, and be the spine of the blade, and have more 15n20. The two bars nearer the edge are shorter and have less 15n20. The overall blade is mostly 80crv2, then o1, then 15n20 (about 3.5:2:1)

DSC04103-1.jpg


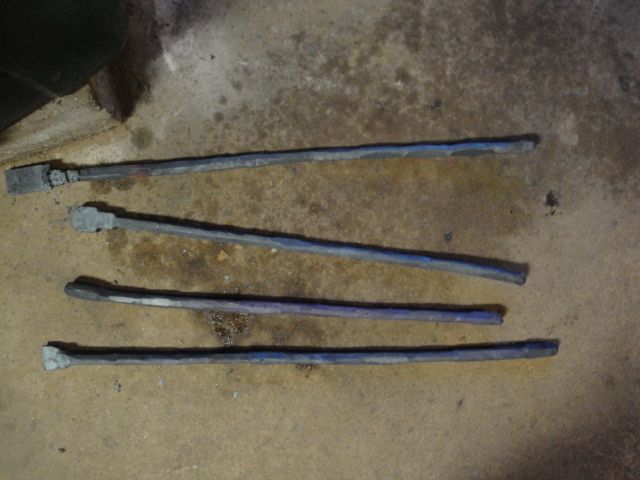
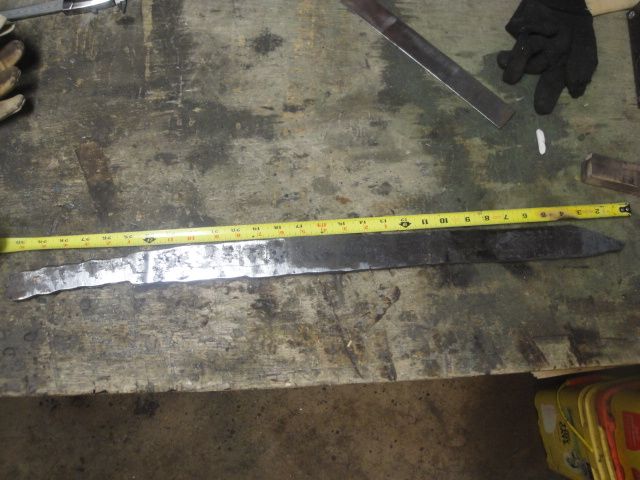
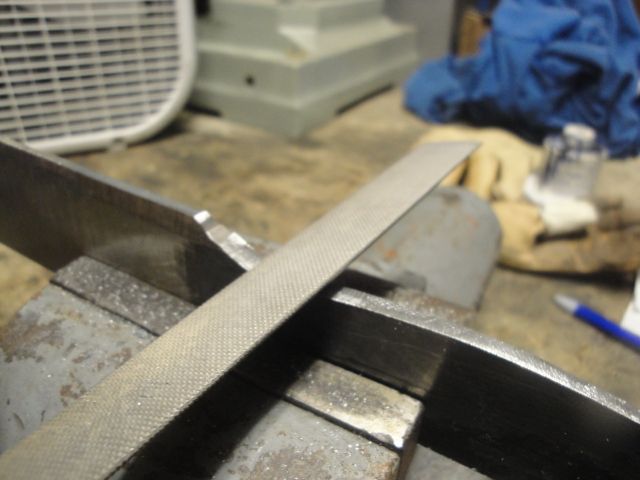
Welded and drawn, shaped into octagons for twisting. They are about .75" diameter.

DSC04104-1.jpg


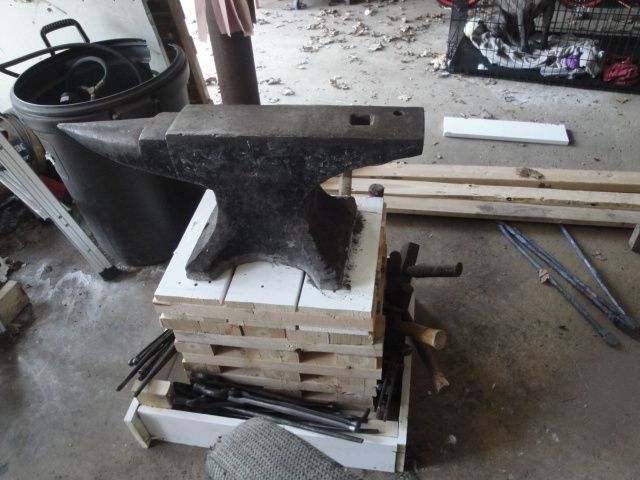
New anvil stand needed a pic. Compare to the plastic bin full of dirt that the anvil was in. This can be seen in the first photo. I took time out to get my anvil the right height and well-supported before continuing the project. Cool, huh?

DSC04105.jpg


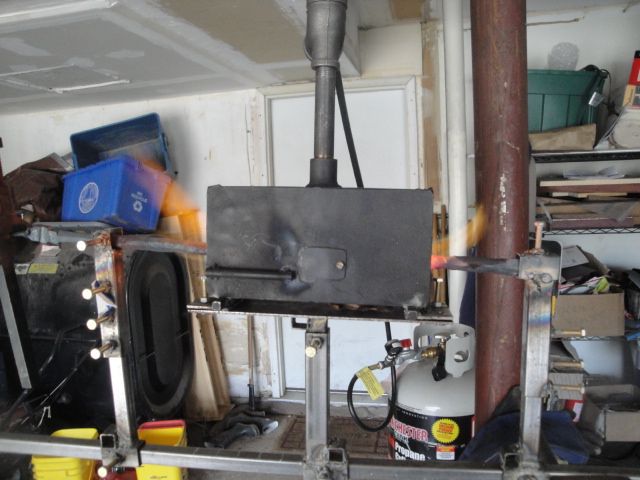
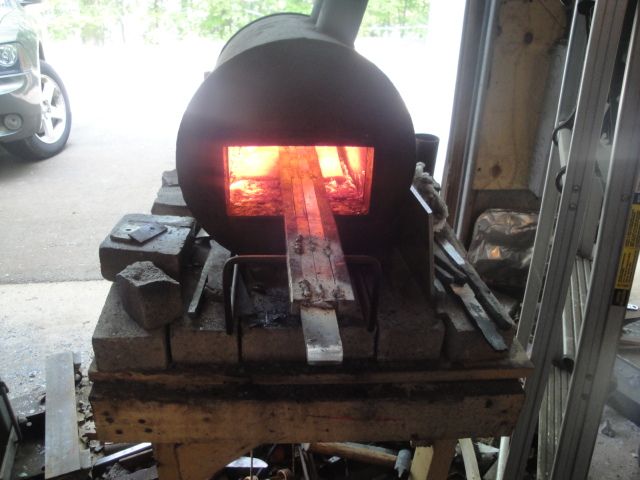
Gettin' down to business with the twist-o-matic 3000! This is something I made (and you should make one, too!). The little forge will reach a serious welding heat for about 1.5" or so. It just sips propane, too. I have it mounted on a post-and-rail assembly (parts = two nearly identical square tubes, one fits just over the other, box of nuts, box of bolts, forge, mild steel plate for mounting forge to post, and one firebrick forge).

Bring the bar up to welding heat, twist, slide the forge down the rail 1" (that is what the chalk marks are for, to get even twists). Repeat. It is dead simple, and you can get tight twists that are structurally sound. I think that I am really welding while twisting. You really should make one of these!

DSC04106.jpg


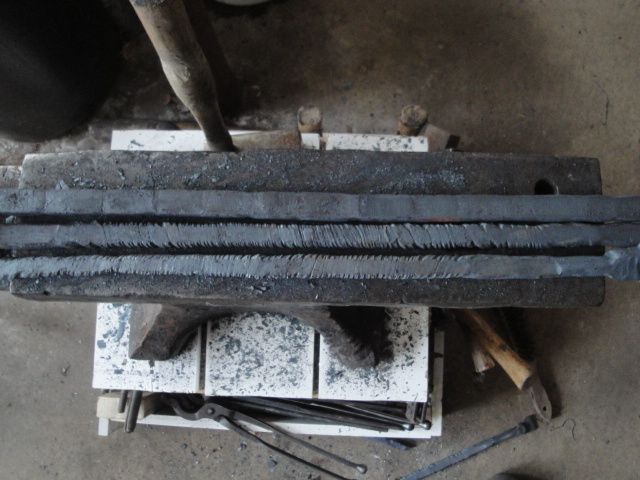
These are actually bars from a bowie knife project, but they look almost the same as the bars from the current project. Only difference is that I cut the end off of one of the bars in the bowie set, and the ones for the messer are a little thicker. But, I didn't get pics of them at this point, so the bowie set will have to do.

thanks for looking. I hope you enjoy the ride. Wish me luck.
 
Ok, to continue this saga...

DSC04112.jpg


cleaning and squaring. The bars must have a rectangular cross-section, and be flat, so they can fit together for the next weld. This is crucial.

DSC04114.jpg


Into the forge for welding, with temporary handle. I had to use flux to weld these together. I can only get away without flux when the length of the weld is short enough to bring the whole thing to heat, inside the forge, and set it all in one pass.

DSC04115.jpg


Welded and drawn to length. Some distal taper set, too.

DSC04118.jpg


mostly profiled (there are more refinements after this, especially in profile taper).

DSC04121.jpg


DSC04119.jpg


a sneak-peek to suggest some of the pattern.

still more to come!
 
still working on it.

DSC04122.jpg


I think that files are the greatest tool ever invented. You will see a definite trend to this series of pics. Here, I am filing the transition from blade to handle that was begun with a 2" wheel, and drawfiling tang.

This is a full-tang shortsword.

DSC04123.jpg


Here I am using a half round file to shape the transition.

DSC04124.jpg


drawfiling the spine

DSC04125.jpg


file guide to get transition just right. The shoulders will sit very deeply within the hilt, so that you will be able to see them from beneath.

Not like a sword hilt.

DSC04126.jpg


false-edge. Push file to establish, drawfile to refine

DSC04129.jpg


DSC04130.jpg


I have done more profiling after this. what is not in the pic is that there is some profile taper to about 2" before the beginning of the false edge.

This thing is 1.6" wide at forte, tapers down to 1.4 something" just before upswing to widest point, which is 1.8"
 
OK, no new pics, but the blade has SURVIVED HEAT TREATMENT. It is straight, and in its second tempering.


After forging, I patiently straightened at just the dullest red heat, for a crazy number of cycles to get everything absolutely straight. Then, I did a stress relieve/spheroidal anneal in my kiln.

Followed that with grinding and drilling.


Then, 3 normalizations.

1600F

1475F

1390F


Then, to harden...

1480F quenched into plain veggie oil. (George Ezell suggested and I agreed, so I changed my quenchant out for this project. Nice, slow, cheap veggie oil)

There was NO distortion. Well, about 1mm on the handle. That was it. I was able to straighten before the martensite had set. By hand. (I interrupted the quench after 9 secs in veggie oil).


Tempering: 1 hr, 400F. 1 hr 470F 1hr 480F.


O1 and 80crv2 both have specs that suggest 300C for 55 RC. So, I am tempering at the equivalent of 250C for about 57 RC. Of course, I don't have a Rockwell tester, so this is all interpolation based upon data sheets.


I have to admit, I just follow the specs given by the people who make the steel (or at least industry specs). Of course, I test each blade before I send it out, but I am testing for big problems like hidden cracks and such. I can't tell the exact hardness of what I make, just a range. I bet almost everyone is in the same situation, whether or not they will admit it.


take care,

Kevin
 
I should start working on the hilt some time this weekend. I have to file and polish today!


Here is a pic post heat treatment (there was almost zero distortion in these steels). For a person used to water and clay, it was a relief to quench tool steel in veggie oil. No drama, really.

DSC04134.jpg

This is post heat treat, with 80 grit grinder marks to get the oil off before tempering. The first temper is into the kitchen oven at 405F while I wait for the kiln to cool down so I can do the hotter tempers.

This is the first time in a long time that I have been able to file an entire sword. what I mean is, with a Chinese sword with clay heat treatment, the edge and part of the body are too hard to file, while the back is springy and can be easily filed. This whole blade is pretty springy (though harder than the soft back on a clay heat treat), so I can file the whole thing pretty easily.

Working with this steel now, I can really see by comparison, what a tendency it had to air harden in thin sections. I couldn't cut it with a bandsaw, and could barely file it, just by taking it from the forge and setting it on the anvil. I had to cycle it down in temp to below critical in steps of heating and cooling if I wanted to be able to use my tools on it.

DSC04135.jpg


the beginning of drawfiling. You can see where the grinder marks are getting filed away. This was after less than a minute of work with a 14" @@@@@@@ file. IMPORTANT - buy your files from an industrial supply like McMaster-Carr and not Home Cheapo. You will get the same name on the product, but it will be far superior if you get it through the supply house. Same for Small Mart. Don't shop there for equipment for your shop, it will be second grade.

DSC04137.jpg

after about 3 or 4 minutes. You can see that this section is just about done. You can also see the pattern peeking meekly out of the steel. Real polish and etching will happen later.

Note: Belt grinders do not actually get things flat. First, there are the inevitable dips and peaks that come from accidentally digging the blade in or changing angles almost imperceptibly (the newer you are, the worse this will be, but it never goes away completely). Second, even if you are holding perfectly against the world's flattest platen, you still get the belt bunching up due to friction and cutting a little trough near the top of the cut. There will be a very small hollow to everything ground on a flat platen. You can't always see it, and you can get rid of it some by changing angles, but its there. Draw filing, or using a surface, or a disc grinder, will show this to you. It will also get rid of it!

The next best option, which is how I flatten full-tangs, is to use a magnet and press vertically against platen. This makes the bunching up of the belt only affect a small area. Then, you move the blade up and down some while grinding, and the area affected is negligible.

By the way - I realize that all of you who have been doing this for a couple of years or more (even a couple of decades) already knew all of this stuff. Forgive me. I am hoping that some of the newer folks can learn from this. I was hard-headed, and I read but ignored this sort of stuff in the beginning. It took a year of struggle before I realized that I should stop trying to re-invent the wheel and listen to those who have come before. If nothing else, I hope all of this typing on my part demonstrates that I have actually been paying attention to those kind people.

Thanks!

DSC04139.jpg

Here is where the blade stands at the end of Thursday. I hope to drawfile the other side today, and finish the false edges. maybe, maybe, begin polish. Oh joy, I get to polish something that won't have a shuangxue! This will be a lot simpler.

thanks for lookin'
kc
 
Hello Again,
I have finally managed to get this polished. I must say, the 80crv2 was really abrasion resistant. At least, compared to the W2, W1, and 1075 that I am used to.

This is the first twisted composite blade this large I have made in a long time, and the first one that wasn't a seax.

I am looking forward to making the hilt, because that is going to be the real challenge of this blade.

You can see in the pics, there aren't any weld flaws. The bars were created welding dry/no flux, while they were welded together using anhydrous borax.

You can also see that I drew the twists out to about double their original length, to make sure the welds were nice and strong.

I am excited about this project, and hope I do the blade justice.

DSC04151.jpg


DSC04153.jpg


DSC04156.jpg


DSC04157.jpg


DSC04159.jpg


DSC04162.jpg


DSC04163.jpg


thanks for looking,

Kevin
 
Kevin, (and now I know why you go by 'PROFESSOR')
Sitting here in absolute AWE! I have to wonder who among us are Masochist!?
You know, those that like to deliberately cause themselves extreme pain!

OK, I am too, but not to this extent! All that stuff aside, this is a phenomenal blade.
The complexities of it, I think, you made look like just any ole` body could pull it off!
When in actuality, it takes several years of experience, (years) of practice, and (at least Some) luck, there are
several more ingredients. All this said, to belay my point,
AWESOME JOB! BEAUTIFULLY DONE BLADE! Can NOT wait to see this finished!
I absolutely love the way the twist turned out!
Rex
 
Back
Top