
antigoth24
Well-Known Member
So recently I was talking to Luke Shearer when we were out at Cedarlore forge a couple of weeks ago. While looking at his beautiful wolf's tooth pattern seax we began to discuss the possibility of making a wolf's tooth pattern axe. After some discussion we thought that perhaps an easy way to go about it would be to try cutting the teeth in and then welding in a bit to expose it like highly controlled san mai. Obviously not historically accurate but a starting point to leading to further experimentation. So here we have it my first attempt at this idea, and while it was a complete failure it has definitely opened my mind to so potential other possibilities. So I thought I would share photos of my process and hopefully get everyone's input on ways to go about it to achieve the true wolf's tooth pattern.
P.S.
All of this work is done with a single 3 lb hammer and can be done by anyone with access to an anvil, tongs, forge, and materials.
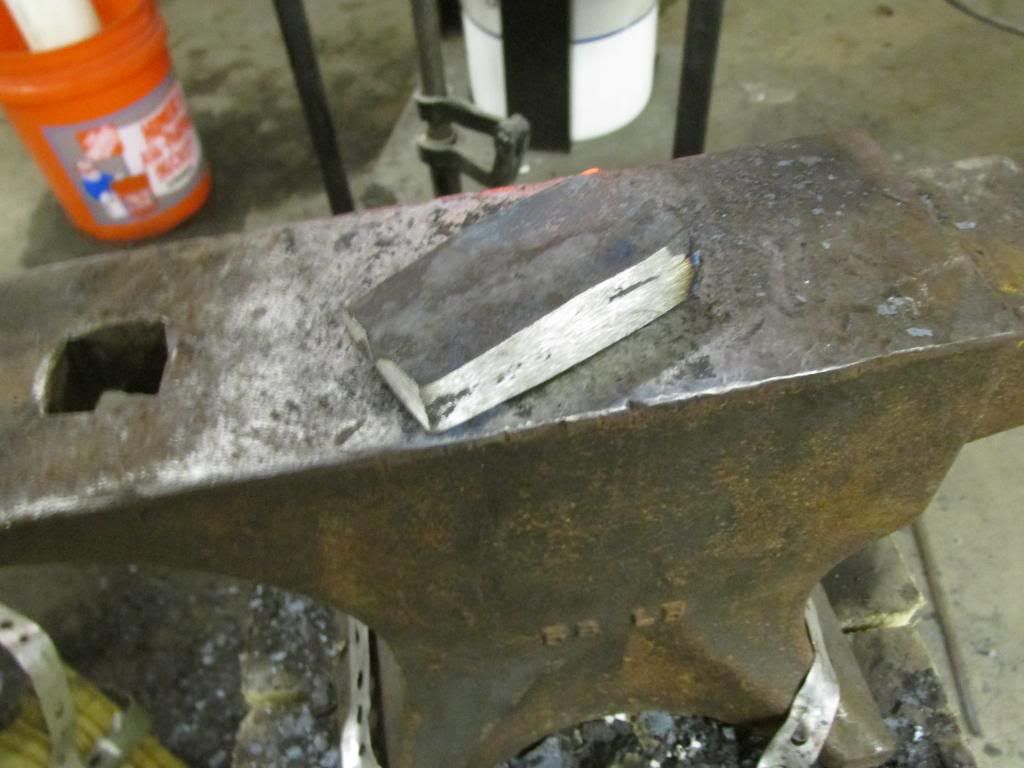
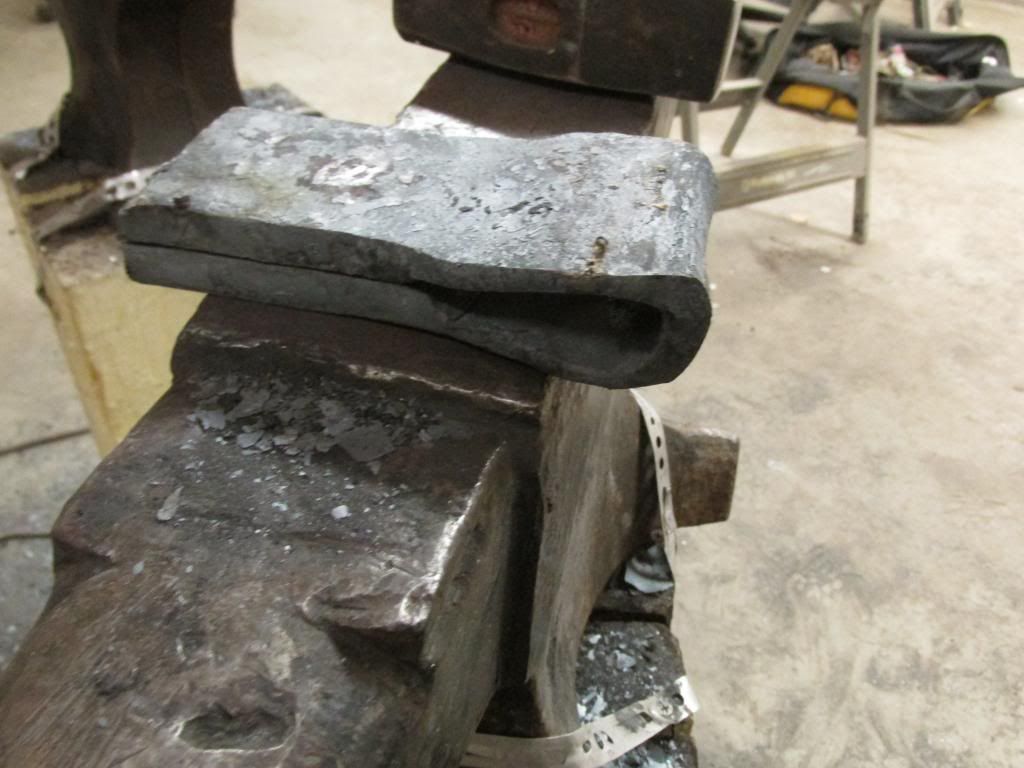
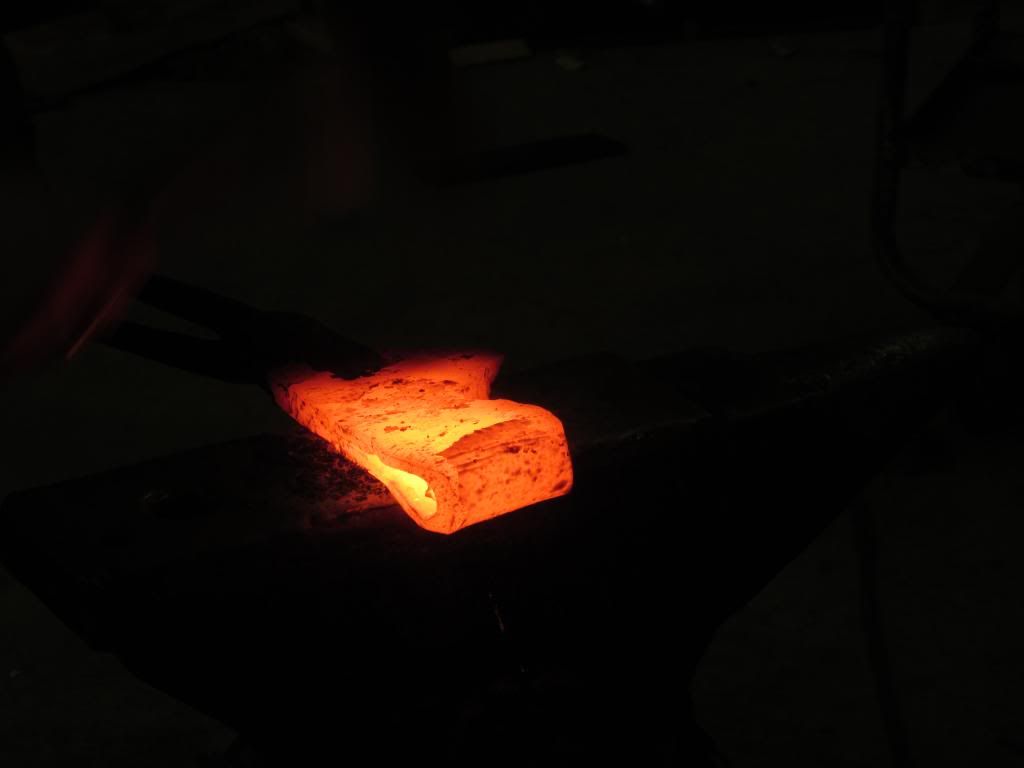
So I started out by welding a 16 layer billet of 1095 and 15N20 and flattening it to the dimensions of a bar of 1084 I had. I intended to wrap the billet around the 1084 to guarantee having a homogeneous edge since I was using such a low layer count in the edge. The dimension were about 1 1/2 inches wide by 1/4 inch thick and the 1084 was 1 1/2 inches wide by 3/16 inch thick. When folded and welded this resulted in an approximately 3/4 inch tick edge bit.

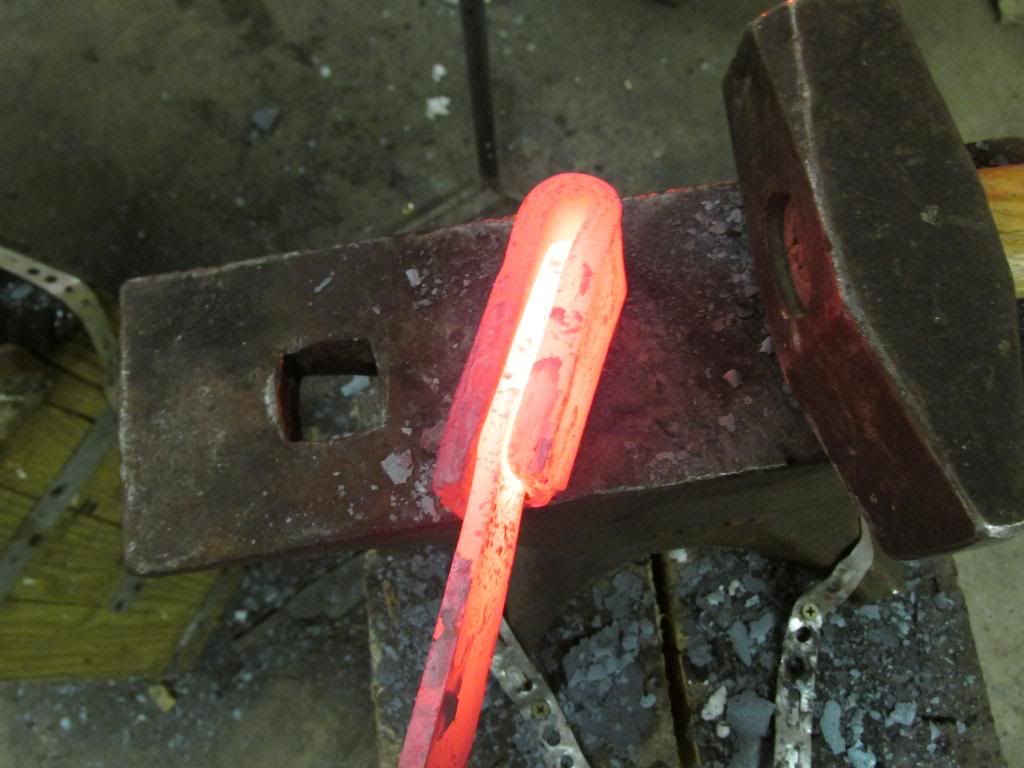
The edge bit after welding and some cleaning:
http://s1304.photobucket.com/user/scottishsmith24/media/IMG_1374_zps4af1e790.jpg.html
Next I started to prepare the axe head. Because it is a wrapped and welded axe I start by creating alternating steps to allow for thinner cheeks and a thicker back to the axe. The stock for this head was 1/2 inch thick by 2 inches wide mild steel.

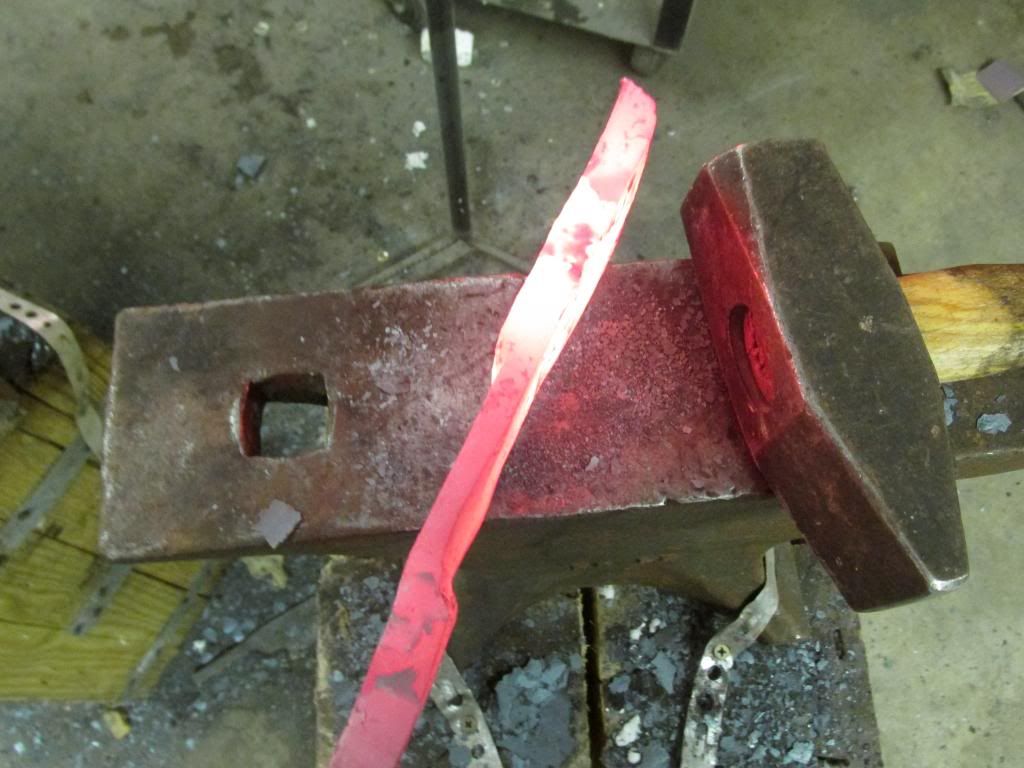
This is then bent in half and folded on it's self. If you make the ears the same size then it should line up:

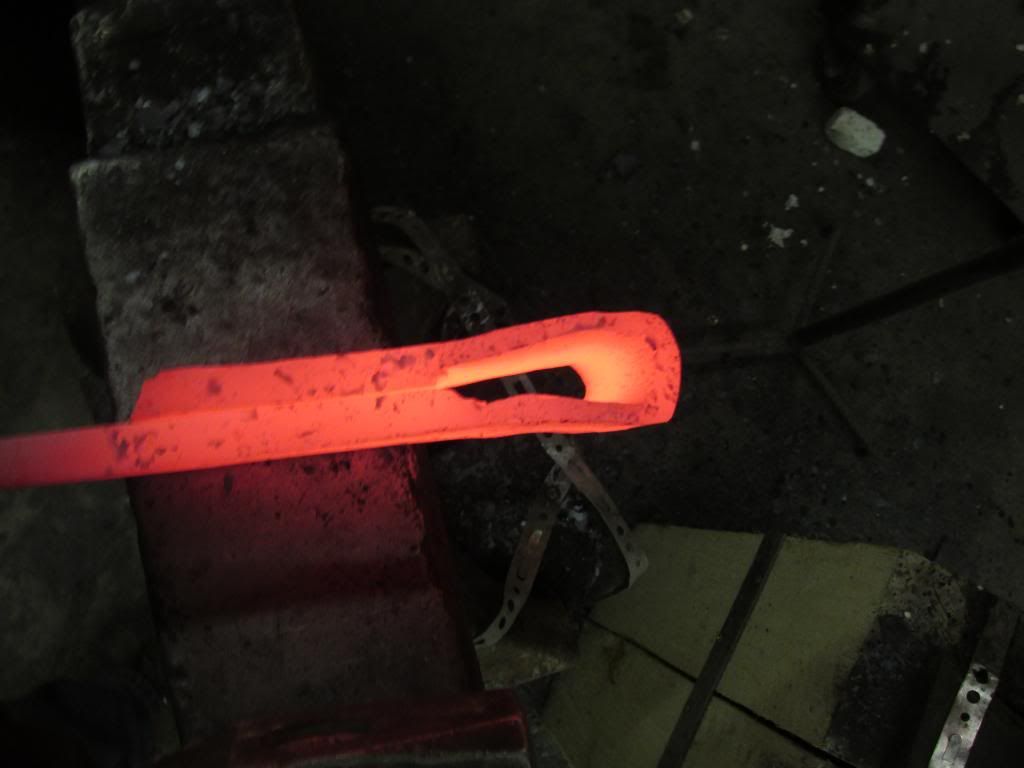
And the axe blank is then cut from the parent bar.
After that the teeth are cut in, this can be done with a hardy or a hot cut but I used an angle grinder for speeds sake.
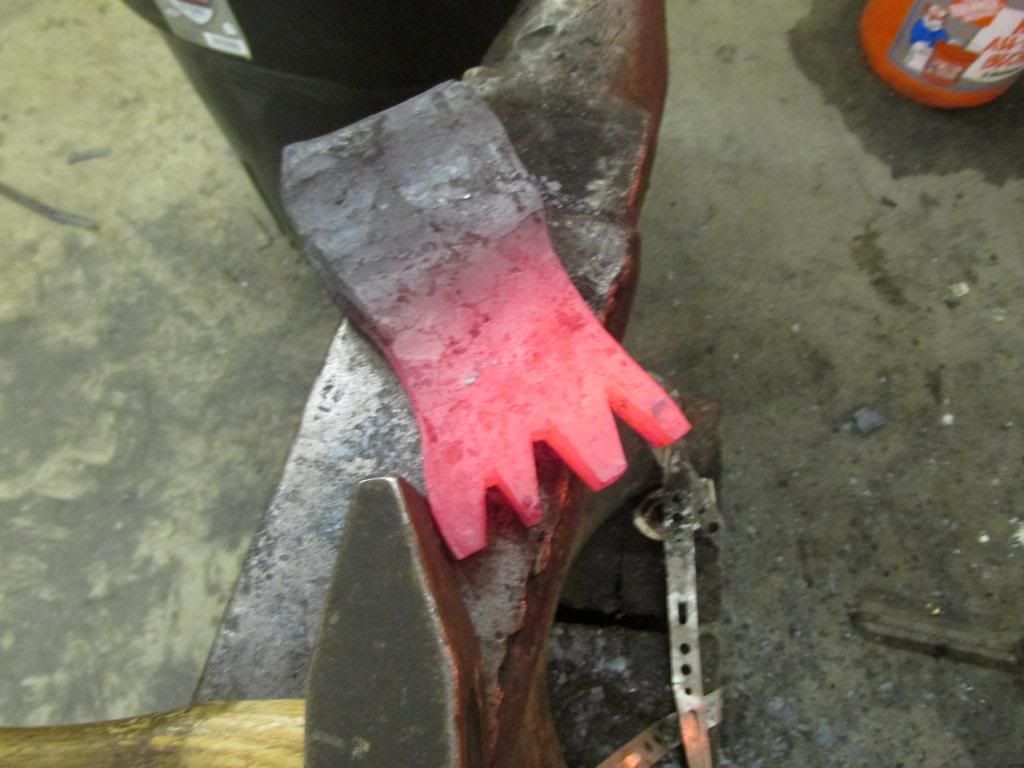
Note: this is all done pre-welding so that the bit can be inserted later.
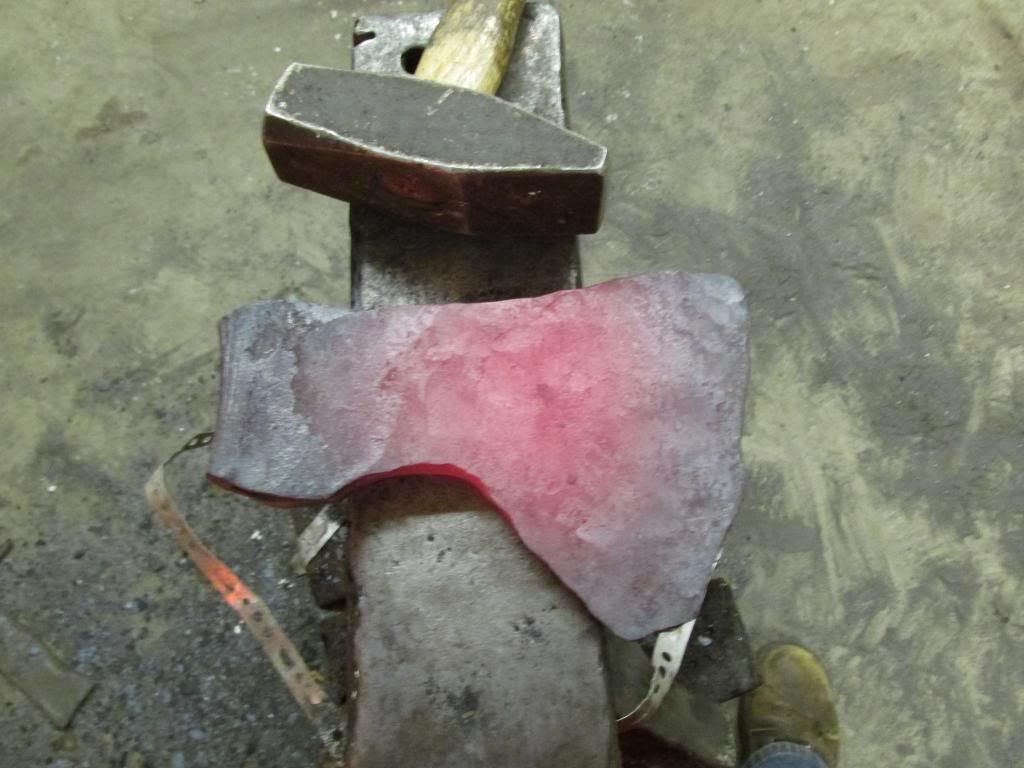
The teeth are then spread apart using a chisel.
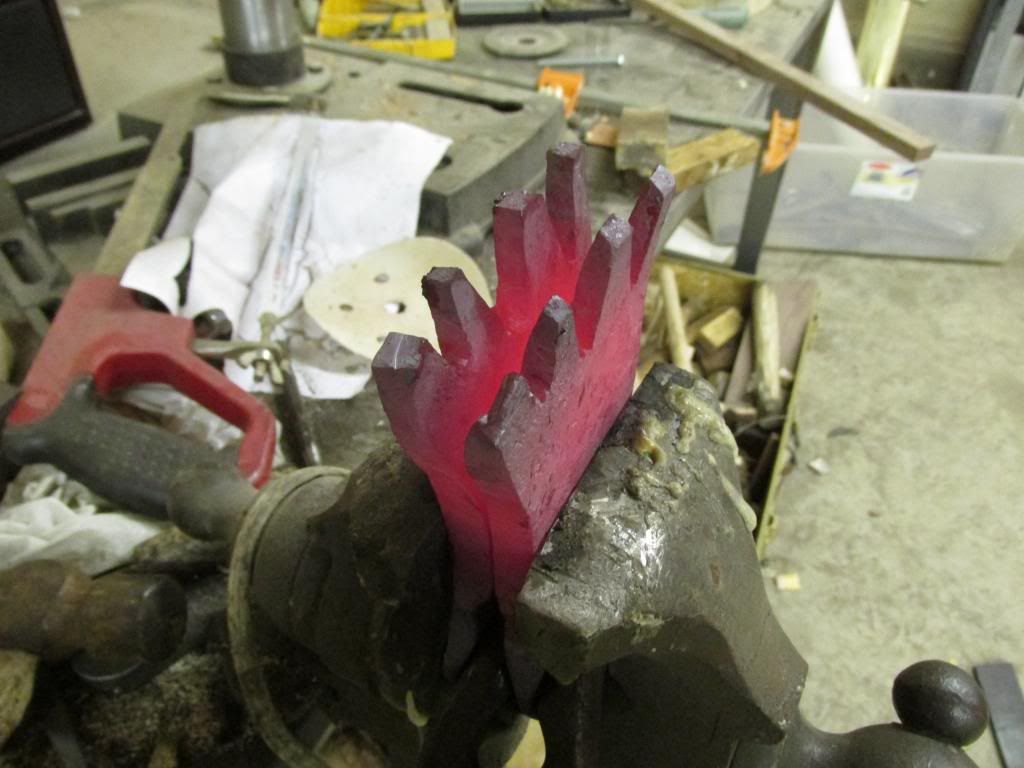
And the bit is inserted:
Unfortunately this was were I lost one of the teeth, but the rest went together well and the axe is spread and shaped.
http://s1304.photobucket.com/user/scottishsmith24/media/IMG_1385_zps7736a4d5.jpg.html
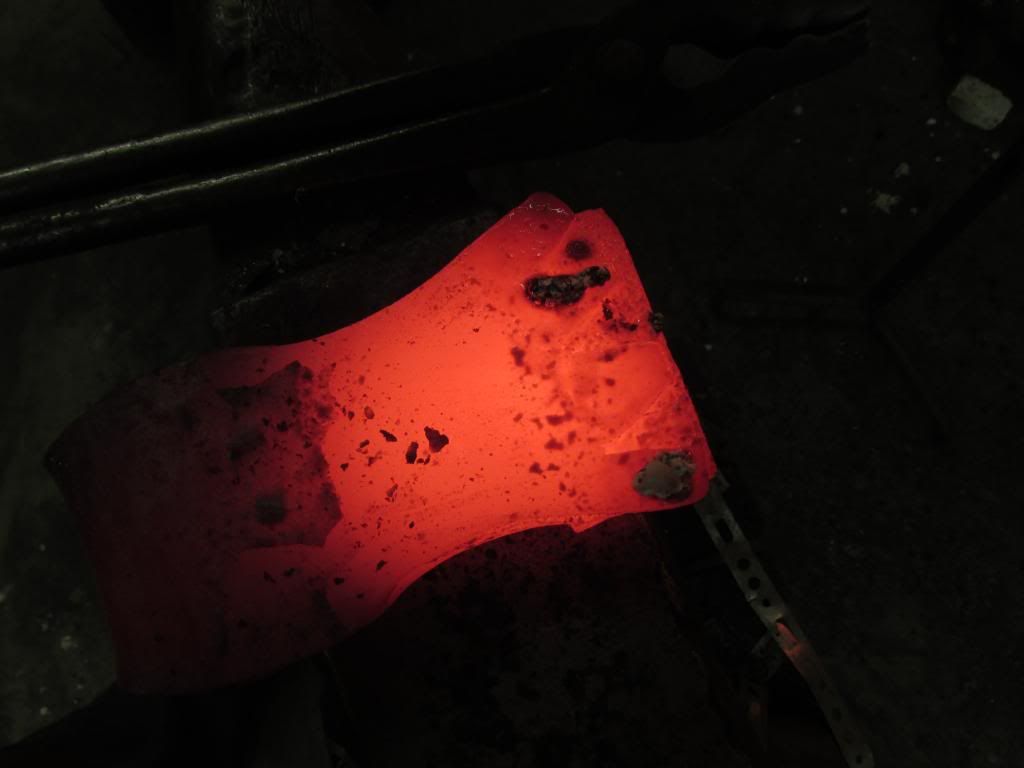
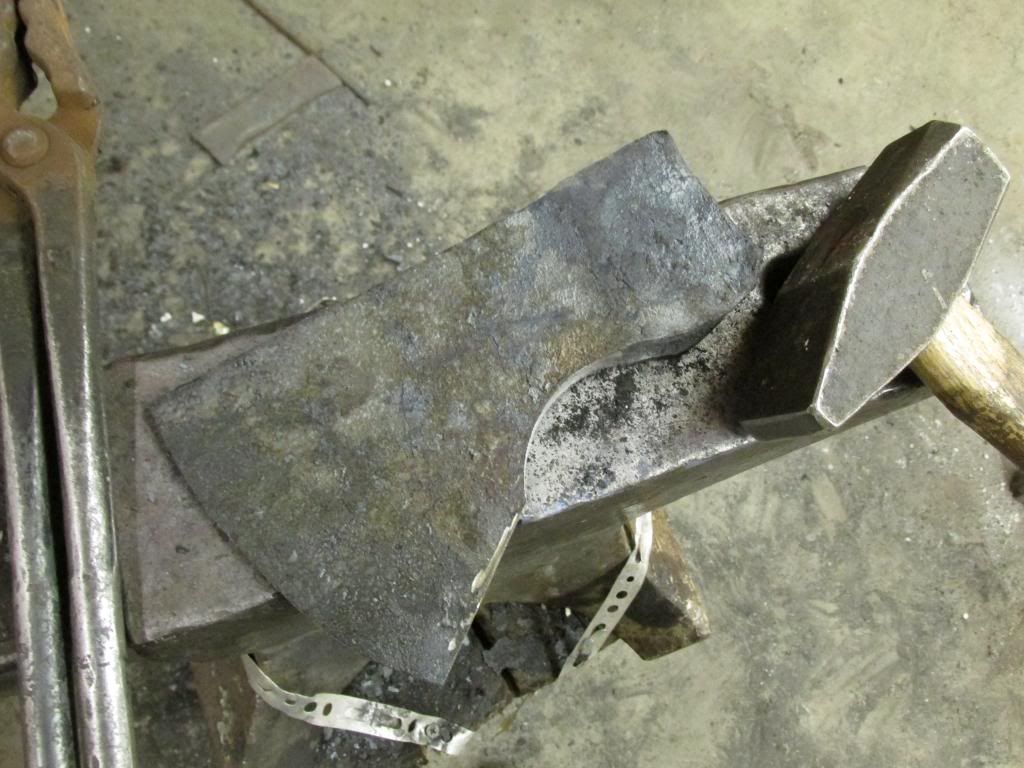
At this point the eye is still unshaped, I save this until the end to prevent damaging it.
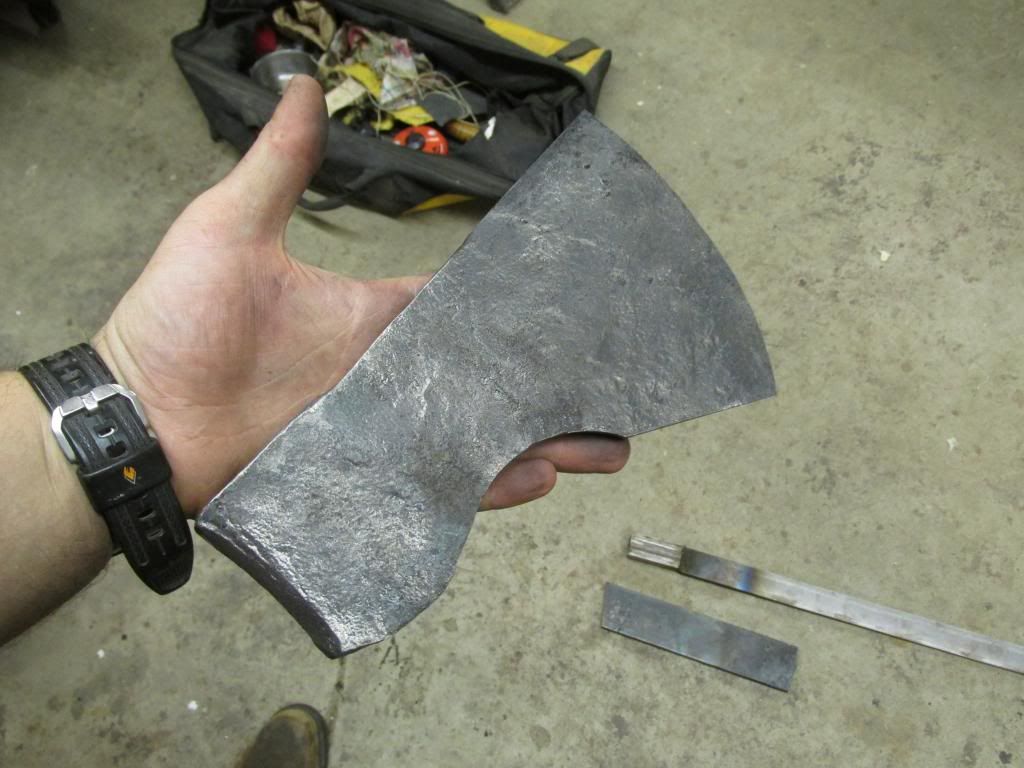
And the axe head welded and spread.
Right not the axe head is about 7 or 8 inches long with a 7 inch long edge. That will be reduced when all is trimmed to shape. Again this can be done with a hardy or hot cut, but I used a grinder as I was working by myself.
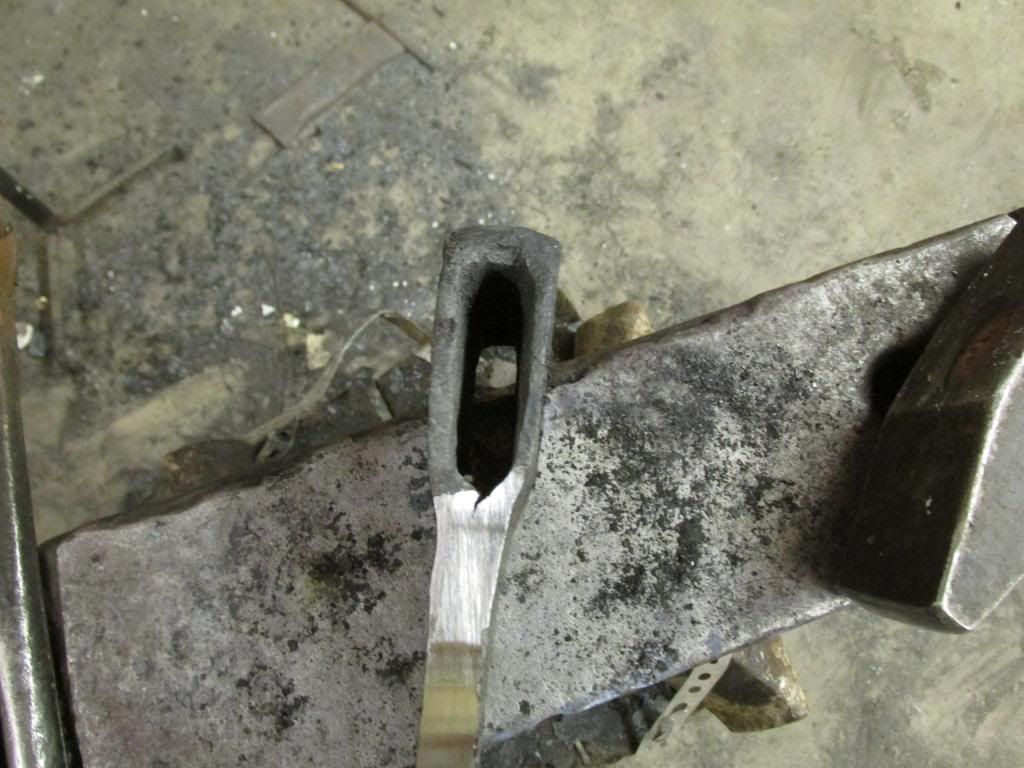
The final edge is 6 inches long.
For size comparison:
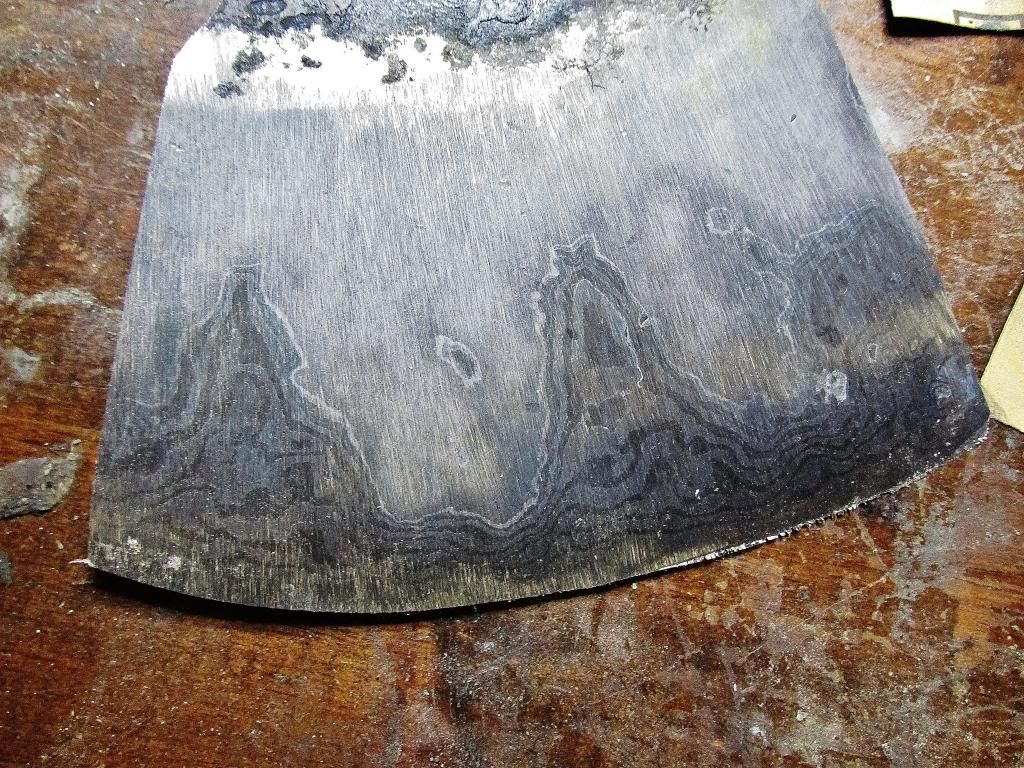
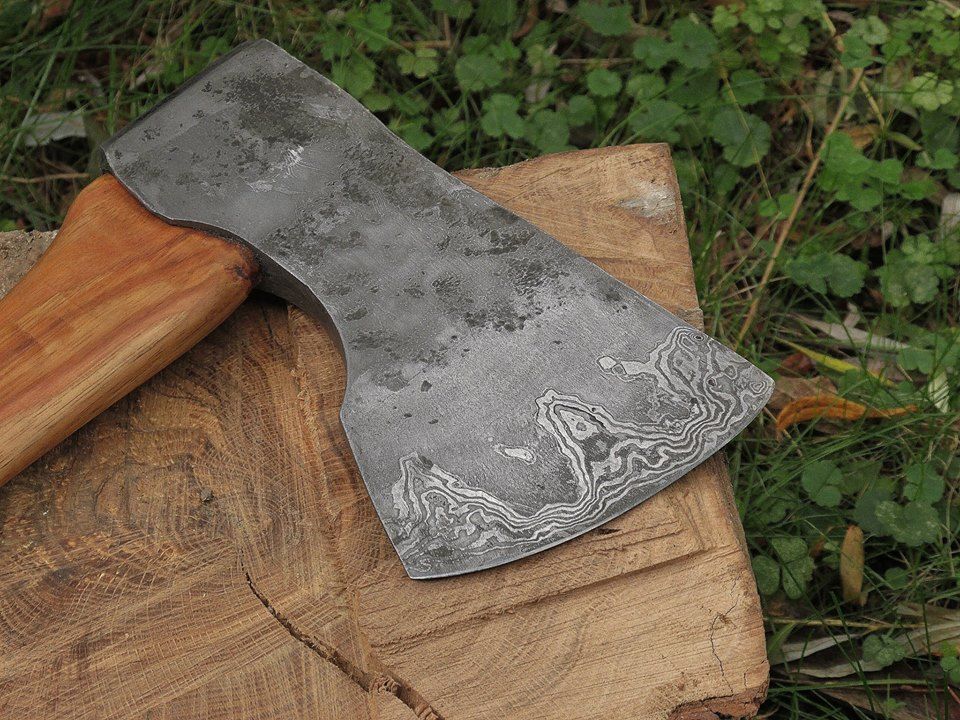
The next set of photos are of the edge at 60 grit after rough grinding and a preliminary etch...as you can see no wolf's teeth so a failure but still a cool axe. I'll just have to try again. I had to turn the contrast up to 100% to show the pattern at 60 grit but it gives you a good idea.
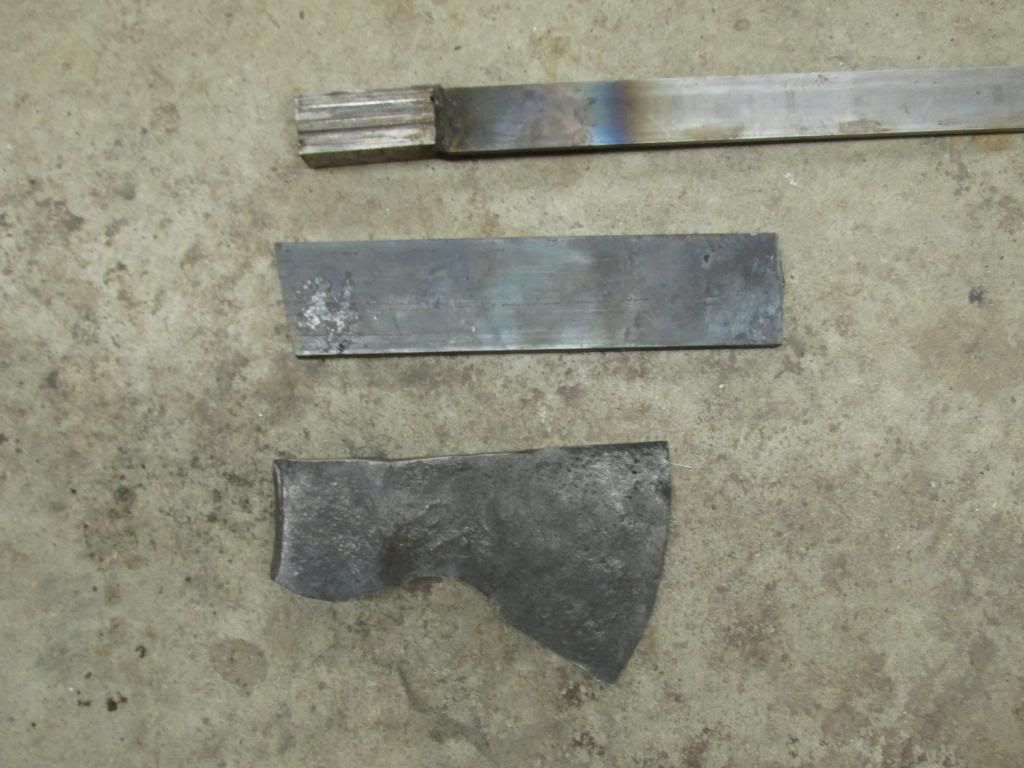
And lastly the starting materials and axe in the same photo.
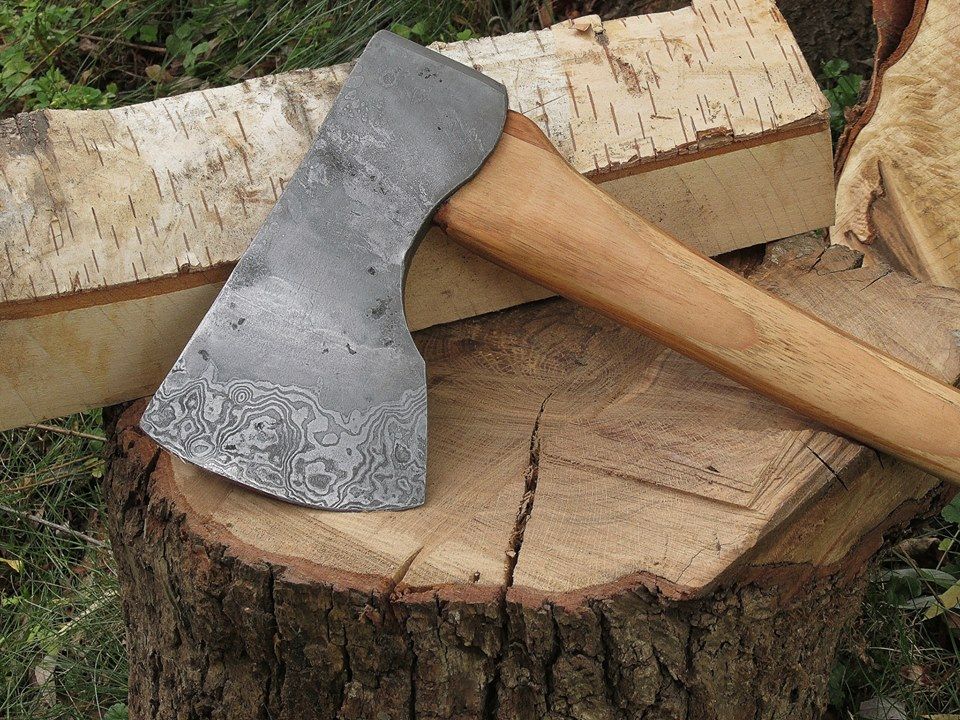
And the final product:
Feel free to give any comments or questions.
P.S.
All of this work is done with a single 3 lb hammer and can be done by anyone with access to an anvil, tongs, forge, and materials.
So I started out by welding a 16 layer billet of 1095 and 15N20 and flattening it to the dimensions of a bar of 1084 I had. I intended to wrap the billet around the 1084 to guarantee having a homogeneous edge since I was using such a low layer count in the edge. The dimension were about 1 1/2 inches wide by 1/4 inch thick and the 1084 was 1 1/2 inches wide by 3/16 inch thick. When folded and welded this resulted in an approximately 3/4 inch tick edge bit.


The edge bit after welding and some cleaning:
http://s1304.photobucket.com/user/scottishsmith24/media/IMG_1374_zps4af1e790.jpg.html
Next I started to prepare the axe head. Because it is a wrapped and welded axe I start by creating alternating steps to allow for thinner cheeks and a thicker back to the axe. The stock for this head was 1/2 inch thick by 2 inches wide mild steel.


This is then bent in half and folded on it's self. If you make the ears the same size then it should line up:


And the axe blank is then cut from the parent bar.

After that the teeth are cut in, this can be done with a hardy or a hot cut but I used an angle grinder for speeds sake.

Note: this is all done pre-welding so that the bit can be inserted later.
The teeth are then spread apart using a chisel.

And the bit is inserted:

Unfortunately this was were I lost one of the teeth, but the rest went together well and the axe is spread and shaped.
http://s1304.photobucket.com/user/scottishsmith24/media/IMG_1385_zps7736a4d5.jpg.html
At this point the eye is still unshaped, I save this until the end to prevent damaging it.

And the axe head welded and spread.

Right not the axe head is about 7 or 8 inches long with a 7 inch long edge. That will be reduced when all is trimmed to shape. Again this can be done with a hardy or hot cut, but I used a grinder as I was working by myself.


The final edge is 6 inches long.
For size comparison:

The next set of photos are of the edge at 60 grit after rough grinding and a preliminary etch...as you can see no wolf's teeth so a failure but still a cool axe. I'll just have to try again. I had to turn the contrast up to 100% to show the pattern at 60 grit but it gives you a good idea.

And lastly the starting materials and axe in the same photo.

And the final product:


Feel free to give any comments or questions.