I realize when we (the knife making/collecting community) think of a disc grinder, we mostly think of a direct drive disk system with the disc directly on the motor. Heck, I picked up an inexpensive motor with the plan to purchase a disc from USAknifemaker in the future! I had assumed I'd get the disc first, then after a bit of time I'd get the work rest. Admittedly, its kind of pricey!
I'm pretty sure by now that my affinity for older tools is not new to this forum. I happened across this Delta Homecraft Disc Grinder in Craigslist a few months ago and just could not say no!
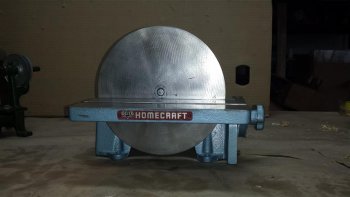
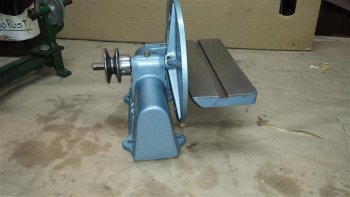
Front view....even has a work rest!
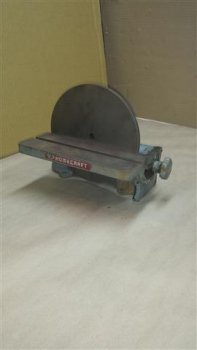
I'm not sure how often I'll need the tilt function of the rest, but at least it has it! I realize I didn't take a picture of the tilt function, but the work rest is a single piece that has a curved machined piece that is screwed to the work rest. That curved piece fits in to a matching slot on the housing body. It supports the rest while also making it easy to tilt! Its so simple its insane and RIDGID as heck! I love how over built the older tools are!
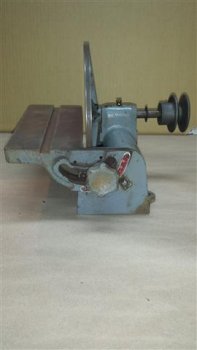
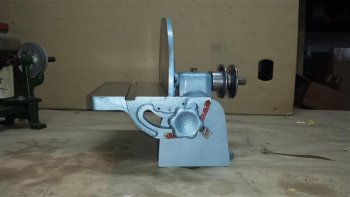
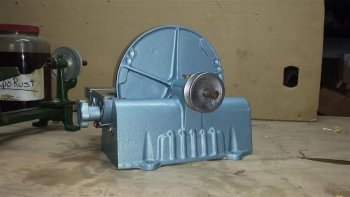
Opposite side view.
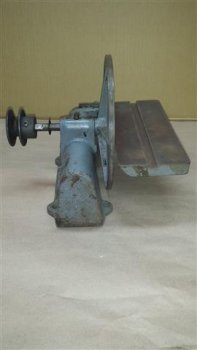
Rear view. The guy said it was slightly out of balance, but as seen in the photo above the pulley wheel was WAY out on the end of the shaft. These were built to accept a sanding drum type accessory on the end of the spindle. I told him the distance could have accounted for the wobbling...and I was right! We moved the pulley in further towards the body and it didn't vibrate anymore.
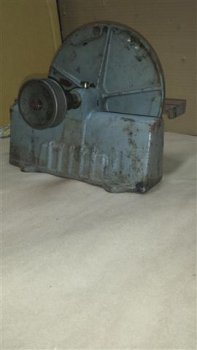
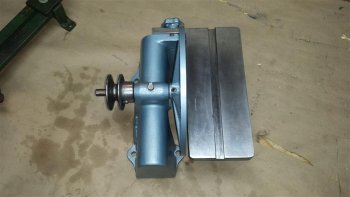
Above view of some sacrifices I had to make. The spindle doesn't run through bearings. Its a brass bushing with oil cup. Unfortunately, this guy thought the brass bushing was causing the wobble, and said he filed away some of the material. I didn't take a good shot of it, but the edge where I would press the brass out is so rounded I would destroy it trying to get it out. Since these aren't real common, a replacement is a dream mission. Since the movement is so little, I elected to simply leave the bushing in place and tape it off. Since the bushing stayed, I couldn't dip this in my electrolysis tank, which meant sandblasting to remove the rust and gunk. Well, I did dip the far side (where it contacts the work rest) in the tank so that it would clean the metal without removing ANY metal. I didn't want there to be much slop in the tilt or the support it provides.
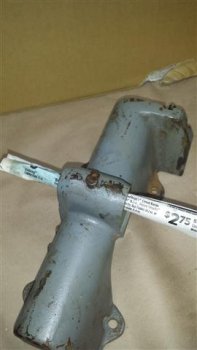
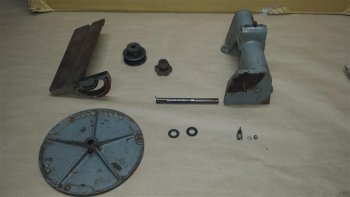
All the parts disassembled. You can see the rust that was on the base where the work rest attaches. It was thick and I wasn't sure how smooth it would function at this point. Not many parts to it, but KISS is a principle I really believe in!
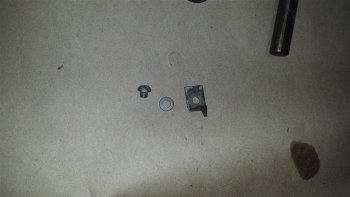
Really complex tilt gauge components!
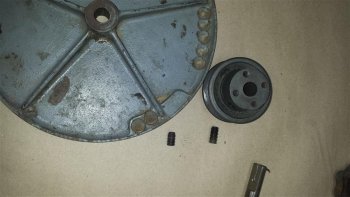
The tapped holes on the back of the pulley wheel were for the various options you could get for this (like a drum sander piece) way back when.
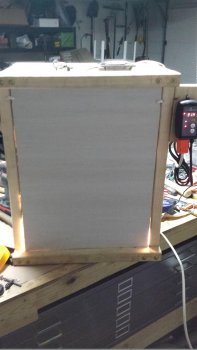
Oh, part of the reason I got this so cheap ($35) was because I didn't want his wimpy 1/6 HP motor. Since I like the older tools and have restored them, I've built myself a mobile motor stand. I have a 3 phase motor in the cabinet, and for each tool I use on it, I simply pull off the top and set the tool (which has its own base) down on it. Then I just pop on the belt and the motor is on two rods that allow it to use its own weight to set the tension. Its a great thing for me since I don't have a dedicated shop and a lot of space. It also allows me to use the variable speed on ANY tool I have, without buying new motors since these old tools mostly have single phase. When I need a different tool, I just put the one I have out away on the shelves and grab the new one. I have a jointer, scroll saw, Band Saw, planer, buffer and now this disc grinder that I can run all on the same motor. If anyone wants to see it, I can post pictures.
I'm pretty sure by now that my affinity for older tools is not new to this forum. I happened across this Delta Homecraft Disc Grinder in Craigslist a few months ago and just could not say no!
Front view....even has a work rest!

I'm not sure how often I'll need the tilt function of the rest, but at least it has it! I realize I didn't take a picture of the tilt function, but the work rest is a single piece that has a curved machined piece that is screwed to the work rest. That curved piece fits in to a matching slot on the housing body. It supports the rest while also making it easy to tilt! Its so simple its insane and RIDGID as heck! I love how over built the older tools are!

Opposite side view.

Rear view. The guy said it was slightly out of balance, but as seen in the photo above the pulley wheel was WAY out on the end of the shaft. These were built to accept a sanding drum type accessory on the end of the spindle. I told him the distance could have accounted for the wobbling...and I was right! We moved the pulley in further towards the body and it didn't vibrate anymore.

Above view of some sacrifices I had to make. The spindle doesn't run through bearings. Its a brass bushing with oil cup. Unfortunately, this guy thought the brass bushing was causing the wobble, and said he filed away some of the material. I didn't take a good shot of it, but the edge where I would press the brass out is so rounded I would destroy it trying to get it out. Since these aren't real common, a replacement is a dream mission. Since the movement is so little, I elected to simply leave the bushing in place and tape it off. Since the bushing stayed, I couldn't dip this in my electrolysis tank, which meant sandblasting to remove the rust and gunk. Well, I did dip the far side (where it contacts the work rest) in the tank so that it would clean the metal without removing ANY metal. I didn't want there to be much slop in the tilt or the support it provides.

All the parts disassembled. You can see the rust that was on the base where the work rest attaches. It was thick and I wasn't sure how smooth it would function at this point. Not many parts to it, but KISS is a principle I really believe in!

Really complex tilt gauge components!

The tapped holes on the back of the pulley wheel were for the various options you could get for this (like a drum sander piece) way back when.

Oh, part of the reason I got this so cheap ($35) was because I didn't want his wimpy 1/6 HP motor. Since I like the older tools and have restored them, I've built myself a mobile motor stand. I have a 3 phase motor in the cabinet, and for each tool I use on it, I simply pull off the top and set the tool (which has its own base) down on it. Then I just pop on the belt and the motor is on two rods that allow it to use its own weight to set the tension. Its a great thing for me since I don't have a dedicated shop and a lot of space. It also allows me to use the variable speed on ANY tool I have, without buying new motors since these old tools mostly have single phase. When I need a different tool, I just put the one I have out away on the shelves and grab the new one. I have a jointer, scroll saw, Band Saw, planer, buffer and now this disc grinder that I can run all on the same motor. If anyone wants to see it, I can post pictures.


