
rootes_of_ohio
Well-Known Member
Well, here goes.
I took some pics today while cutting ivory.
Just the camera in my iPhone, so nothing fancy.
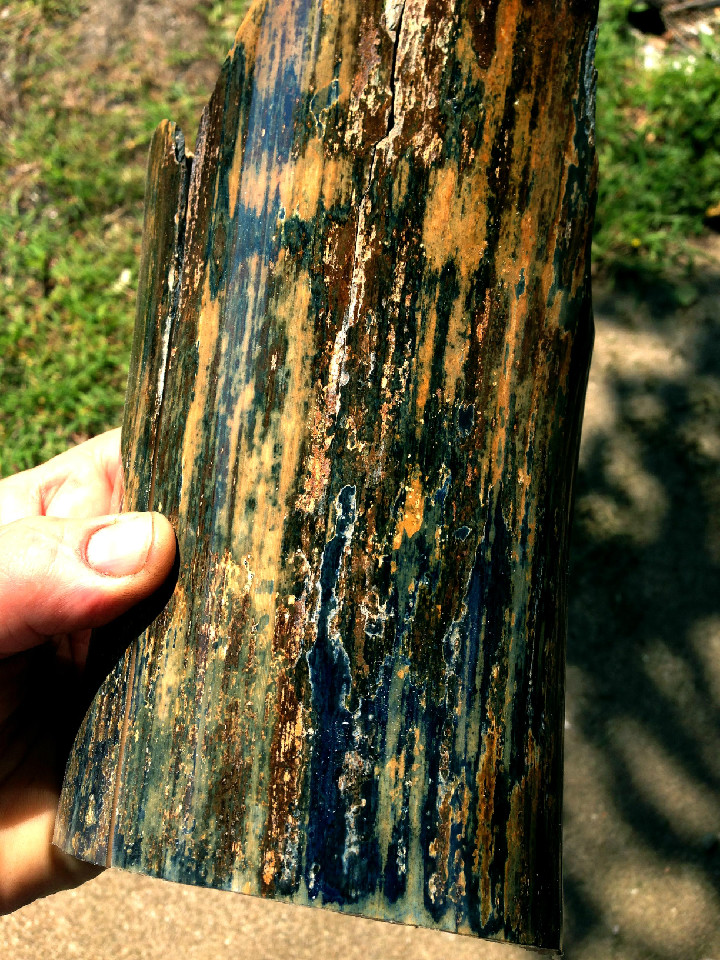
This is the sequence for cutting one piece of bark that weighed about 2 pounds.
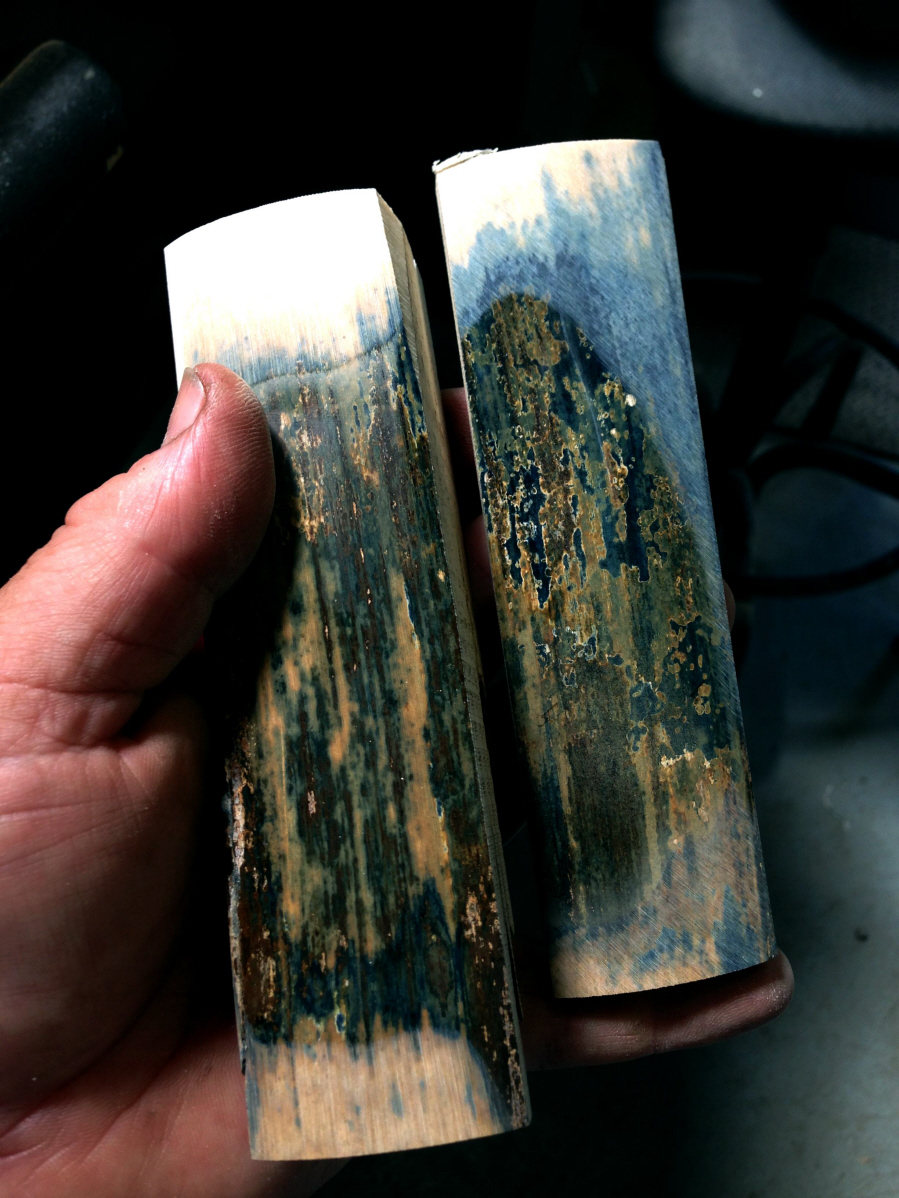
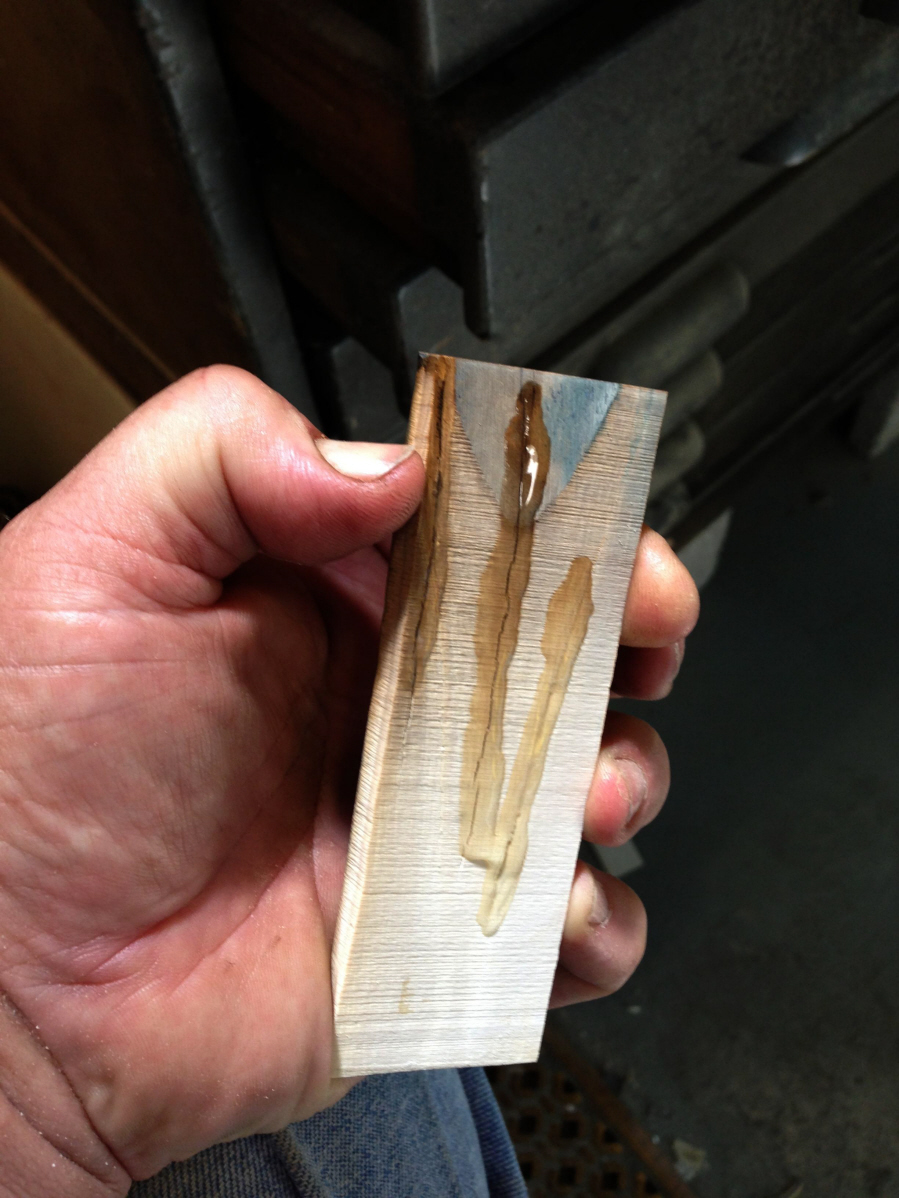
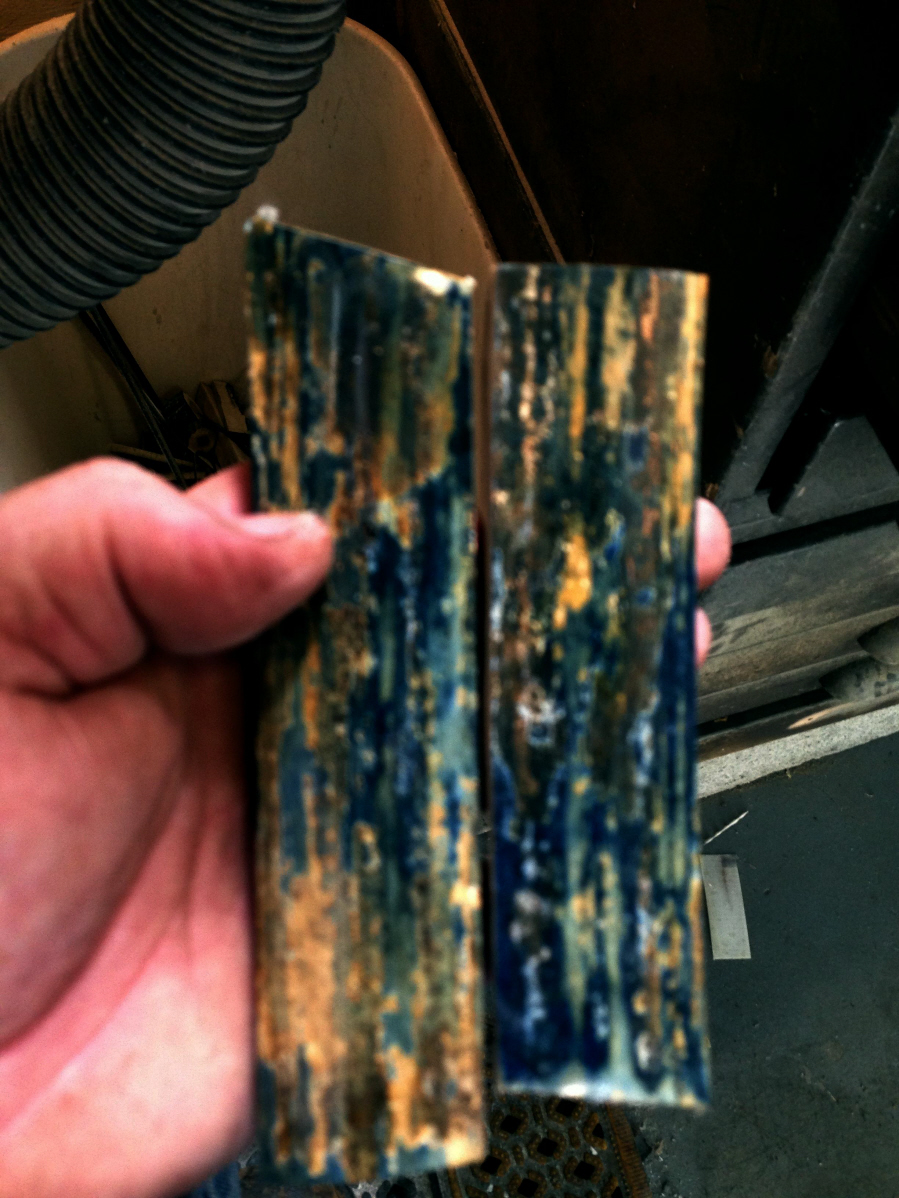
As you can see from the pic, it has already been surfaced to expose the color, then sanded and given a light polish so I can see what I'm working with. This exposes all the colors as well as any flaws that I'll have to cut around (or through.)
This piece of bark had curves running in about 5 directions. While it appears to be flat in the pic, it was anything but flat.
Cut the first piece off using a jig with the bandsaw.
This first piece came off along a crack in the back of the bark piece that nearly perforated the bark.
It was either cut along the crack, or have the piece split in two later.
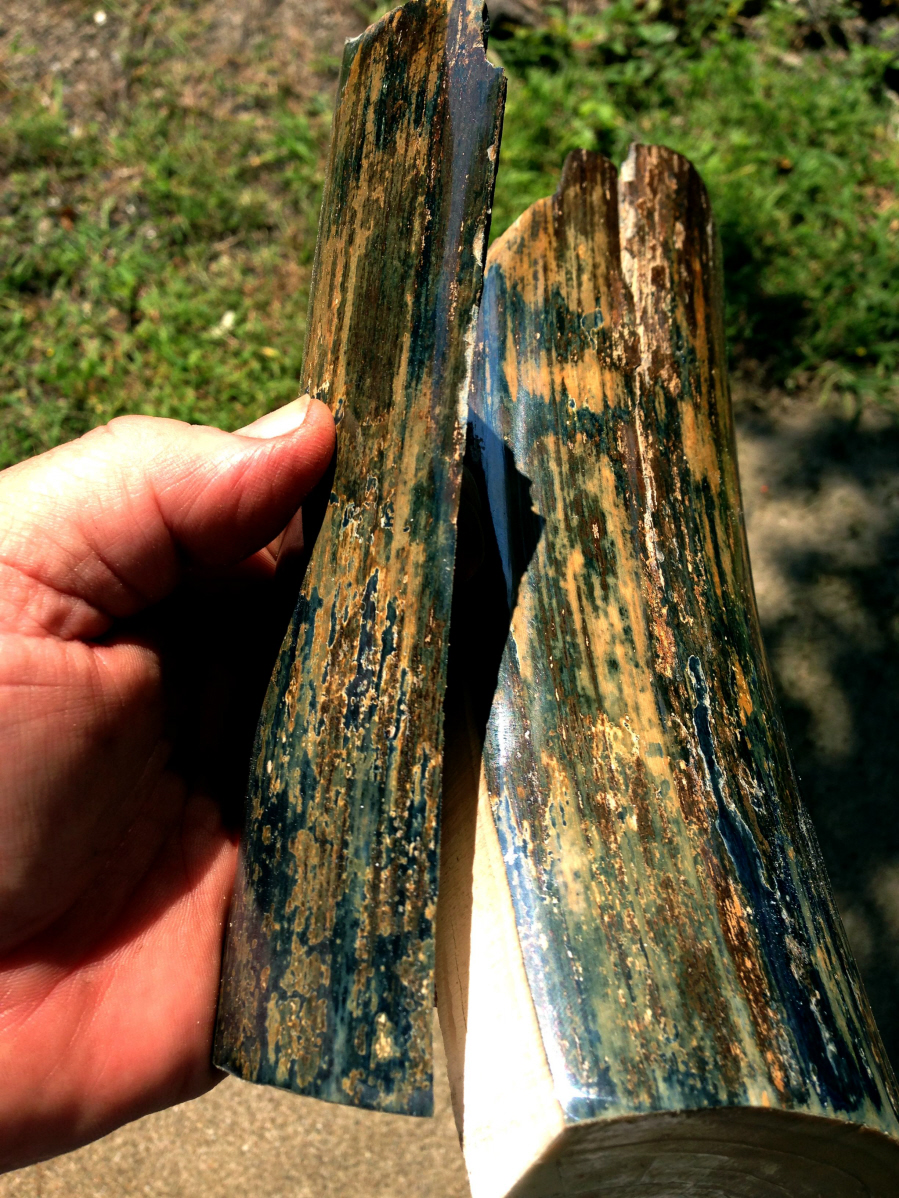
You can see in this pic the second cutoff taken and it also was cut along a perforating crack in the bark.
I'm just lucky with this piece that the cracks ran the correct distance apart.
My goal is to produce 1-1/2" wide x 5-1/2" long scales from these two pieces.
Not likely to happen, but I have to start someplace.
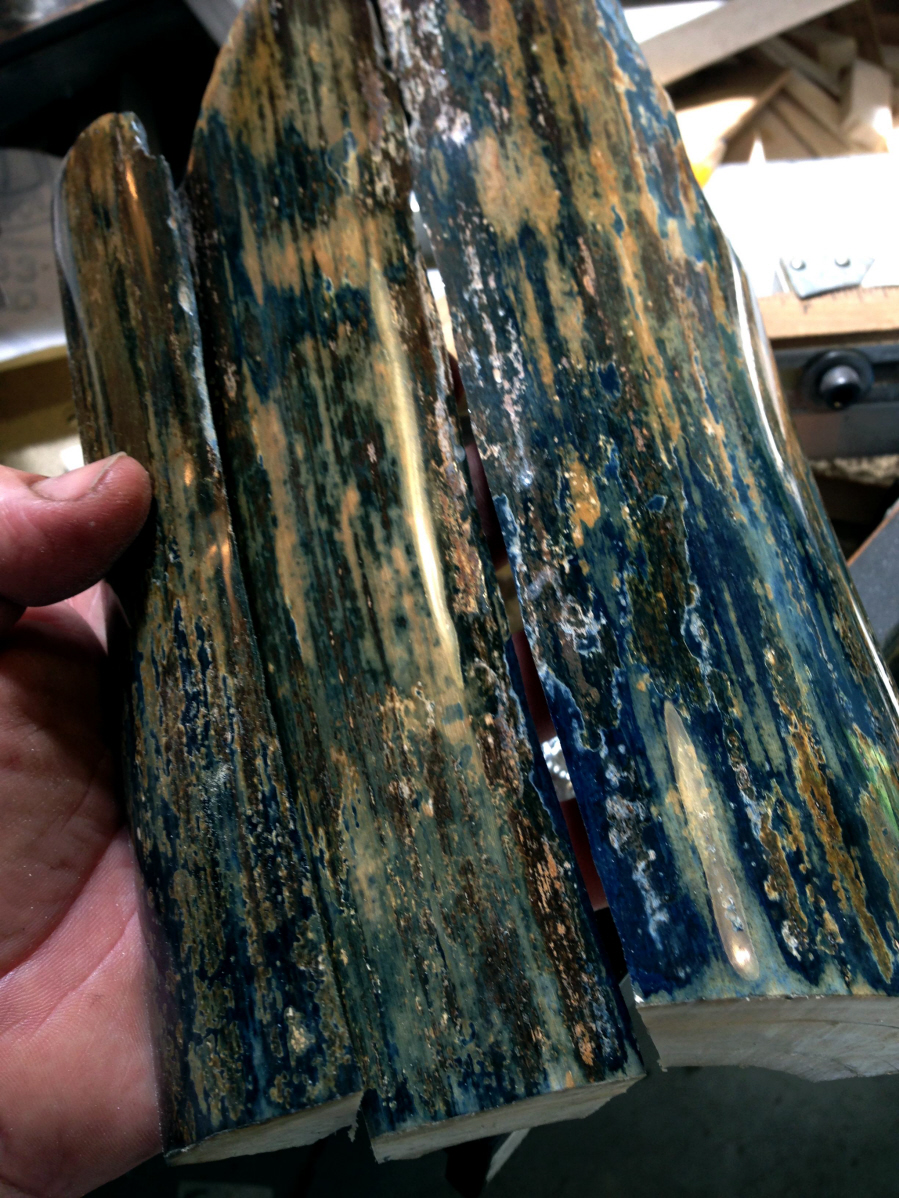
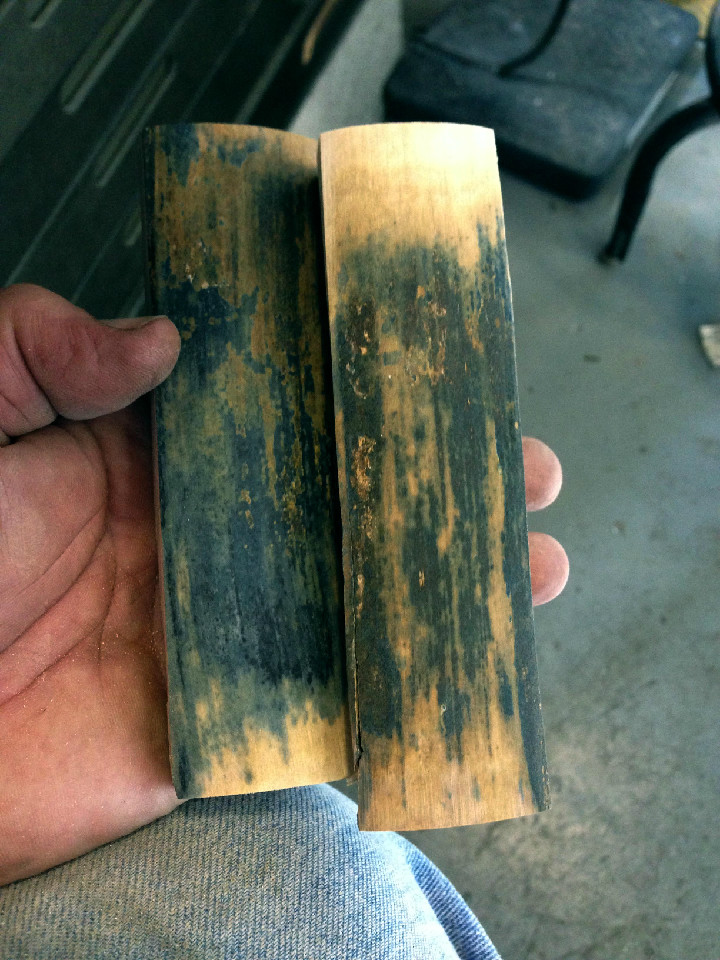
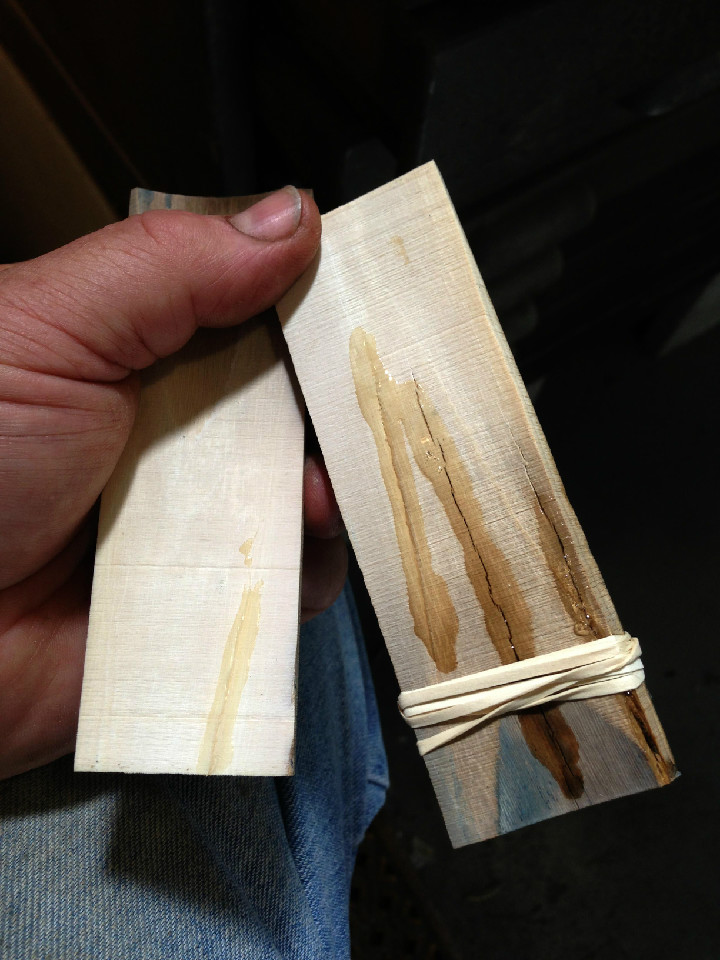
So, here are my two cutoffs. The have both been squared up and run parallel on a fixture.
They are currently 6" or more in length and 1-1/2" wide the entire length of each piece.
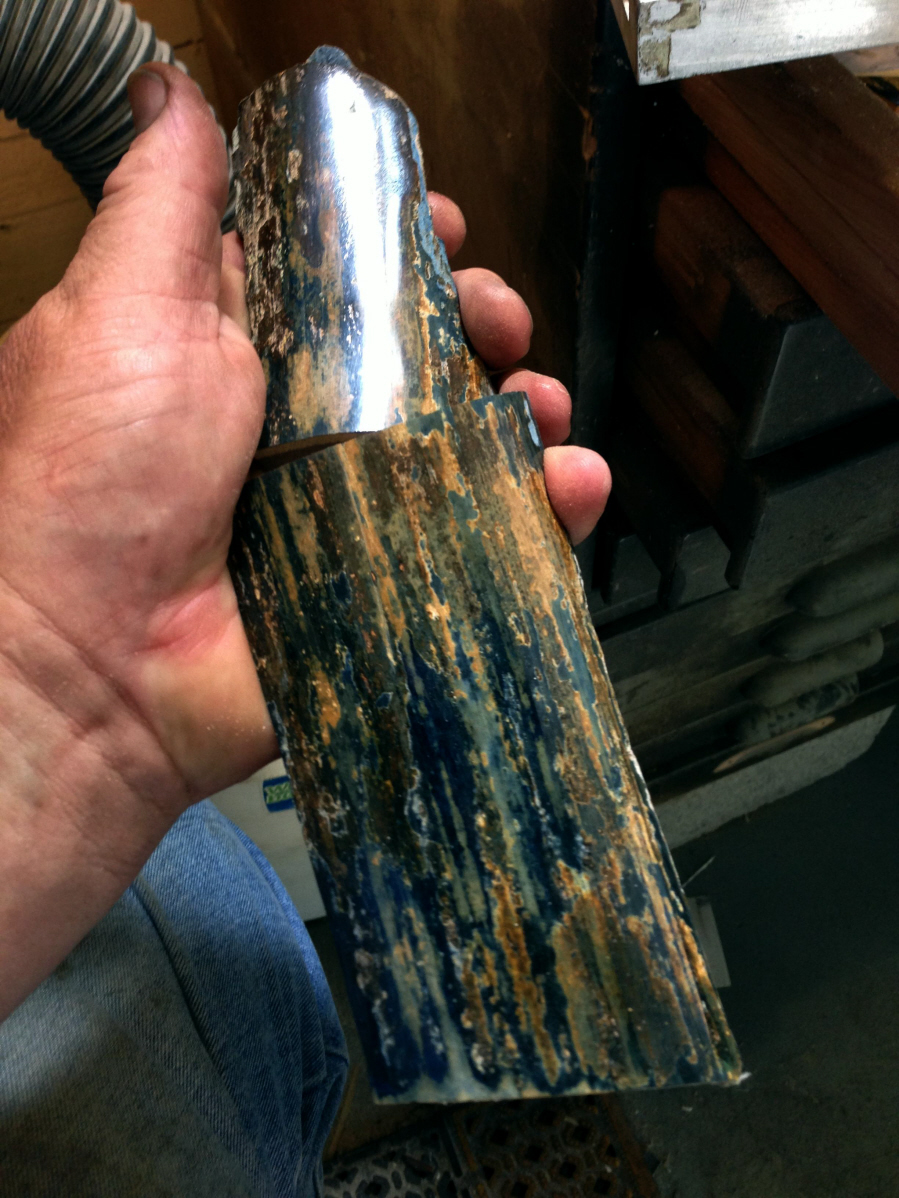
Now the get put on a sander to take out the "dish" or concave curve.
I could leave the color on there and leave the 'dish' effect, but it would not do a maker any good.
A slight concave profile is really good for most mammoth ivory scales.
These were too "dished" and would have proved difficult to work with for the maker.
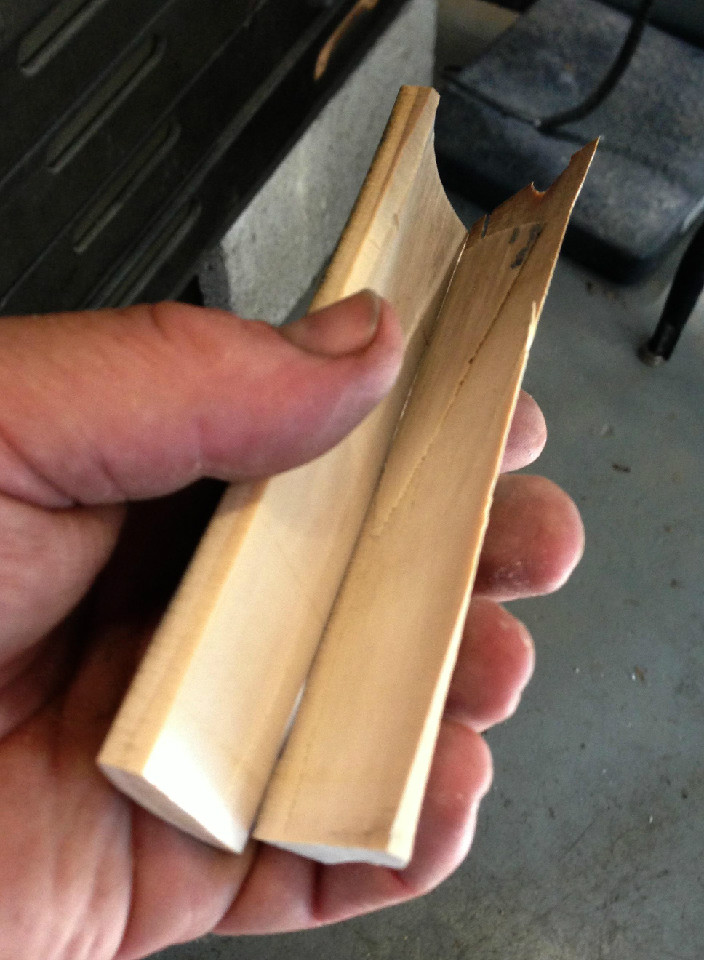
So you can see the ends where the sander flattened the pieces.
Once I rough sand the ends to take out the concave profile, the pieces get run over with a random orbital to remove any ridges, defects, excess unwanted color, and to expose any more blue there may be lurking under the brown.
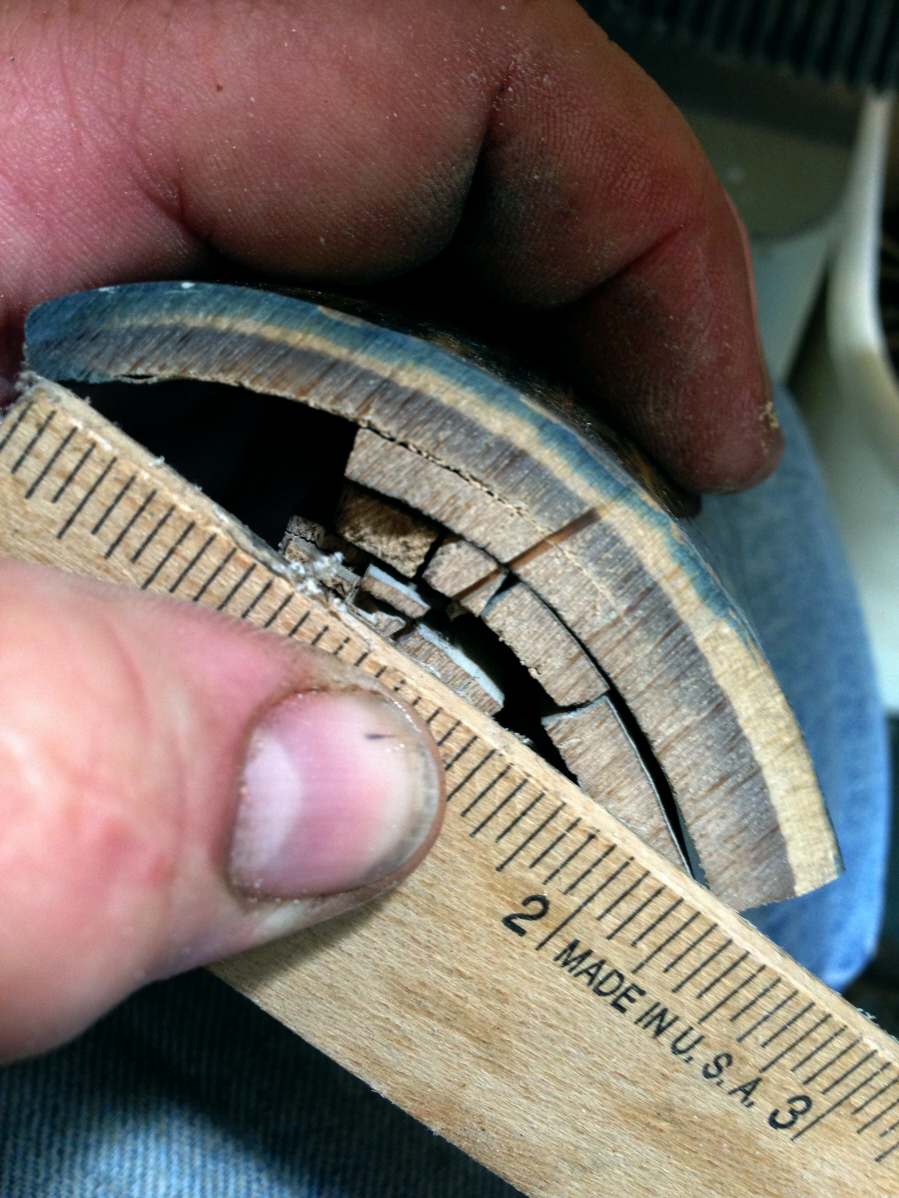
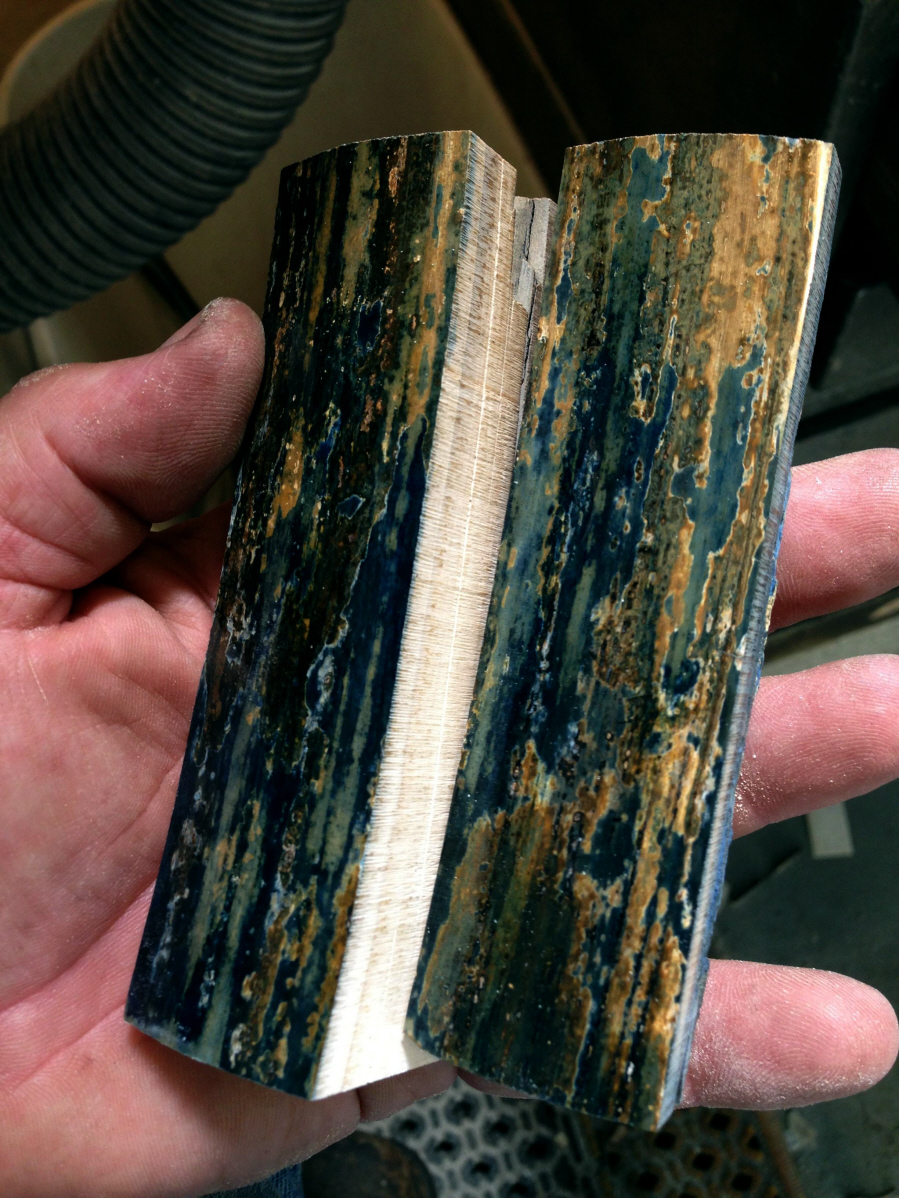
The the pieces are put on another fixture and the backs are "split out"
This is where the scales are cut to thickness and any waste on the backs is removed.
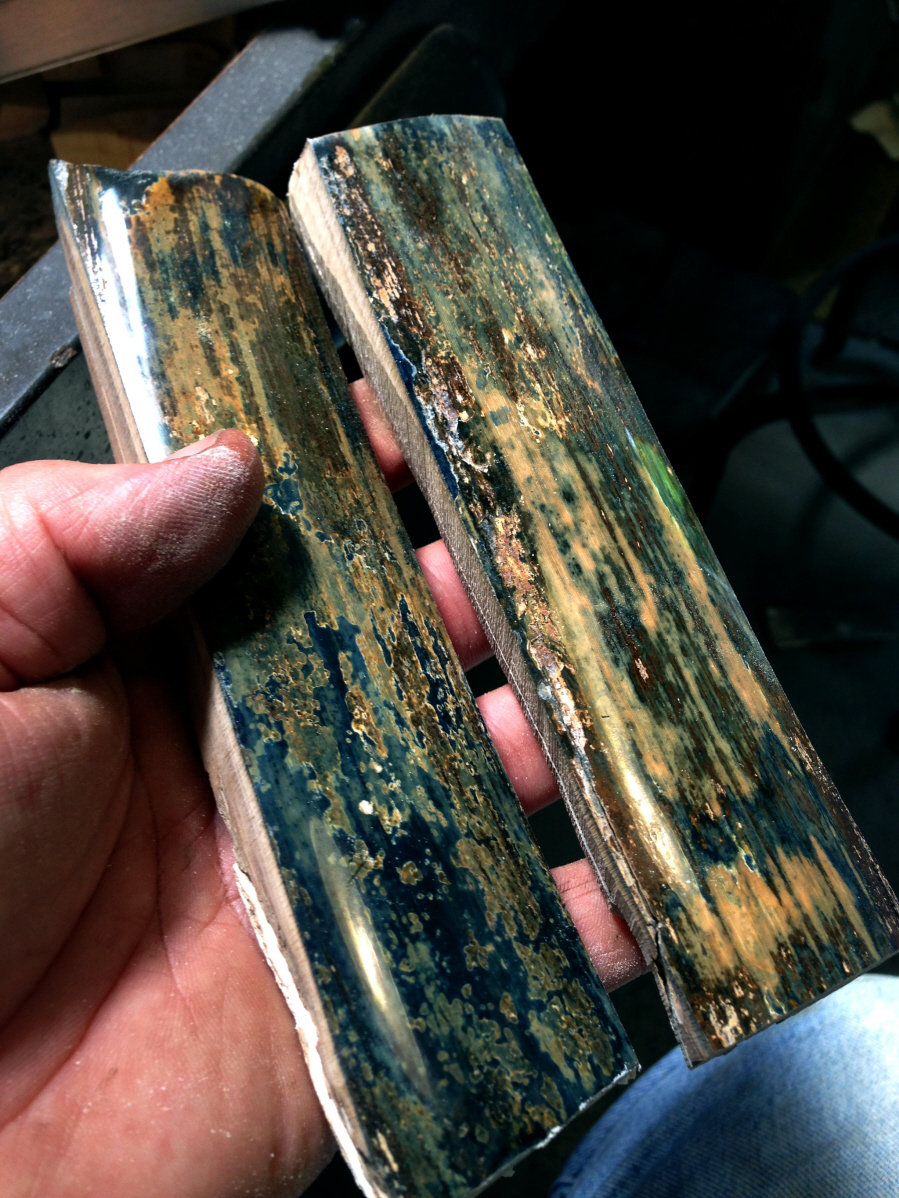
You can see here that they are now flat on the back, parallel in width, only slightly concave on the surface and ready to be inspected for flaws and possible repairs.
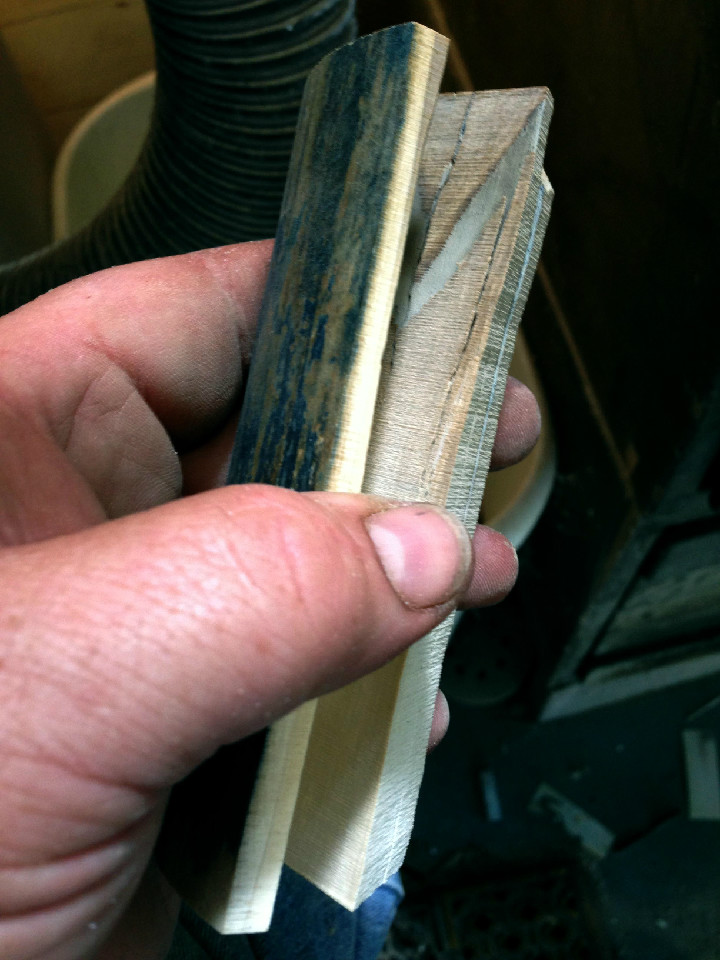
The back of the one piece has some cracks, but they did not perforate to the top.
So, some cyanoacrylate is forced into any cracks to reinforce the piece.
This is strictly reinforcement, not replacement. Most of the CA will be removed as I finish these pieces.
Another pic of the reinforced cracks in the center of the one piece.
These two get set aside to let the CA dry and it's on to the next set of scales.
Hoping to get another 5" or better set, the top piece of the remaining bark is cut off.
This leaves sufficient material for 5" or better in length.
Testing for the maximum width I can get is really important at this point.
This piece of bark could possibly get 1-1/4" widths for the two pieces I want to cut.
Doing a test cut while the piece is on the fixture is the best way to know for sure.
You can see the test cut in the center. Looks like enough width to get my 1-1/4"
The two pieces of 1-1/4" have been roughed out and are ready to be cut parallel at the 1-1/4" width.
They are cut parallel and trimmed to length a bit.
This is not the final length, but just a trim to make the pieces easier to hold.
As with the first set, I put these on a sander to remove the high points on the ends and take out the concave profile.
Just like the other set, once the "dish" is removed, the length is sanded with an 80 grit paper to remove any ridges, high spots or defects and to adjust the color by removing excess brown and/or brinding up more blue from underneath.

Then both sets are cut to final length, the backs are split off and surfaced, and they are sanded to 400 grit with a random orbital sander.
Great care has to be taken not to remove color unnecessarily. But some has to come off.
If I don't remove color correctly, the maker will end up doing it and will be disappointed.
I remove exactly what I have to so that the scales are usable.
This way, the maker knows (within reason) what the finished colors will be once the scales are on the knife.
Often, too, the blue color can be vivianite on the surface of the bark.
Vivianite is usually just powdery and not at all permanent.
It has always been best to remove the vivianite and any non-permanent color so the true colors in the scales show to the maker.

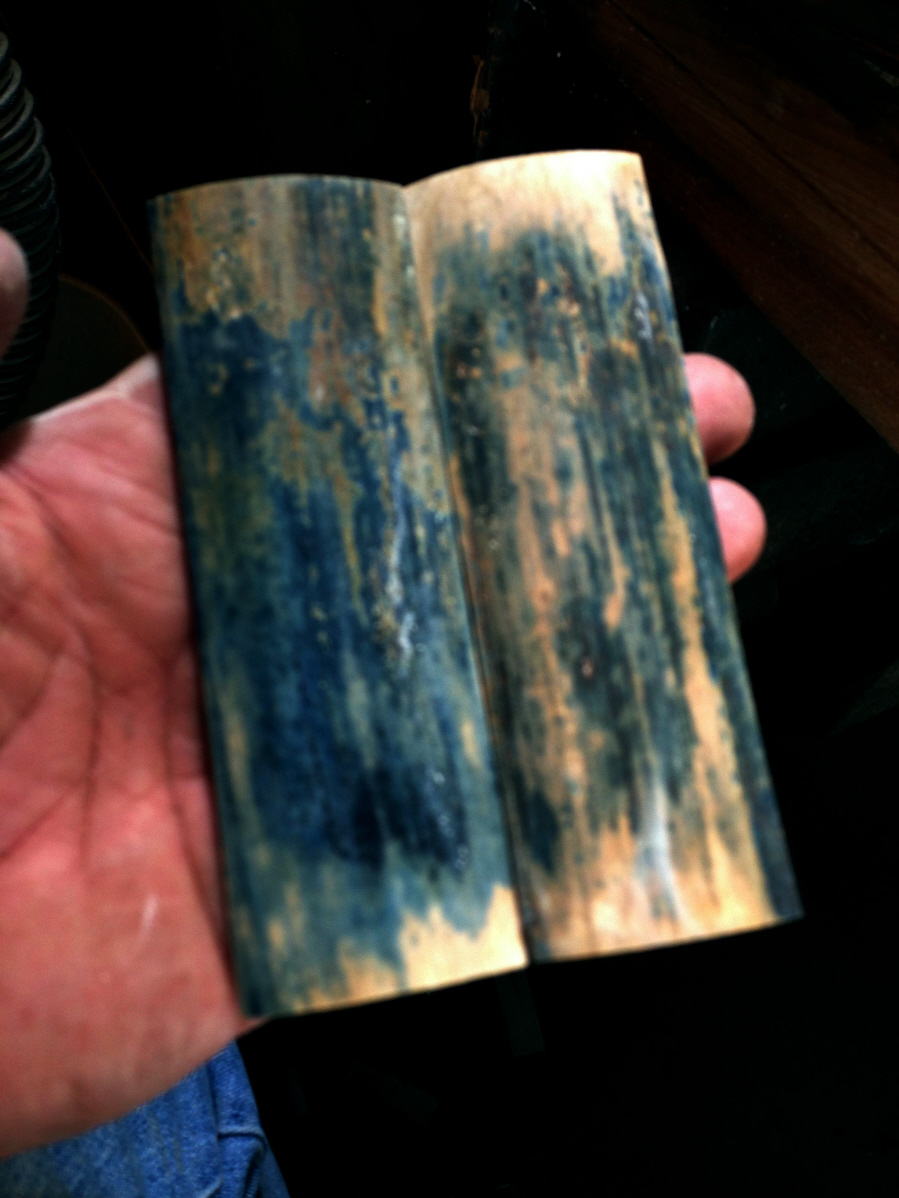
Here is a pic of the backs of the scales.
While there are some imperfections, they have been reinforced with CA and none of the tiny cracks are perforating cracks that lead to the surface. Any imperfections on the backs of these two sets will probably go away when they are given their final surface.
Cracks and imperfections in mammoth bark are common and to be expected.
Perforating cracks are unacceptable.
I try to get the scales down to the point where it is pretty obvious that any imperfections will not present themselves in the finished knife.
If I think the defect is too much or too big, I pitch the scales and will use them later for smaller sizes.
Then both sets are given a light polish to really bring out the colors and textures.
I only sand the scales to 400 grit and only polish them lightly.
This reduces the heat they are exposed to.
Heat is not a friend to ivory.
Later, the maker will be cutting, sanding and polishing these to a hard shine.
Better for me to manipulate the material as little as possible at this stage in the game.
It is easier on the ivory and generally produces a better result for the maker and the finished product.
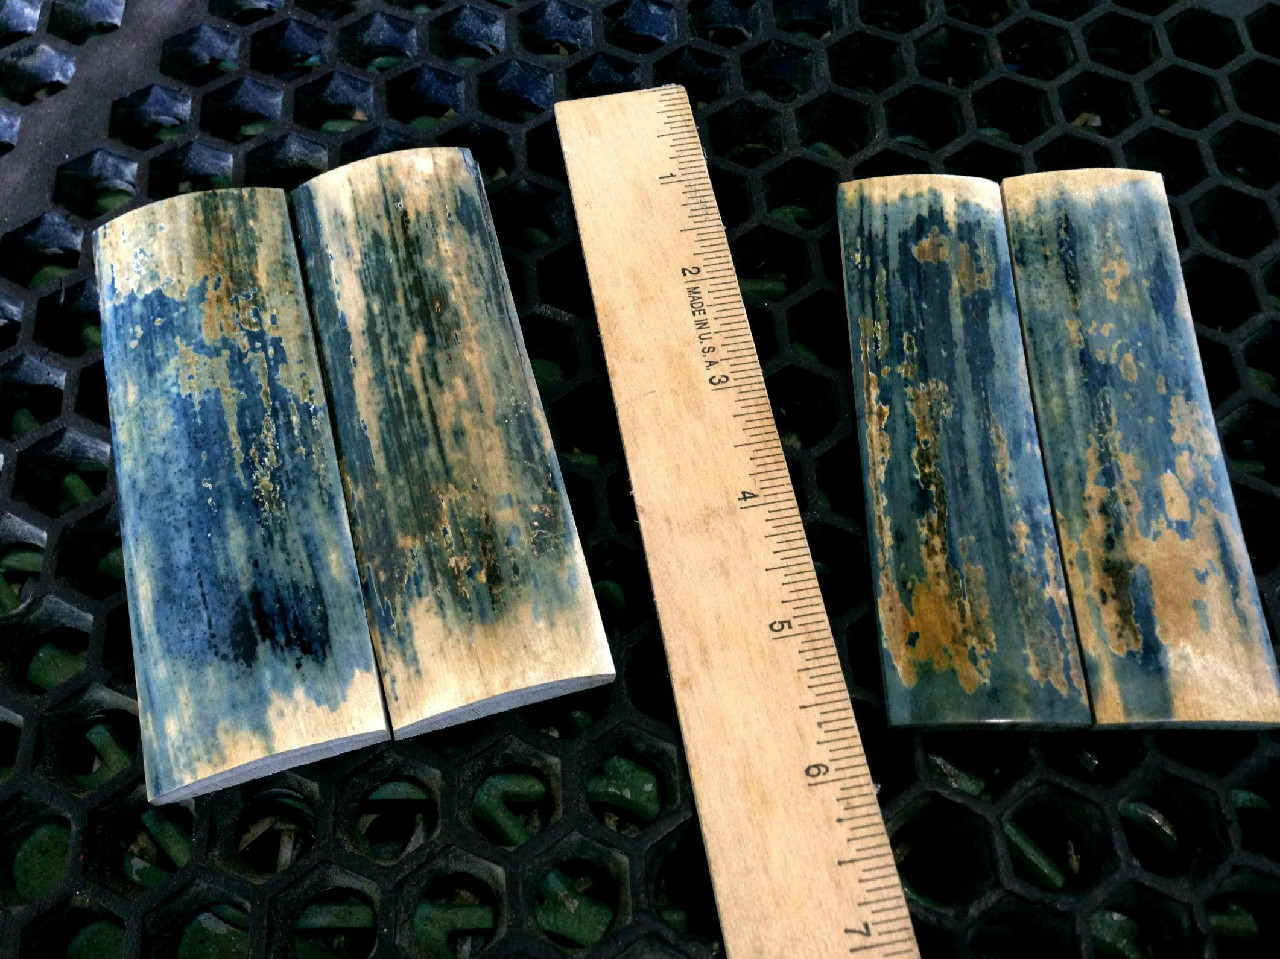
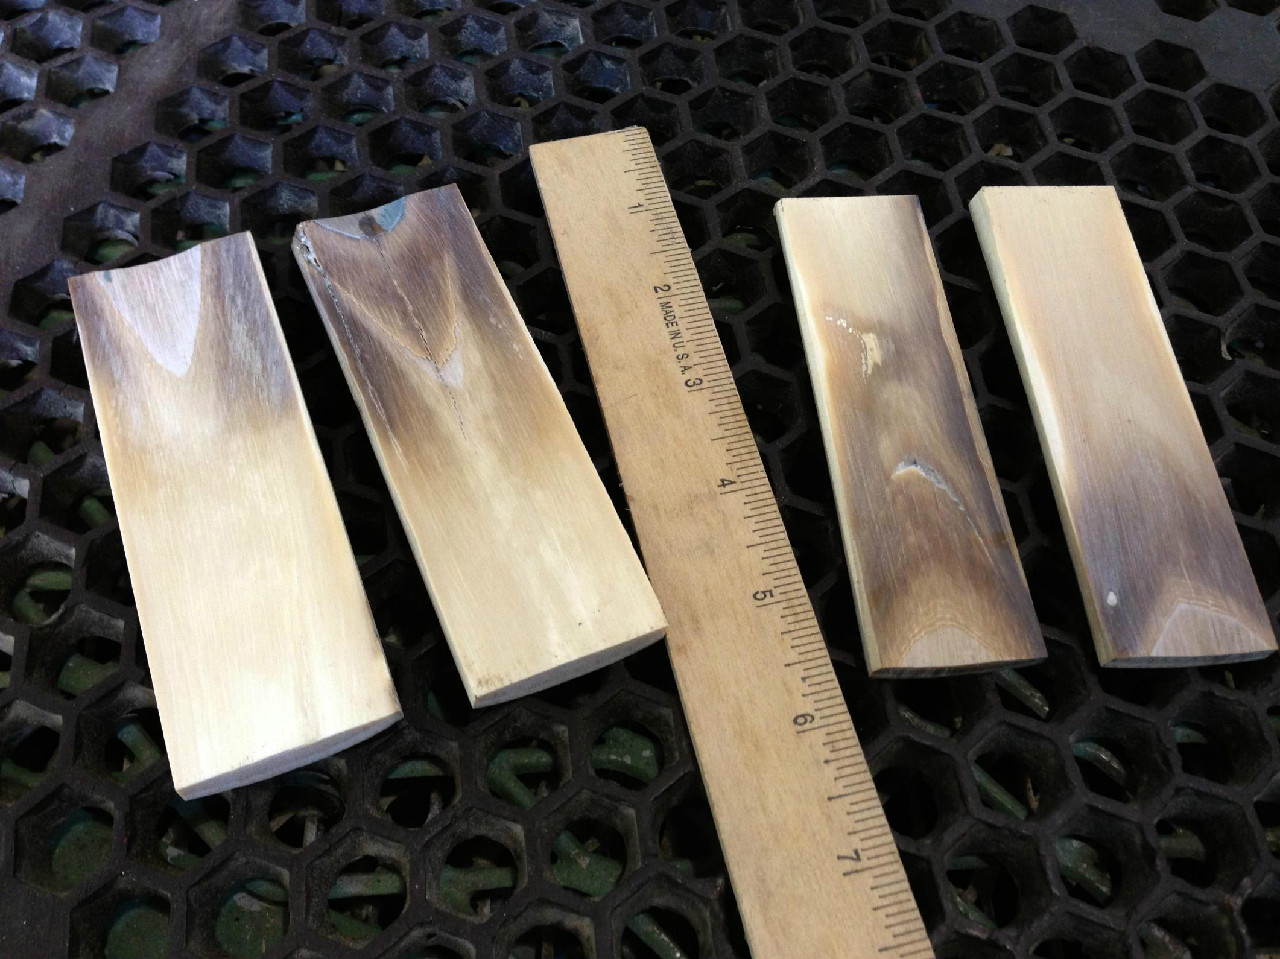
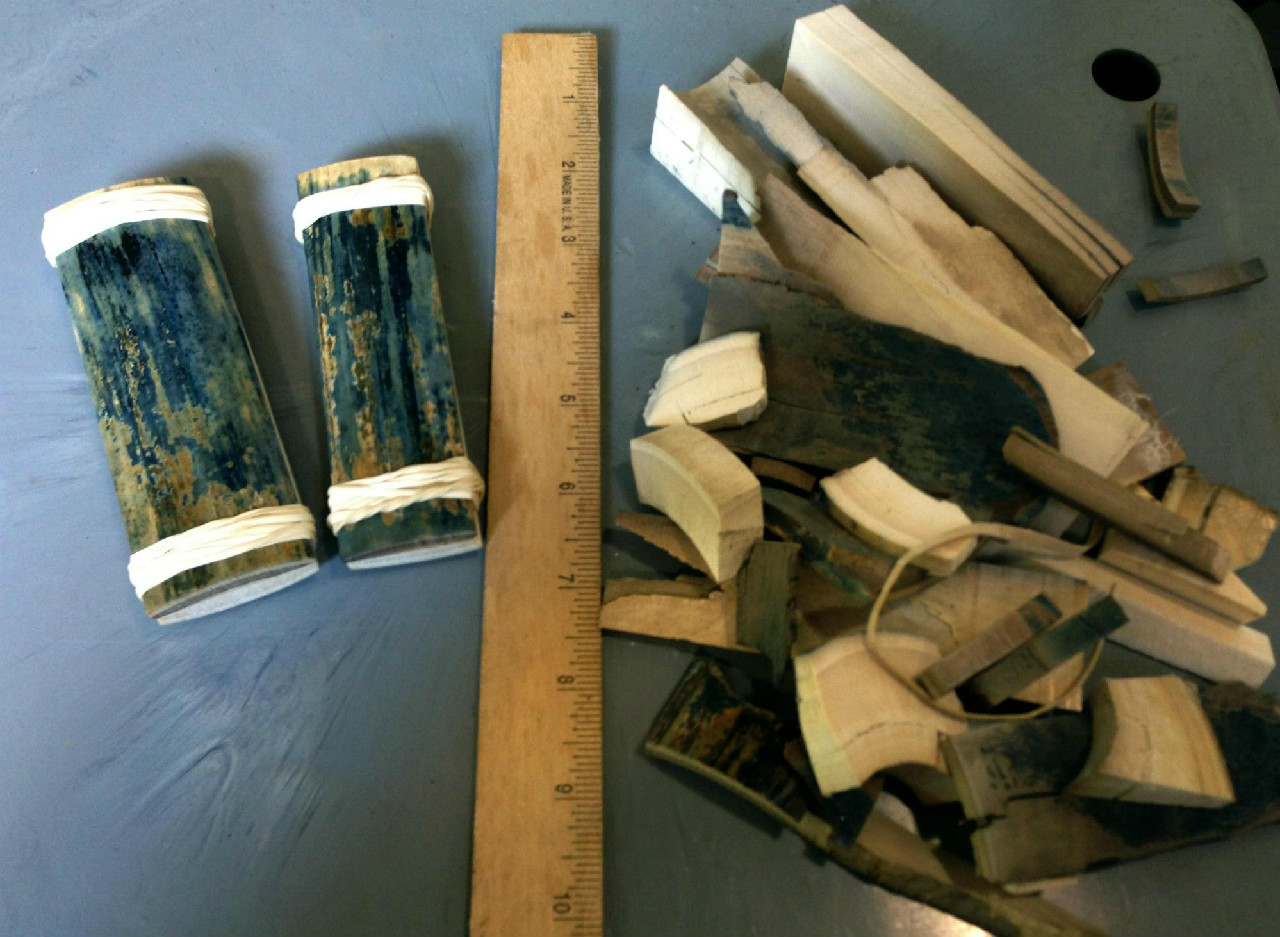
Here are the two sets, finished, taped and banded.
The material to the right is all the waste.
This stuff is not good for much of anything, unfortunately.
Out of a two pound piece of ivory, nearly 1.65 pounds are waste after the scales are cut and finished.
From the one piece of bark, I ended up with one set 4.6" long x 1.5" wide and .350" thick
Then a second set at 4.5" long x 1.3" wide and .300" thick
I can't show the fixtures used in preparing the material because they are proprietary.
But this is the procedure and the results of cutting one piece of mammoth bark.
Questions are always welcome.
Hope you enjoyed the pics and the explanations.
I'm not saying that this is the best way to do this, or the only way.
In general, this is how I do it and the methods have served me well through the years.
Be good to yourself.
Tim
I took some pics today while cutting ivory.
Just the camera in my iPhone, so nothing fancy.
This is the sequence for cutting one piece of bark that weighed about 2 pounds.
As you can see from the pic, it has already been surfaced to expose the color, then sanded and given a light polish so I can see what I'm working with. This exposes all the colors as well as any flaws that I'll have to cut around (or through.)
This piece of bark had curves running in about 5 directions. While it appears to be flat in the pic, it was anything but flat.
Cut the first piece off using a jig with the bandsaw.
This first piece came off along a crack in the back of the bark piece that nearly perforated the bark.
It was either cut along the crack, or have the piece split in two later.
You can see in this pic the second cutoff taken and it also was cut along a perforating crack in the bark.
I'm just lucky with this piece that the cracks ran the correct distance apart.
My goal is to produce 1-1/2" wide x 5-1/2" long scales from these two pieces.
Not likely to happen, but I have to start someplace.
So, here are my two cutoffs. The have both been squared up and run parallel on a fixture.
They are currently 6" or more in length and 1-1/2" wide the entire length of each piece.
Now the get put on a sander to take out the "dish" or concave curve.
I could leave the color on there and leave the 'dish' effect, but it would not do a maker any good.
A slight concave profile is really good for most mammoth ivory scales.
These were too "dished" and would have proved difficult to work with for the maker.
So you can see the ends where the sander flattened the pieces.
Once I rough sand the ends to take out the concave profile, the pieces get run over with a random orbital to remove any ridges, defects, excess unwanted color, and to expose any more blue there may be lurking under the brown.
The the pieces are put on another fixture and the backs are "split out"
This is where the scales are cut to thickness and any waste on the backs is removed.
You can see here that they are now flat on the back, parallel in width, only slightly concave on the surface and ready to be inspected for flaws and possible repairs.
The back of the one piece has some cracks, but they did not perforate to the top.
So, some cyanoacrylate is forced into any cracks to reinforce the piece.
This is strictly reinforcement, not replacement. Most of the CA will be removed as I finish these pieces.
Another pic of the reinforced cracks in the center of the one piece.
These two get set aside to let the CA dry and it's on to the next set of scales.
Hoping to get another 5" or better set, the top piece of the remaining bark is cut off.
This leaves sufficient material for 5" or better in length.
Testing for the maximum width I can get is really important at this point.
This piece of bark could possibly get 1-1/4" widths for the two pieces I want to cut.
Doing a test cut while the piece is on the fixture is the best way to know for sure.
You can see the test cut in the center. Looks like enough width to get my 1-1/4"
The two pieces of 1-1/4" have been roughed out and are ready to be cut parallel at the 1-1/4" width.
They are cut parallel and trimmed to length a bit.
This is not the final length, but just a trim to make the pieces easier to hold.
As with the first set, I put these on a sander to remove the high points on the ends and take out the concave profile.
Just like the other set, once the "dish" is removed, the length is sanded with an 80 grit paper to remove any ridges, high spots or defects and to adjust the color by removing excess brown and/or brinding up more blue from underneath.
Then both sets are cut to final length, the backs are split off and surfaced, and they are sanded to 400 grit with a random orbital sander.
Great care has to be taken not to remove color unnecessarily. But some has to come off.
If I don't remove color correctly, the maker will end up doing it and will be disappointed.
I remove exactly what I have to so that the scales are usable.
This way, the maker knows (within reason) what the finished colors will be once the scales are on the knife.
Often, too, the blue color can be vivianite on the surface of the bark.
Vivianite is usually just powdery and not at all permanent.
It has always been best to remove the vivianite and any non-permanent color so the true colors in the scales show to the maker.
Here is a pic of the backs of the scales.
While there are some imperfections, they have been reinforced with CA and none of the tiny cracks are perforating cracks that lead to the surface. Any imperfections on the backs of these two sets will probably go away when they are given their final surface.
Cracks and imperfections in mammoth bark are common and to be expected.
Perforating cracks are unacceptable.
I try to get the scales down to the point where it is pretty obvious that any imperfections will not present themselves in the finished knife.
If I think the defect is too much or too big, I pitch the scales and will use them later for smaller sizes.
Then both sets are given a light polish to really bring out the colors and textures.
I only sand the scales to 400 grit and only polish them lightly.
This reduces the heat they are exposed to.
Heat is not a friend to ivory.
Later, the maker will be cutting, sanding and polishing these to a hard shine.
Better for me to manipulate the material as little as possible at this stage in the game.
It is easier on the ivory and generally produces a better result for the maker and the finished product.
Here are the two sets, finished, taped and banded.
The material to the right is all the waste.
This stuff is not good for much of anything, unfortunately.
Out of a two pound piece of ivory, nearly 1.65 pounds are waste after the scales are cut and finished.
From the one piece of bark, I ended up with one set 4.6" long x 1.5" wide and .350" thick
Then a second set at 4.5" long x 1.3" wide and .300" thick
I can't show the fixtures used in preparing the material because they are proprietary.
But this is the procedure and the results of cutting one piece of mammoth bark.
Questions are always welcome.
Hope you enjoyed the pics and the explanations.
I'm not saying that this is the best way to do this, or the only way.
In general, this is how I do it and the methods have served me well through the years.
Be good to yourself.
Tim
")