Kitchen Chopper WIP

Eddie Mullins

Well-Known Member
I wanted to make a knife the family could use so decided to make a knife for the kitchen. I wanted something that could be used for chopping and wide enough to be useful for scooping things off the cutting board. So I sketched what I'm calling a chopper, I don't know if there is a proper name for it.
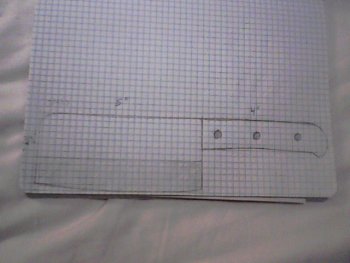
chopper sketch.jpg

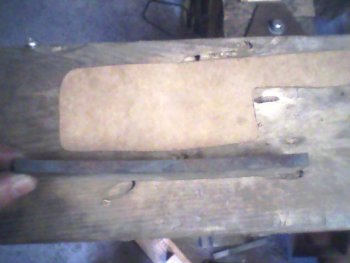
I cut out a cardboard template and then took my best guess on the size of the leaf spring piece I would need to make it. I thought it would be better to be a little over sized than under.
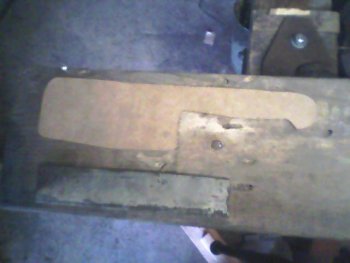
template and leaf spring1.jpg

template and leaf spring2.jpg

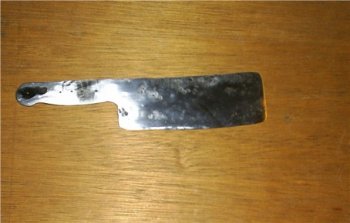
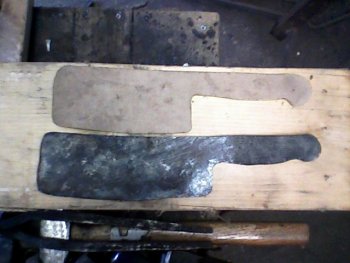
Then I forged to shape. It ended up slightly larger than my original template.
chopper as forged 7-21-13.jpg

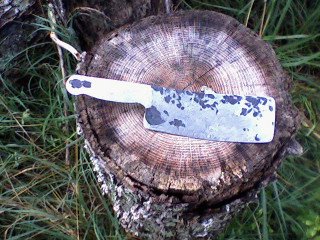
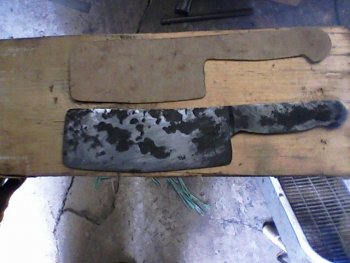
I want to leave some appearance of the forging process when when finished with this knife, so I purposefully used a rounding hammer to leave some minor indentations. This is after an initial pass with files. I still have a little more to go, then heat treat.
chopper 1st rough shaping 7-21-13.jpg
 
Well it looks like you are off to a great start so far.

a couple of names of existing patterns like your's would be a Chinese cleaver or Japanese nakari if you are making this one thin enough for veggies or a Western Cleaver if you are planning to leave it thick enough to chop bones.

I will be watching your WIP.

Laurence
 
Thanks. Its going to be thin for veggies. I'll try to get a shot of the profile showing the thickness later.

Here's where I am now, more time with the hand files on the blade. I may do a little more, but other than drilling the handle holes I am just about ready to heat treat. I didn't get the exact effect I was after with the hammer marks, but I do like the kind of rustic forged look I have ended up with. Both sides are of course a little differnet.

Photo-0253.jpg
 
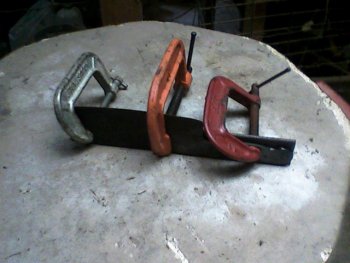
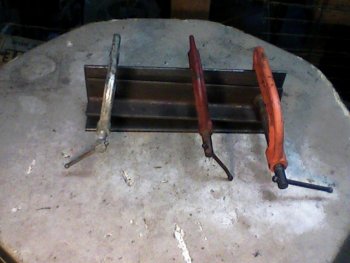
Well got the HT underway yesterday, normalized several times, triple edge quench and then to the toaster oven for tempering last night. I thought I was ready to finish things with a couple more temper cycles this morning when I discovered it had warped, apparently during tempering, unless I just didn't notice it during the hardening. I ended up reheating past critical and straightening on the anvil, then starting over with normalization cycles. I didn't get it perfectly straight but close enough. This time I put it on its spine instead of flat for tempering and after the first cycle I thought there was a slight increase. I did a little research on warping issues on here and found some good info. Not wanting to start over again, I opted to try to correct during tempering since its minor, so its back in the toaster oven but clamp to a piece of angle iron. I'm going to repeat again after this cycle.

The chopper is a fairly thin, wide blade. Since I am working by hand, I wanted to remove as much material as I could before HT while the metal was still soft, I guess increased warp potential will be a trade off to this approach. I hope I can prevent in the future using the angle iron.

I'll get more pics after tempering is complete.
 
Well after the first temper cycle clamped to the angle iron the spine is straight.

chopper angle iron temper 7-27-13.jpg


There was still a little curvature to the blade edge, so I cut I piece of wider angle iron that covered the full width of the blade. I then decide to used the smaller piece and sandwiched the chopper between.


chopper sanwiched angle iron temper 7-27-13.jpg

I checked the thickness for future reference, and because I just got my first calipers yesterday and needed an excuse to use them : ) . The blade is .04 to .06 and the spine is .15 near the handle, tapered down to .09. Fairly thin for HT but I was trying to forge to shape as much as possible.
 
I tried to get a shot of the spine and blade after the 2nd temper but the pics really didn't show them very well. The angle iron trick seemed to work.

I cleaned of the scale and hand sanded to 600 grit. Ready to get the handles on and sharpen.

Somebody is gonna have to tell me the secrete for indoor pics, this is the best I could do. I like the way the intentional hammer marks from the forging ended up turning out.

chopper 600g 7-27-13.jpg
 
Last edited:
Before attaching the scales, I decided to thin the blade down more to get ready for sharpening so, with no belt grinder, I used the angle grinder on low rpm and a 120 grit flap disc. Took it nice a slow, didn't let the blade get hot to the touch, and am pleased with the results.

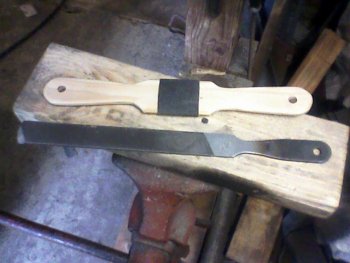
I decided to hand sand again afterward to blend everything back in. I had just been using a wood block, but deiced to make something a little better suited to the task. I'm not sure if others use something similar, could be in everyone's shop, but I have never seen or used anything like it. I pattern the handles from my file. The emery cloth or sand par is just held in place with my thumbs. Works pretty well, just thought I'd share, might help another hand sander getting started.

file , hand sanding block 7-28-13.jpg


Eddie,
Sounds like you are doing fine so far, Keep going and things will get a little easier with each knife.
So lets see those handle scales?

Laurence

www.rhinoknives.com

Thanks. I have definitely learned alot from making this one, and have a functional knife I am pretty pleased with to show for it.

Its funny you mentioned the handles, that ended up being the one area I would tweak if I was doing it over again. They ended up about 1/2 to 3/4 inch shorter than I would have liked for the right balance and grip. I might make some adjustments later if it bothers me too much. I'm afraid the scales aren't much to look at, still just using some red oak that was available locally. I figured I would rather ruin a cheap piece of wood while figuring things out. I can always replace them later (especially if I redo the handle).

I also had a little issue peening the stainless pins in the handles. They aren't that bad, but didn't flared out symmetrically, and one bent slightly. I'm think I might like to try a little softer material in the future.

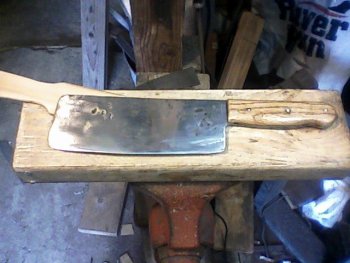
Well here's the finished "chopper". Other than the handle proportion, I am pretty pleased with it, particularly for the first time forging a blade this large and this thin, and it only being my 2nd finished knife.

finished chopper 7-27-13.jpg
 
The sanding paddle looks like it would great. They really help you give a wide even pressure.

The chopper looks fine and servicable. Time to make some stir fry or chili and do some veggie chopping.

Laurence

www.rhinoknives.com
 
So its called a sanding paddle, I thought something like this was probably already being used by others, I just don't recall ever seeing reference to one.

The chopper does work pretty well. I had to give it a whirl, so being a southern boy, I pulled out some potatoes and onions and made some home style hashbrowns. Its a little heavier than my chefs knives, which is to be expected, but the weight helps to do the work you, its seems to just fall through the veggies. Gave me a little since of accomplishment to have my first servicable knife. I discovered by accident that I seem to naturally grip a little forward when chopping, with my index finger partially on top of the spine, so the handle actually works much better than I thought.
 
Eddie,
Sanding paddle is just what I know them by from a older gent that showed me how to hand sand years ago.
Others may have different names for them and I have seen several shapes, sizes and configurations.
Don't the hash browns taste better when you make them up with your own homemade knife?

Laurence

www.rhinoknives.com

I think they were the best ones I ever had : ) .

I like the chopper - I like the fact you got that much surface area from that smaller looking bar of steel!

Nice Hammering

Thanks, I started out forging and moved on to knives, I really enjoy the hammering aspect.
 
Back
Top