Burl Source
Forum Owner & Moderator
This is a quick and easy guide to finishing burl and other figured woods for knife handles. This method works well with both light and dark colored woods. For this demonstration I used maple burl (hardwood) and redwood burl (softwood).
I am not saying this is the best or only way to finish burl. It's just a quick and easy way with results that will rival some of the longer more drawn out processes.
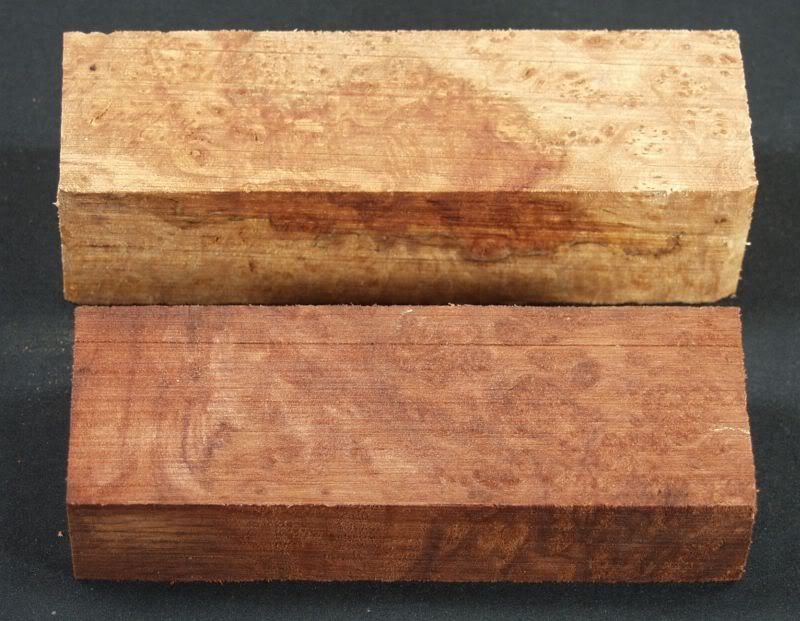
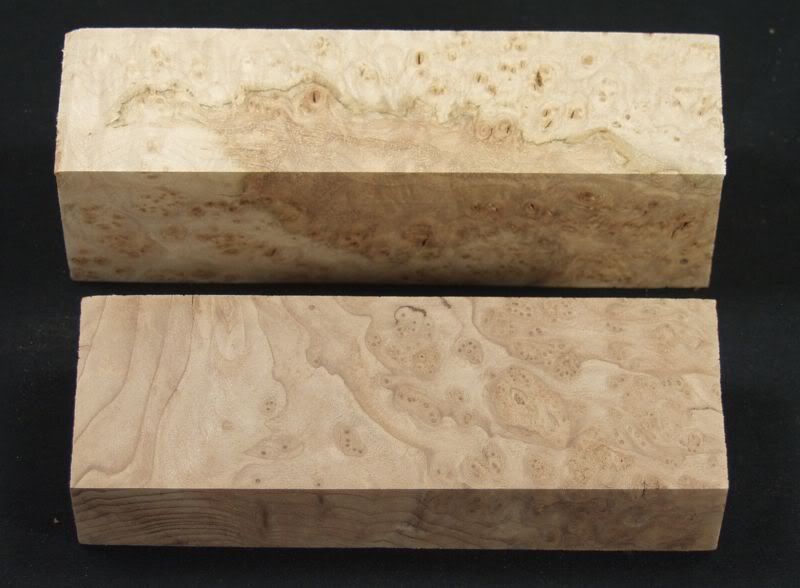
The first two photos show a couple blocks of some scrap material I am using for this guide. The first shows the blocks dry and the second with the blocks misted with water. You will see a big difference that you can compare to the photos of the finished pieces at the end of this guide.
Dry Photo unfinished blocks
Wet Photo unfinished blocks
The first step after you have shaped your handles is a thorough sanding. Working through the grits up to 400 grit is good enough for most woods. The next photo shows the blocks sanded to 400 grit.
400 grit photo
After the wood has been sanded to 400 grit it is time to get it ready to be oiled. Using your air compressor and an air nozzle blow off any dust from sanding.
We mix our own oil (1/3 linseed, 1/3 paint thinner, 1/3 varnish) but you could just purchase a can of danish oil for similar results. I use a brush and apply a very liberal coat of oil to the wood. After it sits for about 10 or 15 minutes I apply a second coat. Depending on whether I am in a hurry or not I let it sit for about an hour and then wipe it down with an old t-shirt.
Next with the compressor and air nozzle I blow out any excess oil that can accumulate in checks, voids and open grain. This step is important, otherwise that excess will bleed out resulting in an uneven finish.
Next photo shows the blocks after they have been oiled.
Oiled blocks photo

The normal way to do an oil finish is to build up successive coats for a good finish. That can take days. This is where I steer away for the old school way of a hand rubbed oil finish.
Some times when you oil the wood you will see some sanding scratches you did not notice before. Normally you would have to re-sand the wood and then re-oil the wood. As long as the scratches are not deep, the next steps will correct minor blemishes.
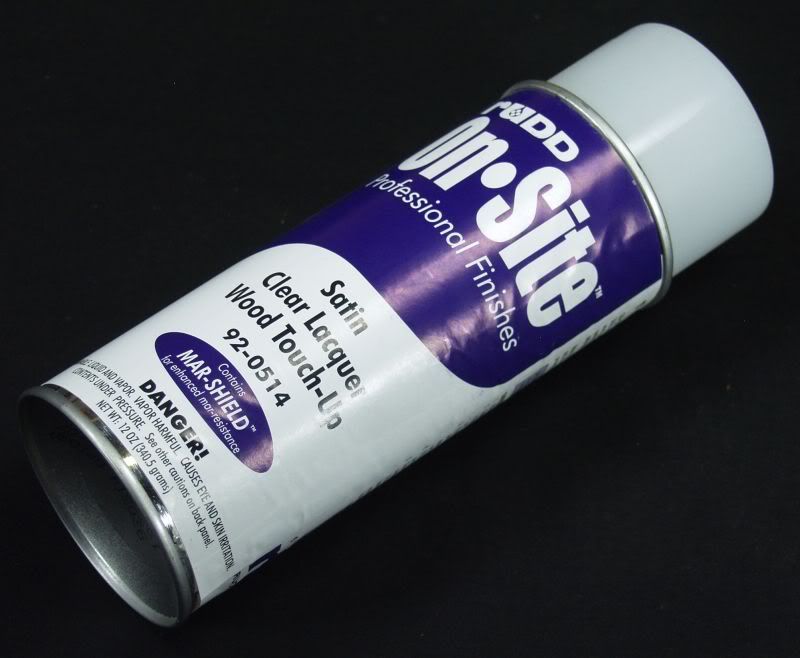
Without waiting for the oil to dry fully I use a top coat of lacquer. It is up to you whether to let the wood dry overnight or not. When I make boxes I just wipe off any excess oil and go to the lacquer step. I use Rudd brand Aerosol with a satin finish.
Lacquer can photo
I am not saying this is the best or only way to finish burl. It's just a quick and easy way with results that will rival some of the longer more drawn out processes.
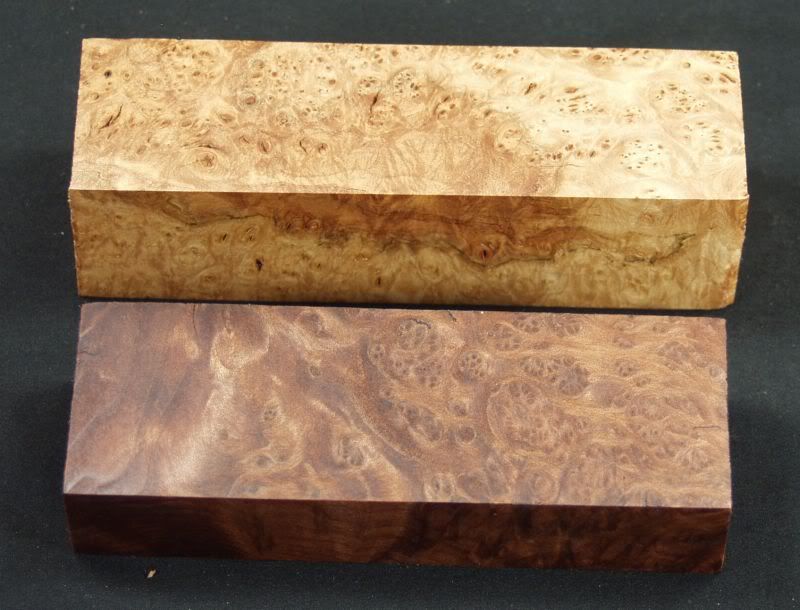
The first two photos show a couple blocks of some scrap material I am using for this guide. The first shows the blocks dry and the second with the blocks misted with water. You will see a big difference that you can compare to the photos of the finished pieces at the end of this guide.
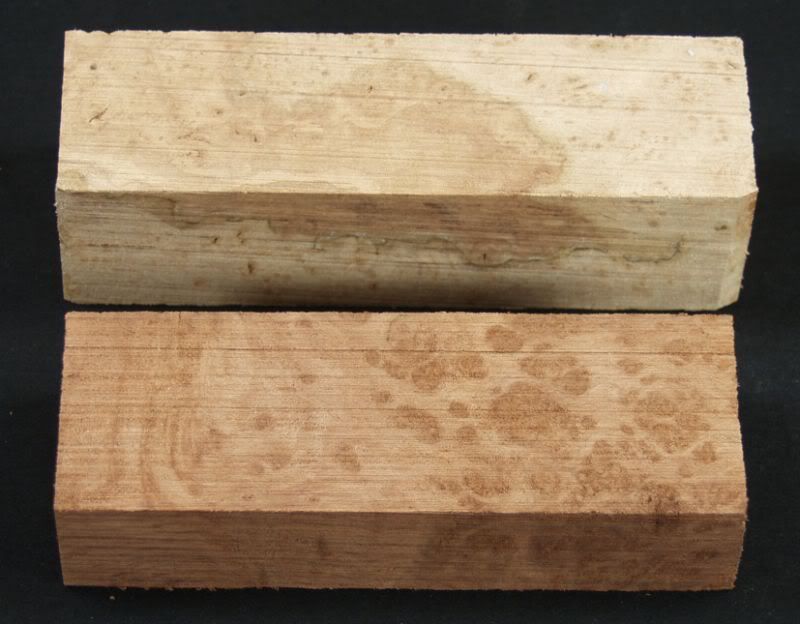
Dry Photo unfinished blocks
Wet Photo unfinished blocks
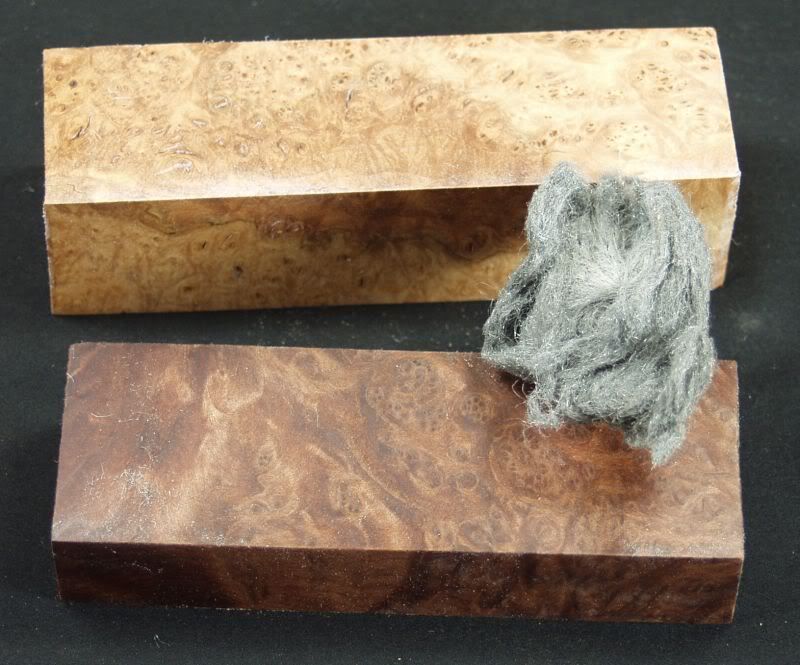
The first step after you have shaped your handles is a thorough sanding. Working through the grits up to 400 grit is good enough for most woods. The next photo shows the blocks sanded to 400 grit.
400 grit photo
After the wood has been sanded to 400 grit it is time to get it ready to be oiled. Using your air compressor and an air nozzle blow off any dust from sanding.
We mix our own oil (1/3 linseed, 1/3 paint thinner, 1/3 varnish) but you could just purchase a can of danish oil for similar results. I use a brush and apply a very liberal coat of oil to the wood. After it sits for about 10 or 15 minutes I apply a second coat. Depending on whether I am in a hurry or not I let it sit for about an hour and then wipe it down with an old t-shirt.
Next with the compressor and air nozzle I blow out any excess oil that can accumulate in checks, voids and open grain. This step is important, otherwise that excess will bleed out resulting in an uneven finish.
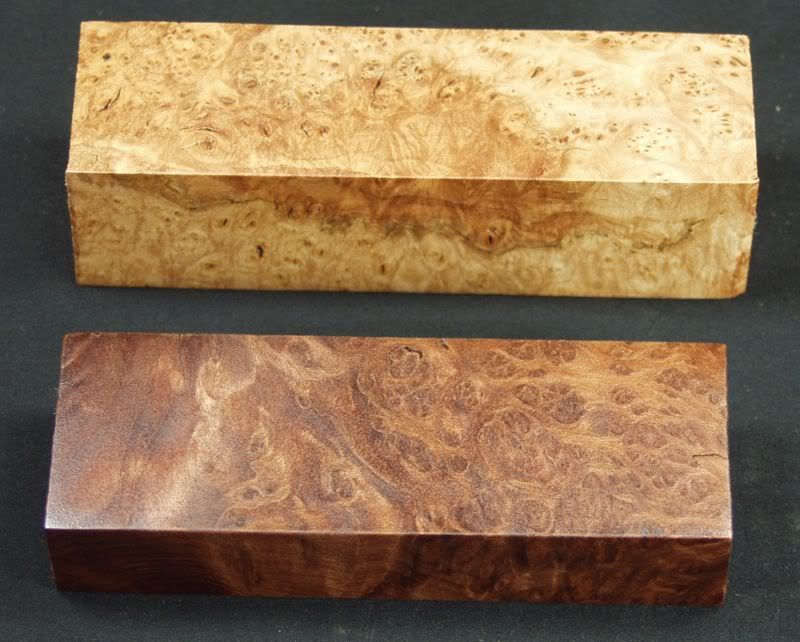
Next photo shows the blocks after they have been oiled.
Oiled blocks photo
The normal way to do an oil finish is to build up successive coats for a good finish. That can take days. This is where I steer away for the old school way of a hand rubbed oil finish.
Some times when you oil the wood you will see some sanding scratches you did not notice before. Normally you would have to re-sand the wood and then re-oil the wood. As long as the scratches are not deep, the next steps will correct minor blemishes.
Without waiting for the oil to dry fully I use a top coat of lacquer. It is up to you whether to let the wood dry overnight or not. When I make boxes I just wipe off any excess oil and go to the lacquer step. I use Rudd brand Aerosol with a satin finish.
Lacquer can photo