New Makers Mark Press

backtines

Well-Known Member
I think I've got it..

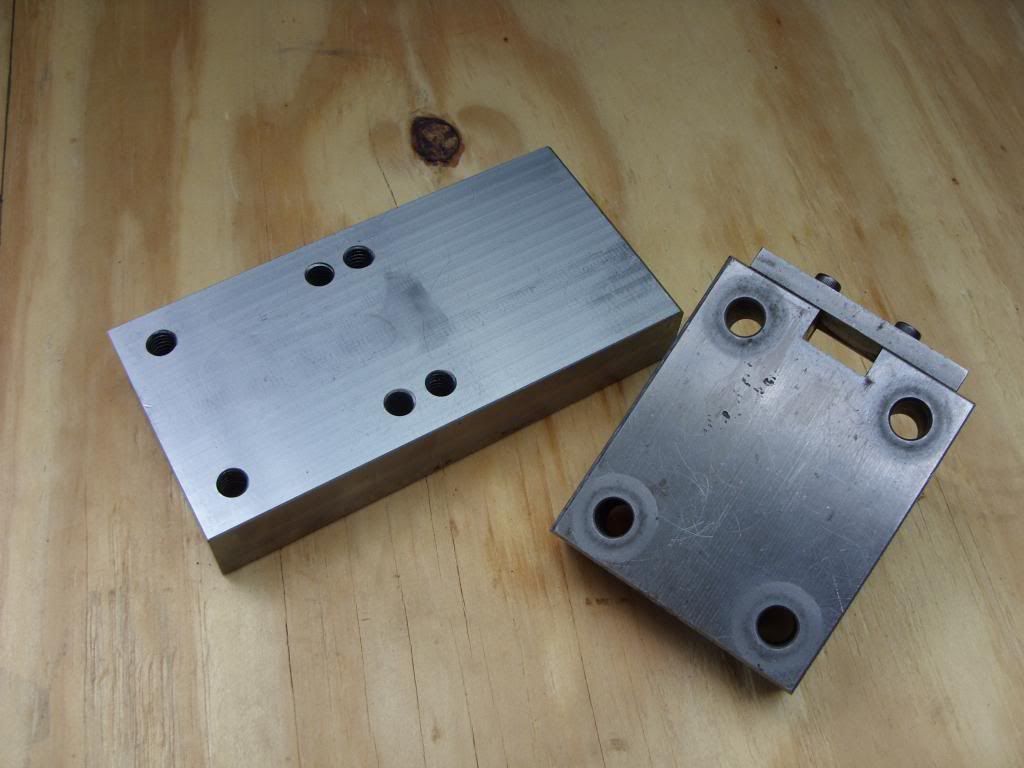
After going back and forth with trying to decide on how to make a makers mark press. I had this idea of taking a standard 1 ton arbor press from Harbor Freight and milling a slot in it to accept my makers stamp. I followed it up by adding a few set screws to lock the stamp in place. Also to give me the option of tweaking the stamp left or right.

Whatta ya guys think ?


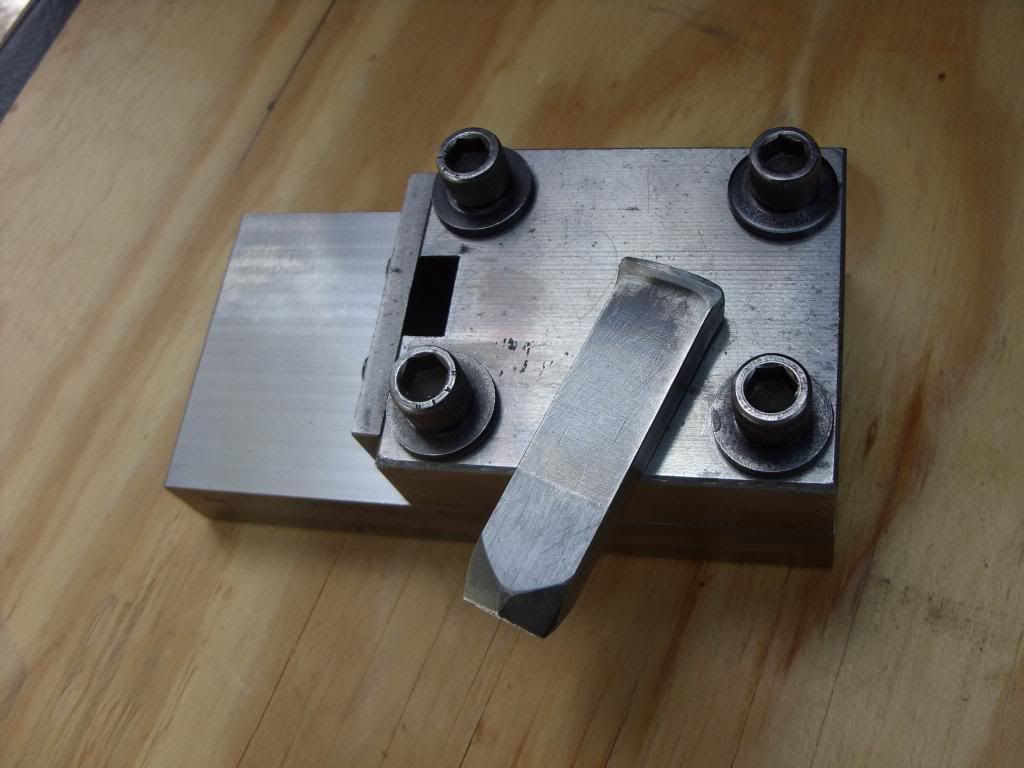
The set screws also give me the option of tweaking a little left or right.


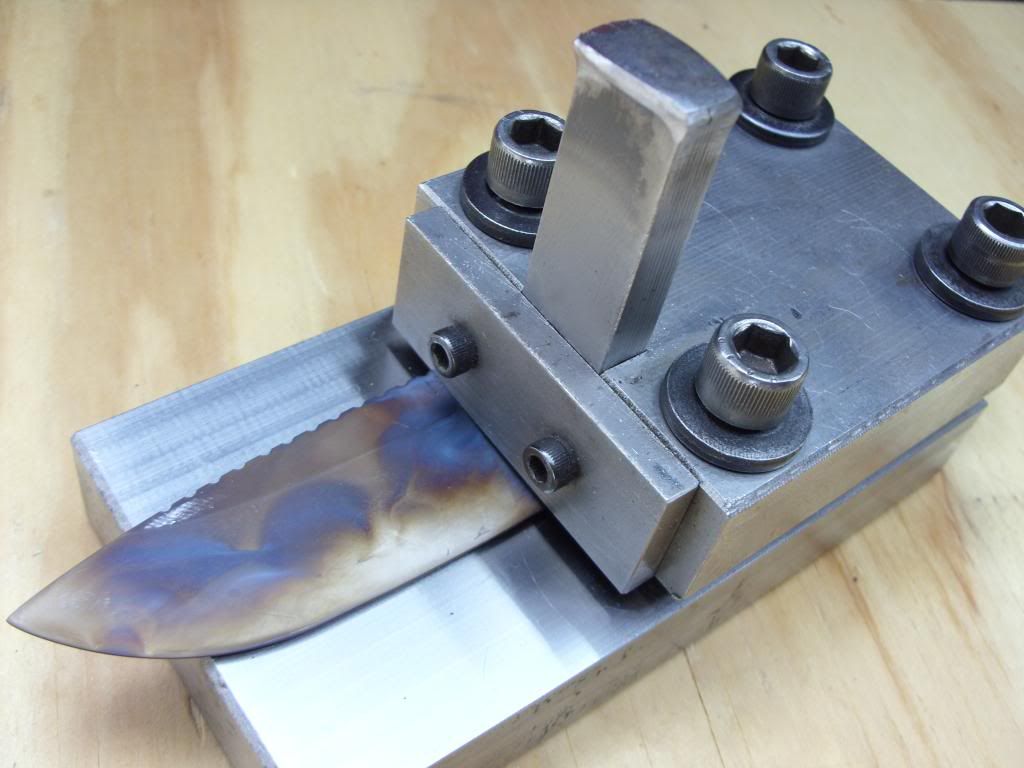
I put a chunk of aluminum down on the table so I wouldn't scratch the blade


Lay the blade in place, bring down stamp , and whack top of post.. Im gonna make a brass block for top so i dont mushroom the heck out of it .


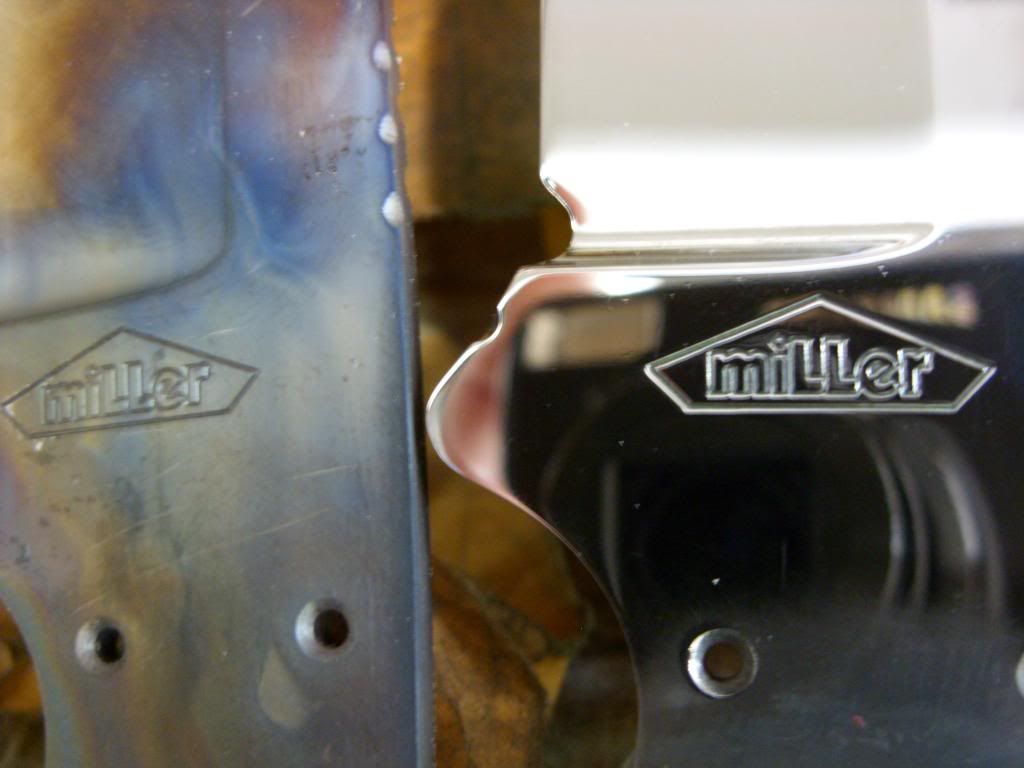
Stamp came out ok. But a little light on the D and T.. I had to tweek it a little and give it another hit because I believe the ends are worn from me stamping by hand. ( cant hold the stamp straight by hand )

[/URL

I put the bolster in loosely and darkened up the mark for another pic
[URL=http://imageshack.us/photo/my-images/839/dsc02835ho.jpg/]


Just needs a little hand sanding and clean up


All in all , I bought the press for 50 bucks at Harbor Freight. A little milling and a few set screws. Thats a rap..

PS, I was talking to Josh Dabney on the phone the other night about converting my Surface Grinder over to belt and we got on the topic of making a press. This was pretty much the way we figured it to come out , less the bass cap for top of ram..

Anyway , Thanks for looking .
 
Looks perfectly like what I had mind. I'll bet once you get your stamp set screwwed where you want it you'll never need to touch it again.

Nice mod and I think this is a WIP !

-Josh
 
Looks perfectly like what I had mind. I'll bet once you get your stamp set screwwed where you want it you'll never need to touch it again.

Nice mod and I think this is a WIP !

-Josh

I think I may need a new stamp .. After messing around with it last night, no matter what I did , I couldnt get my stamp to come out with one nice hit . When the stamp is in the closed possition , I can shine a light from the other side and physically see the my corners are high. Its all from trying to stamp by hand and not being able to hold it perfectly straight. I think I may need to invest in a new stamp.. But it really is a lot easier doing it this way , then my old way.
 
Mikey,
It might help if you mount the press onto a more stable surface, the bench top is probably flexing and your not getting the full benefit of your hammer blow. I use my steel welding table as a work surface whenever I'm stamping something like this.
 
Mikey,
It might help if you mount the press onto a more stable surface, the bench top is probably flexing and your not getting the full benefit of your hammer blow. I use my steel welding table as a work surface whenever I'm stamping something like this.

Good point Cal , Ill give that a go tonight . Id hate to bolt it to my table though, Ill clamp it down solid and give it a try. I still may think the ends are a pit worn though .. Anyway Ill try it .. Thanks CAl.
 
Mikey,
Forgive me if this sounds ignorant, but why Oh why wouldn't you use a stencil and etch?
I know the stamp is old school but on stock removal the etch is sooo smooth and easy.
Just askin.
Steve
 
Mikey,
Forgive me if this sounds ignorant, but why Oh why wouldn't you use a stencil and etch?
I know the stamp is old school but on stock removal the etch is sooo smooth and easy.
Just askin.
Steve

Truth Steve and I do believe its me .. Ive been messing around with this knife stuff a few years now and Ive put my name on 75 knives or so . Id say the first 50 i used an etch o matic etching machine . I swear to you , everytime I used it , I had to cross my fingers and hope and pray to the knife gods that it would come out ok . More times then less , id peel back the stencil , and the letters would look like s**t.. It would look heavier in spots and light in other spots . Then if I had to realign the stencil , I could never get it dead on . Id try , but ruin the whole knife . Id spend hours on making a knife and ruin it in 1 minute. I just plain out wasnt happy with the out come ..

I then posted a thread or two with my problem , and got some good advice.. DOnt use as much solutions, use a q tip and wire it back to my etch o matic ect.. I definitely had more control that way but still not what I was looking for.

Sorry for the run on story but this is how it went down..

I found myself getting more into the knives and leather sheaths , so I ordered a stamp for my leather sheaths with my logo and since I had to wait over a month for it , I fingured for another 100 bucks or so Id get one for steel.. Thats where I am today . I just figured id use the steel stamp .

Now Fill me in brother !! Im into this gig alot more now , trying to find the right tools for the job. So tell me , Where did I go wrong .. I would have to guess that using that Etch O Matic was my first mistake right ? LOL .. Tell me what I need to get to make those beautiful etches I see on thse blades.

Anyway long short , I had to start somewhere and ALWAYS OPEN ! for new ideas and new tools.. Tell me what to do Steve.

Thanks.
 
I really don't do anything special. I have a Personalizer Plus and use good quality stencils.
I cut the stencils out and leave some material around them and use blue tape as a hinge. This way I can check on progress with perfect realignment.
I also tape off the areas I dont want boogered up by the acid. Then I set to the deepest etch and turn the dial to "11" and do 5 second pressings with the block applicator that is almost dry. If you leave it on too long, it will sizzle and can melt the stencil. I can get .008" to .010' of depth and can clean up the area with some 2000 grit if it's a little cloudy.

If you are doing damascus and have a logo with a border (an oval) etch your logo before you etch the damascus then fill in the logo oval with nail polish (I use red) then dip your blade until the dammy is where you want it and then wipe off nail polish with thinner and you will have a nice shiny silver logo surrounded by damascus.

The last pic is on the light setting just to give a flat logo with no depth. A big advantage of etching as that it can be done on hard or soft blades, tools, guns, anything metal.

attachment.php

attachment.php

attachment.php

attachment.php


etch4.jpgetch3.jpgetch2.jpgetch 1.jpg
 
I really don't do anything special. I have a Personalizer Plus and use good quality stencils.
I cut the stencils out and leave some material around them and use blue tape as a hinge. This way I can check on progress with perfect realignment.
I also tape off the areas I dont want boogered up by the acid. Then I set to the deepest etch and turn the dial to "11" and do 5 second pressings with the block applicator that is almost dry. If you leave it on too long, it will sizzle and can melt the stencil. I can get .008" to .010' of depth and can clean up the area with some 2000 grit if it's a little cloudy.

If you are doing damascus and have a logo with a border (an oval) etch your logo before you etch the damascus then fill in the logo oval with nail polish (I use red) then dip your blade until the dammy is where you want it and then wipe off nail polish with thinner and you will have a nice shiny silver logo surrounded by damascus.

The last pic is on the light setting just to give a flat logo with no depth. A big advantage of etching as that it can be done on hard or soft blades, tools, guns, anything metal.

attachment.php

attachment.php

attachment.php

attachment.php


View attachment 38669View attachment 38668View attachment 38667View attachment 38666

Looks good.. The machine I had , had no such things as settings. I plugged it in and went to work. Ok ,I did not push pull for 5 sec's, and I was never able to sink the etch down to .010 either. Im gonna blame the machine and some inexpierence on my behalf. I think I may try it again . The Personalizer Plus. Ill definetely look into it .. Thank You Steve.
 
Tracey actually has a KD Etcher now that is cooler and more sophsiticated than my old PP.
You may want to look into that one. The only thing that would make it nicer would be if it had my picture on it. :)
Steve
 
Backtines,I went thru the samething you did with the etcher,I used one for a few years but I was never really happy with the results.this was with a marking methods hand held unit and it was years ago,before any of the models I see being used now.or I was just unaware of them.I always liked a traditional stamp anyway.anyhow,I came up with a fixture to hold my stamp,which is just like your stamp.you can have a machine shop or anyone with a milling machine make this.once your blade is clamped in you can stamp your blade perfectly,remove the stamp and look at your mark and restamp if you want perfectly.the blade and stamp will never change position.this thing is the cat's ass of stamp holders.I'm not going to describe it,it'll take to long,I'll take pictures and post them here on sat.
 
Backtines,I went thru the samething you did with the etcher,I used one for a few years but I was never really happy with the results.this was with a marking methods hand held unit and it was years ago,before any of the models I see being used now.or I was just unaware of them.I always liked a traditional stamp anyway.anyhow,I came up with a fixture to hold my stamp,which is just like your stamp.you can have a machine shop or anyone with a milling machine make this.once your blade is clamped in you can stamp your blade perfectly,remove the stamp and look at your mark and restamp if you want perfectly.the blade and stamp will never change position.this thing is the cat's ass of stamp holders.I'm not going to describe it,it'll take to long,I'll take pictures and post them here on sat.

Cool, I'd love to see it.
 
Ok,here's the pics.photobucket changed something so hopefully this will work...........the first pic shows it layed out,two blocks of steel,the holes in the top pas thru holes and the bottom block threaded.you can see how this was made,the top block was milled the width and depth of the stamp and a plate bolted across the top.
SN851155_zps48e46871.jpg


This picture shows it together with my stamp,much like backtines..........
SN851156_zps6da7b93c.jpg


This shows a blade inserted,clamped down,and the stamp in place {this blade is obviously heat treated,it's just for the picture}
at this point you can stamp it and then look at it and restamp if you want,or you can beat the stamp till next sunday,it's not going to change position.
SN851157_zpscedd053c.jpg


this shows the finished stamp,nice and deep and clear.this is one thing I like about stamping is the fact that you can buff or satin finish over it with out possibly messing it up.
SN851161_zps4d8c777e.jpg
 
Bladegrinder, that is a very very cool idea ! I like that a lot . I like it better then what I made just for the simple fact that the blade won't move. Really good idea, too bad I didn't see this a month ago lol. Well done!
 
Back
Top