Leather Sheath Making WIP

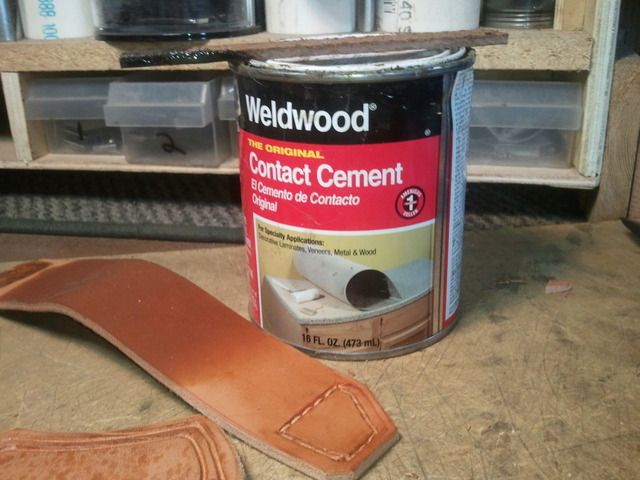
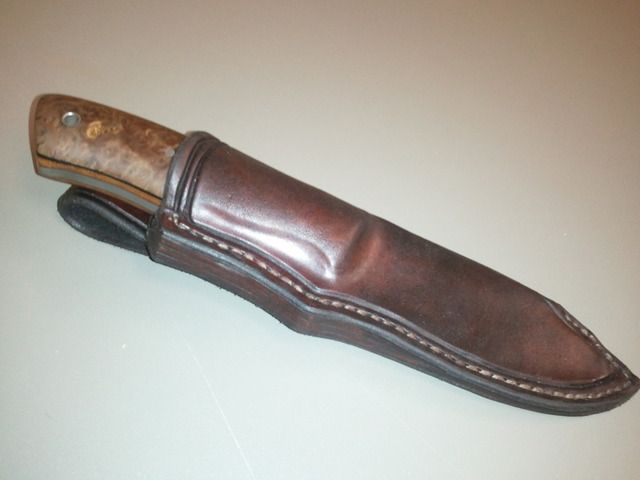
Here's how I make my leather sheaths. Some of it might look familiar if you've seen Chuck Burrows excellent DVD. I've also learned a lot from Paul Long's and John Bianchi's DVDs.

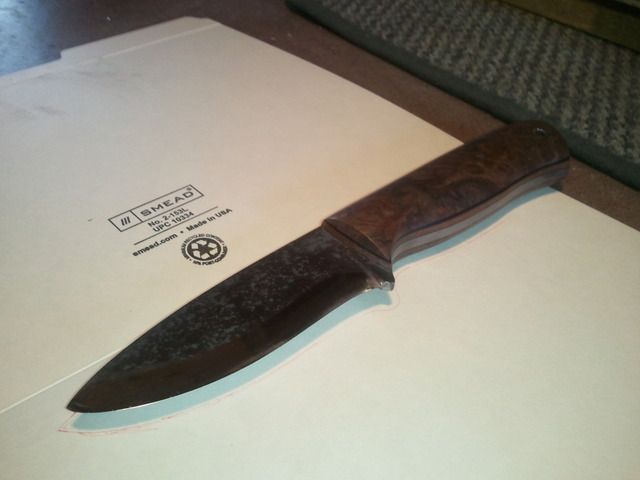
I didn't make this knife, someone wanted me reprofile the blade and then decided they wanted me to make a sheath for it also.
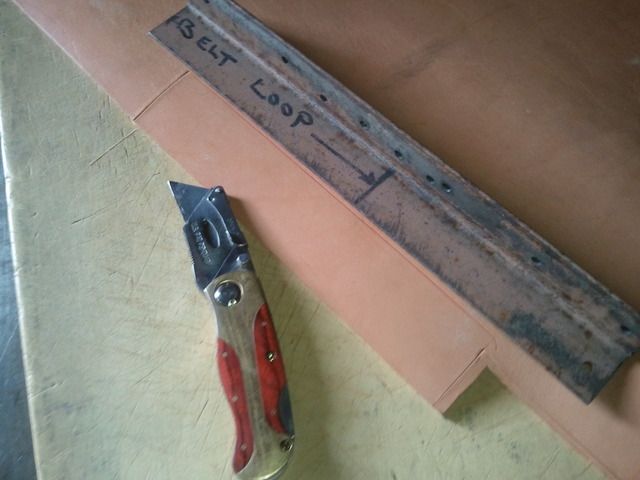
Layout:
First I lay the blade, spine down and centered on a manila folder. Then, roll it over to one side. This will take the thickness of the handle into account.

2012-10-21151941.jpg


(edit: changed 5/16" to 1/2" in the following paragraphs, the 5/16" is for a much smaller model)
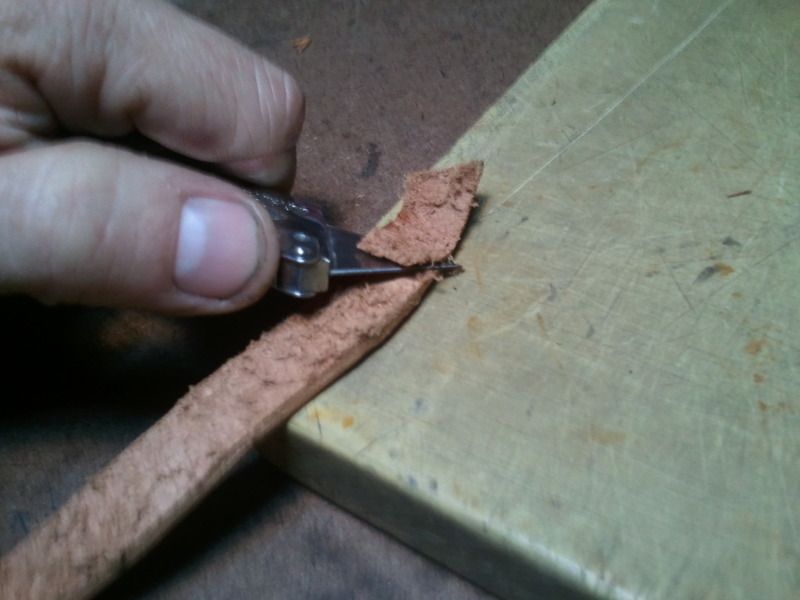
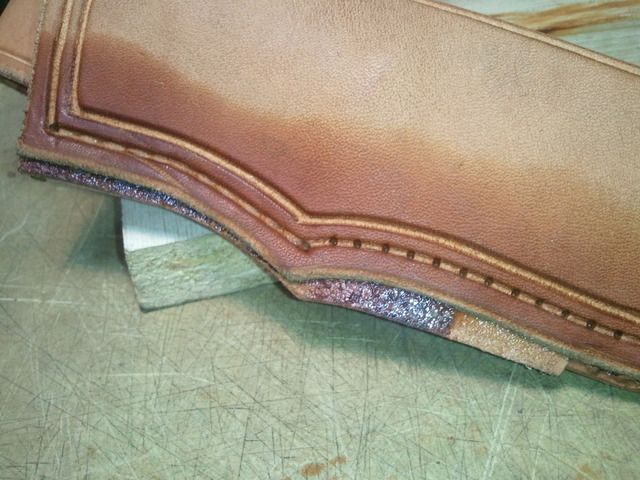
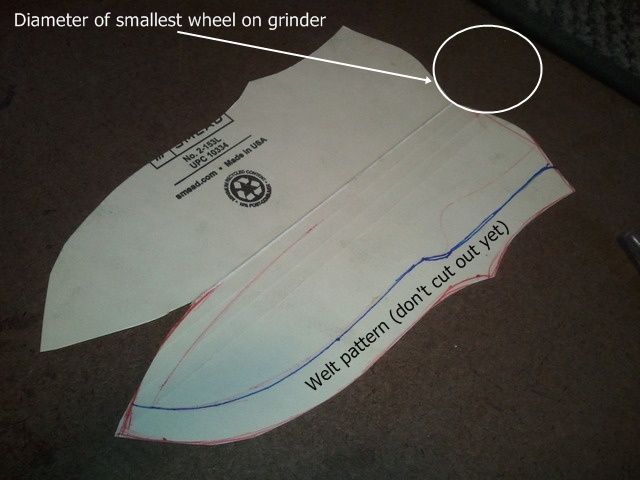
I measure over about 1/2" all the way around the blade side. Also around the tip if you're going to sew around the tip, which I always do. It’s a small touch that I think sets it apart and doesn’t add much work at all. You don't have to make it quite so wide on the back side of the tip since there wont be a welt there.

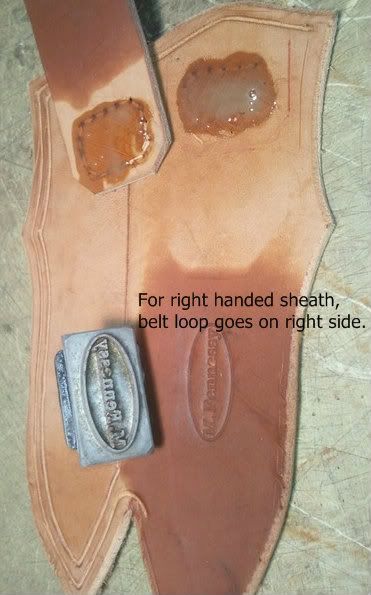
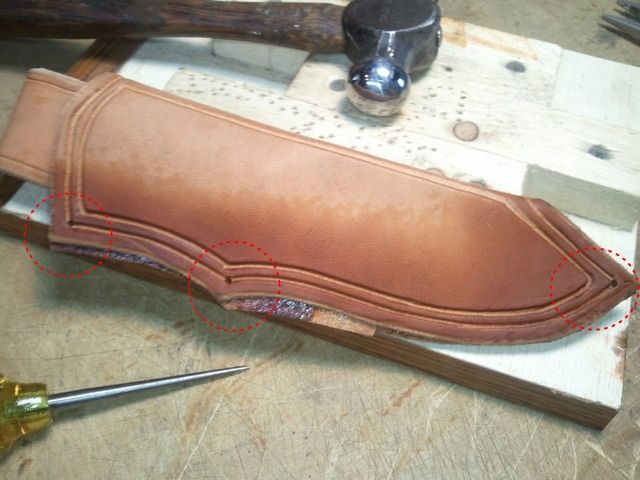
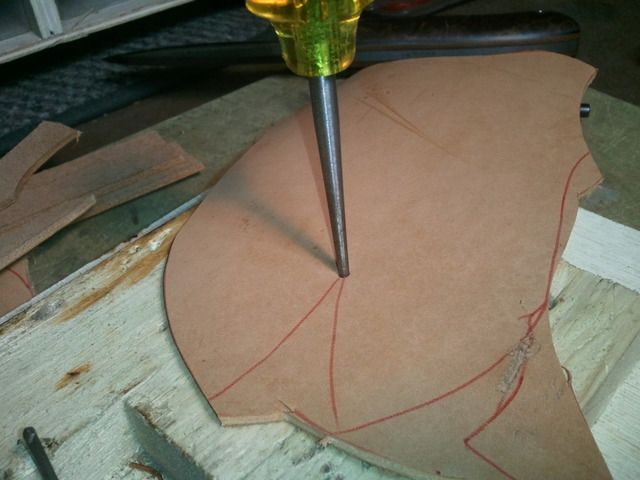
When you get to the widest point of the knife, usually the guard or near the ricasso, you can stop outlining the knife and just make the shape whatever design you want from their up, as long as it's 1/2" wider than the widest part. In the picture you can see I went wider than 1/2" at the widest point so that I could put a slight curve on the top third of the sheath.

By the way, 1/2" is a little wider than you need but I would rather adjust later and have more material to take off than have to scrap it because I ran out of room, which used to happen to me quite a bit.

2012-10-21152248b.jpg


The top you can shape however you want, just make sure that it will be an even swoop across the top when you cut out the pattern or you might have a hard time sanding it later. I make sure the center curve fits the smallest wheel I have (2")

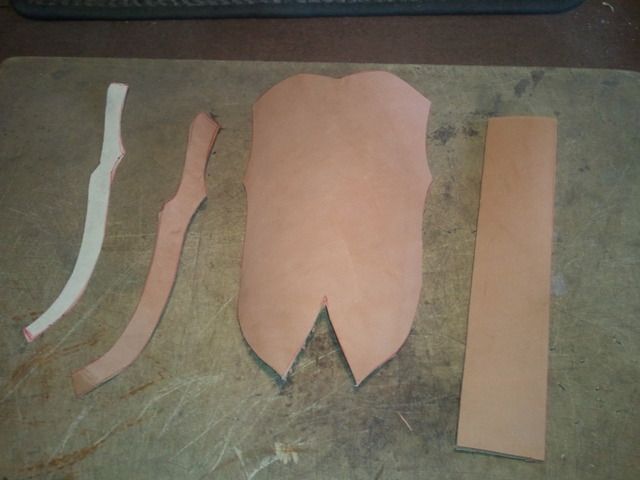
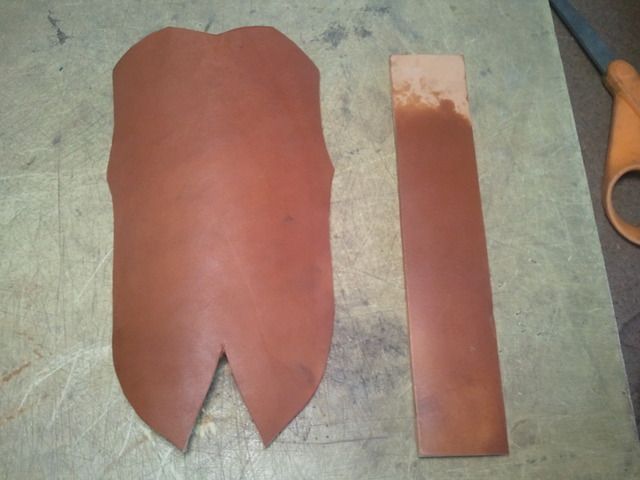
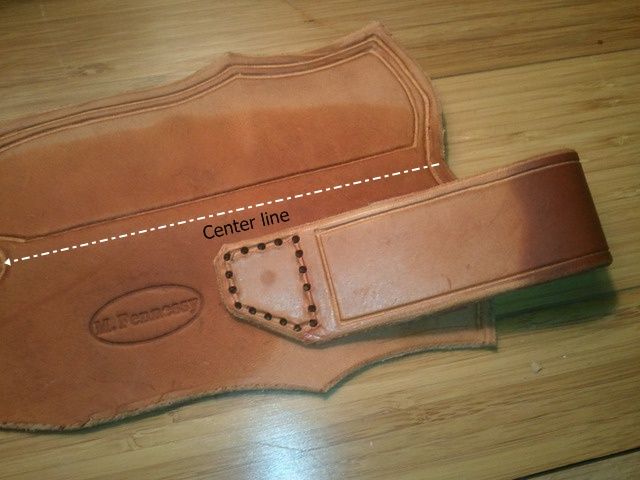
Draw a line from the widest point straight up to the top of the sheath. This will be the pattern for the welt. Here I've drawn that in in blue so you can see it better. Don't cut it out yet, we'll do that after transferring the bigger pattern to the leather.

2012-10-21152625b.jpg


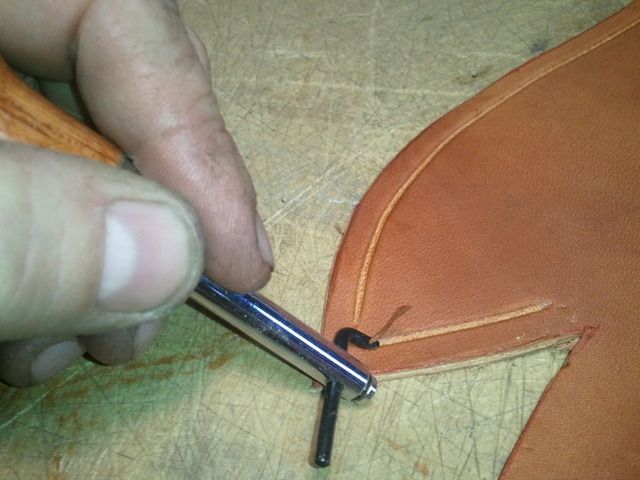
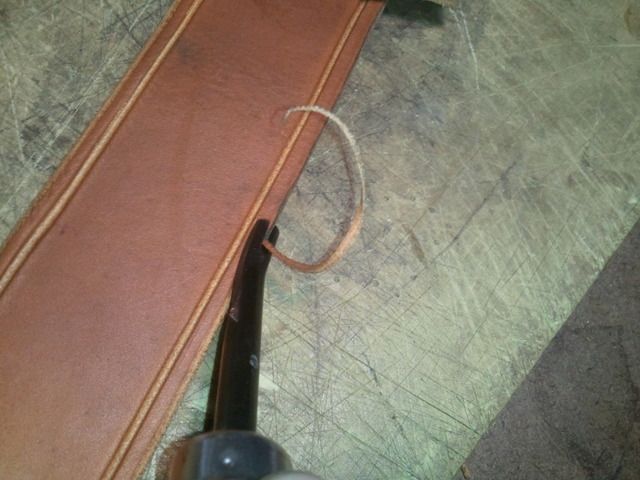
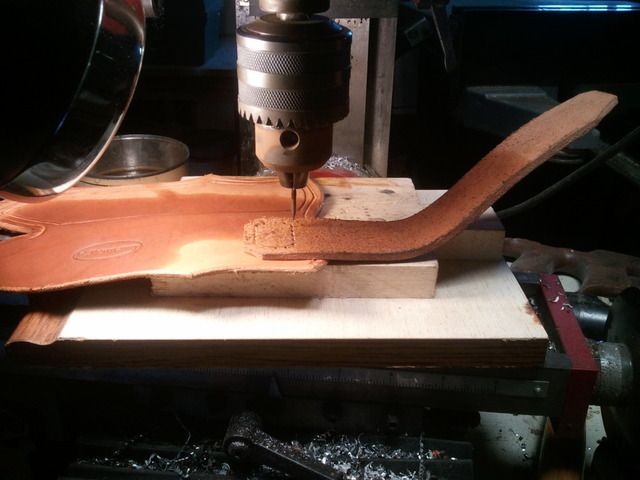
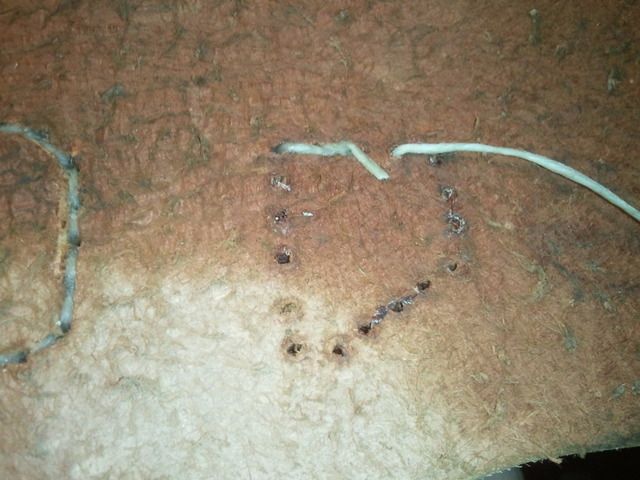
If you have to bring two cuts together in a 'V', put a small hole that you can cut out from so the leather doesn't split later.

2012-10-22175150.jpg
 
Last edited:
I just use a utility knife to cut the leather out. I resharpen it before each sheath. I make the belt loop 6" or so long and as wide as my ruler. I use a piece of angle iron, actually bed frame, to cut straight lines. It gives me something to grab onto so it doesn't slip. Ignore the 'belt loop' measurement in the picture, that was for a different design.

2012-10-21153721.jpg


Here's everything cut out.

2012-10-21155017.jpg


Here's the three specialty tools I'll be using. Stitching spacer (overstitch wheel), groover and edger.

I took out the regular slot head screw that came with the groover and put in a torx socket head screw. This made it much much easier to tighten and loosen and the socket head rides along the edge of the leather better.

2012-10-21155353.jpg


Leather is slightly dampened with a spray bottle to make tooling and bending easier. I put my hand over places that I know I will be gluing up later, like on the top of the belt loop. I should have left a dry spot on the sheath where the loop will attach. It was dry by the time I got to that step anyway. I'm being very slow on this sheath since I have a deadline :les: I'm finally figuring out that going slower is sometimes the quickest way to get something done.

You'll have to see for yourself how wet to get it. It will soak in pretty fast. Some people put it in a plastic bag to temper it and even out the dampness. I've seen pros not bother so neither do I. Just not too wet and not too dry.

2012-10-21155544.jpg
 
Last edited:
Can't get enough of Sheath WIP's! Thanks for posting. I look forward to seeing the outcome.

I'm finally figuring out that going slower is sometimes the quickest way to get something done.

Some days, I have to relearn that lesson! :(
 
*NOW IS WHEN YOU HAVE TO DECIDE IF IT'S LEFT OR RIGHT HANDED. IT'S VERY EASY TO FORGET AND END UP MAKING IT BACKWARDS*

Looking at the sheath, good side of the leather facing you: Belt loop will go on the right side for a right handed sheath. You'll be cutting the groove for the stitching on the left side.

I'm jumping ahead putting this picture here, you'll see it again later. Actually this is also a good picture to show where the grooves go and where to stop.

2012-10-21163136b.jpg


Adjust the groover to put a groove about in the middle of where the welt will go. This groove is mostly for the stitching, but will be decorative along the top. I don't run the groover where the stitching will be in the back because I'm not positive where the holes will be yet.

2012-10-21155906.jpg


I also cut grooves in the belt groove where I'll be putting stitching in. You'll have to figure out exactly how you want to attach the belt loop but you should get a pretty clear idea by looking at the rest of the pictures.

If you want a decorative groove you'll need to do that now. If you're going to be doing any tooling, you'll need to outline where you're going to do that.

This sheath will just have a decorative groove, but I'll show you on another sheath how I do tooling.

Note that the center line of the decorative groove isn't really centered, it's about 1/4" away from the center line. If you put the decorative groove right down the center, you won't be able to see it from the *front?*, *top?*, *whatever you call the side you'll probably look at the most*.

In the pictures of the other sheath with tooling you can see that the center line IS actually centered. This is so the tooling will wrap around the sheath. I usually don't have it do that. I usually have it stop in the same place as the decorative groove would be but it works either way.

2012-10-21190357b.jpg


(Different sheath) Here's how I do tooling. I only use two punches, a basketweave (don't remember the size) and a camouflage stamp (don't remember the size). Not much to it at all actually.

You can see an extra red line (a mistake) on the leather here. Use a red ball point pen because it will get covered up by the leather dye. I mark the sheaths up quite a bit and the marks always disappear after dying.

2012-10-24062022.jpg


2012-10-24073731.jpg


Just so you can see the finished tooling. By the way, this is a very short knife, about 5 1/2":

compactkoash.jpg


Here I've run the stitching spacer into the grooves of the belt loop. This tells you where you'll drill/punch your holes.

2012-10-21161346.jpg
 
Last edited:
Running the edger along the edges. Don't do this until you're done with the groover because it lessens how much square edge you have to run against the guide (socket headed screw).

2012-10-21170733.jpg


The top of the belt loop needs to be attached first. Put contact cement where both pieces will come in contact. It will have to dry before you put the pieces together. Put enough on so when it dries it will still be slightly glossy.

Make sure you keep the contact cement off of the rest of the sheath. The leather won't stain where there's contact cement. Some people stain everything beforehand. If you do that, do it the day before so the leather can dry completely.

I also stamp my mark now

2012-10-21163136.jpg


Here's the contact cement I use. I've heard Barge is better but I haven't tried it yet.

2012-10-21163521.jpg


Drilling the stitching holes.

2012-10-21165715.jpg


I use a nail so I guess I'm not technically drilling a hole, it's more of a (spinning) punch. This way the holes should eventually close back up on the thread. I used to drill them out but that removes material so it's not quite as tight around the thread later on. I don't know what size nail I use. It will depend on what size thread and needle you use. I prefer it to be hard to pull the needle through the hole on the second pass (more on that later). I have to use a pliers to pull it through sometimes.

Also, the nail is too far in the chuck on this picture. It works okay but if you're not careful you'll get an imprint from the spinning chuck. I usually have the nail further out so I don't have to worry about that.

(gotta run, more later)
 
Last edited:
Great thread. I use Barge but, at times I run out and have to wait for it to arrive. I'm going to try some wood contact cement as a backup solution.
 
Thanks everyone, glad you like it.

TS, I bet almost any contact cement would work fine. I'll pick up some Barge at some point but after I get these sheaths put together, I can't imagine any way that you could get them apart without really trying (and using the right tools).
 
Once the holes are punched through, flip it over and cut a groove where the holes came through. It won't be pretty or smooth like on the smooth outside, especially without the edges of the belt loop to guide the groover, but that doesn't matter.

I hate how rough it looks when I do this but all you're doing is making a place for the thread to drop down below the surface of the leather. That's especially important on the inside of the sheath so the tip doesn't catch the thread.

You can also see in this picture that it's wet down the center. As soon as I have the leather cut out, I'm spraying the center of the main sheath and the belt loop, both outside and inside, with water every once in a while. I want the water to have a chance to soak in gradually so I can bend it in half later without stressing the leather.

2012-10-21165924.jpg


Tandy waxed thread and needles form Tracy.

2012-10-21171059.jpg


Stitching: There's several ways to stitch. Right now I use the simplest way.

I start on the back, go through the hole, pull the thread through. I leave a short tail that I lay down in the groove so it gets stitched over a couple of times by the next stitches. (This pic is out of order but shows what I'm talking about here. Also, notice I forgot to run the groover between the holes. I pulled out the thread and did that after I took the picture)

2012-10-21190949.jpg


Then just move over one hole and run the thread through, move to the next hole and run the thread through. This will put thread in the space between every other hole.

Keep doing this until you get to the end (main sheath) or where you started (belt loops). Then change direction. You'll automatically be filling in every other space that was left out before. It won't matter where you started, or if there are an even or odd number of holes. You will always just start filling in the right way when you change direction.

I'm probably making it more complicated by trying to explain it. It really is extremely simple. Imagine, or ask, how a kid would sew with yarn and construction paper. That's all there is to it. Up, over to next hole. Down, over to next hole. Up, over to next hole.... When you get to the end, turn around and keep going.


2012-10-21181551.jpg
 
Last edited:
Add contact cement where the bottom of the loop will go and let it dry.

2012-10-21183953.jpg


Repeat punching the holes, then stitch the same as before. Stitching each part of the belt loop should only take a couple of minutes.

2012-10-21190357.jpg


Trip off the bottom tip of the welt so it will blend in between the two halves of the sheath

2012-10-22085019.jpg


Put contact cement on one side of the welt and one side of the sheath and wait for it to dry.

Most of the time is spent waiting for contact cement to dry. I make sheaths in between other projects so it doesn't feel like it takes up any time at all. I put the leather on the wood stove that already has a fan blowing on it (with whatever metal it takes underneath it to keep it just moderately warm). In the summer, obviously, I just use the fan. The fan gets used a lot for drying things in leather work.

2012-10-22090121.jpg


You could put contact cement on both sides of the welt and both halves of the sheath if you know for sure that the knife will fit. I know that the handle of this knife is too thick for just one welt, so I'll be building up layers. You could make the sheath wider and it will work but I like to keep it as tight as possible and would rather build up a thicker welt.

I'm not sure if that makes sense. If not, hopefully the upcoming pictures will clear it up. Let me know if it doesn't.
 
Here is the sheath with two more pieces of welt added (for a total of three). You can see how thick the handle is here.

Most of the ones I make don't need an extra welt. I used to make much thicker handles and had many extra pieces of welt added for thickness. It ends up looking kind of cool from the edge when it's all done. The problem is keeping your stitching holes straight through all those layers.

You can also see how rough the inside of this piece of leather is. I get double shoulders from Wicket and Craig, which are HUGE. Some parts are shaggier on the inside than others.

You can also see where I lightly ground off some of the shagginess on the top third. I don't have any problem with it being slightly shaggy on the inside but I don't what to see it poking out of the top where the edge will be polished.

2012-10-22100949.jpg


Glued up after double checking the fit.

2012-10-22103432.jpg


I first punch holes where I need them to be. I'll use the spacer to make the rest of the holes work out, maybe shifting a hole or two a little, but I NEED these three holes to be exactly right there.

2012-10-22103944b.jpg


Stitches marked with the spacer (spur looking tool) on the top part. They're a little faint so I go over them with the awl so that I'm less likely to mess up when I'm using the drill press. You can see that on the bottom part.

You can see that the leather is damp where I'm using the spacer. I'm constantly dampening the leather where I'll be working on it (except for when I'm using the edger).

2012-10-22104421.jpg
 
Holes drilled.

2012-10-22105235.jpg


2012-10-22105228.jpg


After running the groover along the back after the holes are drilled. You can see that I got the leather a little too wet and the groover ended up dragging some across the leather. Still getting a knack for how damp to get things for different tools. Each one is different and may change if it get's dull.

2012-10-22105614.jpg


Stitching. I start on the back again (always) and pick a spot where I think that the double stitching at the end will not draw the eye too badly.

Same as before, pick a spot and head off in either direction. When you get to the end, turn a round and keep going. You'll automatically start filling in the voids.

When you're done, run over all the stitching with the overstitch wheel (what I've been calling a stitching spacer). That will drive the thread down in the groove and give a nice professional touch. Most people will think the stitching was done on a machine.

2012-10-22110638.jpg


2012-10-22111805.jpg
 
Last edited:
Here's where it get's a little unfair. I happened to find a perfect leather forming piece of antler in my big box of antlers. I also cut the bottom at an angle and sanded it to be more useful to me. I smoothed the edges a little and they're getting smoother over the years.

You'll have to find something similar or probably several things to form and push and prod the leather around. I know they make things like that but I've never tried them so you're on your own there. Rounded wood handles would work good. Hard plastics would work fine too.

I spend quite a bit of time working the leather around, smoothing down the inside of the grooves and curving the edges. I think it make a huge difference in the end. Maybe the biggest difference of any one thing. Especially working something into the grooves to even them out.

Keep it wet when forming for the handle (wetter than it looks here)

2012-10-22112044.jpg


I wet down the sheath slightly and put it in a large mason jar with stain in it. The stain is cut with water (it's water based). I don't remember by how much, maybe half and half. I shake the jar really well before putting the sheath in, then put the top on and shake a little and quickly take it out. If you leave it in too long it will get really damp and take forever to dry. It also might start to wrinkle, especially on the belt loop.

I bought this stain from Tandy on sale. It was called Institutional stain. I figured that meant industrial strength. What it means is that it's safe for children and convicts. :34:

It turns out that I really like it though. Most people don't, at all. It might have more to do with what I finish the leather with. I also use oil based, which is very much a superior product but I like this stuff when I'm dunking the whole sheath in. I may have to do it twice though.

2012-10-22113255.jpg


Dry it out slightly, either on the dehydrator, wood stove, or slightly-preheated-but-turned-off toaster oven.

2012-10-22115334.jpg


Here it is after drying but before sanding down the edges. You can see why people don't love this stain but I'll be dying it again after sanding down the edges, smoothing things out, and forming it a little more. Also, I like two light coatings better than one heavy one and the oils I'll be putting on will make it much darker, and richer looking.

2012-10-22180524.jpg
 
Last edited:
After sanding down the edges. You can see where the thinned welt layers come together. I sand up to about 400 grit. It depends on how much energy I have or how fancy the sheath is. With the gum tragacanth and all the dye, preservatives, oil and sealer the final grit isn't really crucial. Doing a good job shaping and carving the edges the way you want it to look is more important. Then you're just evening everything out.

2012-10-22181441.jpg


Here it is after the second staining and more forming. I don't always stain it the second time, it depends on how strong my stain mixture is and how long I leave it in. When I refill my jar I just eyeball it.

2012-10-22184617.jpg


After using Obenauf's Heavy Duty Leather Preservative (LP)
http://www.obenaufs.com/ I LOVE this stuff. I bought it for my Redwings but now I use it on anything leather. It does make the leather darker, which I like. It was developed for firefighters boots. If you use the LP, get the leather warm first. I use the woodstove or a heat gun. After smearing it on, heat it again and it will soak into the leather.

2012-10-23061938.jpg


After putting on Obenauf's leather oil. Put it on and heat up until the leather won't absorb anymore, then wipe off.

2012-10-23065916.jpg
 
Last edited:
Put gum tragacanth on the edge then rub in with a piece of denim.

2012-10-23063859.jpg


After rubbing down the edge. You can skip the gum tragacanth but it's a lot of work to get it to polish up like this. Sanding to higher grits before would probably help a lot. This is a better shot of the thinned welt layers coming together. I really, really like how this looks. I'm tempted to make make some knives with thicker handles just to be able to do this to the sheath.

2012-10-23064025.jpg


Finished sheath. I also dunked it in Super Sheen. This gives a shine to the outside and seals in the inside to prevent moisture from soaking into the leather. It will also help stiffen the sheath slightly.

The color will mostly even out in one day and completely even out in two days as the dye and even more so, the oil spread through the sheath.

2012-10-24101809.jpg


2012-10-24101837.jpg
 
Last edited:
Extra info. I'm always cleaning clutter out of my way. Have something handy to throw leather scraps into, they build up quick.

Here's a shot of my tool organizer. It has most of my specialty knife making tools and jigs (leather, fixed blade, slip joint and liner lock). I only use about ten specialty tools for leather. My engraving stuff is all in the house.

For me it makes a huge difference in the end product if I can clear everything out of the way except for what I'm working on right now.

It's pretty handy cause I can pick it up and take it wherever I'm working. The cutting board is used for leather and slides underneath above a carpet floor mat (you can just see it underneath) that can slide out for working on parts with small screws (they don't roll away on the carpet) or that are already polished and I don't want to get scratched. I used to have a slab of marble that also fit underneath it for doing tooling work on leather but I never bothered to use it. The cutting board works fine for me.

Thanks for looking, hope it made sense. Let me know if you have any questions.


2012-10-23071014.jpg
 
Back
Top