Handle Broaches with simple tools WIP

Josh Dabney

Moderator
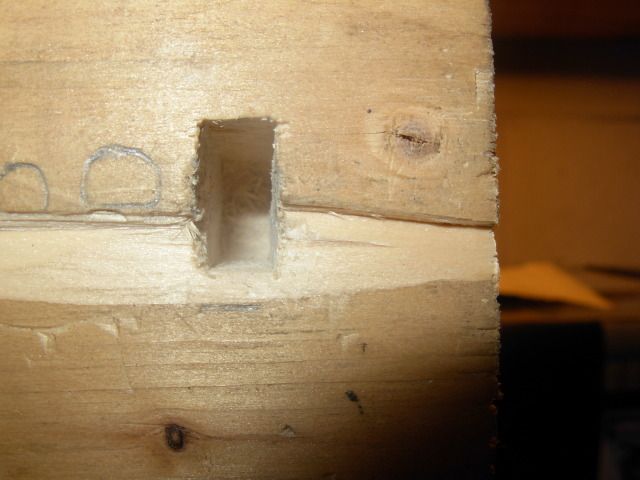
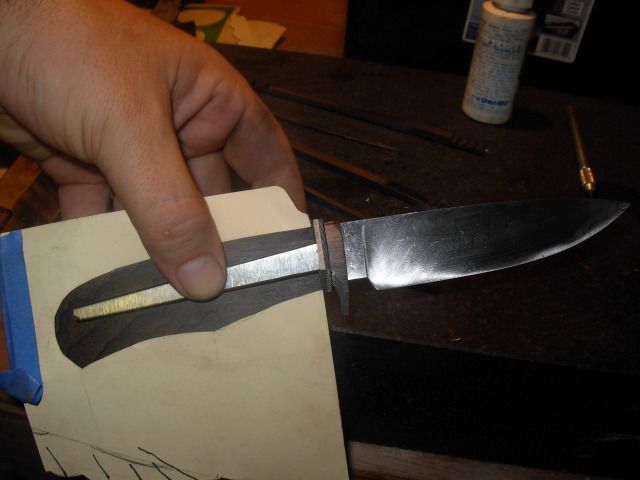
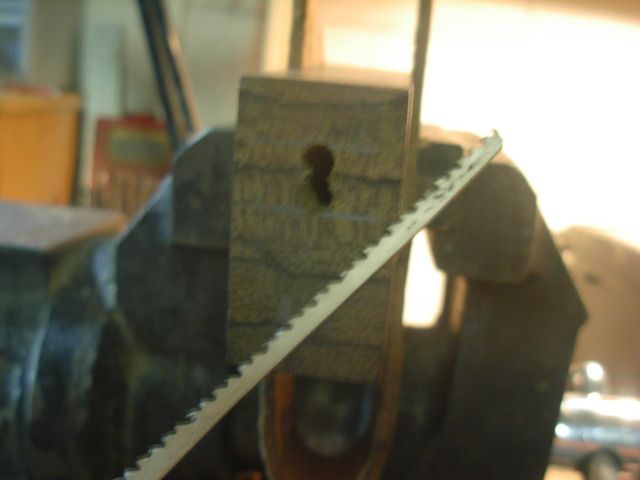
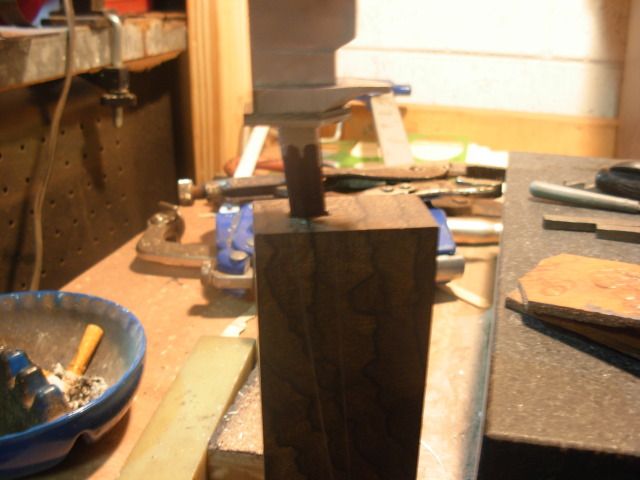
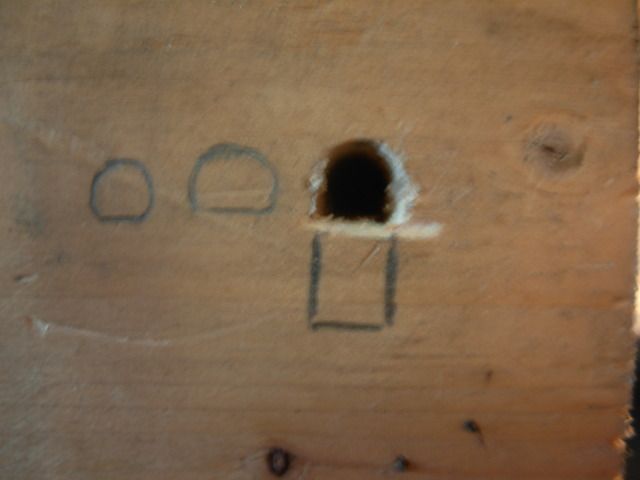
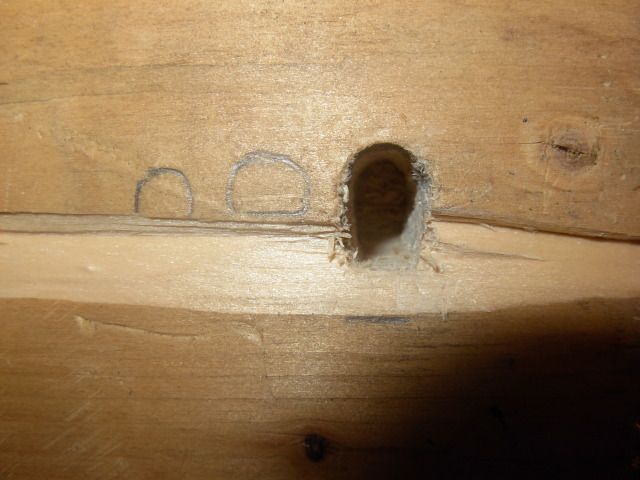
According to those who have them broaches are the only way to go for hidden tang handles so I set out to make myself a few with tools and materials I had laying around. I attempted to keep things as simple as possible for folks who may want to give a shot at making their own.

I did a little research around the web and came up with a plan and spent last night teaching myself how NOT to make broaches so I think I'm on pretty sound footing now.

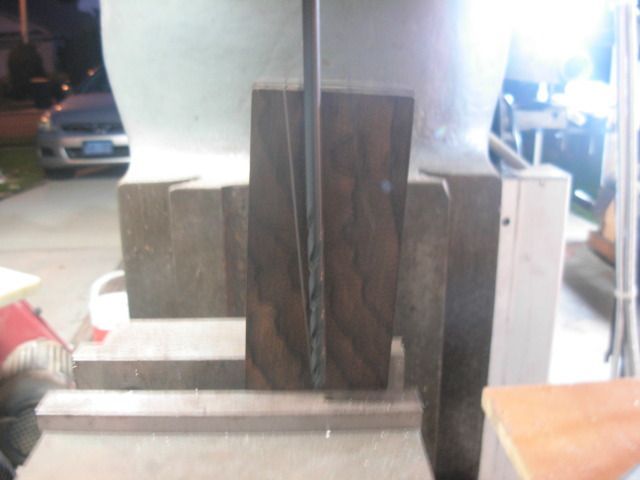
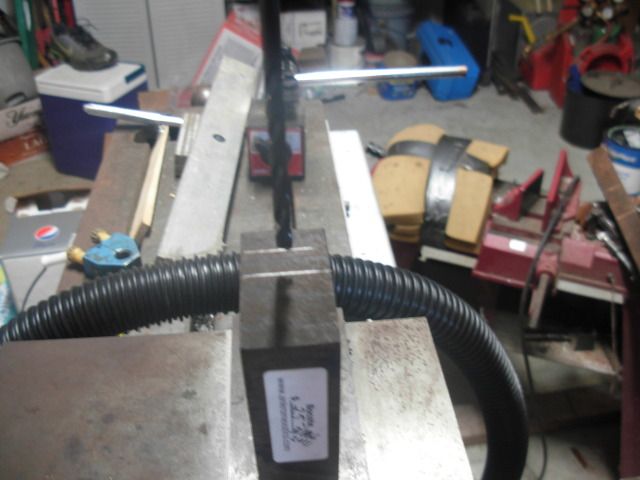
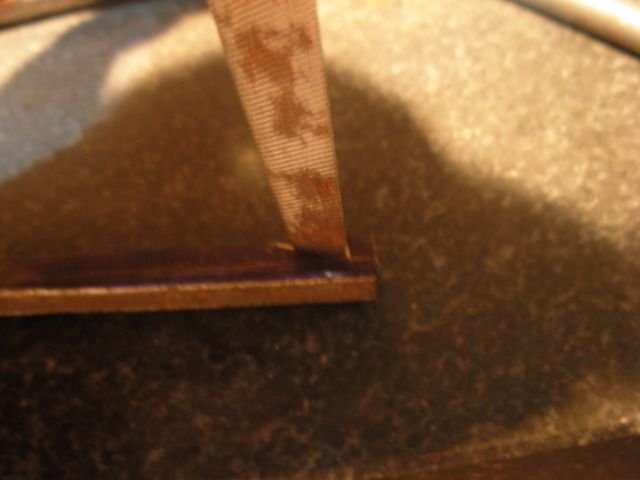
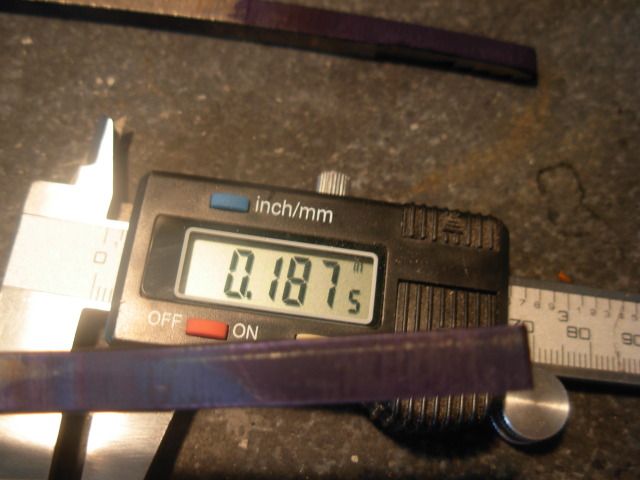
I started out with some 1x1/4 1095 from Aldo and set-up a makeshift fence on the bandsaw to rip the steel down into 8" long strips. I cut a 1/4" slice off each side then ripped the remaining section down the middle

002-26.jpg


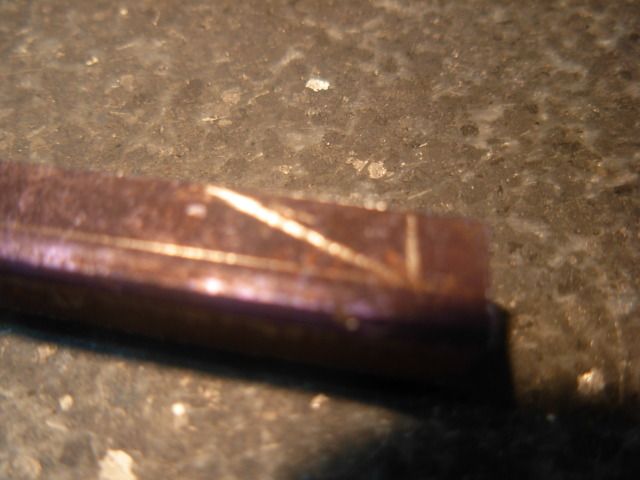
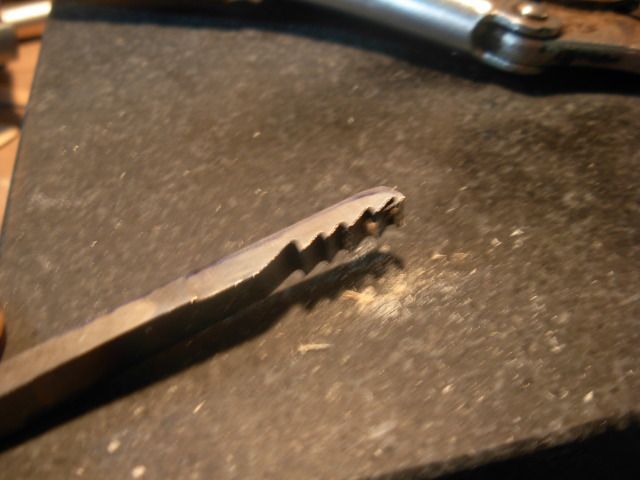
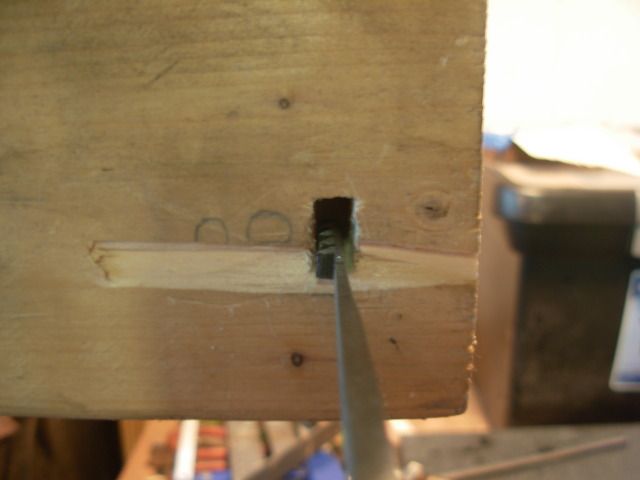
I made the top broach last night. I coated one side of my blanks with layout blue and scribed a line .100 for my tooth depth

003-24.jpg


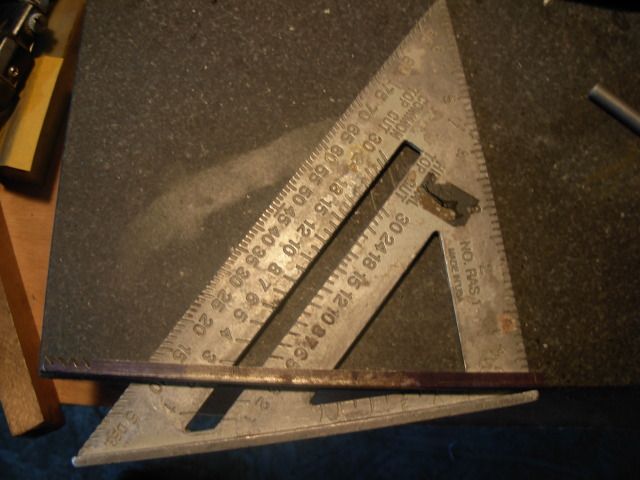
Now I'm using a speed square to set my 10 degree tooth angle

005-25.jpg


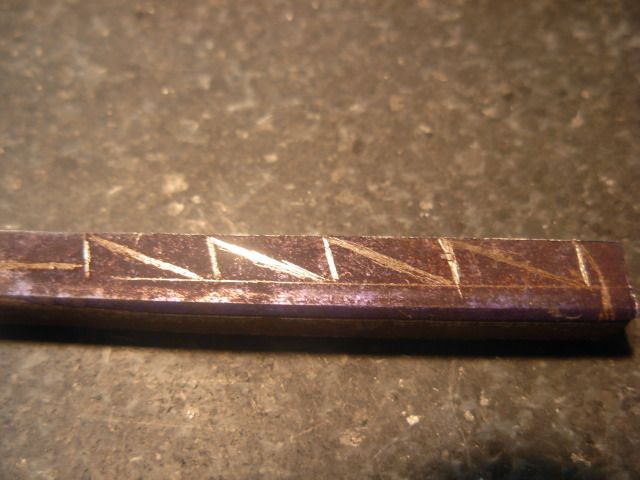
This is a Harbor Freight large triangle file I bought long ago for $2 on sale I believe. Too crappy and rough for much but these files work great for deburring, rounding sharp corners and other non-critical work. I've got one side of the file lined up on my 10 degree scribed line to scribe the relief side for my tooth layout

006-25.jpg

007-25.jpg


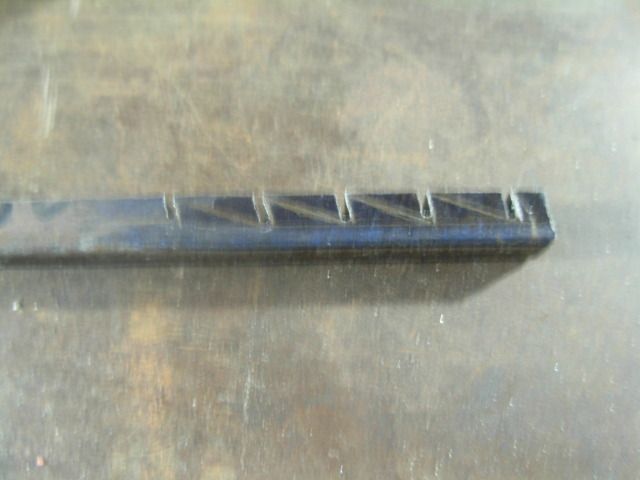
Repeat that pattern for the desired number of teeth to complete the layout

008-20.jpg


I used the same method for laying out the smaller broach also

009-17.jpg


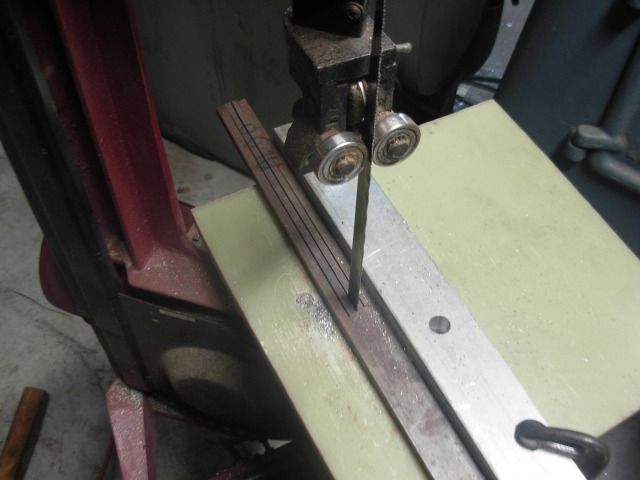
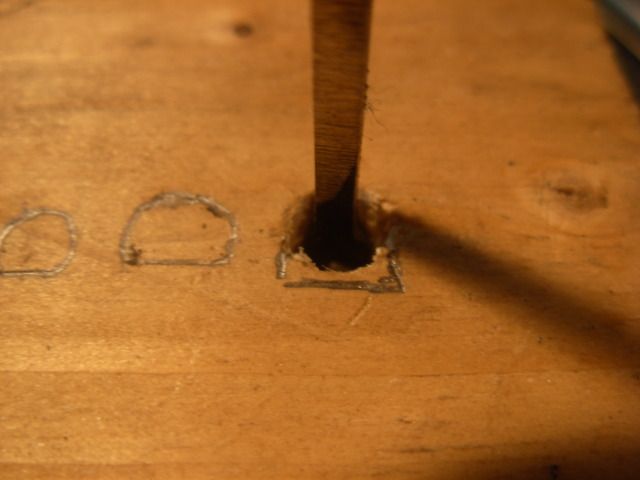
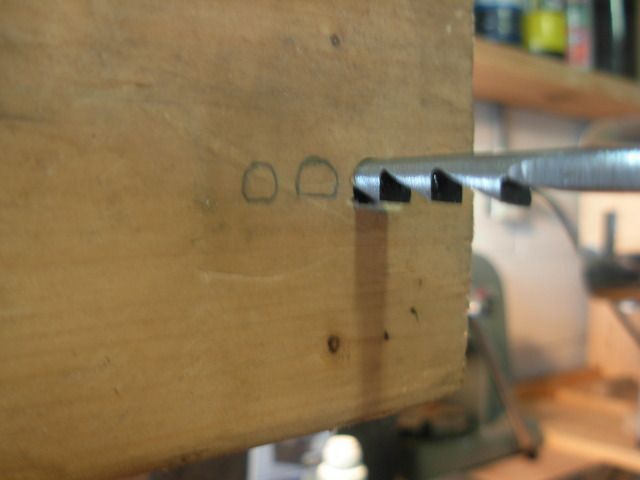
Bandsaw cut my 10 degree lines

010-17.jpg


Hogged most of the relief side with a 50 grit blaze

011-18.jpg


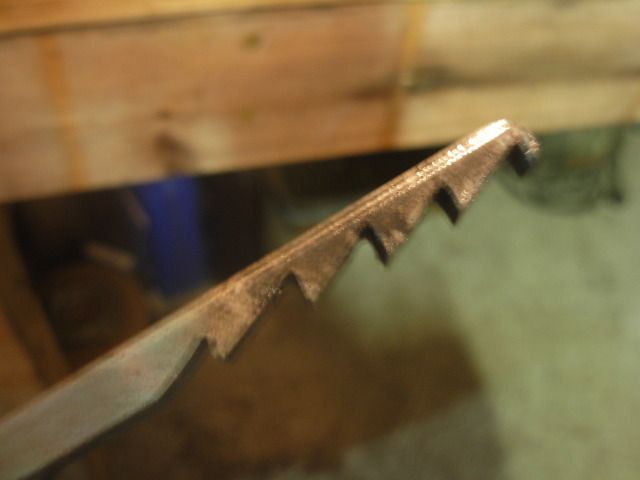
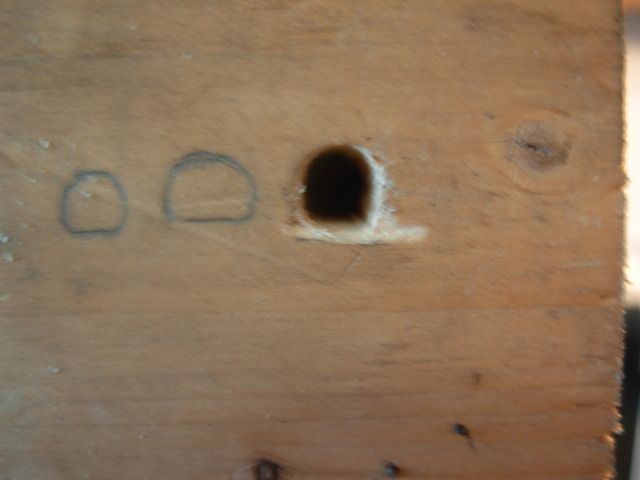
Finished the relief side with the bandsaw then cleaned up the cuts with the triangle file

012-18.jpg


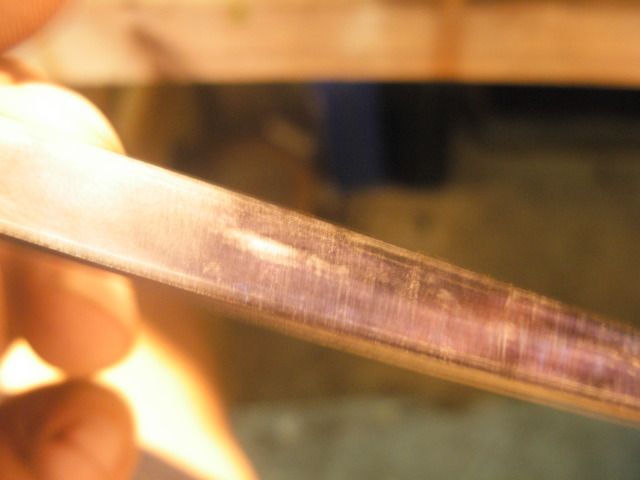
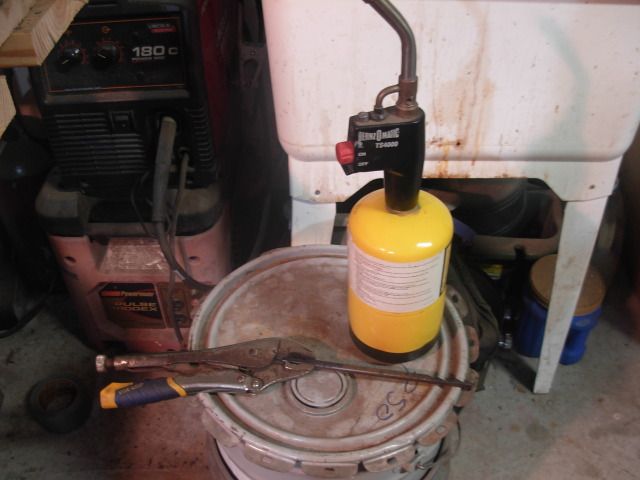
Super simple heat treat. A MAPP gas torch, a magnet, and some quench oil. Preheat your broach evenly and start pouring your heat into the spine side. Keep your flame moving back and forth and rotate the broach to get your heat running towards the teeth side and work it up to NON-Magnetic then quench. I considered fully hardening these with my oven and spring tempering the shaft part but figured I'd keep it simple and see how it works out.

013-18.jpg


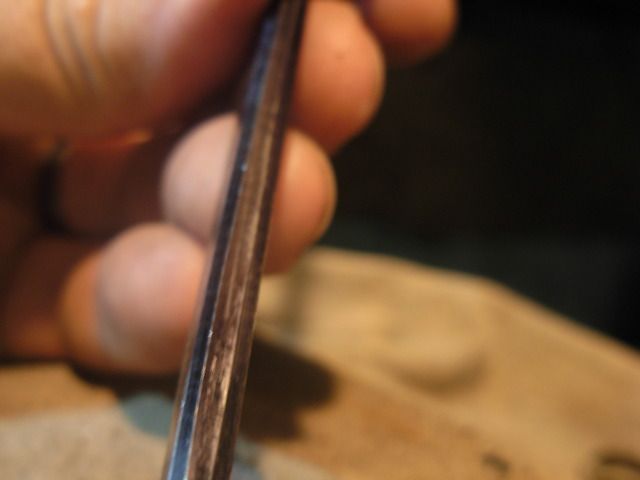
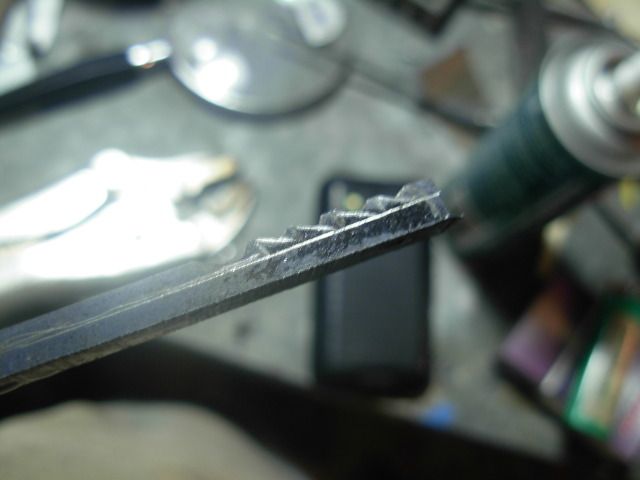
Quenched and skating a file

014-18.jpg


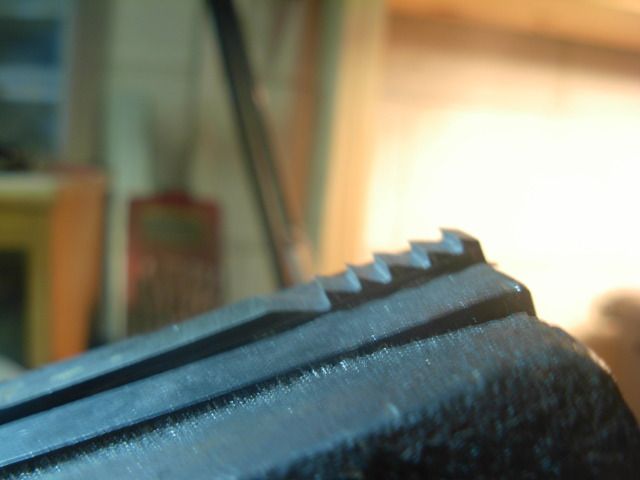
A quickie clean up and she's ready for a temper

015-16.jpg


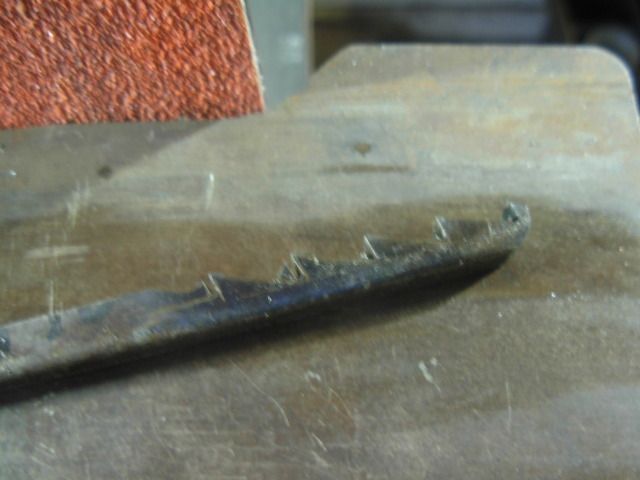
The little guy is so small I skipped the bandsaw altogether and just roughed in the teeth on the grinder

016-16.jpg


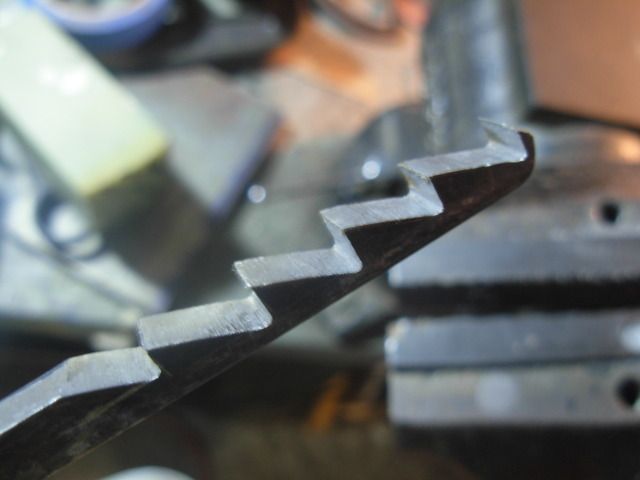
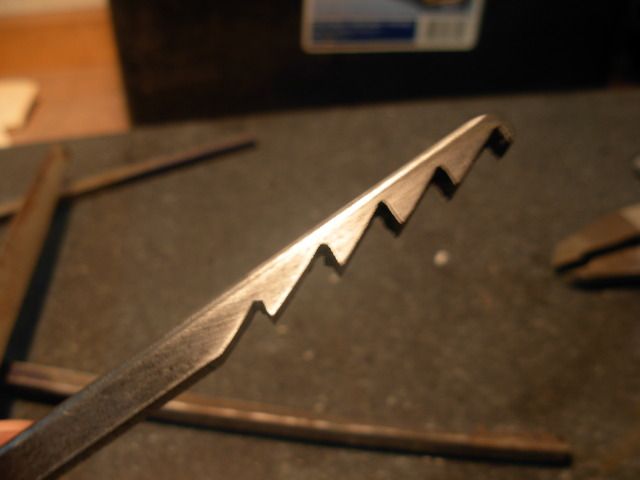
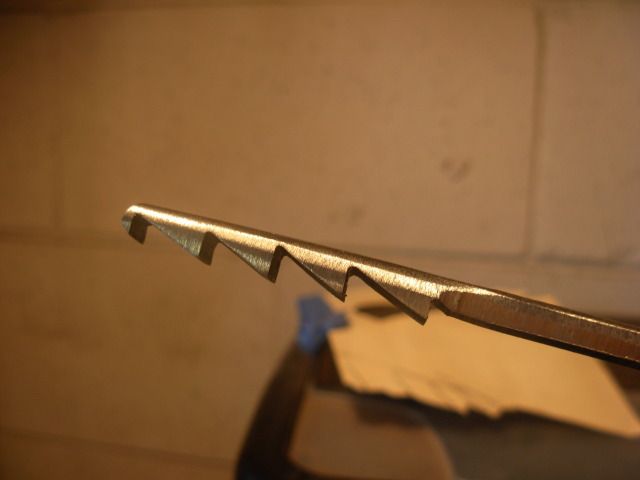
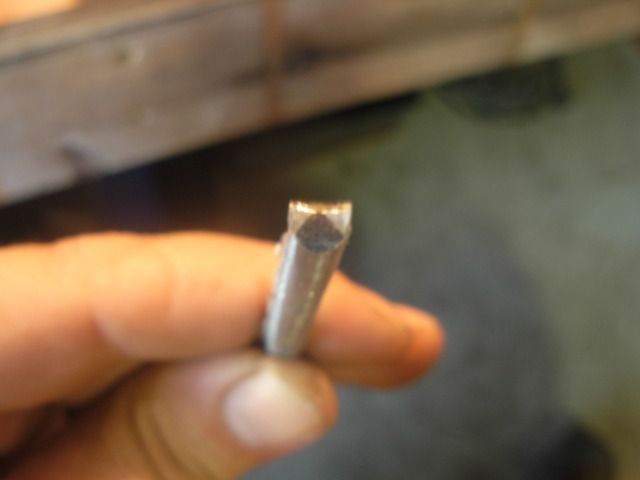
Finished cutting the teeth with the file

017-12.jpg


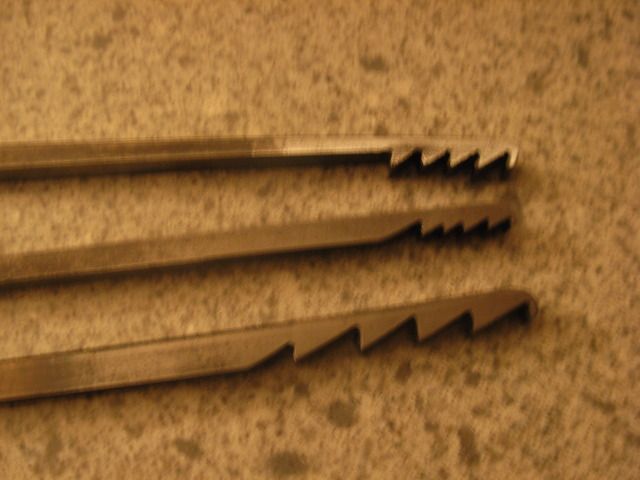
And here's the 3 ready to temper. I know my kitchen oven runs 50 degrees or so hot so I'm tempering them 2 hours, 2 times, with the ovens temp set at 300 which should actually be in the 340 to 360 degree area.

018-12.jpg


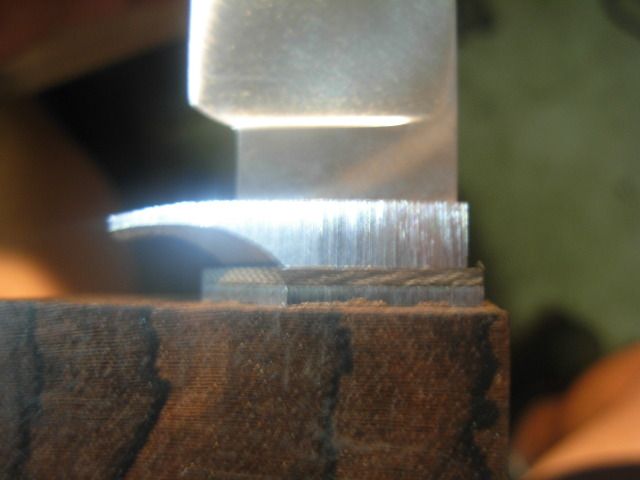
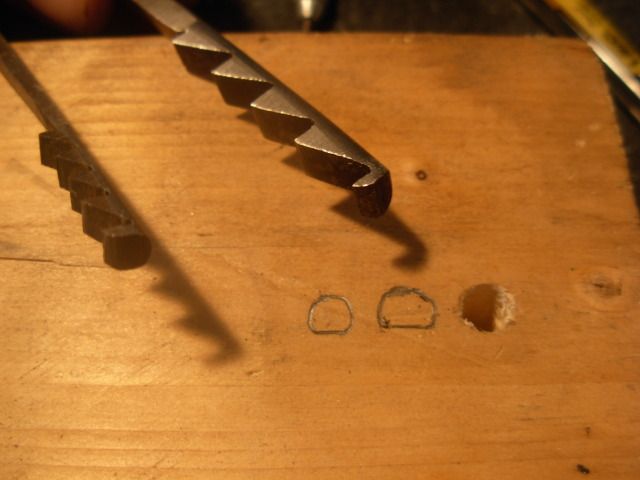
These guys are a bit bulky still but I'm going to grind them down to final dimension tomorrow then put some basic handles on.
 
Looking good Josh! I'll have to attempt one soon. BTW, thanks for livening up the "Knife Makers Area," with a nice WIP as it seems to have quieted down for the past few weeks.
 
Grab your crayons kids and color me stupid. I cant for the life of me figure out what these are for,
Lil' help please...?
...be gentle.
 
Mike, THANKS for adding Nicks pics !!! His work and attension to detail is extremely inspiring !!!

Eric, As the pics show the broaches are for shaping the tang slot in handle blocks starting out with round holes drilled. In the past I've used drill bits made to "chew" sideways, files /rasps ground down, and most recently a Sawzall blade ground thin enough to fit into the hole. All these methods can get you there slowly and lack the presicion to get the kind of results Nick and others achieve with the broaches.

That said these fellas are in the second temper right now but I halted a knife in-progress to make these so I'll follow the WIP through fitting up my tang slot to show the broach's use and grab a pic of some of my previous methods for this purpose.

-Josh
 
Here's a shot of the Ht-ed broaches and some past methods that can work but prove to be troublesome for various reasons.

001-24.jpg


The side cutting drill bit works ok for the mouth area but doesn't work well at all from the middle of the hole down to the bottom.

The rasp worked semi-ok but was painfully slow to perform a relatively simple task.

The Saw-zall blade cut fast and easy but the thickness or thin-ness of the cut is problematic and multiple cuts must be made to reach the thickness of a typical tang. Without broaches though this was the best option of the the methods I've tried.

I think the broaches are gonna be the cat's meow for this job and also the short section of teeth allow for a far better job of fitting a curved tang.
 
Great little WIP. Thanks so much.

I dont do alot of hidden tang handles because I could never seem to get a accurate fit up and always had a less then perfect results.

Much respect.
Randy
 
Doing a final grind on these. Thinned and tapered the shaft section, ground the width to 1/4", and rounded the top of the broach.

002-27.jpg


Sized the small one at 3/16"

005-26.jpg


Time for a test run in a 2x4. 1/4" hole and a tracing of the cross section of the broaches

007-26.jpg


Here's my game plan. Use the small broach to cut those bottom corners square enough for the large broach to fit then go to town

008-21.jpg


Just a minute with the small size but of course the 2x4 is very soft wood

009-18.jpg


Getting the big guy to fit. This is why I rounded the tops of the broaches.

010-18.jpg


Was having a difficult time with the face of the broach catching the sides of the hole and binding up so I ground a tiny radius on the front edges

011-19.jpg


Now to test run the big guy

012-19.jpg


No sweat ! As I feared though these large teeth are very aggressive and as you can see I chipped a big piece out at thw mouth of the hole

014-19.jpg


This one with the much smaller teeth works much better but still removes material quickly

016-17.jpg


With this size combination you can get the 3/16 broach in sideways to clean up the cornes and sides pretty easily

017-13.jpg


Now we can pound a square peg into this once round hole :)

018-13.jpg


Now that I got my feet wet it's time to try these out on a piece of stabilized Bocote

021-10.jpg


I traced my tang on the block and chucked it up in the mill vice to allign with my 3/16 drill bit

023-7.jpg


Line the bit up with the first side of the block

024-7.jpg


Zero out the Y axis on the DRO

025-8.jpg


Now line up with the back side

026-7.jpg


Block is 1.1988" thick.

027-7.jpg


Press the 1/2 function button and the DRO divides the Y value in two

028-7.jpg


Move the Tables Y axis back to zero and we're now perfectly centered on the block and ready to drill the first hole

029-6.jpg

030-6.jpg


Re-allign the block for the second hole

031-5.jpg


Now the holes are drilled to begin fitting up the tang

032-5.jpg


Even my small broach wont fit in these 3/16" holes so I cut the webbing between the holes out with the old Saw-zall blade to make room for the broach

034-4.jpg


Clean out and square up the hole and do the first test fit. I color the tang with a sharpie so I can see where the wood scrapes the tang and need to be cut more

035-3.jpg


Here you can see how the sharpie works for fitting. The webbing between the original holes is still a bit fat on one side where it cleaned the sharpie off the tang

036-3.jpg


Keep repeating the process of sharpie, test fit, broach out the high areas. Now it's scraping right along the edge of the tang

037-3.jpg


Keep at it until she fits all the way in

039.jpg

041-1.jpg

043-1.jpg


Now my thoughts on these home made broaches-

They cut extremely aggressivly ! Too much so I think. Smaller teeth closer together would be beneficial I believe.
I cut the teeth way to deep into my steel. About half depth would would make for a much sturdier broach.
I also tapered the shaft too thin on my 3/16" one and bent it a couple times. They cut well but you do need to put some pressure on them to cut down in the bottom of the hole. On the next one I wont taper the sides of the shaft and will only taper the bottom with enough clearance to allow some cut.

I think I'll make a couple new broaches with these design revisions along with a micro that'll fit inside a 3/16" hole and be all set.

Take care fellas, and don't be afraid to try something new :)

Oh, Thought I'd add that if you some broaches and dont want to make them Riverside Machine offers them here-
http://www.riversidemachine.net/item561596.ctlg

Or go all out and contact MS John Perry through his website here for a set of his broaches-
http://perrycustomknives.com/index.php

-Josh
 
Hi Josh

How did you find the teeth edges all being flat in use? I wonder if you made two sets of each size, one the same as you've done here and on the other angle each tooth, alternating every tooth. Use the pointy one first then finish with the flat broach.
 
Stew,

I didn't see the teeth being flat as a problem. It would not be hard to offset the tooth angles if you wanted to try that out but I don't see it as needed for this application.

I'm no engineer or saw maker but speculate that offset and deep teeth would be improtant on a sawblade because of the high rpm of the blade, chip clean out, and depth of cut asked from a saw. These features keep the blade from loading up with dust and allow the cut to be wider than the body of the blade to prevent binding.

In our broach application fast cutting and deep cuts aren't an issue and I kinda think of the broach almost more like a multi-toothed hand plane than a saw blade in the way it cuts.

That said though the great thing about making these yourself is the ease of experimenting. Now that I've got my feet wet by making a few of these once I settle on a design I'm comfortable with I'll probably use my mill to cut the teeth on a set of really nice broaches and handle them with some curly maple.

I do have it in mind to add another broach thats wider for easy final dimensioning the sides of the tang hole.

The sky's the limit with variables when your making things yourself !

I'd suggest making one with flat teeth first and giving it a test run to see if you think a more aggressive cut is needed before going with the angled teeth.

Take care friend and please feel free post your results and thoughts here if you decide to make some broaches.

-Josh
 
Josh,
Thanks for a great WIP, awesome job! But, I do have a suggestion, I wish I could give you a reference or the credit to where I saw this, with having Dain Bramage...ahh, I mean Brain Damage, I honestly have trouble remembering much of anything, I am thankful for the stuff that does stick for which there is no rhyme or reason for the things that do. This could possibly be one that I had designed a while back and had planned on making one until I bought the one from Riverside that you suggested and pretty much forgot about it, anyway, back to my suggestion, my teeth where sorta scooped out, kinda like a hollow grind. I see now that the scoops aren't needed, unless you wanted to use them on the most agressive broach. The best I can explain what I'm remembering about the broach I'm thinking about was that it had an arched spine, the teeth were facing inward, for curved tangs or maybe anter material, it should work on regular straight tangs as well. I want to say the curve was around a 30 degree curve, I think, that just stands out to me, and the only way I came up with that is by measuring almost all of my handle material, Whitetail (mostly) Elk (a little), Sambar Stag (very, very little) I also figured in what felt the best in my hand, and around 25 to 30 degrees was the average, (I think). I do remember not being satisfied with the angle of the arch. That is the best to my recollection, if I find the drawings I did on the original, I'll pass it on. It is still possible that I saw this somewhere else, I'm always looking at knife stuff and there just aint' no tellin'.

Do understand that is ONLY a suggestion, you have actual experience making one of these, I have only used the one I bought, so you know much more than I do, you have done a fantastic job on your WIP, THANKS again for sharing it, Rex
 
Rex,

I get what you're saying about the angle of the "arc" for a curved tang/ antler . I think making the body section of the broach thinner from top to bottom than the teeth will give enough reach to get down into the back side of the curve.

However these could be very easily bent before hardening to make them curved on the teeth section. Part of whats great about a fella making these himself is the ability to customize it to your liking.

I did make two more sets of broaches from 5160 with the teeth milled in and fully hardened but I haven't tried them out yet. Gave one set to a friend too to see what he thinks of them.

These things are kinda fun to make. I went from having none to having broaches comming out the ying-yang in no time :) LOL

Take care buddy,

Josh
 
Andrew,

I have not put any handles on these yet. I'm holding out until I get to use them a bit and decide which ones I like before putting handles on.

Eventually I'll settle on a tooth design and make one perfect set :)

Stuff happens pathetically slow around here :eek:

-Josh
 
Back
Top